Well, I haven't seen a post to open up for comments, but it is past the 20th, so here we go!
First, a big

to Cracker for giving us a very interesting challenge. When I originally played the GOTM, I invaded the Oda in a similar timeframe, but with somewhat different tactics. The Oda actually declared on me during my invasion of Scandanavia, but when I invaded their continent, in 880AD, I had a Cav army, 22 mostly vet cav, (and three elite knights), but also 20 muskets and 18 cannons. Also, my goal then was to capture the island more or less intact, as I planned on a palace jump to make an additional core, so the course of my invasion was quite different. Playing within the confines of this scenario made for some different choices, both the emphasis on raw speed and the restriction of only one city.
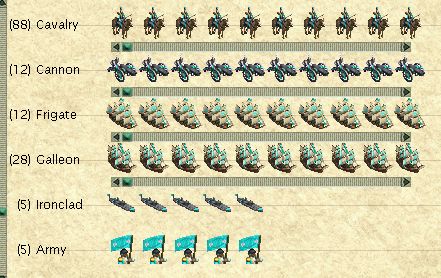
Although the starting forces were quite impressive (awesome job of barb farming to get so many elites, I need to improve that part of my game, not enough patience), I also wanted to maximize reinforcements, especially to get some artillery and more defenders over. To do that, I would need more ships, and for that I needed cash. I did make a couple choices that have been more hesitant about in the course of a normal game (turned off research for a few turns, selling maps and Iron relatively cheap) because I knew it was a quick scenario, but I didnt do anything outlandish either.
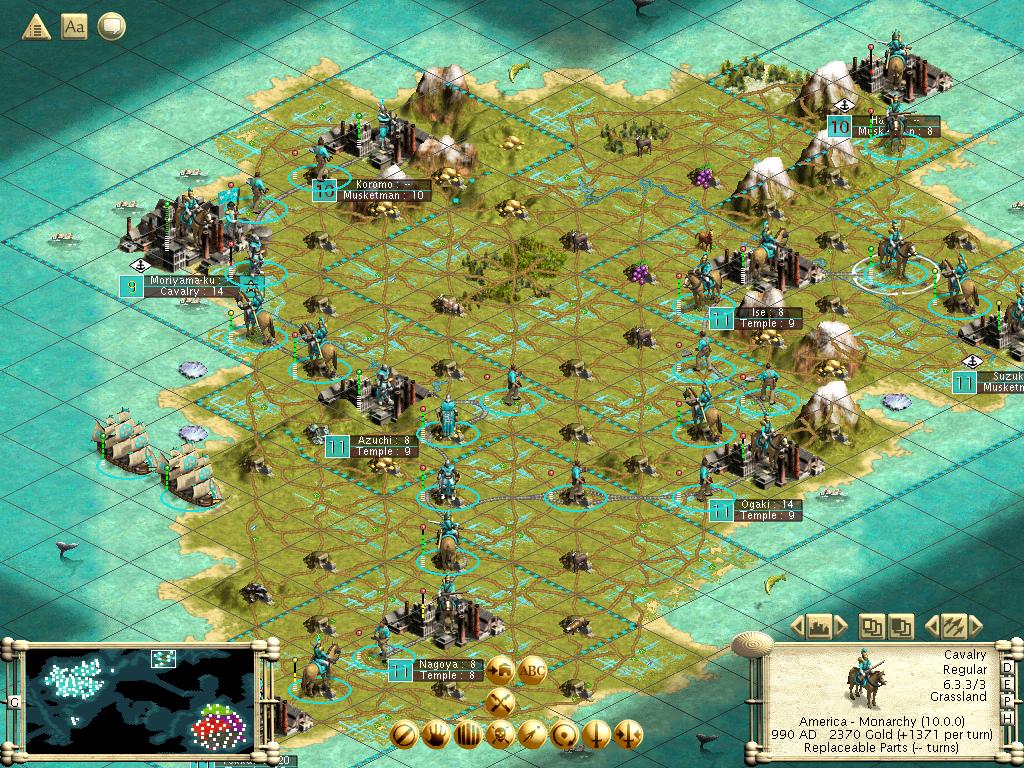
I had taken a lot of planning time to decide the best course of action for the landing. With very few defenders, and no artillery, I was worried about getting overrun on the beaches. I was also concerned that without being able to capture a city, I would have nowhere to heal. With the 4 muskets being in one ship, I basically had to pick a site in range of that ship. The healing question got me thinking about how I could clear a spot for my one city. I certainly couldnt afford to have it flip! So I took a printed screenshot, and a pencil, and started looking at the cultural borders of the cities. Here is a much cleaner looking map, with my observation:
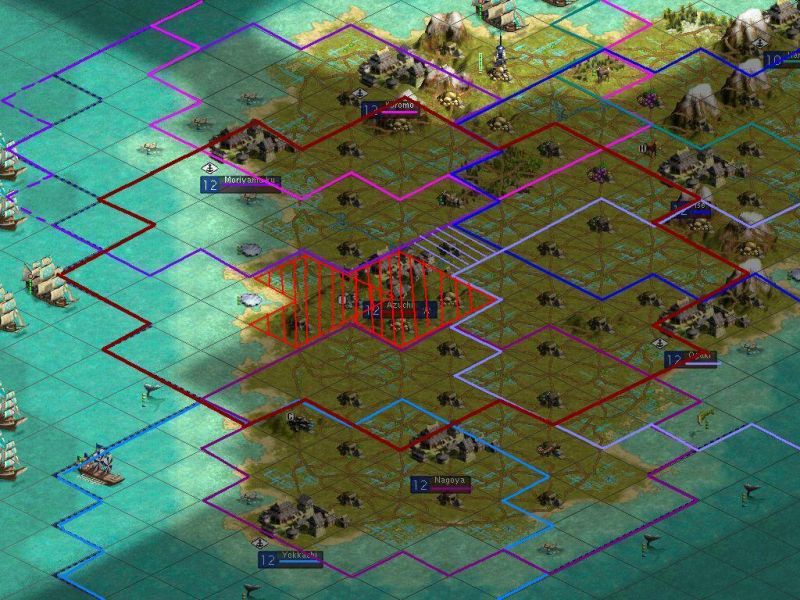
Most of the Odan cities had already expanded borders to a range of 3, but Azuchi had a radius of 4. (Each colored line represents the borders generated by each city). This was causing a lot of overlap, and so I realized that most landing sites were within the borders of at least 2 cities, meaning even after landing it would take several turns to clear an area for healing, and building my city. However, there was one spot (the six tiles marked in Red) where I would only be within the borders of one city, Azuchi (the capital, ironically). (The blue lined tile to the East would be auto-filled by being surrounded). If I could land here, then destroy Azuchi the next turn, I would have a small sanctuary outside his borders to heal, and could build a city with a reduced risk of flipping. Not only that, but it offered hills for defensive bonuses, and would take away his Iron source as well, preventing him from building new Samauri or Agashirus. (He didnt have Saltpeter, so I wasnt worried about muskets). Afterwards, it struck me as being similar to a jeweler preparing to cut a diamond, looking for where to strike it to reveal the facets. This was the fault line I would hit, and try to crack him open. (For all the effort, it was a short-lived sanctuary, as a couple turns later the borders of Nagoya expanded to 4

, which would have filled it all in, but by then my settler had landed and I built New Atlanta).
Anyway, I was now ready to play the game. So on the inherited Turn 0 (950AD) I sold world maps around, which had apparently been held back, since they were quite valuable. I also sold Iron to the Greeks. I also debated selling contact with the Oda. Their troops on the Barb island were only 2 tiles from the Babylonians, but no one had contact with the Oda yet! If this were a normal game, I think I would have declared war immediately, killed the Oda forces on the barb island, and then I wouldnt have to worry about a rep hit from having the frigates in his coastal waters. For that matter, I could then destroy the Oda and not had any attitude hits for razing his cities, either. However, based on the challenge, we had to wait and declare honorably, so I would have to take my chances as to whether the Babs got contact with the Oda. If I got lucky, maybe they would be afraid of the barbs and not move, and I could kill off the Odan units next turn.With my new cash, I rushed or short-rushed 5 galleons and 4 frigates back in the homeland. I also paid to investigate Azuchi (the capital), which had 7 vet Samauri, a bowman, and a settler. I also investigated Moriyama-ku, to get an idea of their non-capital defenses, and it had a Samauri and 2 Agashiru Spears. I moved cav and muskets to the ports which would build galleons next turn, and I was ready. In between turns, I could see some forces doing random patrols, but not too many. The Babs killed the barb volcano for me, but of course got contact with the Oda.
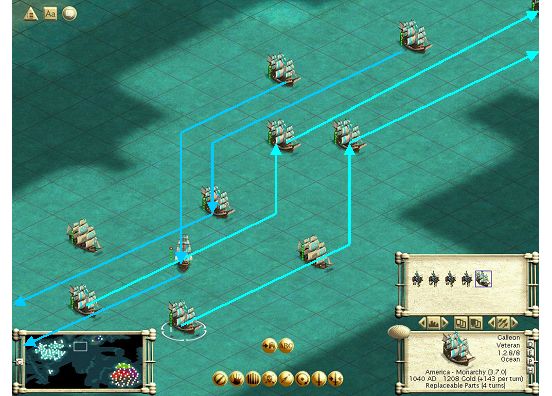
960AD (1) Move frigates, Declare War! I follow and kill his two known frigates, although I lose one of mine in the north. I also kill his forces on Barb Island, and land troops on Kiku island near Scandanavia. Now I am ready for D-Day. My initial assault includes the 4 muskets, 17 cav, and the army. The rest of the ships should be able to land next turn. I had a couple double back after landing, and transferred troops from ships at sea to coastal ships, so I could start moving empty galleons back for reinforcements.
IBT: LOTS of movement. Man, does he have a lot of troops, this could get ugly. Thankfully, the army acts as a big Do Not Disturb sign on my stack, and there are no counterattacks.
970AD (2) Bachs and Newtons both complete. Always nice, Bachs should help offset any war weariness, except we are a Monarchy, not used to that very often! Time to start clearing out a path to Azuchi. For now, I avoid the hills and hit the grasslands, killing 5 Agashiru, 4 Kensai, 2 Bowmen, and a Horse. I also am greeted by
Robert E. Lee, who offers to lead an army if I can give him a place to rest (i.e. a city). The rest of my forces land, including my settler, so next turn we should be ready. To the west, my cav attacks the small island of Kita-Ku, and I kill the defenders, a Samauri and 2 Agashiru, at the cost of a Cav.
IBT: The army is still covering the landing zone, so the AI contents himself with picking off a couple of exposed Cavs. (I tried to ensure all attackers either hit stacks or could get back to the army, but nobodys perfect!)
980AD (3)
New Atlanta is founded on the beachhead, and short-rushes a barracks. Lee forms a Cav army. Time for the assault on
Azuchi. Its a bloody battle, as I have to first clear out a grassland tile en route. Altogether, I destroy 6 Samauri, 3 Agashiru, and 2 Kensai, at at the cost of 3 cav, but am rewarded again with
Sherman, who forms another Cav army, and serves to cover our attacking forces on Azuchis ruins. Clearing more grassland areas yields 6 more Agashiru and 5 Kensai, for the loss of another cav.
IBT: The Oda again avoid the armies, and attack New Atlanta instead, at the cost of 2 Samauri for a musket.
990AD (4) More meat-grinding in the killing fields, I have tried to position my armies on the hills, and attack down to the grasslands:
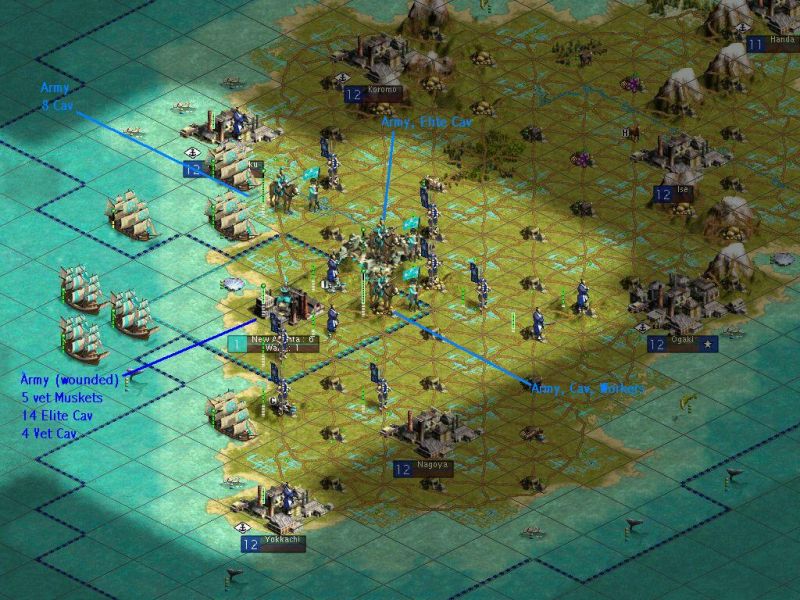
This turn, the result is one Otomo, 8 Kensai, 11 Agashiru, a Samauri, a horse, and a bowman, all for the loss of 1 cav and the gain of
Grant, who forms another army. As shown above, I had also started moving north, but it was a little too soon. New Atlanta gets rushed walls.
IBT: The Oda are no longer in fear of the Armies, and I lose Washingtons army (on the Azuchi ruins),and a cav, to counterattacks, although he loses 7 Samauri, 2 Kensai, and 2 bowmen.
1000AD (5) More kill zone attacks, with the armies it is a slaughter now, I kill 5 Kensai, 13 Agashiru, a bowman, and a Samauri.
MacArthur emerges, and after some debate, I decide to use him to rush the
Pentagon in New Atlanta. I want it to generate some culture, and 3 4-cav armies are less vulnerable than 4 3-cav armies.
IBT: Counterattacks are slowing down, I lose a Musket and a Cav to his 6 Kensai and a bowman.
1010AD (6) We finally have some breathing room, the fields are starting to clear up:

I kill an Otomo, 4 Kensai, 2 Agashiru, 3 Bowman, and for the first time this game, there are no visible units in the open!
Patton arrives to form a 4th Cav army, and attack forces are positioned on the Coal Hill, and north along the river.
IBT Lose one musket, killing a bowman.
")
")
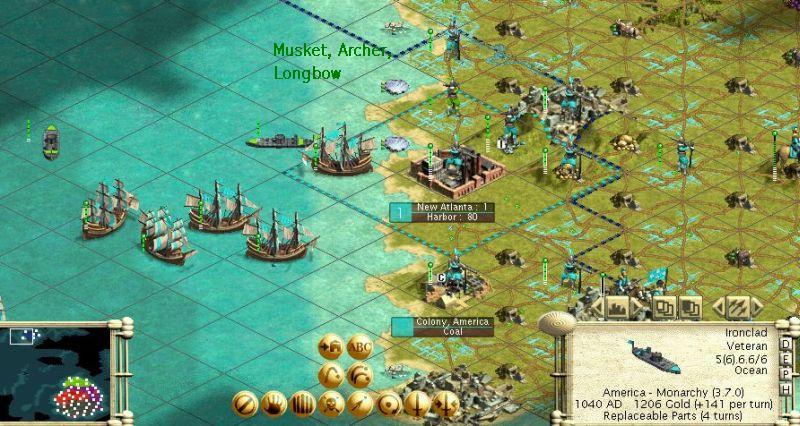
 their archer and longbow suicide on fortified muskets behind walls.
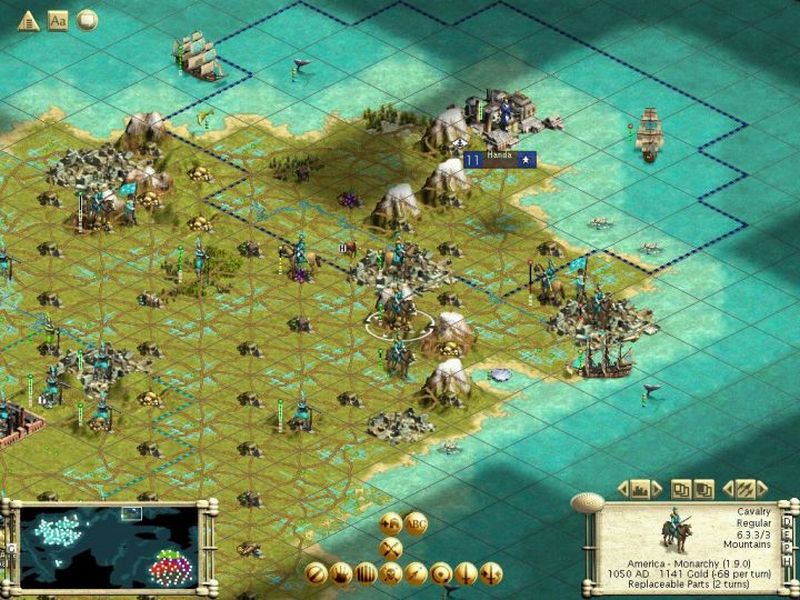


 Ouch! Less than optimal.