punctuator
Ginger Snap
I've been trying to piece together state-of-the-art information on how to efficiently produce resources in CivWorld, from three sources: experimentation within the game, the wiki, and the official forums. After a lot of digging, I think I've got it. Please correct me if you see any errors in the following. I hope this will be a useful resource.
 Ways to Acquire Resources
Harvests
Harvests are one of your most powerful resource producing methods. You gain 1 harvest per hour, and the Interior Minister of your civ has a chance to randomly gift you a bonus harvest every time she uses a harvest. Every time you click the harvest button you gain resources equal to the sum of the amounts displayed on your citizen "cards" at the bottom of the view area. You can also see how many resources of a particular type will be produced by a harvest by mousing over the corresponding menu button.
 Citizen Productivity
A citizen's productivity is the amount of resources that she adds to a harvest, and is represented by the number that appears on her citizen "card" at the bottom of the view area (it can also be seen by clicking on the citizen's house). Citizen productivity is determined by several factors.
 Note that after 16 population, citizens will no longer move into new Houses. Instead, starting from the bottom right hand corner of the citizen "card" list and moving left, your citizens will begin to have their productivity doubled. The new citizens simply move into the same houses (which become "townhouses"), doubling productivity. They do not require a separate resource to work, in the case of Farmers/Workers.
 Citizen Happiness
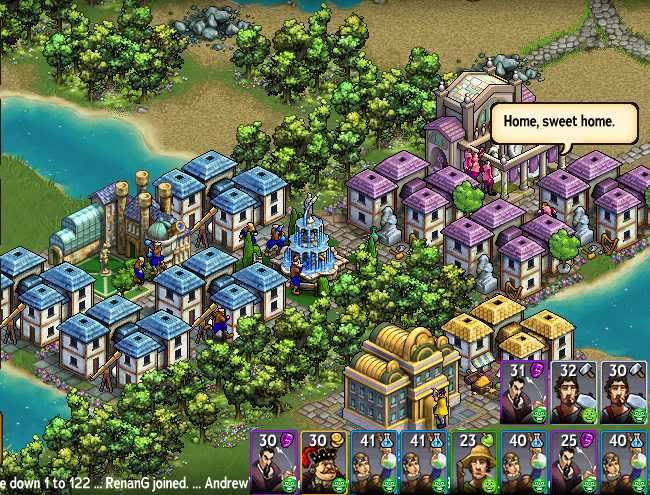
Citizens have the following levels of happiness: Content Happy Very Happy Ecstatic. (There are levels below Content, but I've never seen them, as I've never used a Civic that gives a happiness penalty.) Happier citizens are more productive. You can affect the happiness of all citizens in the civilization through Wonders and Civics. You can also increase the happiness of individual citizens with careful House placement. The following each give +1 Happiness level:
The forest and water bonuses also stack with themselves. So a Merchant whose House was sandwiched in between two forest tiles would be Very Happy, assuming no other modifiers.
However, the neighbor bonus does not stack with itself. A Scientist with two Scientist neighbors and no other Happiness modifiers would be merely Happy.
Note that "next door to" means that the two tiles must share a side; diagonally adjacent tiles do not count (in general, CivWorld means "share a side" by "adjacent" unless otherwise specified).
Although Ecstatic is the highest Happiness level that the game will report, citizens continue to have their productivity increased by additional Happiness modifiers even after reaching Ecstatic. For example, I just tested this with a 42 productivity Farmer who was Ecstatic because of two adjacent water tiles and the Hanging Gardens. Adding a Farmer neighbor increased productivity to 46, even though the reported Happiness level remained Ecstatic.
 Benefit Buildings and Drop Off Points
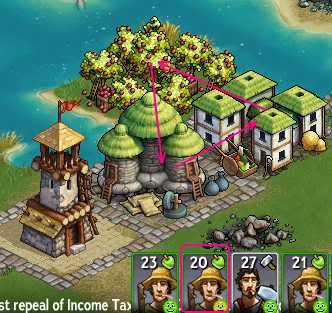
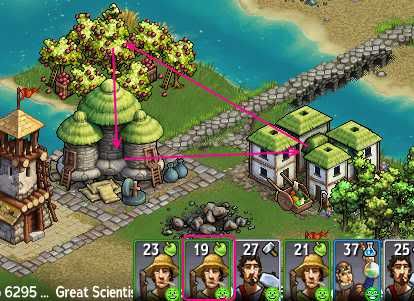
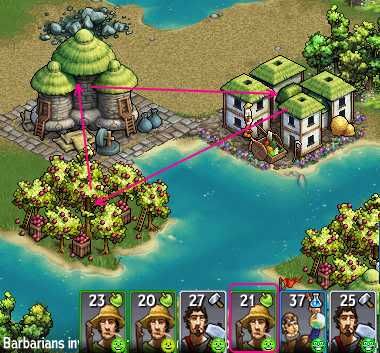
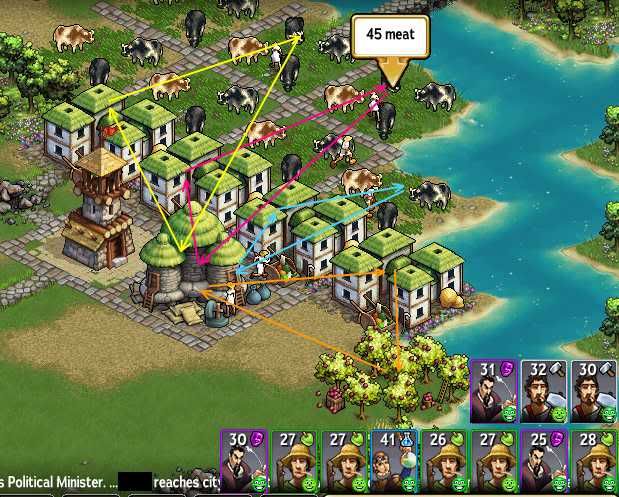
Every citizen type has a corresponding Benefit Building (or, typically, more than one). Each citizen also has a building at which she "drops off" the product of her labors. A citizen's productivity is increased by both proximity to and size/type of Benefit Buildings and Drop Off locations. Proximity will be covered in the Work Route section below. As for size, bigger is always better (in CivWorld!). Workers will automatically travel to the Benefit Building and/or Drop Off location that gives them the highest productivity. Be careful when experimenting with building placement! Upgraded buildings do not return 100% of their cost when moved/recycled, and even Small Village Greens do not.
The default Drop Off point is the Palace at the center of town. However, the Palace can only be upgraded through Wonder Events and special Auctions, so it's generally better to relocate your citizens to different Drop Off locations as soon as possible (for much of the early game, you have no choice regarding Scientists, Artists, and Merchants, however). (Note: It appears that an upgraded Palace does improve productivity for citizens who Drop Off there. It's not known whether a Village Green of equivalent size would be better, worse, or the same.)
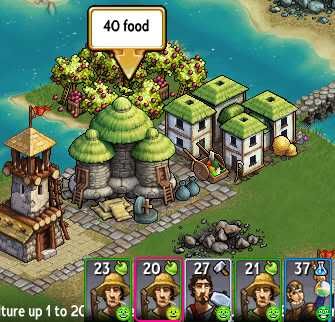
 Farmers have only one Benefit Building, which also serves as a Drop Off point: the Granary. A Farmer's productivity is increased by being close to a large Granary. You should build Ginormous Granaries near your Farmers' Houses and/or Resources to maximize food productivity. A Farmer can also use the Palace or Village Green as a Drop Off point, though a Farmer benefits more from a Ginormous Granary than a Ginormous Village Green.
 Workers have the most diversity of Benefit Buildings and Drop Off locations. Like Farmers, Workers' Benefit Buildings all also serve as a Drop Off point. Unlike Farmers, Workers' Benefit Buildings are resource-specific. That is, a Worker who is working an Iron resource will only benefit from an Iron Forge, and not from a Lumber Mill. The one exception is the Factory, which is unlocked relatively late in the tech tree--it is a universal Benefit Building/Drop Off location for all Worker resource types. Workers can also use the Palace or Village Green as a Drop Off location. I haven't tested this, but I assume Workers are like Farmers, and gain more benefit from their specialized Benefit Buildings as Drop Off locations than from a Village Green.
 Scientists must use the Palace or Village Green as a Drop Off point. They have two Benefit Buildings, the Library and the University. An individual Scientist benefits from only one Benefit Building (whichever one she actually travels to). Universities give higher productivity than Libraries of the same size.
 Artists must use the Palace or Village Green as a Drop Off point. They have two Benefit Buildings, the Theatre and the Museum. An individual Artist benefits from only one Benefit Building (whichever one she actually travels to). Museums give higher productivity than Theatres of the same size.
 Merchants must use the Palace or Village Green as a Drop Off point. They have two Benefit Buildings, the Market and the Bank. An individual Merchant benefits from only one Benefit Building (whichever one she actually travels to). Banks give higher productivity than Markets of the same size.
This is not an example of a perfect set up, but it allows me to swap buildings around for culture/science/gold production as needed, while leveraging happiness bonuses and travel times for high productivity even with a few Artists/Scientists, as opposed to trying to maximize one or two (I care less about Merchants). I'm sure a specialized Village Green for each resource type would allow for more overall Science/Culture/Gold production, but my economy is usually focused on Food and Hammers, so right now I just have the one multi-purpose Village Green.
In retrospect, placing the Museum adjacent to the Village Green would have probably been a higher-productivity set up. In general, if you want to focus on a single resource type such as Science or Culture, you'll do best to place a Village Green adjacent to a University/Museum, in a place with lots of forests and water for maximizing citizen Happiness.
Ways to Acquire Resources- Harvests
- Trickle Income
- Bonus Resource Bubbles
- The Market
- Mini-Games
- Dowries
HarvestsHarvests are one of your most powerful resource producing methods. You gain 1 harvest per hour, and the Interior Minister of your civ has a chance to randomly gift you a bonus harvest every time she uses a harvest. Every time you click the harvest button you gain resources equal to the sum of the amounts displayed on your citizen "cards" at the bottom of the view area. You can also see how many resources of a particular type will be produced by a harvest by mousing over the corresponding menu button.
- Food: Build Menu
- Science: Tech Tree
- Culture: Wonder Building
- Gold: Market
- Hammers: Armies/Battles
Citizen ProductivityA citizen's productivity is the amount of resources that she adds to a harvest, and is represented by the number that appears on her citizen "card" at the bottom of the view area (it can also be seen by clicking on the citizen's house). Citizen productivity is determined by several factors.
- Happiness
- Size of Benefit Building and Drop Off Point
-
 Length of Route Traveled
 - Base Value of the Resource Worked*
-
 Percentage Modifiers from Eras, Wonders, Civics, and Great People
Note that after 16 population, citizens will no longer move into new Houses. Instead, starting from the bottom right hand corner of the citizen "card" list and moving left, your citizens will begin to have their productivity doubled. The new citizens simply move into the same houses (which become "townhouses"), doubling productivity. They do not require a separate resource to work, in the case of Farmers/Workers. Citizen HappinessCitizens have the following levels of happiness: Content
Happy Very Happy Ecstatic. (There are levels below Content, but I've never seen them, as I've never used a Civic that gives a happiness penalty.) Happier citizens are more productive. You can affect the happiness of all citizens in the civilization through Wonders and Civics. You can also increase the happiness of individual citizens with careful House placement. The following each give +1 Happiness level:- Living next door to a citizen of the same type (Farmer, Worker, Scientist, etc.)
- Living next door to a water tile.
- Living next door to a forest tile.
The forest and water bonuses also stack with themselves. So a Merchant whose House was sandwiched in between two forest tiles would be Very Happy, assuming no other modifiers.
However, the neighbor bonus does not stack with itself. A Scientist with two Scientist neighbors and no other Happiness modifiers would be merely Happy.
Note that "next door to" means that the two tiles must share a side; diagonally adjacent tiles do not count (in general, CivWorld means "share a side" by "adjacent" unless otherwise specified). Although Ecstatic is the highest Happiness level that the game will report, citizens continue to have their productivity increased by additional Happiness modifiers even after reaching Ecstatic. For example, I just tested this with a 42 productivity Farmer who was Ecstatic because of two adjacent water tiles and the Hanging Gardens. Adding a Farmer neighbor increased productivity to 46, even though the reported Happiness level remained Ecstatic. Benefit Buildings and Drop Off PointsEvery citizen type has a corresponding Benefit Building (or, typically, more than one). Each citizen also has a building at which she "drops off" the product of her labors. A citizen's productivity is increased by both proximity to and size/type of Benefit Buildings and Drop Off locations. Proximity will be covered in the Work Route section below. As for size, bigger is always better (in CivWorld!). Workers will automatically travel to the Benefit Building and/or Drop Off location that gives them the highest productivity. Be careful when experimenting with building placement! Upgraded buildings do not return 100% of their cost when moved/recycled, and even Small Village Greens do not.
The default Drop Off point is the Palace at the center of town. However, the Palace can only be upgraded through Wonder Events and special Auctions, so it's generally better to relocate your citizens to different Drop Off locations as soon as possible (for much of the early game, you have no choice regarding Scientists, Artists, and Merchants, however). (Note: It appears that an upgraded Palace does improve productivity for citizens who Drop Off there. It's not known whether a Village Green of equivalent size would be better, worse, or the same.)
Farmers have only one Benefit Building, which also serves as a Drop Off point: the Granary. A Farmer's productivity is increased by being close to a large Granary. You should build Ginormous Granaries near your Farmers' Houses and/or Resources to maximize food productivity. A Farmer can also use the Palace or Village Green as a Drop Off point, though a Farmer benefits more from a Ginormous Granary than a Ginormous Village Green. Workers have the most diversity of Benefit Buildings and Drop Off locations. Like Farmers, Workers' Benefit Buildings all also serve as a Drop Off point. Unlike Farmers, Workers' Benefit Buildings are resource-specific. That is, a Worker who is working an Iron resource will only benefit from an Iron Forge, and not from a Lumber Mill. The one exception is the Factory, which is unlocked relatively late in the tech tree--it is a universal Benefit Building/Drop Off location for all Worker resource types. Workers can also use the Palace or Village Green as a Drop Off location. I haven't tested this, but I assume Workers are like Farmers, and gain more benefit from their specialized Benefit Buildings as Drop Off locations than from a Village Green. Scientists must use the Palace or Village Green as a Drop Off point. They have two Benefit Buildings, the Library and the University. An individual Scientist benefits from only one Benefit Building (whichever one she actually travels to). Universities give higher productivity than Libraries of the same size. Artists must use the Palace or Village Green as a Drop Off point. They have two Benefit Buildings, the Theatre and the Museum. An individual Artist benefits from only one Benefit Building (whichever one she actually travels to). Museums give higher productivity than Theatres of the same size. Merchants must use the Palace or Village Green as a Drop Off point. They have two Benefit Buildings, the Market and the Bank. An individual Merchant benefits from only one Benefit Building (whichever one she actually travels to). Banks give higher productivity than Markets of the same size.Spoiler example of a Village Green site :
This is not an example of a perfect set up, but it allows me to swap buildings around for culture/science/gold production as needed, while leveraging happiness bonuses and travel times for high productivity even with a few Artists/Scientists, as opposed to trying to maximize one or two (I care less about Merchants). I'm sure a specialized Village Green for each resource type would allow for more overall Science/Culture/Gold production, but my economy is usually focused on Food and Hammers, so right now I just have the one multi-purpose Village Green.
In retrospect, placing the Museum adjacent to the Village Green would have probably been a higher-productivity set up. In general, if you want to focus on a single resource type such as Science or Culture, you'll do best to place a Village Green adjacent to a University/Museum, in a place with lots of forests and water for maximizing citizen Happiness.


 bonus resources = (2 + pop)*(1 + bonus/100)
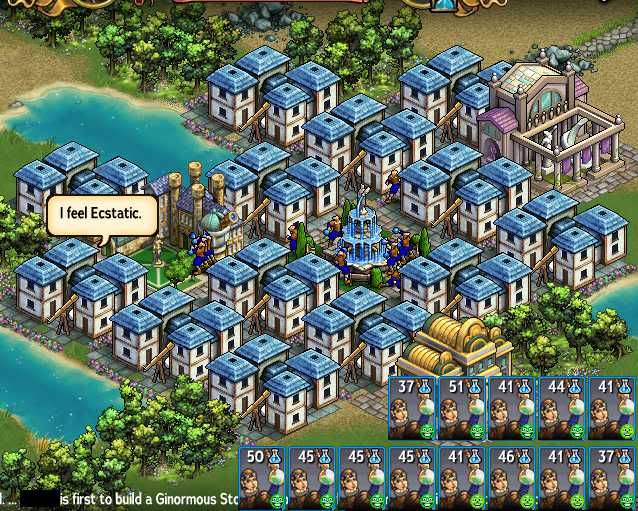
 That's 0.0542013935 bonus resources per second. Wooooooooooooooooooooooooooooooooooooooo!!!!1!! game breaking!
") Thus, having high productivity citizens tends to produce extra dividends in the form of extra Dowry bonuses from other players.
Thus, having high productivity citizens tends to produce extra dividends in the form of extra Dowry bonuses from other players.