The Slave Trade for Dummies : A Guide to Stealing Workers

Nares

Emperor
Joined
May 2, 2006
Messages
1,634
The Slave Trade
For Dummies
A Comprehensive Guide to Stealing Workers

With an update by kazapp.

Cabert said:
building takes workers, workers need to be built :confused:

In response to some recent inquiry, and my own new found pleasure in nefarious pursuits, I've chosen to compile some sort of guide to the (very easy) task of enslaving enemy populations.

Difficulty Settings
This is a tactic primarily reserved for Monarch level and above. It is not until Monarch level that the AI receives a free Worker, though it is entirely possible to wait around for the AI to build a Worker and stealing that on Prince and Noble settings. I do not suggest using this on lower than Noble settings, as the AI receives a production malus, and, at those settings, you don't really need a free Worker anyway.

Some have questioned the validity of this tactic on the highest difficulty settings. The tactic is viable on all difficulty settings. However, the real difficulty of implementing the tactic is gauged based on the game speed. Slower game speeds (Marathon/Epic) will provide a more reliable means of producing a first Worker than faster game speeds (Normal/Quick).

This tactic suffers from a very odd difficulty curve. It is actually slightly more difficult to steal a Worker at Monarch difficulty than it is to steal one at Emperor or Immortal. Deity, of course, encounters a two Settler start, which has its own set of problems, and pissing off a civ at that difficulty when you're already so far behind is a choice you must make on your own, though the tactic is still as valid in theory on Deity as it is on other difficulty settings.

Why is it more difficult to do this at Monarch than at Emperor? Well, the answer is simple. On Emperor, every AI starts with two Archers and two Scouts (three Archers and two Scouts on Immortal). On Monarch, the basic civ starts with two Archers and no Scouts. However, only one Archer is "free;" the other is an upgrade to the free Warrior every civ starts with. As we all know, if you start with Hunting, then your free Warrior is converted to a Scout. This is true for the AI as well. On Monarch, civs that start with Hunting start with one Archer and one Scout.

The difficulty arises in that the AI will use an Archer to scout if it does not start with a Scout (in other words, most civs will scout with an Archer). The "wandering Archer" is a woe that many people encounter when trying to steal a Worker. Either it happens to be near them when they choose to act, and subsequently invades their (unprotected) capital, or the fleeing Worker (now captured) runs into the "wandering Archer" on its return to your capital. Naturally, the "wandering Archer" can recapture (or perhaps destroy; this is untested) the Worker, whereas the Scout cannot attack at all (and therefore is of no danger to your Worker). I consider this hardly more a problem than running into a random Barbarian Animal spawn on the return trip, but the "wandering Archer" is still something to keep in consideration.

Step 1: Reinforcements
The first step in stealing a Worker is to make sure you have a spare Warrior or two. The reasons for this are two-fold: 1) you want more explorers, and, quite frankly, Scouts suck, simply because they cannot steal a Worker if the opportunity arises; and 2) you may need to employ a second Warrior in order to properly capture a single Worker. As a result, I suggest building at least one or two spare Warriors before starting on a Settler (you're stealing your Worker, so why build it).

Step 2: Knowing Your Enemy
Obviously you need to find the other civs. The more you find, the better decision you can make as to who you're going to steal from. Factors to consider are a civ's location, what techs a civ starts with, what the civ’s UU is, a leader’s traits and a leader’s “natural disposition.”

With regards to location, your ideal target is the first civ you intend on warring with. This is to prevent accumulating a negative malus with a civ that will survive long enough to become a problem. Preferably, this target is close. Close enough that assimilating :borg: their territory (namely their capital and one or two cities they may found before you invade) into yours will not economically bankrupt you. Once you’ve found the civ you want to steal from, you then need to consider a few other civ/leader specific factors.

I do not expect most players to know inherently what techs and traits a civ/leader starts with. For this, refer to the manual. With regards to technology, it is important to know what Worker techs the civ starts with, and if it starts with The Wheel or not. I will elaborate more on both of these later. Just make sure to take note of them now.

Knowing a civ’s UU is also important. For example, Mansa Musa’s Skirmishers make a highly formidable opponent for a Warrior, even if it is on a Forested Hill. Indeed, the only way to achieve combat parity (aka a 1:1 ratio) in a Warrior v. Skirmisher combat is to either have some combination of Forest, Forested Hill, Woodsman I or II boni, and/or a river crossing malus against the Skirmisher. Very rarely will this be possible, so Mansa Musa is a very poor target. Other key factors to consider are if the UU is early or not, if the UU is linked to a resource or not, and if the AI will fully utilize the UU or not. For example, Huayna Chapac’s Quechas are highly touted for their anti-Archer ability. However, AI Huayna makes little to no real use of them, but instead makes more traditional use of Archers. Alternatively, Montezuma’s Jaguars are not very scary when compared to Axemen, but they are far stronger than Archer or Warriors, and he will be much more of a nuisance once you cut off his military resource supplies (Copper, Iron, Horses) than other AIs can be.

With regards to leader traits, it is important to note if a leader is Creative or not. Early border expansion can cause some minor difficulty in stealing a Worker. While it’s not entirely impossible to steal a Worker from a level 3 capital, the number of potential tiles a Worker can be working that you can access from outside the cultural boundaries is greatly reduced. Ideally, your target is not Creative, and does not know The Wheel, though both of those conditions can be overcome or planned for.

A slightly lesser known feature of AI leaders is that they have inherent “personalities.” These personalities manifest in a variety of forms. Most straightforward is that (some) Aggressive leaders are more prone to attacking you, particularly if you begin piling up a “-X You declared war on us!” malus (X = 3 for each time you declare war). Counterbalancing this is that Aggressive leaders could care less if you declare war on civ’s they are Cautious with. Consider that in comparison to “optimistic” leaders, who will inherently consider a civ their “friend,” even at the base zero relationship. It is possible to piss off multiple optimists by repeatedly declaring war on a civ, to the point where you can even accumulate enough of a “-X You declared war on our friend!” (X = 1 for each time you declare war) to be equivalent to if you had declared war on the optimist themselves. Of course, a given optimistic civ will only consider another optimistic civ their “friend” if they’ve met, and this is a good way to determine if and how many “-1 You declared war on our friend” mali you might accumulate with non-targeted civs.

Step 3: Planning the Heist
You’ve now picked your target, and are ready to steal a Worker. At this point, refer back to what technologies the civ starts with. Explore around the cultural boundaries of the target, and determine what (if any) resources may concur with the techs a civ starts with, or what tiles the AI is most likely to improve first. As was noted to me by Zombie69, you can actually determine the location of hidden resources based on the Food/Production/Commerce (FPC) of a tile.

In terms of technology, if a civ starts with Agriculture, and there is a Agriculture based resource in the fat cross of its capital, it is almost guaranteed to improve that tile early (if not first). With regards to terrain, capturing a Worker mining a Hill is probably the best choice, as your Warrior will now have a 25% defensive tile bonus if attacked on the Incoming Turn (IT). There is almost zero chance of finding a Worker in a Forest (and therefore Forested Hill), unless it is building a Road in that Forest. While the AI does indeed enjoy going Road happy (and will Road every tile in the fat cross), the odds of encountering so ideal a situation are low, sadly. Even then, if the Worker is building a road in the first ring of the fat cross, your Warrior can be attacked freely from the capital. If the Worker is building a road in the second ring of the fat cross, that generally means that there is a road connecting that tile to the capital, and your Warrior will, as well, be attacked from the capital.

Tiles in the second ring of the fat cross are ideal, as, unless the civ has knowledge of The Wheel, it is almost 100% guaranteed that your Warrior will not be attacked on the IT. Additionally, tiles in the fat cross have 100% access from outside the cultural borders (versus only four of the first nine being accessible once the city is level 2, or, in other words, once its boundaries have “popped” once). If possible, you want the tile the Worker is improving to be separated from interior tiles (namely, the capital) by a river. Attacking across the river connotes a -25% malus on the attacking unit, increasing the odds your Warrior survives. Finding a Worker on a Hill separated from interior tiles (either the capital or the first nine) by a river is one of the best positions to be in, as, if an attack occurs, your Warrior now has superior combat odds to the Archer.

Step 4: Run Away
Now's the time to get that Worker back to your capital. Depending on Barbarian and difficulty settings, this can be more or less difficult. Raging Barbarians does not seem to spawn all that many more Barbarian Animals, so it is of little concern at this point in the game. However, difficulty does play a major role. As I noted in the Difficulty Settings section, some AIs will explore with an Archer on Monarch difficulty. On Emperor and up (including Deity), the AI will explore exclusively with Scouts. This does not entirely eliminate the “wandering Archer” problem, but it greatly reduces it (true “wandering Archers,” not the scouting kind, seem to be a response to the few Barbarian Animals that approach AI civs cultural borders; my assumption is the AI “knows” to kill them for free XP, or is performing some moderate form of fogbusting).

There are very few means of improving the odds that the Worker survives. One method is to employ some sort of escort. Warriors make poor choices in this role, due to the difference in movement speeds. An escorting Scout is really the only choice of escort. Employing it as a fogbuster (rather than a direct escort) is probably a better use of the unit.

What little to say about terrain is as follows. Move the Worker manually (you should be moving all units manually at this point in the game). My experience is that this (somehow) reduces Barbarian interference. It also greatly increases the number of times you’ll bang your head against the wall if you do happen to end your turn next to a Barbarian Animal. Do not move it onto a Hill. Hill tiles can be seen from two tiles away. A two-movement Barbarian Animal (Wolves and Panthers) can “see” the Worker, and will usually beeline for it on the IT(sometimes Barbarian Animals exhibit territorial behavior, and will wander a given set of squares, even if able to “see” the unit). Jungles and Tundra spawn Panthers and Wolves respectively (those being the two two-movement Barbarian Animals); try to stay away from them if possible). Similarly, Deserts spawn Lions (usually in great numbers), and Forests spawn Bears. Barbarian Soldiers (Warriors and Archers, as by Axemen and later you should not be employing or even have to employ this tactic) will almost assuredly beeline for the Worker (or any unit they “see”).

It’s important to be prepared to lose the Worker. Of course, it helps to steal from a closer neighbor, but sometimes the nearest neighbor is not the best target (for example, if the nearest neighbor is Montezuma or Mansa Musa). This is the only time distance from your capital provides any real danger to the tactic.

Step 5: Eye for an Eye
More often than not, the AI will attack your Warrior on the IT. An attack can be expected if you’re in the first nine of the fat cross, or if the AI knows The Wheel (and presumably built Roads in all of the first nine). Because what tile your Warrior will be defending from is determined by the AI, and that tile is usually highly undefendable, it is more than like that you are going to lose your Warrior if attacked. There are three possible IT responses to stealing a Worker: 1) Your Warrior is not attacked; 2) Your Warrior is attacked and, regardless of odds, survives; or 3) Your Warrior is attacked and is killed.

If your Warrior is not attacked, you are in the clear. I suggest moving the Warrior outside the cultural boundaries, though you can choose to move the Warrior to a more defendable position. However, if you do choose to stick around, be wary that, if the AI does attack (this is based on the combat odds it reads), it will sometimes, regardless of odds, kill your Warrior. If your Warrior dies, consider it as though your Warrior was attacked on initial IT and respond as I direct below.

If your Warrior is attacked and survives, you are again in the clear. You can leave the cultural boundaries or not, as you see fit. The AI is unlikely to attack your Warrior again unless the odds are extremely in its favor. I suggest leaving, however, as, if a Warrior miraculously survives an attack from an Archer, it is extremely liable to be heavily injured. Healing is greatly diminished inside an enemy’s cultural boundaries. I strongly suggest moving outside the cultural boundaries and healing. You can consider the Warrior a free unit with free experience, but there is no reason to waste it.

If your Warrior is attacked and is killed, you now need to bring in your reinforcements, reinforcements being the Warrior(s) you have been producing since the start of the game. Move it into a highly defensible tile and Fortify. You have your choice of tiles to defend from, and the goal here is to force the AI to sacrifice an Archer on your Warrior.

In all of these, the key is either to not fight at all or to kill one of the AI’s units. This is vital brokering peace, and will be discussed in the following step.

Step 6: Playing Nice
So, you've successfully stolen a Worker, have lost (or not lost) a Warrior in the process, and are still at war with a AI civ. Watch every turn to see when the AI is willing to talk to you (when it no longer reads "Refuses to Talk!"). You can immediately request peace if you've met one of the two following conditions: 1) the AI did not attack your Warrior at all; or 2) your Warrior (doesn't matter if it’s the first, second or third) kills an AI Archer (just one will do). Basically, the AI will not accept peace if it thinks it is stronger than you. It will only think this if it has killed one of your units, but has not lost any itself. It will always accept peace at this point in the game if it loses one of its units to you, even if it has killed multiple units of yours in the meantime. It will accept peace if it did not attack your initial Warrior at all.

You want to establish peace for two reasons: 1) it avoids AI retaliation; and 2) it allows the AI to recover. At this point in the game, the AI can easily overrun you if it is inclined to do so. However, the AI is programmed to not respond with extreme force so early in the game. Consider, though, that a Stack of Death at this point in the game consists of a few Archers. You most likely do not even have the Archery tech, let alone much, if any city defense, let alone any Archers as city defense. You do not actually need city defense at this point in the game unless an AI is trying to kill you. So why stay at war?

Allowing the AI to recover is key. You want the AI to resume builder strategies. First, this can provide you the opportunity to steal another Worker. Second, it will improve the land you intend on invading. Third, it will allow the AI to expand moderately. That is to say, now that you’ve stolen a Worker from it, it’s not going to expand nearly as fast as an unmolested AI would. However, what little expansion it will do will serve to reduce Barbarian spawning over the next few centuries. That is well worth it, especially if you keep a fairly constant monitor of the AI and prevent it from accessing any military resources (leaving it relatively weak when you are capable of invading).

Further, allowing your target civ to expand moderatly prevents another civ from settling in that same land. You really only want to declare war on one civ at this point, and you don't want to lose land that could be yours to a second civ. Having to declare on them makes things tricky. They have more land than usual (because your target civ would have settled there), and, with that land, more research and production, making them a more formidable foe. It also means accumulating more "-X You declared war on us!" and "-X You declared war on our friend!" mali than you need to.

Phase 2: Planning the Next Attack
At this point, your options are open. You've succesfully grabbed a Worker. You've established peace with the AI you stole from. You've hopefully done this without offending too many (if any) other AIs (you receive a "-1 You declared war on our friend!" each time you declare war on an AI they know; this only applies for certain AI leaders; others, such as Tokugawa or Alexander, don't make friends very easily, and will not care as much, if at all, if you declared war on anyone but themselves, at least at this point in the game).

Now you're ready to do it again. At this point, AI friendships become more of a consideration. If executed properly, you will not develop more than a "-3 You declared war on us!" malus with the first civ you stole from (assuming you make peace as soon as it is available to do so). However, you can easily develop "-3 You declared war on our friend!" by pulling this trick on an AI multiple times, or worse if you pull it once on each member of a group of friendly civs. Working up to a "-6 You declared war on us!" with one civ and a smattering of "-2 You declared war on our friend!" and "-1..." mali is not as bad as stacking both penalties on multiple civs. Part of the strategy is that you're building so large a malus on the first civ you plan on attacking.

At this point in the game, it's really only an AI's natural inclination to start off with an optimistic attitude towards friendship or not that determines if you'll get the "-1 You declared war on our friend!" malus. As I said, AIs such as Tokugawa and Alexander don't care if you attack people, so long as you don't attack them. The only real positive boni that can be spread at this point are religions. It's easy enough to see who's sharing a religion and who's not. Of course, once you've picked your target, it's best to stick with it. You further stunt their development (but not their expansion; they'll continue settling cities during the periods of peace, and even during periods of war).

Sometimes, hanging around to grab a second, or even a third Worker is possible. In the example game (see below), I grab two Workers off Cyrus (and could have grabbed a third). In another game, I spotted a Copper source in the third ring of an AI civ's capital. I chose to camp my Warrior in the fourth ring of the capital, on a Hill, and when the AI went to link up the Copper, nabbed my second Worker from that particular AI. This served to not only stunt his development, and serve to improve my own (it was my second Worker of the game, with me actually producing my first some three turns later), but also prevented him from building Axemen, making my job of invading him far easier when I finally did so some ten or fifteen turns later. Eventually, that AI chased my Warrior down with a Archer, and got lucky on some longshot odds. I was two turns from invading him at that point, so it didn't make much of a difference. As it is, some AIs will wisen up (or start off wise from the start), and will learn to escort their Workers with Archers, at which point you either curse at yourself for having not rolled Incan, or wait around for a better opportunity (even escorts will wander off mysteriously at times, leaving the Worker open for attack).
 
Alraun said:
Stop. How do you even get there in the first place without your first warrior dying? It's uncommon I can get to another civ's cultural borders without my warrior dying.

Hmm, now that's a good question. Sometimes, the random Barbarian generation just hates on you. Other times, you'll have four Woodsman II Warriors running around. I've found manually moving each turn (rathering than allowing the program to auto-path) somehow (perhaps entirely fictitiously) reduces the Barbarian interference.

Dynamic Spirit said:
Yeah but if the warrior dies, then there's noone to escort the worker back to your city

No need to escort the Worker. If you lose it, you lose it. Just don't let it auto-path back to your capital. Actively move it each turn. Even if you lose it, you've set the AI back a little bit. I've done this to AIs clear across a map with little hope of getting the Worker to me (I had already snagged one from my primary target, and was looking to snag a second from him within the next few turns anyway). Sometimes opportunity is as strong a motive as intent.

Dynamic Spirit said:
Perhaps the key is to only steal workers from civs > 10 plots from your capital?

I think the mistake you made was stealing a worker from Montezuma. From what I've seen, most AIs will leave you alone for a long time, even if you stay at war with them. Montezuma is a known psychopath (and my favorite civ to make friends with; he's the only one that can aptly assault another AI civ), and, without a doubt, the worst civ to attempt this on.

Alraun said:
So I just tried this against Genghis on Emperor. He wouldn't give me peace, GG me.

I don't know if the AI's bloodthirst is dependent on difficulty, but base AI "personalities" are editable in the XML. Genghis, being an Aggressive civ (and the more aggressive of the Mongol leaders), is only slightly worse a choice to steal from than Montezuma (see above). Besides, it sounds like Genghis never lost a unit, so it's no surprise he's not scared of you (he has a higher Power rating, no less).

Chris Woods said:
I always do this to the closest civ, and I never make peace. I jack the worker and use a few warriors to keep the AI cowering in his home city.

In general, it is a bad idea to keep the AI pinned in their capital. For starters, it keeps you in a state of war which you declared (War Weariness, and more War Weariness for having declared the war yourself). It also runs the risk that the AI will send a small group of (brave) Archers to attack you. As I note in the guide, you are most likely in no position to defend against an Archer attack.

Additionally, keeping them pinned down has two further negative side effects. First, you will encounter increased Barbarian activity, because the civ you’re stifling is not expanding. Second, other civs can expand into the territory the civ you are stifling would have expanded into. You want that land for yourself. You also do not want to have to declare war on another civ in order to take it, especially because that civ is larger than usual (because it has land that was intended for the civ you’re stifling). Additionally, if you’re pinning them down with Warriors, they can still settle cities by using Archer escorts. It’s highly unlikely that your Warriors will kill even one Archer.

It's far more beneficial to negotiate peace as soon as possible. It may even allow you to grab a second (or even third) Worker from them before you finally do invade.

theimmortal1 said:
And you don't get the "You declared war on our friend" negative either.

Well, this is not entirely true. As near as I can tell, the distinction is made in Aggressive v. non-Aggressive leaders. Aggressive leaders have social problems, and will not inherently form friendships. With them, friendship is something to work towards. However, non-Aggressive leaders, or, as I refer to them, “optimistic” leaders, will inherently consider a fellow “optimistic” leader a “friend.” I use the term friend loosely, as any malus would end their friendship. Keep in mind, however, that even if you later get two “optimistic” leaders to hate each other (or at least not remain friends any longer), the “-X You declared war on our friend!” malus will not disappear.
To refer back to the above quotes from Alraun and Dynamic Spirit, it's very much important to broker for peace as soon as possible. As I said, the AI will eventually march a stack of Archers at you (even if you're camped outside their city with Warriors; heck, they'll even manage to settle under Warrior supervision). And you can run into the two expansion problems I referred to above. So, in order to allow some natural expansion by the primary target, and to reduce Barbarian activity, you need to make peace.

The best way to achieve peace is to put your Warrior to better use than just nabbing the Worker. Planting it in a Forest is, obviously, ideal. Getting the Archer to attack across a river is the next best possibility. Aggressive civs can use their first promotion on Cover instead of Woodsman I, and further add to the odds of taking out that initial Archer retaliation. Killing that Archer will almost assuredly guarantee that the AI will accept a peace offering. If necessary (and the AI is sufficiently close), you may want to use two Warriors to nab the Worker; one to grab it, and die, and the other to camp in a Forest in order to kill the one unit needed to guarantee peace.

Above all else, make sure to pursue peace negitations as soon as the civ is willing to talk to you.

Eqqman said:
Edit: As mentioned by somebody else in a different thread, the game allows you to disband a unit even after you've moved them. What do you think of just always disbanding the attacking Warrior so that the AI can't get the credit for killing him, delaying the peace talks? Really it seems like if you have the opportunity to take an AI Worker, you probably should, regardless of wether he's on an ideal tile for you to defend or not. You're just not going to be able to wait for him to happen to move to a spot better for you.

You're certainly allowed to disband your Warrior after stealing the Worker. However, the AI, as near as I can tell, considers this as you having lost a unit, and will not accept peace unless you take additional action to "convince" it to. Better to have the chance of winning on longshot odds than to have no chance at all.


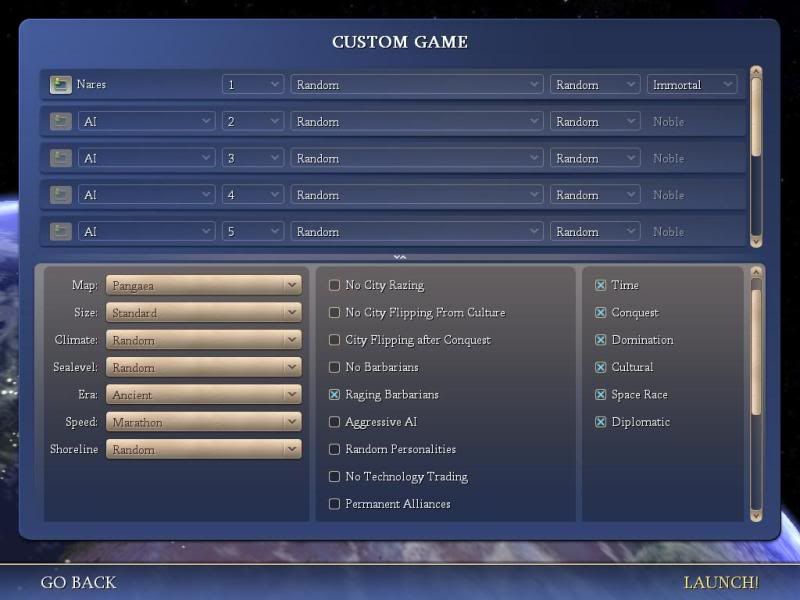
Standard sized Pangaea with Standard number of civs (7), Marathon speed, Immortal difficulty, with Raging Barbarians and (unseen) Locked Modified Assets; all other settings are Random.

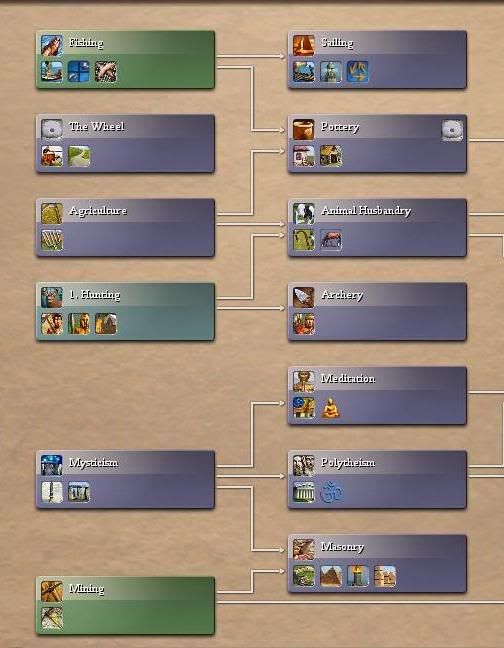
First few steps are pretty standard stuff. Found your capital, basic research path of Hunting -> Archery -> Mining -> Bronze Working. I suggest either founding on a Plains Hill, or working a production emphasized tile, at least for the first Warrior you produce, even at the cost of growth or research. Set production to Warrior.


I always manually move my units at this point in the game. I've found it has (imaginary) influence on Barbarian spawning. Head for hills first. Pick up Huts, of course, but your real priority is to find some potential targets.


After meeting this schmuck, I nabbed a Hut to the North of my Warrior before his Scout got there. It provided me with a map of the area NE of my capital, which mostly consisted of empty water. More significantly, it showed no cultural borders, so I knew he wasn't up that way. Meanwhile, his other Scout was wandering just East of my capital, so I figured he had to be to the East or Southeast of me.

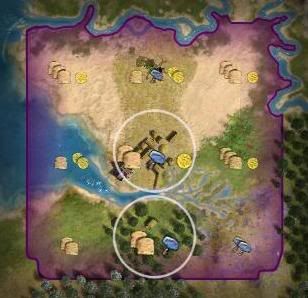
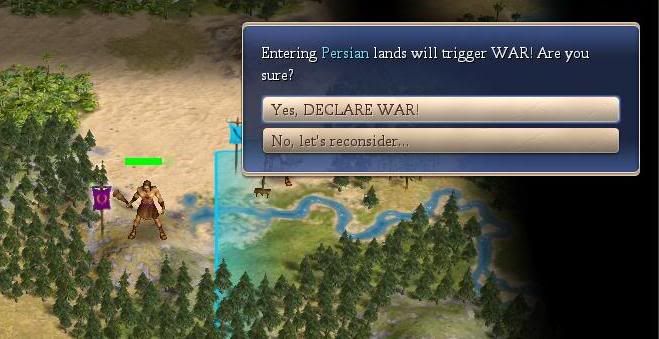
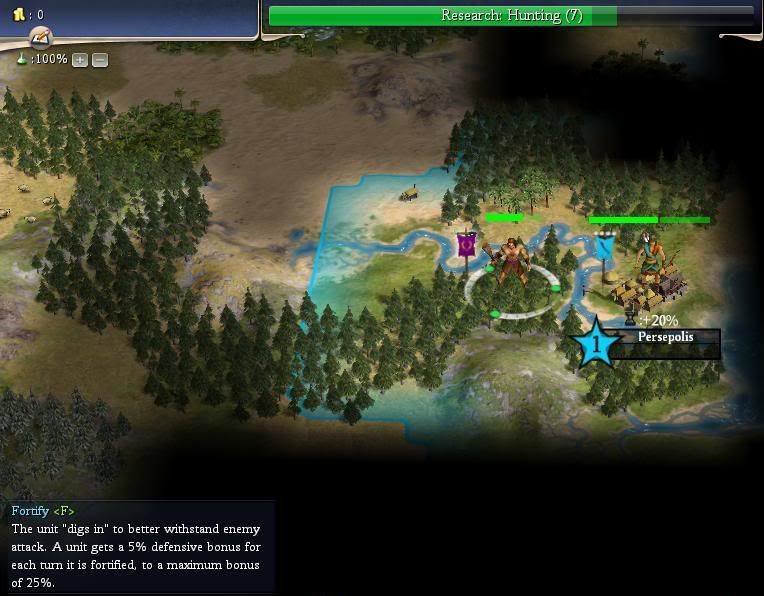
Needless to say, I was correct. Within one turn of showing up, I noticed him start working a Flood Plains tile (indicated by a small hut on the tile). One turn after that, his unescorted Worker moved in to start Farming the tile. I decided to do what I had been aiming to do from turn one.


Notice that his cultural boundaries had already expanded (damn you Creative trait). His city would be 1SE, 1E of the Worker. I chose to set up camp in the Forest 1SE of the Worker. This site was ideal for both being Forested, and for giving a -25% malus to any attacker crossing the river. I don't need to do this, but I feel like it, as the combination of Forest and river crossing is the second best tile I could fortify on, and give me the second best odds of killing an Archer that I could manage.


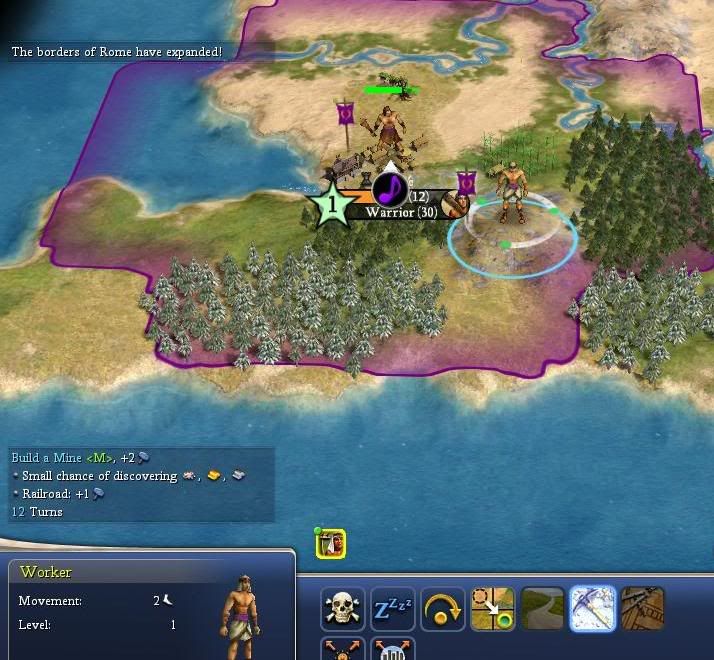
At this time, I finished producing my first Warrior, so I changed from the 2F/1P Grassland Forest to a 3F/1C riverside Corn tile. I set production to a second Warrior. I've also almost got my newly acquired Worker back home, and its time to see what, if anything, he can do for me.


Oh well, just a Mine. Nothing wrong with that, especially not once I eventually reach pop 2 and can work the Plains Mine and either the Flood Plains or riverside Grassland Corn.


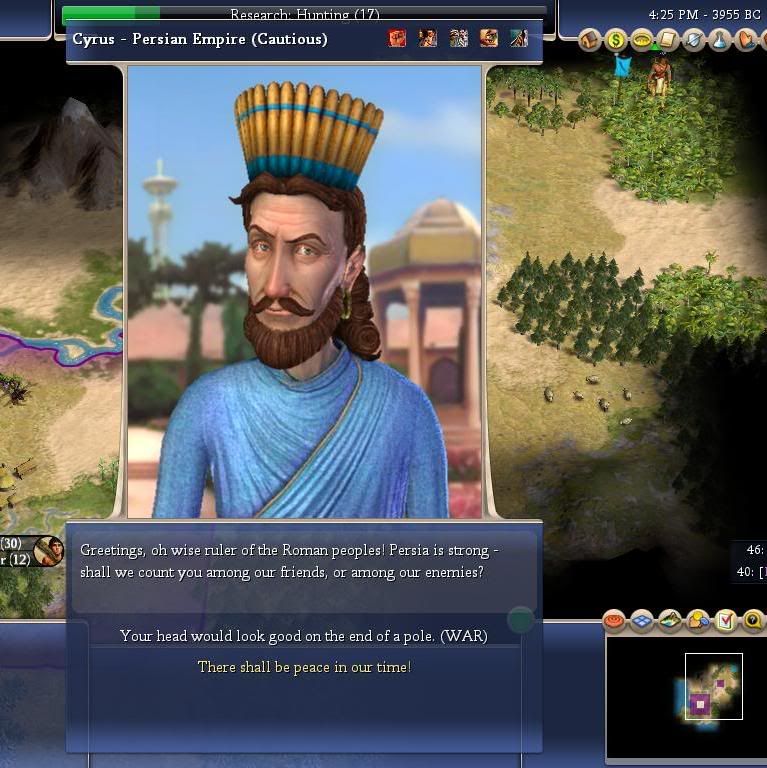
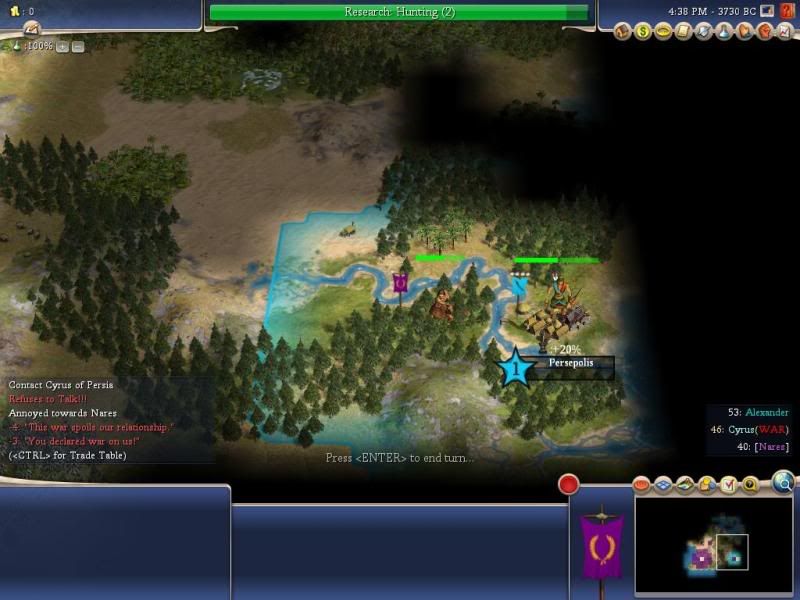
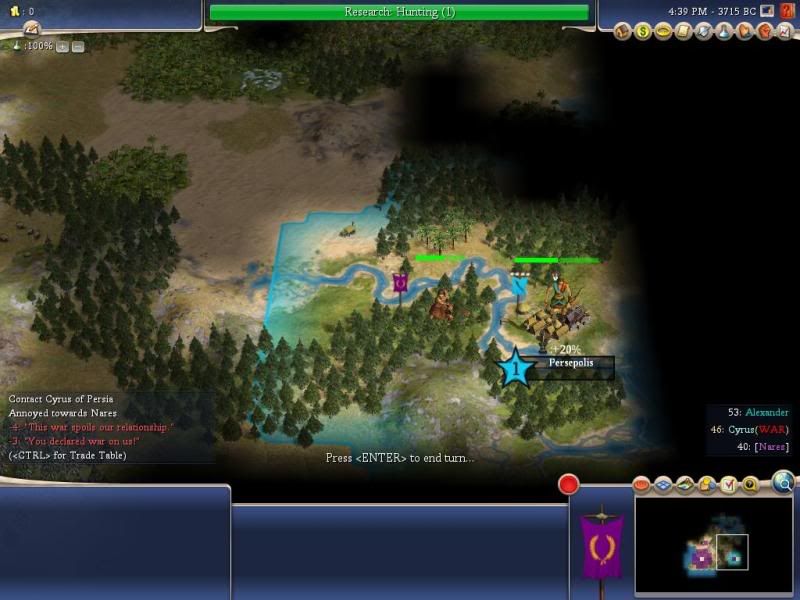
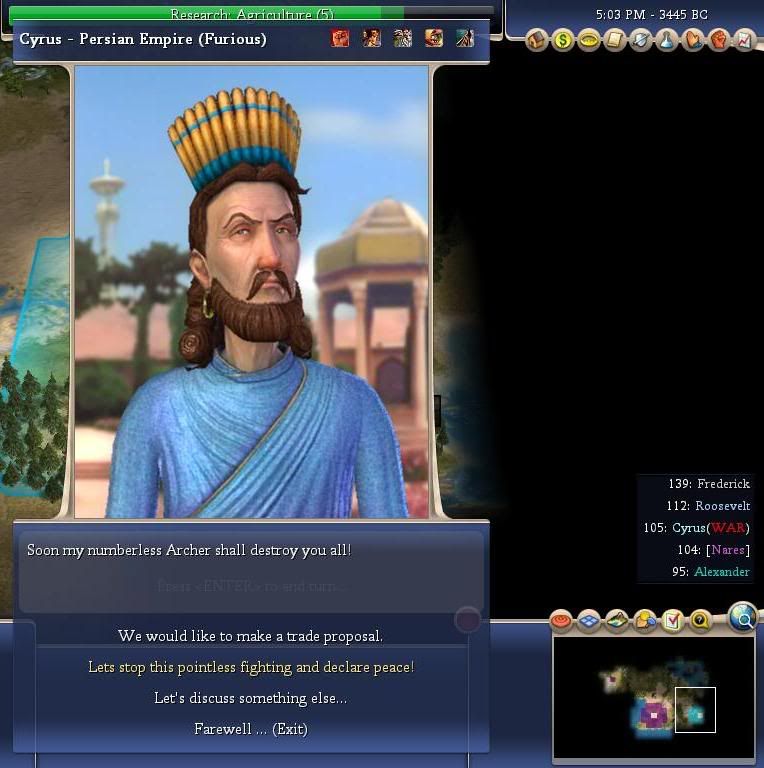
Meanwhile, I continue checking to see if Cryus is ready to talk to me yet.


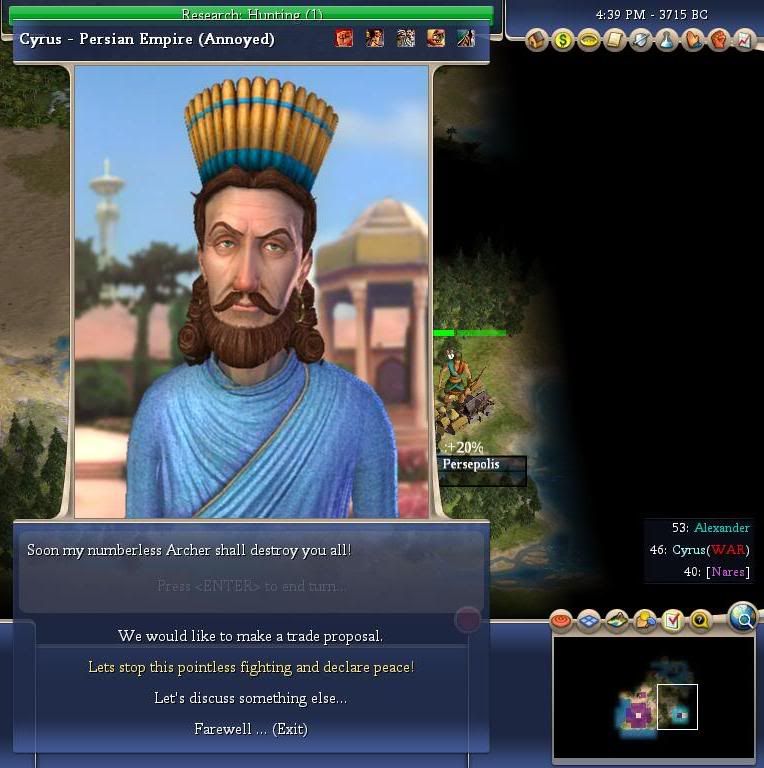
Finally, he's cooled down enough to listen to my side of the story.


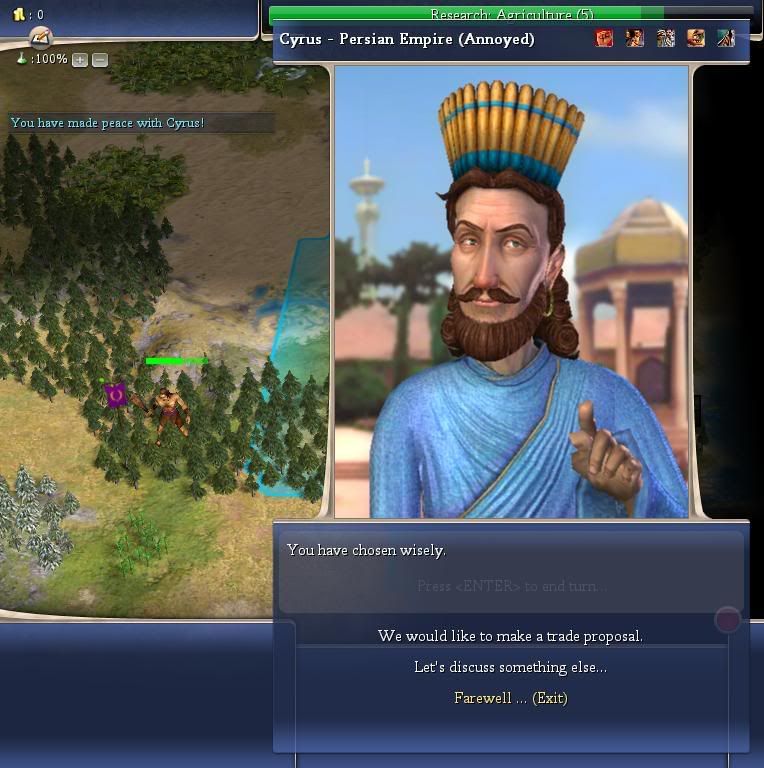
And so I make peace with him (no military units were lost by either side, so he's willing to make a deal).


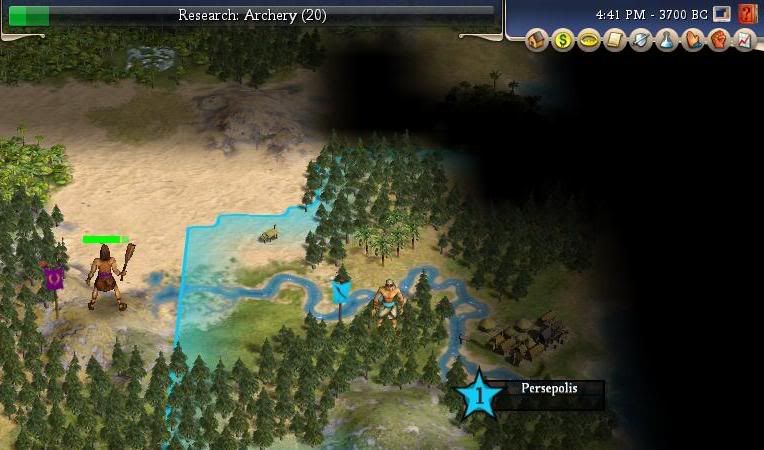
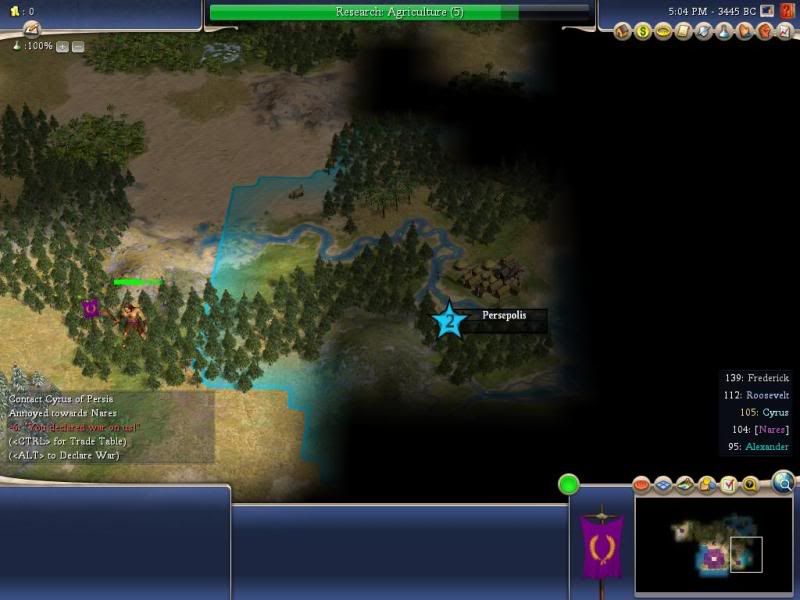
As a result, my brave Warrior (I really should have renamed him Roman Slaver) gets booted back outside Cyrus' cultural boundaries. I move him back onto the Hill, with the expectation of the following:


Meanwhile, I meet this sour fellow, who somehow is already pissed at me for picking on Cyrus (they must have met via Scouts; they also helped me figure out that some AIs have a natural disposition to be "friendly" with other civs as a first response; it's not as though any real exchange occurred between them).


On to Part Two
 
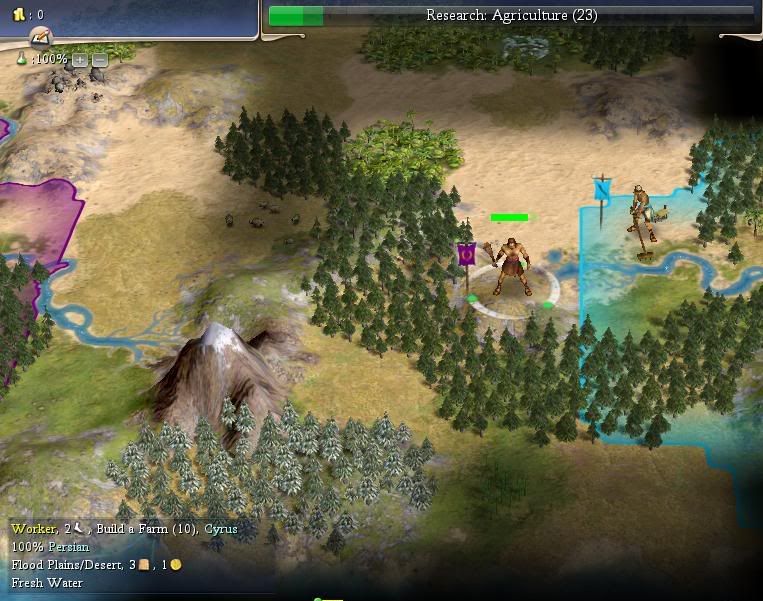
Remember that second Worker that moved into place to resume Farming that Flood Plains? Well, he's hard at work, and unescorted (silly Cyrus). However, with ten turns remaining until his work is complete, and next to nothing for him to do back in my territory (it's times like this that make The Wheel a great starting tech), I choose to let him continue his work.


Now, for those of you who know of the proper chop-rush technique, you already know that Build A ______ (2) is a key point in making sure you properly apply the chopped :hammers:. Two turns remaining means that, on the next turn, your Worker (or the AI's Worker, for that matter), will automatically complete the improvement it is building. There are ways to avoid this happening with your own units, but there's no way to prevent it from happening to the AI. The trick here, however, is that the AI Worker will actually move on the same turn it completes the thing (though this response is entirely gauged off of a mistake made when nabbing from Ghandi, so it may not apply to other AIs; it's not a mistake I made again).
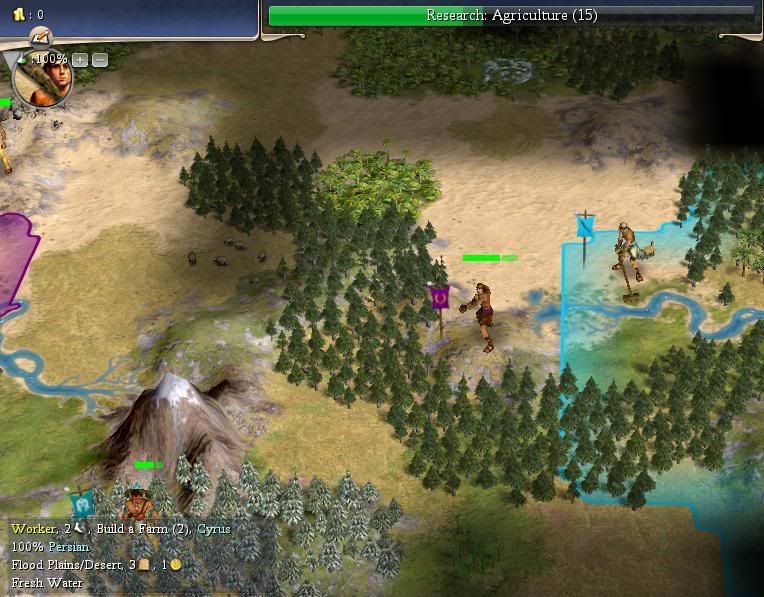
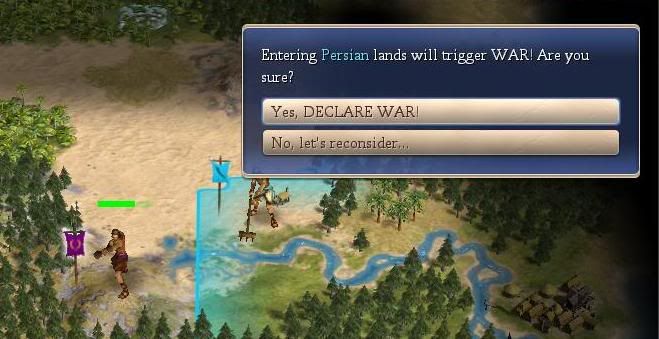
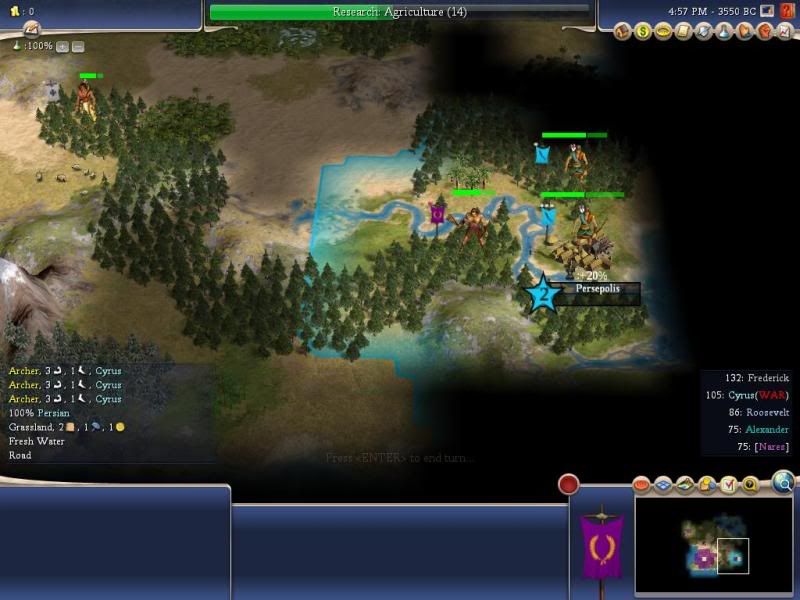
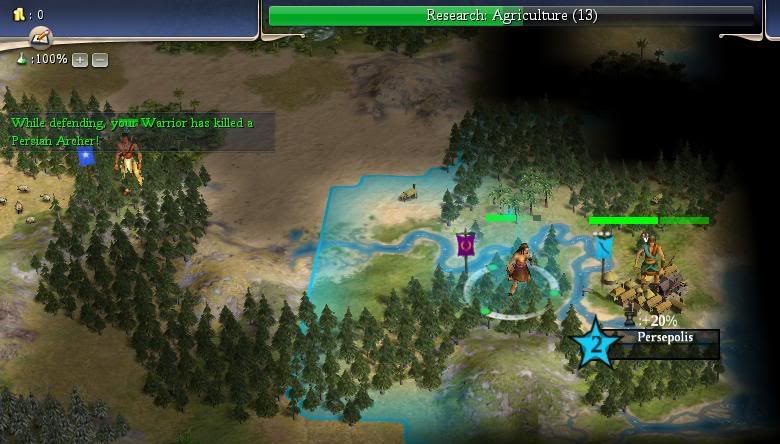
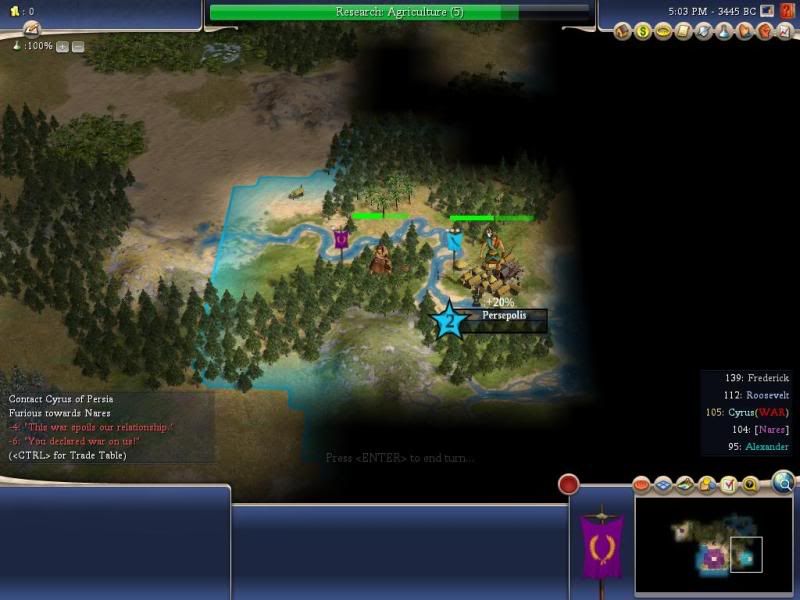
Hence why it was finally time to strike.


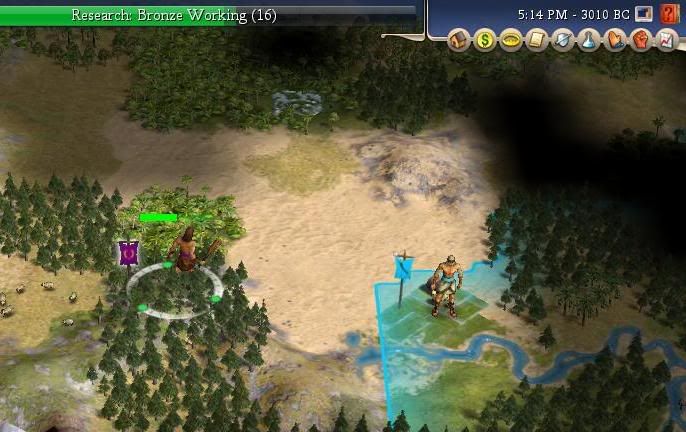
I moved back to my tile of choice, somehow not being attacked on the incoming turn (silly Cyrus still hadn't learned to build a road).


And, this time, I got the expected response. Now that I have killed one of his Archers, I am guaranteed that he will accept a peace offering.


Having not taken much damage (once a Woodsman I promotion was factored in), I remained fortified until Cyrus was willing to talk again.


And I make peace.


Yes, I am quite wise, Cyrus. But I already knew that.


Meanwhile, no one really cares all that much that I'm a bully. Okay, in all earnestness, Cyrus is Annoyed with me ("-6 You declared war on us!", Frederick, the sourpuss, is Cautious of me ("-2 You declared war on our friend!"), as is that cripple Roosevelt ("-1 You declared war on our friend!"). Alexander, of course couldn't care (actually, he probably secretly likes me; homo).

EDIT: I removed the image here of the diplomacy screen, as it wouldn't resize well enough.

My Roman Slaver (I really should have renamed him; good thing I have the saves for this) gets bumped back out of Persia.


And moves back to the hill. Oh wait, what's that. NO WAI!!!!!!111!!!!! I guess you really can't teach an old dog new tricks. Don't expect an AI to be this stupid. EDIT: Actually, it isn't. I mistakenly sent the fortified Warrior to chase a rogue Barbarian Warrior. The AI used that time to complete the Farm, after which my Warrior could only stomp in frustration at being unable to nab the Worker.

 
I've had zero success with this tactic unless the AI player was literally right at my doorstep, basically as close or closer as Cyrus seems to be to you in the set of images. Either the Warrior and/or Worker die from Barbarian attacks or the first AI I find is just too far away to make it worth the wait for my first Worker.

Have you done an analysis of your city development with and without a captured Worker? Let's say I walk 10 tiles from the capital and capture a Worker on the 11th move. In 5 more turns I'm back with the Worker at my capital and ready to improve a tile. I'd be at the same point if I started making my own Worker, but this is best case. In the typical case the theoretical time I get to my first improvement is much longer, namely because the Worker will be killed on the way back to the capital. Is having 1-2 extra Warriors and perhaps one more point of population really offsetting the big delay in improving your own tiles? The biggest concern I have with thsi delay is the fact that I have to Worker to connect copper or horses... so I'm still making Warriors when I'm supposed to be making Axemen to kill this guy I'm stealing Workers from.

Edit: As mentioned by somebody else in a different thread, the game allows you to disband a unit even after you've moved them. What do you think of just always disbanding the attacking Warrior so that the AI can't get the credit for killing him, delaying the peace talks? Really it seems like if you have the opportunity to take an AI Worker, you probably should, regardless of wether he's on an ideal tile for you to defend or not. You're just not going to be able to wait for him to happen to move to a spot better for you.
 
Is it possible to disband captured workers? Cuz if that's possible, I think I will build a bunch of cheap warriors in the fastest time possible, then sent them to the enemy territory, and capture their free workers, and then disband those workers (unless I am sure that they can make it back to my cities without being captured). Although the enemy at the monarch level often get free scout and archers, they can only take on one unit at a time. So while they take on a unit, the other warriors can move in to capture the workers, which they will disband. Then, the warriors can play gurrella warfare, running around the enemy city while avoiding being hit by the archers, and then capture the next worker produced by that enemy city. And this can keep on going on and on and on until our own civilization has grown significantly. This will work even better once we have mounted units. But they are much more expensive to produce though.
 
Perhaps I should have chosen a more distant opponent for the demonstrative purpose of this (similar to how I came to choose Immortal). Granted, this was the first game I loaded in order to take screenshots of the tactic.

With regards to actually implementing the tactic, I think you're looking for a cure-all. That is to say, you should make the determination if and how you want to apply it.

Eqqman said:
Let's say I walk 10 tiles from the capital and capture a Worker on the 11th move. In 5 more turns I'm back with the Worker at my capital and ready to improve a tile. I'd be at the same point if I started making my own Worker, but this is best case.

For starters, you discuss producing your first Worker within 15 turns. That suggests Normal speed. As I discuss in the opening, this is primarily a tactic reserved for slower speeds, which serve to enhance unit movement speed as opposed to other aspects of gameplay (production/research).

Eqqman said:
The biggest concern I have with thsi delay is the fact that I have to Worker to connect copper or horses... so I'm still making Warriors when I'm supposed to be making Axemen to kill this guy I'm stealing Workers from.

Again, it sounds as though this is an issue of time. Not playing on Marathon or Epic speed really changes how you can apply this. I can assure you, attempting this on those speeds has far different results from the ones you're seeing. As it is, if you're trying to steal your first Worker at the point of discovering Copper, then you probably should have made the realization already that you need to build a Worker rather than relying on stealing one. That you waited so long suggests that you had to travel an excessive distance. Even if you were to steal a Worker, at that point, there would be increased risk of getting it back to your capital as a result of having to travel so far.

Eqqman said:
Have you done an analysis of your city development with and without a captured Worker?

No, I have not. But such an analysis would be more an analysis of what civ makes the best use of an early Worker. Realistically, you're looking for a congruence of starting techs and (lucky) map placement. If you start with Agriculture and you find a Corn or Wheat in your capital's fat cross, should you start with a Worker rather than wait on stealing one? That's your choice, but such a start strongly suggests building a Worker first.

However, aside from that particular start, there are not overly many instances when you would absolutely be inclined to start with a Worker rather than build one or two Warriors before the Worker (though to do either is a matter of choice; you could as easily start with a Settler). Perhaps if you start with Hunting and have multiple Elephant resources in your fat cross. Or if you find yourself on a Flood Plain start with a Financial civ and intend on making Pottery a very high priority.

With regards to specific advice for you, Eqqman, I could perhaps give you better advice in the context of a specific game. Try, if you would, playing VoiceOfUnreason's Lessons on Epic: Washington (I believe you were trying to make the move to Monarch; this is a Monarch level game). In it, I personally stole two Workers from Qin, and one from Huayna Chapac (which was intercepted by two Barbarian Warriors and two Barbarian Archers).

Thank you for the suggestion of disbanding the Warrior before it can be killed. I will look into testing this to see if it will provide a suitable means of reaching the proper diplomatic outcome.
 
Nares said:
As I discuss in the opening, this is primarily a tactic reserved for slower speeds (more typical of higher difficulty level play)

I think the difficulty of playing Immortal at Marathon is much less than the difficulty of playing Immortal at Normal speed. Sure, people playing Deity and Immortal often play at Marathon, in order to make the game easier for themselves. But to my mind, that defeats the point, a bit.
 
Nares said:
For starters, you discuss producing your first Worker within 15 turns. That suggests Normal speed. As I discuss in the opening, this is primarily a tactic reserved for slower speeds (more typical of higher difficulty level play), which serve to enhance unit movement speed as opposed to other aspects of gameplay (production/research).

Well, this gives rise to another question. Are the expert players (ones who aren't just doing Quechua rushes on Duel maps) only playing the higher difficulty levels at slower speeds? If so I might as well stop trying to get through Monarch at Normal speed right now and save myself some hassles.
 
I can win 95% of time on Emperor on Normal speed I am useally play on.
Worker stealing rarelly pays on on normal speed, as at time you find AI they allready expanded cultural borders and ready to respond in force.

Some times it is still profitable.
 
I play Deity on normal speed. I don't like the other speeds. I agree that slower speeds are easier (because they favor war and the AI sucks at war), especially on higher levels (because war becomes pretty much necessary to win those).

Worker stealing does work on normal speed, and i use it all the time.
 
Another question for the OP: If you bring up the dialogue box and select the 'Let us stop this pointless fighting and declare peace' you automatically get the 10 turn Peace Treaty. If you skip this the default deal becomes a Cease Fire agreement. Have you experimented with the ramifications of taking a Cease Fire instead of the Peace Treaty? On the surface it would seem to be more advantageous, especially in situations where your opponenet is very close. With a soldier camped at his borders you are in a position to respond immediately if the AI pops out a new Worker in under the 10 turns you'd have to wait for a treaty. I think I've only ever taken a Cease Fire once in my life, and I have no idea if the AI is more inclined to accept that than a real peace. Usually I'd rather have the real peace so I can safely redeploy over the next 10 turns, but if I'm serious about snagging Workers you'd want the flexibility to catch as catch can.
 
DaviddesJ said:
I think the difficulty of playing Immortal at Marathon is much less than the difficulty of playing Immortal at Normal speed. Sure, people playing Deity and Immortal often play at Marathon, in order to make the game easier for themselves. But to my mind, that defeats the point, a bit.

Noted. The statement inside the parentheses will be removed. I did not intend for this to become another discussion of ways in which to make higher difficulty settings easier to play prior to starting the game (ie reducing map size, or, in this case, slowing the game speed down).

EDIT: Also removed the single line (that I know of) in the guide which correlated higher difficulty play to slower game speeds.

Suffice it to say, the tactic is easiest to implement on Marathon speed, then next easiest on Epic speed, then Normal, etc. It's also less imperative that you make the determination between producing your own Worker and stealing one on the slower difficulties; there's simply more time in which to steal one. No less, the slower speed will delay the arrival of Barbarian Soldiers (even on Deity difficulty setting).

Mutineer said:
Worker stealing rarelly pays on on normal speed, as at time you find AI they allready expanded cultural borders and ready to respond in force.

Zombie69 said:
Worker stealing does work on normal speed, and i use it all the time.

Worker stealing does work on Normal speed. That it can be used in place of building an early Worker on slower speeds does not preclude its use to provide a second or third Worker (or perhaps first, if you find yourself in that position). Granted, it is more difficult to grab the later Workers. Mutineer points out some reasons as to why this is. Additionally, you're stealing past the point of the arrival of Barbarian Soldiers, which, as I note, beeline on the Worker.

I'm sure if asked, Zombie would state that he builds a Worker as appropriate, and steals as appropriate.

I'm almost inclined to believe that I need to write a second guide in how not to confuse the outlaying of a tactic from the step by step usage of that tactic. I attempted to make it thorough; obviously I should have entirely removed all thought on behalf of the reader, and provided specific tile-by-tile instructions as to how and when to implement this. I don't know if a giant disclaimer reading something to the effect of "USE YOUR BRAIN WHEN ATTEMPTING TO IMPLEMENT THIS TACTIC; THIS GUIDE MERELY SERVES TO HIGHLIGHT SOME POINTS OF CONSIDERATION WHEN ATTEMPTING TO STEAL A WORKER," would suffice.

Eqqman, with regards to your query about Peace Treaties versus Cease Fires, at an early stage of the game (my guess would be pre-Writing), there are no Peace Treaties.
 
Eqqman, with regards to your query about Peace Treaties versus Cease Fires, at an early stage of the game (my guess would be pre-Writing), there are no Peace Treaties.

True, but that leaves my questions open. Also, Cease Fires remain an option throughout the whole game as far as I can tell. If I'm nabbing Workers after I get Writing then the information is still relevant.
 
Eqqman said:
True, but that leaves my questions open. Also, Cease Fires remain an option throughout the whole game as far as I can tell. If I'm nabbing Workers after I get Writing then the information is still relevant.

Worker theft post-Writing is more typically a function of capturing Workers that are inside a city. If you're still trying to steal Workers while unable to form a powerful enough group of units to attack your target, then you're presumably making a mistake somwhere. No less, if you're trying to steal Workers from a target with the intention of somehow impeding its progress, then you're again making a mistake.

That the fact that your question can exist isn't the issue. In the first case, you should have the military resources to actually assault a target (rather than just the few you would employ in Worker theft). In the second case, you're not actually causing that great an impact on the target's develpoment (it's improved tiles already, there are other Workers, etc.).

Additionally, if you're stealing Workers post-Writing because you lack enough Workers, then you should probably readdress how many Workers you produce on your own. This already seems to be something you need to do.
 
Nares said:
Eqqman, with regards to your query about Peace Treaties versus Cease Fires, at an early stage of the game (my guess would be pre-Writing), there are no Peace Treaties.

I was curious about this so I checked it out. I indeed was only getting Cease Fires until I developed Writing. Oddly enough the default 'Let us stop this pointless fighting...' agreement was still a Cease Fire even though you can now negotiate a Peace Treaty. I couldn't find anything in the Civilopedia mentioning these agreements.

I'm curious as to why I don't hear people discussing Cease Fires. It seems like a good trick to buy yourself 0-2 turns of peace when you really don't want to interrupt the war at all. Maybe an enemy stack is about to reach an undefended city. Get a Cease Fire to pop them back out your border, then redeclare next turn or the turn after when you can get your men in there. The AI might even be stupid enough to move Workers out in its one move of peace.
 
Eqqman said:
I'm curious as to why I don't hear people discussing Cease Fires.

I think the primary reason as to why most people ignore Cease Fires is that there's no pointy stick negitiations involved in them. Versus Peace Agreements, which can net you gold or techs (cities, as much as they're an option, are almost impossible to convince the AI to part with).

I did a minor amount of research as to your suggestion to disband the Warrior after capturing the Worker. The most common response I received was that the AI will not negotiate a cease fire (to use the correct term) if you do this. I'm not sure how it treats your unit, just that it doesn't generate any amount of war mongerer respect (or whatever the associated AI personality value is). Though I should note that all of that was done on Deity difficulty, so there's a very minor (though not entirely zero) chance that the AI would respond differently given a different Power ratio between your civ and its.

EDIT: After I have the chance to test that further, I'll add the results to the guide.
 
Good guide. In principal i like the strategy. I wouldnt pick a civ within 4-5 squares of your civ capital. I tried this a few turns later my capital was attacked and i was gone. It was either a archer or chariot of the Americans. Still testing stealing a worker. Mind you the Americans were pinned in a part of map with my capital blocking the exit.
 
I've succesfully used the 'steal worker' tactic on monarch several times, and I have to admit I didn't think about it at all until reading about it on these forums. But winning a couple of times on Monarch I moved up to emperor... But, as soon as I try this tactic on emperor I always run into problems. :(

Assuming I can even locate a civ in time to steal a worker from there are several other issues. Sometimes...
*...the AI actually escort the worker with an archer, making me unable to snatch it and then moving into another position.
*...the worker don't make it back, especially if I had a bad starting position.
*...the AI refuse to sign peace, despite me having more troops. And this sometimes even happens against the none-aggressive civs. (lately against Saladin and Washington... who "refused to negotiate with terrorists"). Yes, even when the worker has survived AI has refused peace. Though it tends to be easier to get the CF if worker survives or if you successfully kill the archer. I'm guessing the AI is comparing his army to yours or something along those lines.

Basically, I succeed 1 out of 4 times on emperor. And honestly I consider it a bit of cheating to restart that early because one failed to steal a worker... what am I doing wrong? Or do you people simply restart if you fail the worker theft? :confused:
 
Top Bottom