Create units with OpenFX

muffins said:
The cure for that is to have all you cameras way out (and I do mean WAY out ;) ) and to set the zoom to something stupidly high (like 250mm plus)


Next unit, I'll re-set up my camera configuration.
 
Dease said:
@ neomega - how'd you get your shadow slightly blurred around the egdes?


proabbly turning on anti-aliasing to full strength, also my spotlight's hardiness I pronbalby turned down, but made the cone large, and far, very far, from the unit.

Actually, if it's not antialiasng set to high, then it is something in my set up, which is attatched as a zip a few posts up.
 
hmm, looked at your setup and I can't see how you have shadows at all, there's no ground :confused:
Also, I've never had a spotlight make a shadow, :hmm:
 
Dease said:
hmm, looked at your setup and I can't see how you have shadows at all, there's no ground :confused:
Also, I've never had a spotlight make a shadow, :hmm:

Sorry, the ground I import as a separate model, or as part of the model, but not connected to the skeleton.


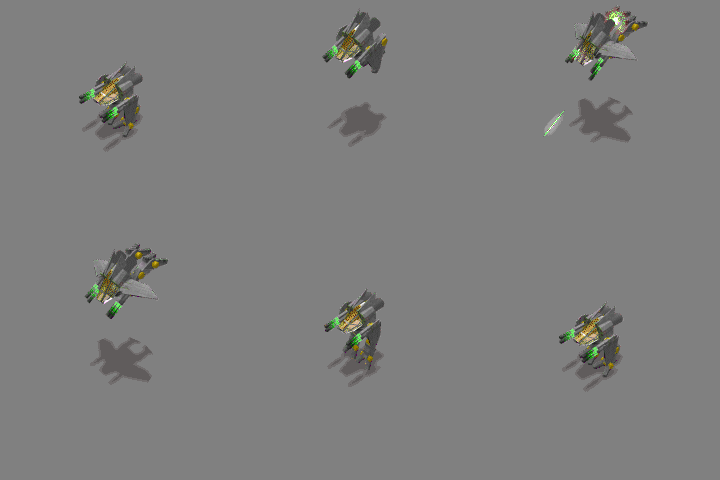
OK, so I solved the problem of getting close to my camera by using the scaling keyframe. It was very tricky, but using lots of motion will hide the wavyness of growth and shrikage. This animation was shrunk and grown 20%.

For future reference, I would suggest if anyone plans on doing any "Jump" type animations, and do not wish to readjust their entire camera and light set up (shadows also grow if you aren't careful... see some of my older animations... :p ) to get their model close to intended scale before modelling, as open FX can only scale in the accuracy of the second digit place. So if you original model is giagantic, and you scale it down to 10% to fit in your platform, you will be forced to work in scaling increments of 10% (0.10 to scale originally, then +/- .01 for dscale adjustment due to camera appraoch)
 
I still have no idea how you made your shadows soft at the edges... If you could explain it, that'd be great... That is, if it's not too much trouble :D.
 
A Viking Yeti said:
I still have no idea how you made your shadows soft at the edges... If you could explain it, that'd be great... That is, if it's not too much trouble :D.


I attatched my set-up.

In your render panel, under options, "anti-alias ground reflection".

under control: anti-aliasing best, and use accelerated anti-aliasing is turned off.

I am not sure which of these three do the trick.... it also may be the spotlight, if that's the case, it's in the set-up.
 
Ok.... could somebody clever perhaps help me with surface textures. I want a map which will stick to the unit, during animations, but which I can size and position like a normal map.

Basically I want to be able to create a texture map for a certain part of a model, with details, which will move with the model during animation.

I am yet to find a way of doing it.... help?
 
The Great Apple said:
Ok.... could somebody clever perhaps help me with surface textures. I want a map which will stick to the unit, during animations, but which I can size and position like a normal map.

Basically I want to be able to create a texture map for a certain part of a model, with details, which will move with the model during animation.

I am yet to find a way of doing it.... help?

1. Get the texture map "primer" from the Blender apple texturing tutorial. He doesn't want remote linking, so I will respect that. But it is an awesome set-up with colors, numbers and letters, so you can do pin-point texturing.

2. Select the parts you want textured.

3. Set up the map. Turn decals off, until you understand the difference between the two. ;)

4. Use planar... I can't get cylindrical to work for fixed maps.

5. After setting up your map, and it looks good, go to attributes--> fixed to mapping-->Convert normal map to fixed to map

6. THEN go back into Attributes-->maps-->edit map, and change it from planar to fixed.
 
@ neo - I'm trying out your setup to get the soft edged shadows, however, I can't even get a shadow :mad:
I don't think spotlights create shadows, I have a ground (an imported model as you said) and no shadow comes up :confused: any ideas???
 
Even though this is way off what you have been talking about...
Can someone please explain to me how to make human models??
I have tried and they come out....blocky....
Anyone help would be nice.
-Spart
 
Dease said:
@ neo - I'm trying out your setup to get the soft edged shadows, however, I can't even get a shadow :mad:
I don't think spotlights create shadows, I have a ground (an imported model as you said) and no shadow comes up :confused: any ideas???

Under raytrace, have you checked "trace shadows".

I just tested it out, and it worked fine.

Also, I think that under ettings, Ambient lighting% looks good at 45, and shadow density % is good at 66.

Spart said:
Even though this is way off what you have been talking about...
Can someone please explain to me how to make human models??
I have tried and they come out....blocky....
Anyone help would be nice.
-Spart

One trick is to turn the smoothing angle down... I have mine at 30 I think, so even a pretty sharp angle will be shaded to appear rounded.

If you are textruing, choose shaded texture.

edit... ahh, it appears I have it at 75..... strange.
 

Attachments

  • ofxsettings.gif
    ofxsettings.gif
    21.1 KB · Views: 150
[dance]
I figured out the shadow thing finally :D
it turns out my eight side lights were overpowering the spotlight so I adjusted a bunch of settings and it now works!
thanks for the help neo :goodjob:
 
Neo, if you want fixed cylindrical maps, you have to set the tile setting in the "selected attributes" tag to multi tiled, after you have done all the normal steps of setting up a fixed map.
If you don't the texture will not be displayed.

I look forward to your palette tutorial. Could you post the screen shots you took of the static Blended flic? Its somthing I was thinking of doing myself and you could save me the time. (I already have to correct the pallettes on most of my space units). :(
 
How about some in game screenshots?

These are numbered with the main alpha blend row being numbered 1-16.
 

Attachments

  • 25to32.gif
    25to32.gif
    162.8 KB · Views: 105
  • 17to24.gif
    17to24.gif
    86.7 KB · Views: 99
Does anyone have any tips to help me make a human model?? Such as do I use clinders to make limbs?
 
Spart said:
Does anyone have any tips to help me make a human model?? Such as do I use clinders to make limbs?
I used stepped cylindars for my orks, almost entirely. I used a lat sphere (they are much better than geo spheres), for the head, then did vertex pushing to get it all fitting together. I found the proportions were quite hard to get right (though I wasn't strictly doing humans). It'll take you a few goes to get it all looking right, especially as civ proportions are weird as it is.

Light clothing doesn't really work, nor long hair. The animator needs a dangle feature or something.

Oh, and make the best use possable of phong smoothing. Don't let any angle get too large.
 
@ neo - those are some VERY useful screenshots, THANKS!!! :goodjob:

@TGA - Phong smoothing :confused: please explain :rolleyes:

@spart - I'm going to attach a pic of my human model that I've made from scratch, I labeled all the body parts with what shape I used to make it :)

I did NOT make this all at once, I made the bodyparts as I needed them, I went from almost totally covered units, to nearly naked units making the parts as needed :).

Ask any questions about the model you like.
 

Attachments

  • humanhelp.png
    humanhelp.png
    51.4 KB · Views: 160
Top Bottom