Gray Wolf
Winter Wolf
Note: A PDF file of this tutorial is attached below.
How to make a Flag leaderhead FLC file (using GIMP 2.8 and PSP 7 which includes Animation Shop).
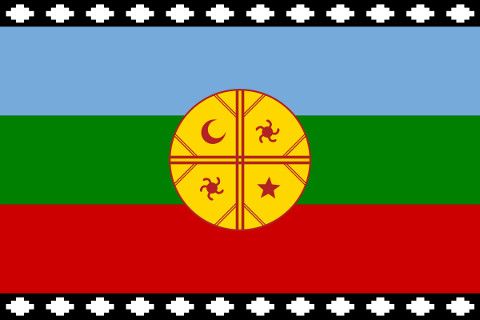
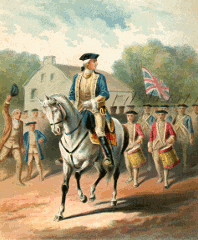
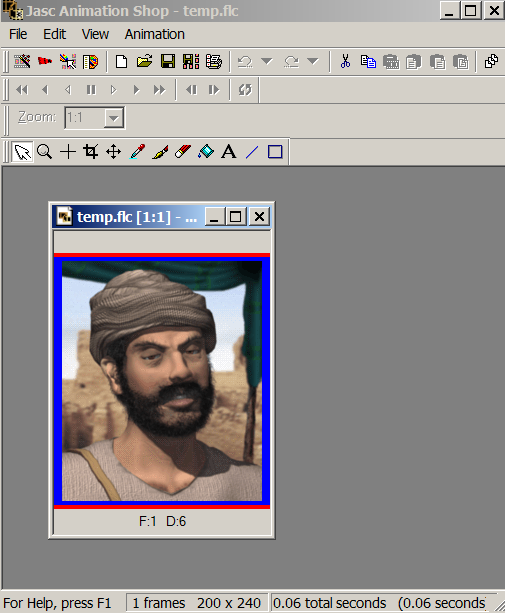
Leaderhead flags are 200 width x 240 height. They look like this:
This tutorial will show you how to make a flag leader head like this.
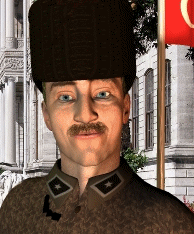
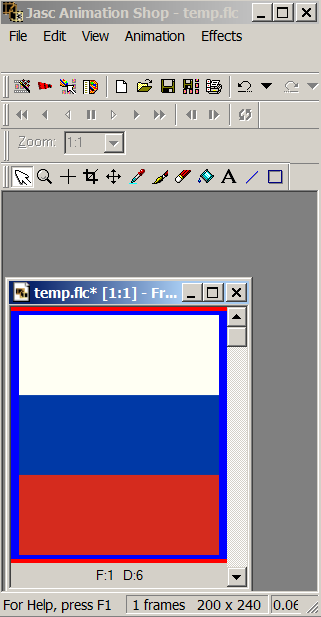
Russian flag leaderhead:

Here's how to make the Russian flag leaderhead:
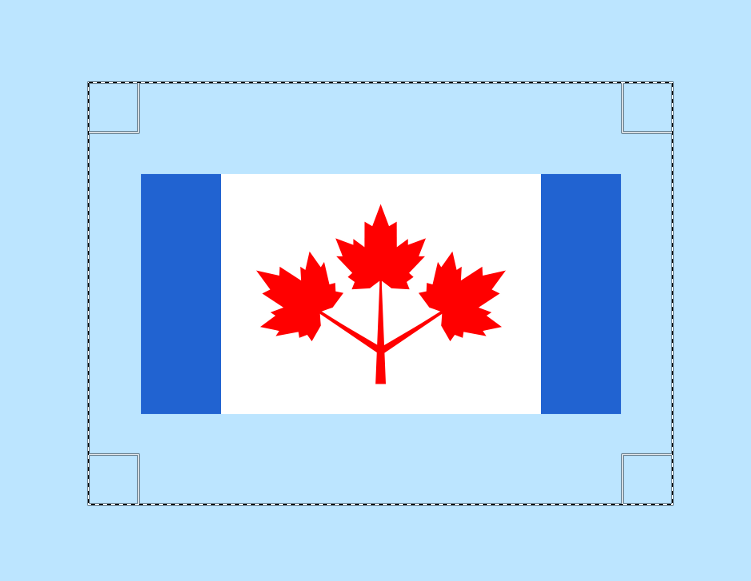
1. Find a picture of the Russian flag on wikipedia and save it.

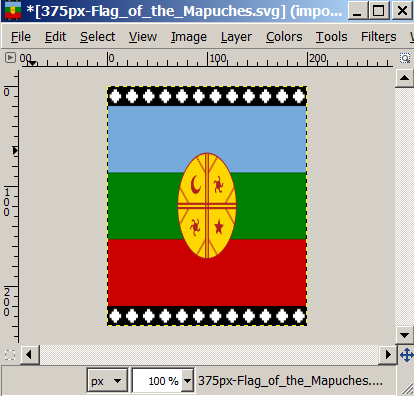
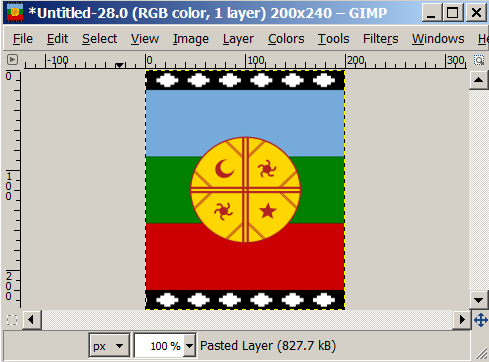
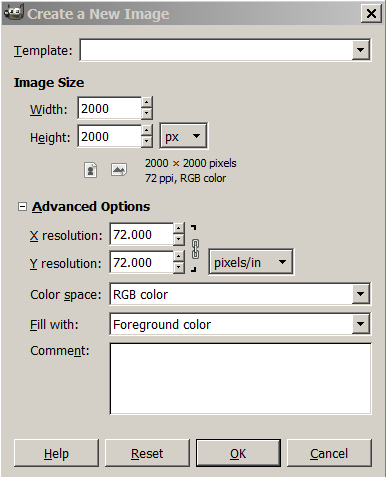
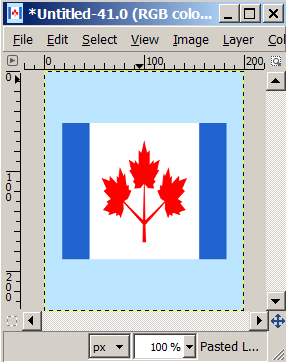
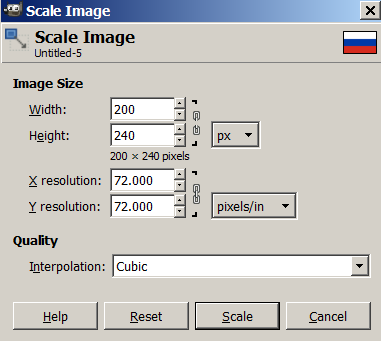
2. Open the flag up in GIMP and scale it to 200 width x 240 height.
Image/Scale Image

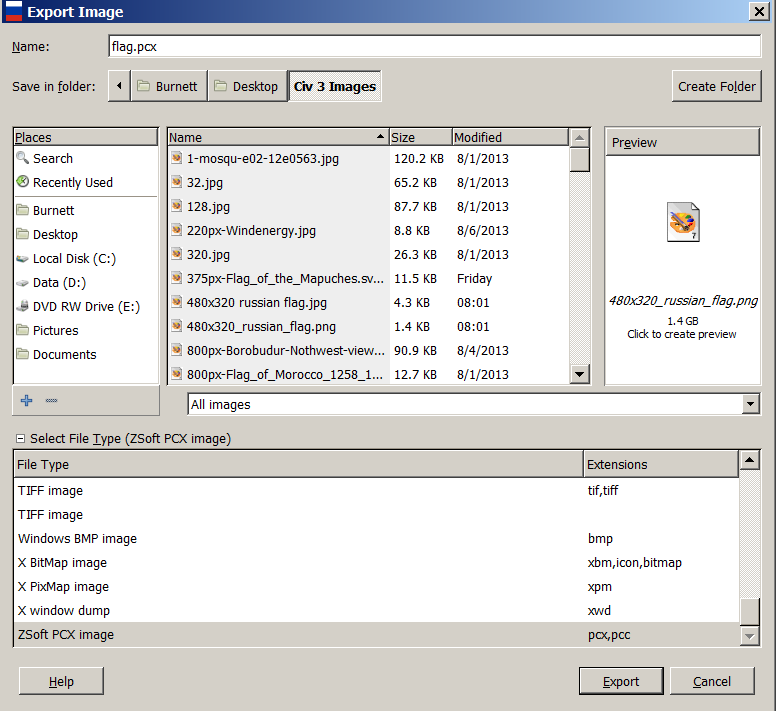
3. Export the file as a .pcx file.
(1) File/Export
(2) click the + sign where it says "Select File Type"
(3) Scroll to the bottom and choose ZSoft PCX image
(4) Change the file name: flag.pcx
(5) Click export
4. Close the current file(s) and open up the flag.pcx file in GIMP
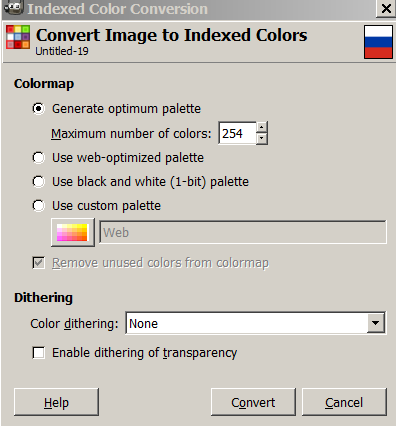
5. Index the Colors / Make a Color Palette
(1) Image/Mode/Indexed
(2) Set the color map to "Generate optimum palette"
(3) Set Maximum number of colors = 254.
This ensures that your palette will have 2 unused colors that you can change later on.
(4) Set Color dithering to "None"
(5) Leave "Enabling dithering of transparency" unchecked.
(6) Click Convert.
6. Overwrite the flag.pcx file
File/Overwrite flag.pcx
7. File/Close Without Saving
8. Open up the flag.pcx file again
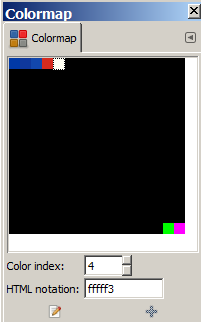
9. Fix the Color Palette (make it work with Civ 3)
(1) Windows/Dockable Dialogs/Colormap (Opens the color map/palette)
(2) Make the colormap window bigger so you can see all the colors.
(3) Double click the last palette color (color index=255)
Set the color to any color that is not in the current pallette.
Try Fuchsia (ff00ff).
(4) Double click the second to last pallette color (color index=254)
Set the color to any color that is not in the current pallette.
Try neon green (00ff00).
(5) Scan the pallette. Find any pallette color that looks white.
If it is ffffff then change it to fffff3.
10. Overwrite the file again
File/Overwrite flag.pcx
11. Close the File Without Saving
12. Re-open the file again
You may ask "Why do we keep closing and re-opening the file?" !!
Basically we want to do this to ensure that the last part saved correctly.
Leave the file open for a while.
13. Open up a .flc file in the conquests/art/flics folder using PSP animation shop...
Any flc file in the folder will work. Try the one called X2_Mursilis_ancient_bwrd.flc
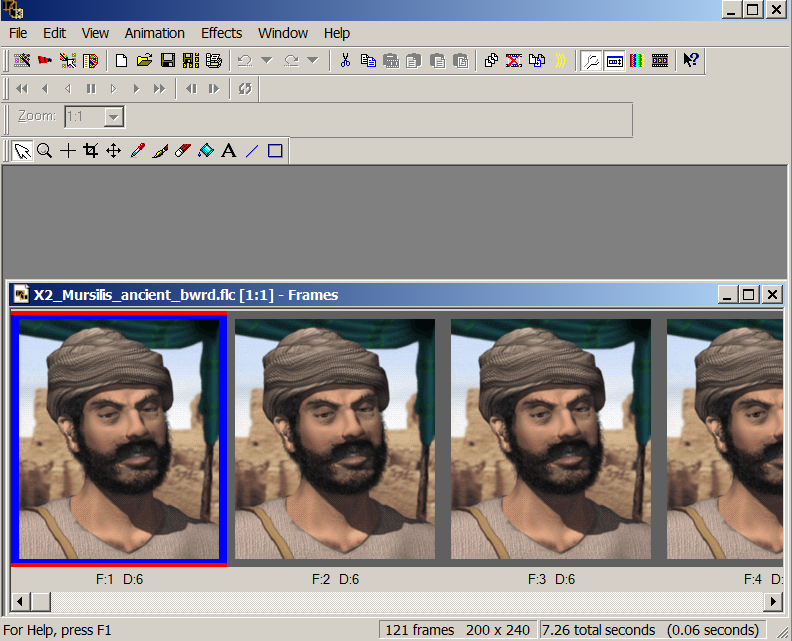
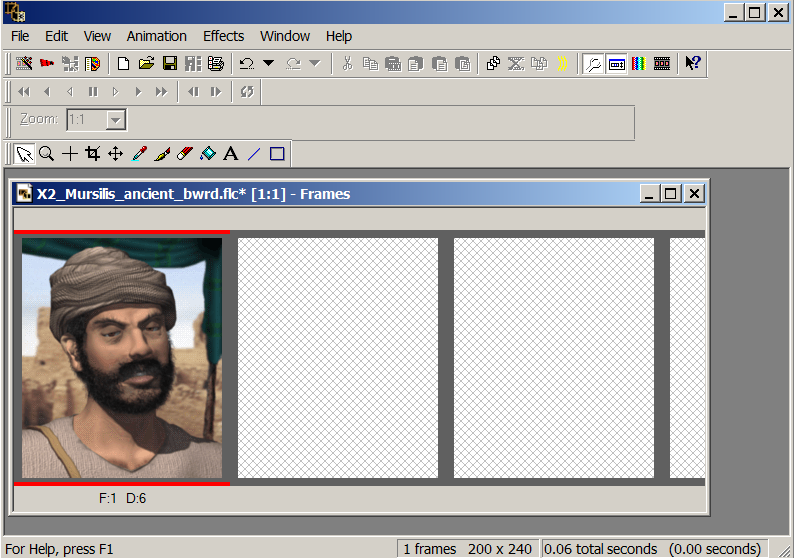
Delete all the frames in the file except for the first frame.
Click on the 2nd frame and then use the shift key and the right arrow key
to select all the frames from 2 until the last frame.
Click the delete button to get rid of all those frames.
You just have one frame now.
14. Save the .flc file
File/Save As/Temp.flc
Click the Save Button
A dialog box pops up. Just click the Next Button all the way through
each diaglog box section. Then Click the Finish Button.
Close the File.
15. Re-open the file.
You should only see 1 frame in the .flc file.
All of the empty frames should be gone.
16. Go back to your .pcx file and do an Edit/Copy
17. Now go back to PSP and select the single frame that you have.
Just click it's title bar.
18. Now do an Edit/Paste/Into Selected Frame.
Line up your frame so that it fits perfectly inside.
It's sometimes a pain but it eventually lines up squarely inside it.
19. Save your file
(1) File/Save As. Example: Russia.flc
(2) An "Animation Quality Versus Output Size" dialog box will pop up
(3) Click the Customize button
(4) Click the tab called "Canvas Color"
(5) Change that to any color that is not white and not something used
in the picture. I like to use some light "close to white" color.
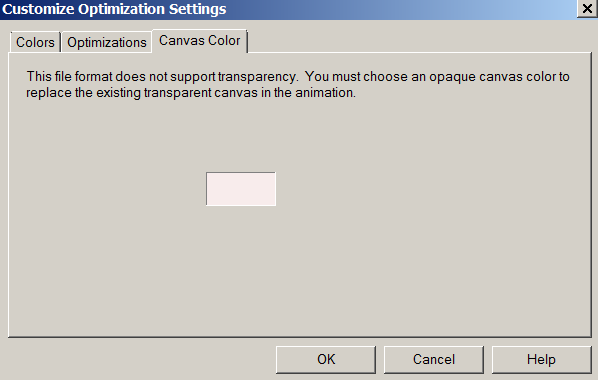
(6) Click OK
(7) Leave the lever set to "Better Image Quality"
(8) Leave the checkbox unchecked ("use these settings...")
(9) Click Next
(10) Click Next again
(11) Click Next again
(12) Click Finish
20. Change Frame Time
In the menu select: Animation/Frame Properties
Then change the display time to 24 (which represents .24 seconds).
If you leave it less than that, then there is a chance that it will hang/freeze
during game time.
21. File/Save ... to Save the File again.
---------------------------------------------------
That's it. Now you have a .flc file that you can put in your flics folder
and use in the .BIQ editor for your civilization.
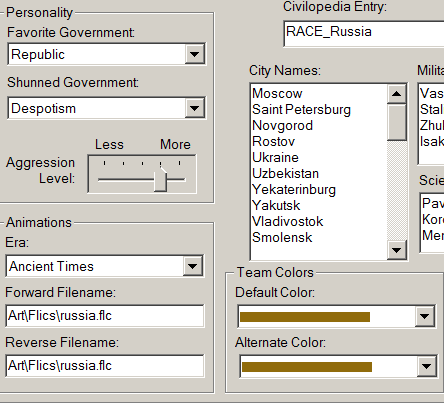
If you don't know what I'm talking about:
For each Civilization in the .BIQ editor, there is a section in the lower left
called Animations. And it has a dropdown box for each era
(Ancient, Middle, Industrial, and Modern). And there is a Forward filename
and a Reverse filename for each era.
Just use "Art\Flics\Russia.flc" for each era and both the forward and reverse filename.
Anyway, that's it. You're done...
How to make a Flag leaderhead FLC file (using GIMP 2.8 and PSP 7 which includes Animation Shop).
Leaderhead flags are 200 width x 240 height. They look like this:
Spoiler :
This tutorial will show you how to make a flag leader head like this.
Russian flag leaderhead:
Spoiler :
Here's how to make the Russian flag leaderhead:
1. Find a picture of the Russian flag on wikipedia and save it.
Spoiler :
2. Open the flag up in GIMP and scale it to 200 width x 240 height.
Image/Scale Image
Spoiler :
Spoiler :
3. Export the file as a .pcx file.
(1) File/Export
(2) click the + sign where it says "Select File Type"
(3) Scroll to the bottom and choose ZSoft PCX image
(4) Change the file name: flag.pcx
(5) Click export
Spoiler :
4. Close the current file(s) and open up the flag.pcx file in GIMP
5. Index the Colors / Make a Color Palette
(1) Image/Mode/Indexed
(2) Set the color map to "Generate optimum palette"
(3) Set Maximum number of colors = 254.
This ensures that your palette will have 2 unused colors that you can change later on.
(4) Set Color dithering to "None"
(5) Leave "Enabling dithering of transparency" unchecked.
(6) Click Convert.
Spoiler :
6. Overwrite the flag.pcx file
File/Overwrite flag.pcx
7. File/Close Without Saving
8. Open up the flag.pcx file again
9. Fix the Color Palette (make it work with Civ 3)
(1) Windows/Dockable Dialogs/Colormap (Opens the color map/palette)
(2) Make the colormap window bigger so you can see all the colors.
(3) Double click the last palette color (color index=255)
Set the color to any color that is not in the current pallette.
Try Fuchsia (ff00ff).
(4) Double click the second to last pallette color (color index=254)
Set the color to any color that is not in the current pallette.
Try neon green (00ff00).
(5) Scan the pallette. Find any pallette color that looks white.
If it is ffffff then change it to fffff3.
Spoiler :
10. Overwrite the file again
File/Overwrite flag.pcx
11. Close the File Without Saving
12. Re-open the file again
You may ask "Why do we keep closing and re-opening the file?" !!
Basically we want to do this to ensure that the last part saved correctly.
Leave the file open for a while.
13. Open up a .flc file in the conquests/art/flics folder using PSP animation shop...
Any flc file in the folder will work. Try the one called X2_Mursilis_ancient_bwrd.flc
Spoiler :
Delete all the frames in the file except for the first frame.
Click on the 2nd frame and then use the shift key and the right arrow key
to select all the frames from 2 until the last frame.
Click the delete button to get rid of all those frames.
You just have one frame now.
Spoiler :
14. Save the .flc file
File/Save As/Temp.flc
Click the Save Button
A dialog box pops up. Just click the Next Button all the way through
each diaglog box section. Then Click the Finish Button.
Close the File.
15. Re-open the file.
You should only see 1 frame in the .flc file.
All of the empty frames should be gone.
Spoiler :
16. Go back to your .pcx file and do an Edit/Copy
17. Now go back to PSP and select the single frame that you have.
Just click it's title bar.
18. Now do an Edit/Paste/Into Selected Frame.
Line up your frame so that it fits perfectly inside.
It's sometimes a pain but it eventually lines up squarely inside it.
Spoiler :
19. Save your file
(1) File/Save As. Example: Russia.flc
(2) An "Animation Quality Versus Output Size" dialog box will pop up
(3) Click the Customize button
(4) Click the tab called "Canvas Color"
(5) Change that to any color that is not white and not something used
in the picture. I like to use some light "close to white" color.
Spoiler :
(6) Click OK
(7) Leave the lever set to "Better Image Quality"
(8) Leave the checkbox unchecked ("use these settings...")
(9) Click Next
(10) Click Next again
(11) Click Next again
(12) Click Finish
20. Change Frame Time
In the menu select: Animation/Frame Properties
Then change the display time to 24 (which represents .24 seconds).
If you leave it less than that, then there is a chance that it will hang/freeze
during game time.
21. File/Save ... to Save the File again.
---------------------------------------------------
That's it. Now you have a .flc file that you can put in your flics folder
and use in the .BIQ editor for your civilization.
If you don't know what I'm talking about:
For each Civilization in the .BIQ editor, there is a section in the lower left
called Animations. And it has a dropdown box for each era
(Ancient, Middle, Industrial, and Modern). And there is a Forward filename
and a Reverse filename for each era.
Just use "Art\Flics\Russia.flc" for each era and both the forward and reverse filename.
Spoiler :
Anyway, that's it. You're done...