The Time Machine spaceship alternative

Balthasar

Wise Man
Joined
Mar 11, 2005
Messages
3,293


Back in the spring of 2009, the Steampunk Mod team - King Arthur, Blue Monkey & I - decided that we wanted to create a Time Machine space race for the mod. So we opened a thread in the Steampunk Forum (which you can see archived HERE) and we did quite a bit of work on it, Blue Monkey in particular figuring out the positioning of it and what the different parts would be, and doing some splendid design work in the process.

Flash forward six years and two or three total computer crashes and a hard drive recovery and migration later, and it's finally (miraculously) finished. My version of it, anyway. I want to thank Vuldacon for being a valuable extra set of eyes for me as I was bringing this to completion, and in particular for playing two entire games of EFZI complete just so that he could save all 10 spaceship-in-progress turns for me. That happened.

I should also be thanking H.G. Wells, who wrote the book, and MGM Art director Bill Ferrari, who designed the time machine that is the basis for this one for George Pal's 1960 movie The Time Machine. H.G. Wells, by the way, was a fan of war games, and seeking a more structured way to play, Wells wrote Floor Games (1911) followed by Little Wars (1913). Little Wars is recognized today as the first recreational war game and for this, Wells is considered "the Father of Miniature War Gaming". He is, therefore, the Great-Grandfather (or at least a great-Uncle) of the Civilization games. Imagine that.

So the download contains the following: A Spaceship folder. Pedia Icons folder. (Suggested) Text folder. Large & Small buildings files. Wonder splashes. GIMP files for do-it-yourselfers. Some (okay alot of) assembly required. But worth it.

So to get the download, Click Here.

A very nice Time Machine victory movie made by Theov to go with this Time Machine spaceship, tested and fully endorsed by yours truly, can be found in this post -> click!
There is another, similar one available in Theov's Mod, which also uses the TM Victory. Thanks Theov! :thumbsup:

Enjoy!

- Balthasar
 
Last edited:
How this was made:
Spoiler :
For many years, the standard way to make a space ship for Civ 3 has been to create 10 parts and a background on 1024 x 768 pcxs and put them into the Art/SpaceShip folder, assign each a name and a spaceship part number in the editor, and make a small wonder that unlocks it. After placing appropriate icons for these in the buildings-large and buildings-small pcxs (in the Art/city screen folder) and in the Art/Civilopedia/Icons/Buildings folder, and not forgetting to place a Wonder Splash of appropriate size into the Art/Wonder Splash folder, you would go next to your text files and make sure that all of your space ship parts, your wonder, and your buildings files are properly entered. Be sure that the numbered parts (listed as buildings with the #ICON_BLDG prefix) in the Pediaicons text file are numbered to correspond with their icon's position on the buildings large and small files, and don't forget that the small wonder will have both a building entry (#ICON_BLDG) and a Wonder splash entry (#WON_SPLASH_BLDG). Go to your Civilopedia text and write descriptions of each of your parts and your wonder. Finally, go back to your biq and make sure that all of these 'Improvements' are properly entered. You can make one more adjustment if you like - to change the labels MODULES, COMPONENTS, & STRUCTURAL in the labels.txt file to better suit you, but that's purely optional. That should be it. Fire it up.

And that has worked very well with many mods. But this time machine required that I be able to put parts inside of other parts.

And then I started thinking: the spaceship folder for Civ3 (which is the same for all versions, AFAIK) has 22 parts plus a SHIPbackground pcx (not counting the pcx files for the launch button, the progressbar, and the View Space Race button, named BigBrother). If I could fool the game engine into believing that I was building the original spaceship, I would be able to use all of those files for the Time Machine. So my first order of business was to discover what order they appear in the game. Vuldacon had used the original pediaicon entries and spaceship file names in EFZI, so I went to him for help. As I described already in the first post, Vuldy went out of his way to help: he made me a folder of saved games - one each for every part of the spaceship built. Moreover, he built them in the numbered order that they appear in the original biq:

1 Thrusters
2 Engine
3 Docking Bay
4 Cockpit
5 Fuel Cells
6 Life Support
7 Stasis
8 Storage
9 Party Lounge
10 Exterior Casing

By substituting my SpaceShip folder for his, I could now view its progress at each stage without having to play through an entire game (of EFZI!).

So first, I made took the list of files in the spaceship folder and made a screen for each, substituting a colored ribbon with the part name on it for each. Fig. 1: Color Chart setup.png

Then I put the new spaceship folder into the scenario and started looking at saved games. It looked like this after three parts had been built: Fig. 2: TMZ color test 2 - 3 done.png I can clearly see here that the top thruster layer covers the engine layer and that all of the visible layers cover the bottom thruster.

An interesting thing happened after the fourth part was built - the Cap appeared: Fig 3:TMZ color test 2 - 4 done.png I do not know if it appears at that same point when these parts are built out of order, or if it appears anyway when any four parts have been built.

Finally, with all parts built, I can see which parts overlap which: Fig. 4: TMZ color test 2 - 9 done.png. I notice that some of the files, for example, ship_all, never appear at all. But I now have a conclusive idea of what order the files are stacked on the SpaceShip screen:

Did not appear/unknown
casing_all
casing_back_top
casing_front
ship_all
thrusters_and_cells_bottom
thrusters_and_cells_top

Certain order of the rest:
cap top
thruster_top
fuelcells_top
casing_back_topB
casing_back_topA
cockpit
partylounge
storage
docking bay
stasis
lifesupport
engine
casing_back_bottom
Cap bottom
thrusters_bottom
fuelcells_bottom
SHIPbackground

From this I learn that four parts have a top and a bottom: the thrusters, the fuelcells and the external casing, plus the cap, which builds itself. Also, there is an extra screen for the casing on top.

Here's the rub: in order that the Time Machine parts appear in the right order on the Spaceship screen, I had to assign the parts this way:

1 Thrusters - Minkowski Cage
2 Engine - Maxwell Generator
3 Docking Bay - Babbage Analyzer
4 Cockpit - Beninghouse Chair
5 Fuel Cells - Larmoral Platform
6 Life Support - Lorenze Transformer
7 Stasis - Flux Capacitor
8 Storage - Kelvin Gyrostat
9 Party Lounge - Riemann Manifold
X Exterior Casing - Poynting Array

But in order for the player to see the parts clearly as they're built, they should be built in this order: 5,1,7,8,6,2,3,9,4,10. There are two ways to do that - either arrange the required techs so that they must be researched in that order, or make part 5 a prerequisite for part 1, and part 1 a prereq for part 7, and so on. In the readme, I recommend the former, although the latter also works perfectly well.
 
Last edited:
There are not nearly enough of these sorts of mods. :cool:
 
Very interesting.
Looks very cool :goodjob: Very well done, with much taste.
There are not nearly enough of these sorts of mods. :cool:
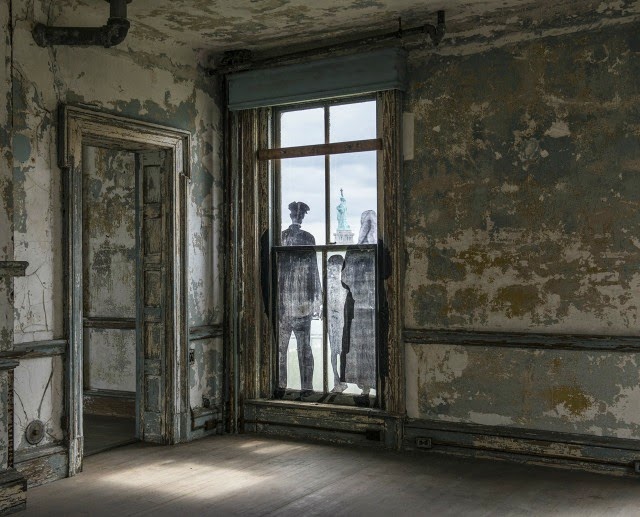
Thank you, kind sirs, thank you. The background has a little story attached to it that I'd like to tell: initially, I googled "19th century empty room" and, from the images I got, only one looked like it was shaped correctly. It looked like this, but from a slightly different angle and at a slightly different time of day. I found out later that it's a room on Ellis Island:
Spoiler :

I added a wall to the right hand side, and a new floor. This image is a recreation of one that I lost, but still had a partial of:
Spoiler :

To this I added some wallpaper I'd used for the Steampunk interface (recolored), and popped-in a garden beyond the window. I fixed up the paneling and floors best I could, added some period furniture, and hung a picture of the League of Extraordinary Gentlemen on the wall:
Spoiler :

And this is the background as finally seen in the download - 100% easter-eggier:
Spoiler :

Mind you, the room (and the entire Time Machine project, for that matter) was done entirely as a cut-and-paste using GIMP. No 3D program was used in this project at all. I'm kinda proud of that. There is a Time Machine model available, but, alas, no one has shown much interest in making it into a unit.
 
Last edited:
This is awesome, Balthasar! Great attention to detail and very imaginative. I see even Doc Brown showed up to give silent approval. It will fit in great with your Victorian interface.
 
Well done! :clap: It looks most excellent, and I hadn't realized until I read the "How to make a Time Machine" instructions just how complicated it would be to get everything showing up properly in layers. That's some nice investigative work and a very good result!
 
How to make a Time Machine
Spoiler :
For many years, the standard way to make a space ship for Civ 3 has been to create 10 parts and a background on 1024 x 768 pcxs and put them into the Art/SpaceShip folder, assign each a name and a spaceship part number in the editor, and make a small wonder that unlocks it. After placing appropriate icons for these in the buildings-large and buildings-small pcxs (in the Art/city screen folder) and in the Art/Civilopedia/Icons/Buildings folder, and not forgetting to place a Wonder Splash of appropriate size into the Art/Wonder Splash folder, you would go next to your text files and make sure that all of your space ship parts, your wonder, and your buildings files are properly entered. Be sure that the numbered parts (listed as buildings with the #ICON_BLDG prefix) in the Pediaicons text file are numbered to correspond with their icon's position on the buildings large and small files, and don't forget that the small wonder will have both a building entry (#ICON_BLDG) and a Wonder splash entry (#WON_SPLASH_BLDG). Go to your Civilopedia text and write descriptions of each of your parts and your wonder. Finally, go back to your biq and make sure that all of these 'Improvements' are properly entered. You can make one more adjustment if you like - to change the labels MODULES, COMPONENTS, & STRUCTURAL in the labels.txt file to better suit you, but that's purely optional. That should be it. Fire it up.

And that has worked very well with many mods. But this time machine required that I be able to put parts inside of other parts.

And then I started thinking: the spaceship folder for Civ3 (which is the same for all versions, AFAIK) has 22 parts plus a SHIPbackground pcx (not counting the pcx files for the launch button, the progressbar, and the View Space Race button, named BigBrother). If I could fool the game engine into believing that I was building the original spaceship, I would be able to use all of those files for the Time Machine. So my first order of business was to discover what order they appear in the game. Vuldacon had used the original pediaicon entries and spaceship file names in EFZI, so I went to him for help. As I described already in the first post, Vuldy went out of his way to help: he made me a folder of saved games - one each for every part of the spaceship built. Moreover, he built them in the numbered order that they appear in the original biq:

1 Thrusters
2 Engine
3 Docking Bay
4 Cockpit
5 Fuel Cells
6 Life Support
7 Stasis
8 Storage
9 Party Lounge
10 Exterior Casing

By substituting my SpaceShip folder for his, I could now view its progress at each stage without having to play through an entire game (of EFZI!).

So first, I made took the list of files in the spaceship folder and made a screen for each, substituting a colored ribbon with the part name on it for each. Fig. 1: View attachment 398789

Then I put the new spaceship folder into the scenario and started looking at saved games. It looked like this after three parts had been built: Fig. 2: View attachment 398790 I can clearly see here that the top thruster layer covers the engine layer and that all of the visible layers cover the bottom thruster.

An interesting thing happened after the fourth part was built - the Cap appeared: Fig 3:View attachment 398791 I do not know if it appears at that same point when these parts are built out of order, or if it appears anyway when any four parts have been built.

Finally, with all parts built, I can see which parts overlap which: Fig. 4: View attachment 398793. I notice that some of the files, for example, ship_all, never appear at all. But I now have a conclusive idea of what order the files are stacked on the SpaceShip screen:

Did not appear/unknown
casing_all
casing_back_top
casing_front
ship_all
thrusters_and_cells_bottom
thrusters_and_cells_top

Certain order of the rest:
cap top
thruster_top
fuelcells_top
casing_back_topB
casing_back_topA
cockpit
partylounge
storage
docking bay
stasis
lifesupport
engine
casing_back_bottom
Cap bottom
thrusters_bottom
fuelcells_bottom
SHIPbackground

From this I learn that four parts have a top and a bottom: the thrusters, the fuelcells and the external casing, plus the cap, which builds itself. Also, there is an extra screen for the casing on top.

Here's the rub: in order that the Time Machine parts appear in the right order on the Spaceship screen, I had to assign the parts this way:

1 Thrusters - Minkowski Cage
2 Engine - Maxwell Generator
3 Docking Bay - Babbage Analyzer
4 Cockpit - Beninghouse Chair
5 Fuel Cells - Larmoral Platform
6 Life Support - Lorenze Transformer
7 Stasis - Flux Capacitor
8 Storage - Kelvin Gyrostat
9 Party Lounge - Riemann Manifold
X Exterior Casing - Poynting Array

But in order for the player to see the parts clearly as they're built, they should be built in this order: 5,1,7,8,6,2,3,9,4,10. There are two ways to do that - either arrange the required techs so that they must be researched in that order, or make part 5 a prerequisite for part 1, and part 1 a prereq for part 7, and so on. In the readme, I recommend the former, although the latter also works perfectly well.

This should go straight into the "Civ3 - Tutorials, Reference, & Guides" section!
 
Good Work Balthasar... now all that is needed is a Bink "Launch Movie" to go with it.
Rob is the only one afaik who has made launch movies. If we knew the settings, format, etc, he used then a "public domain" clip shouldn't be toooooo difficult to adapt.

Well, we know this: Spaship Bink file attributes.png

I would have the machine go backward in time and appear face-to-face with a Civ settler from the first turn of the game. Great Scott! Cue BTTF Theme Music, and credits.
 
I made the Hegemon Movie and EFZI2 Complete "Still Screen" Movie.

The EFZI2 Complete Movie uses one image that was duplicated to show it the length of time needed for the Music to play.

You need Rad Game Tools to make the Movie.
http://www.radgametools.com/default.htm
 
Top Bottom