The Artwork
Setting up Artwork for the Building.
Opening our Civ4ArtDefines_Building, we are confronted with the old palace entry. These entries deserve a short explanation
<Type> - The Name of the Art Entry. This should match the one in your Civ4BuildingInfos
<LSystem> - The Size of the building in the city. Since we have no graphic, pick the smallest size,
1x1. There are other options, like 2x2, 2x3, 3x3, etc... and pre-defined specially named ones, like PALACE.
<bAnimated> - If the building has animations.
<fScale> - The scale of the building that appears in the city. Set to 0 for no art.
<fInterfaceScale> - The scale of the building in the Civilopedia. Set to 0 for no art.
<NIF> - The path to the .nif file that contains your artwork. If there is no art, set it to a special value,
"
Art/Empty.nif"
<KFM/> - Used for special animations. Generally, leave it alone.
<Button> - The path to the button. In this case, it should be "
Modules/OurFolderName/OurFolder/OurButton.dds".
Note:
The button name should not have commas in it. The entries that do have commas are referencing a large file, called an Atlas, which is one large file of buttons. Also, make sure there is no whitespace in the path to the button. Whitespace will cause pink icons to appear.
If you have a building graphic to go with your building:
If you found a building graphic for your building, copy it to your Working folder. If you wish to seperate it from the XML, you can create an Art folder inside your working folder and move it there. This is not necessary, however.
Inside the graphic files for the building should be a SOME_FILE_NAME.nif. The NIF extension is key here.
Use the relative path to your art nif, so the path should look like this:
"Modules/Town_Well/Art/Town_Well.nif"
The actual path may vary, but it should start with the Modules, and End with the NIF. Put this value inside of the NIF text spot, where the Palace entry currently is.
The fScale and fInterfaceScale control how big the building shows up in game, and the LSystem controls what space is uses. This is all subjective. I would try a 2x2 Lsystem value first, and 1.0 in each of the fScale and fInterfaceScale.
Notice one thing here. fScale has a f in front of the name, so it is a floating point data type. This means it can hold fractional values.
To get these values right usually takes a few adjustments, loading the game up, looking in the civilopedia and worldbuilder until you are satisfied.
If you have no artwork for your building:
If you have no artwork, then the file is rather easy to set up, we 0 most of the entries, set the Lsystem to a 1x1 for an empty building, set the nif to "Art/Empty.nif" and change the Art Name to the same as the one in the Building Infos.
Creating a Button
Creating a button is easier than you think.
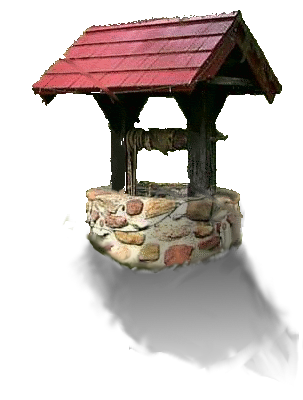
First, find an image that you think is suitable. Square images work best, otherwise we will need to crop or resize them. I will be using this one:
You can use the image editor of your choice, but the MS Paint that comes with Windows7 is actually really good.
Resize the picture until you get it to a 64x64 image. Then, paste this image frame overtop of it, it's the standard Civ4 border icon.
At this point, you should have an icon that looks like this:
Civ4 reads icons that are in a special format, DDS. There is a great free image converter, I highly recommend,
DXTBMP.
Once you have it installed, open your icon with it.
once you have your icon loaded, you should be at this screen:
Now, select the box in the upper right corner, indicated here:
Ignore the warning pop-up. Now you will need to select an "Alpha" channel for the button. Basically, the alpha channel is what makes the button look like a button. Without it, your button will look very odd. The default alpha channel to use is this one.
Select it. It should appear in the alpha box. Now, select
file->save as->DDS Texture.
A context menu will appear. Save the button as a
DDS DXT3. Any other setting will cause your button to appear improperly in Civ.
All that is left is to update the button path with our new button. Once that is done, save the Art defines.
Here's the completed Art Defines to Reference, the button name and path may differ:


") I Said I already did.
I Said I already did. 