Nightinggale
Deity
- Joined
- Feb 2, 2009
- Messages
- 5,443
I started modding recently and like everybody else I used Danny's makefile. However it didn't live up to my needs and little by little it changed into something else. Now it's full of new features and I decided to share it with all of you.
First of all, credits for the original makefile goes to DannyDaemonic. You can see his makefile in this thread. While most of my makefile changed, the core idea and setup is almost unchanged. It's still the same compiler with almost the same options.
This makefile is written for Civ4 colonization, but it should work for all Civ4.
What my new makefile changes:
Userguide
A total of 4 different DLL files are now possible.
Important notice for steam users:
It has come to my attention that civ4col crashes when it is debugged. Switching to the CD version appears to fix the problem. The cause is unknown and I'm unaware of how to get it to work. I haven't investigated as I don't have the steam version myself.
Released version 2.5
Changelog:
2.1 and 2.2 was never uploaded as a standalone release. However they exist in some project commit history and are added here for completeness.
2.5:
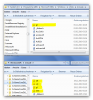
Added SOURCE_DIR, allowing project files and source files to be in different locations
Added the ability to compile cpp files in subdirectories for the source dir
Fixed a number of bugs in fastdep to allow this to work
Added Makefile.project
2.3:
Fixed fastdep (broken in 2.2)
2.2:
Makefile now generates a file called Makefile.settings
Changes in this file overwrites changes written in Makefile. Useful is the makefile is part of a project in svn/git.
Makefile.settings can also use CUSTOM_CFLAGS and CUSTOM_LDFLAGS.
TEMP_FILE_DIR (default temp_files) can also be changed in Makefile.settings. Disk speed is more important for temp files than source files. You can compile a source on a network drive with decent speed if you store temp files locally. Pointless for most users.
Example:
This will define MY_FLAG in C++ and search for python and boost in the default install dir for colonization installed by steam.
2.1:
Uses $(PROGRAMFILES) by default, which converts to "C:\Program Files (x86)" or whatever it is called on your system (32/64 bit support in any language?)
Added new directory temp_files. All temp files are placed here instead of together with the source itself.
Assert executes almost as fast as a release build. However it will trigger asserts, meaning it is useful to play normally at decent speed to get into cases where asserts trigger. You will likely need a Debug build to investigate the asserts though. Autosave each turn when using this is likely a good idea and random random seed is a bad idea.
Profile provides info regarding the source files. This mean profiling tools like Very Sleepy and AMD Code Analyst can tell the amount of time spend in each line of the C++ code. Personally I had the best experience with Very Sleepy, possibly due to how simple it is to set up.
The calls to the makefile is a bit different now. You set up the type of DLL file and then what to do with it.
Project file setup
The attached project files are written for Visual Studio 2010. This section is for people who for one reason or another will make their own rather than using the attached one.
The place to set up build options is Project->(mod name) Properties->Configuration Properties->Nmake
Here you edit your targets.
Edit Command lines for build, rebuild and clean like this:
Changing TARGET will give access to all 4 types of DLL files. You likely need to add more targets in Configuration Manager. Additional setup is needed if you want to use multiple CPU cores (see below)
The clean command only needs nmake clean.
Using multiple cores
Nmake works fine, but Microsoft decided for some reason that one core is enough. With most people using dual or quad cores today this makes compiling slower than it have to. To get around that limitation you have to use the 3rd party nmake clone called jom. Using that instead of nmake will automatically use all cores for compilation. However it can't always run the same makefile as nmake, which is why it has to be called a bit different.
Example of rebuild Release with multiple cores
Notice how dll is split into precompile and build. That's because jom can't handle the setup before the cpp files are compiled.
jom needs to be in the project directory or in the path for this to work. You can write something like
This will work if jom is in the bin directory (presumably together with fastdep.exe).
Makefile setup
The first time the compiler uses the makefile, it will create Makefile.settings and Makefile.project.
Makefile.settings is intended to personal use and can contain setup like path to boost and similar computer specific data. It uses the flags CUSTOM_CFLAGS and CUSTOM_LDFLAGS.
Makefile.project is intended to be added to svn/git and contains data, which will be needed by everybody in order to compile the code. In addition to PROJECT_CFLAGS and PROJECT_LDFLAGS, it has the flags:
Note on speed: while it would be logical to assume 4 cores makes compilation 4 times as fast it isn't the case. Precompile and linking is still using only one core. Also when compiling 4 files at once it also mean a lot more file I/O at the same time. Waiting for disk access can become an issue. Still you will get noteworthy faster compilation. Defraging your HD could improve speed as well.
IMPORTANT FOR SINGLECORE CPUS: jom adds a little bit of extra overhead to gain support for multiple cores. This mean if you only have one, then DON'T use jom as it will likely just slow you down a little.
Jom can't build Profile or Debug targets
This is because Microsoft decided that symbols are written to vc70.pdb by the compiler for each cpp file. This means jom tries to have multiple threads write to the same file at the same time. The makefile will give a proper error message for this instead of trying, which gives hard to read error messages.
I recommend having two Release build rules, one with jom and one without it. The reason is that jom handles files in parallel, but they also write output in parallel. This makes reading error messages tricky as it goes
While it is possible, it does take a little work to see which error belongs to which file. Luckily if the two build rules are written like in the examples (but without nmake clean), nmake will start where jom encountered an error as they share object files. The object files depends only on TARGET.
Shared boost and python libs
The makefile can use boost and python in the Civ install dir instead of in the project directory. EmperorFool and Asaf came up with the idea, though I implemented it a bit different.
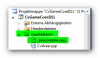
At the start of the makefile is a variable called CIV4_PATH (commented out by default). If this is set, the compiler will look for boost and python in the directory stated. This mean it is the path to CvGameCoreDLL including CvGameCoreDLL if you use your installed Civ.
Firaxis didn't change or update either boost or python. This mean linking to warlords CvGameCoreDLL is fine even if you compile for say colonization or vice versa.
Environmental variables[\B]
The makefile now listens to environmental variables set in windows. They aren't needed, but they can be used to overwrite variables in the makefile. They are as follows:
CIV4_LIB_INSTALL_PATH overwrites CIV4_PATH
FASTDEP_FULL_PATH overwrites FD
This is useful if the makefile is added to svn/git because then the user can set this to the local system without modifying the file.
Guilde on how to set environmental variables in Windows 7.
Path to YOURMOD
I changed the default path to YOURMOD to" ..". This works for the majority of MODs with files and source distributed in the same directory, which appears to be common, specially for svn/git sources.
I added Visual C++ 2010 project files with a setup for all 4 TARGETs with fast option for Assert and Release. It expects jom to be in the bin directory.
Guide for writing fast compiling code:
Firaxis screwed up including headers and included everything in all files. Using fastdep allows us to recompile just the files including the modified header. This guide will tell how to remove unneeded includes with a great reduction in compilation time to follow. I measured a reduction of 66% when changing CvPlayer.h.
Starting the mod from the project itself
If the project is started using the default settings, it will try to execute the dll file, which is useless. However it is possible to set up the project to start the game exe and tell it to start the mod in question.
Benefits:
Here is how you set up the project to start the mod
You open the Project menu and select References.
Under Configuration Properties, you select Debugging.
line|value|explanation
Command|C:\...\Civ4BeyondSword.exe|Full path to the game exe
Command arguments|mod=" modname "| modname is the name of the mod you want to start
Working Directory|Full path to the dir with the exe|copy paste the line from Command and remove Civ4BeyondSword.exe
This works best if the makefile is set to place the DLL in your mod. This mean YOURMOD should point to the root of your mod. The default setting is "..", but it can be set to anything in Makefile.settings. The default setting is good for most cases as it assumes a source/project directory in the root of the mod. This makes the source distributable and works well with svn/git.
Note: even though Civ4BeyondSword.exe is used in the example, it works with any version of the civ4 engine, including Colonization.
First of all, credits for the original makefile goes to DannyDaemonic. You can see his makefile in this thread. While most of my makefile changed, the core idea and setup is almost unchanged. It's still the same compiler with almost the same options.
This makefile is written for Civ4 colonization, but it should work for all Civ4.
What my new makefile changes:
- Multi core CPU support
- A total of 4 different DLL files
- Faster precompile setup (though it wasn't that slow to begin with)
- Different (easier?) setup
- Smaller file as code is reused
Userguide
A total of 4 different DLL files are now possible.
- Assert (Release optimization with asserts enabled)
- Debug
- Profile (Release optimization with symbols added)
- Release
Important notice for steam users:
It has come to my attention that civ4col crashes when it is debugged. Switching to the CD version appears to fix the problem. The cause is unknown and I'm unaware of how to get it to work. I haven't investigated as I don't have the steam version myself.
Released version 2.5
Changelog:
Spoiler :
2.1 and 2.2 was never uploaded as a standalone release. However they exist in some project commit history and are added here for completeness.
2.5:
Added SOURCE_DIR, allowing project files and source files to be in different locations
Added the ability to compile cpp files in subdirectories for the source dir
Fixed a number of bugs in fastdep to allow this to work
Added Makefile.project
2.3:
Fixed fastdep (broken in 2.2)
2.2:
Makefile now generates a file called Makefile.settings
Changes in this file overwrites changes written in Makefile. Useful is the makefile is part of a project in svn/git.
Makefile.settings can also use CUSTOM_CFLAGS and CUSTOM_LDFLAGS.
TEMP_FILE_DIR (default temp_files) can also be changed in Makefile.settings. Disk speed is more important for temp files than source files. You can compile a source on a network drive with decent speed if you store temp files locally. Pointless for most users.
Example:
Code:
CUSTOM_CFLAGS= -DMY_FLAG
CIV4_PATH=c:\Program Files (x86)\Steam\steamapps\common\civilization iv colonization\CvGameCoreDLL2.1:
Uses $(PROGRAMFILES) by default, which converts to "C:\Program Files (x86)" or whatever it is called on your system (32/64 bit support in any language?)
Added new directory temp_files. All temp files are placed here instead of together with the source itself.
Assert executes almost as fast as a release build. However it will trigger asserts, meaning it is useful to play normally at decent speed to get into cases where asserts trigger. You will likely need a Debug build to investigate the asserts though. Autosave each turn when using this is likely a good idea and random random seed is a bad idea.
Profile provides info regarding the source files. This mean profiling tools like Very Sleepy and AMD Code Analyst can tell the amount of time spend in each line of the C++ code. Personally I had the best experience with Very Sleepy, possibly due to how simple it is to set up.
The calls to the makefile is a bit different now. You set up the type of DLL file and then what to do with it.
Project file setup
The attached project files are written for Visual Studio 2010. This section is for people who for one reason or another will make their own rather than using the attached one.
The place to set up build options is Project->(mod name) Properties->Configuration Properties->Nmake
Here you edit your targets.
Edit Command lines for build, rebuild and clean like this:
Code:
set TARGET=Release
nmake clean (not for build)
nmake source_list
nmake fastdep
nmake dllThe clean command only needs nmake clean.
Using multiple cores
Nmake works fine, but Microsoft decided for some reason that one core is enough. With most people using dual or quad cores today this makes compiling slower than it have to. To get around that limitation you have to use the 3rd party nmake clone called jom. Using that instead of nmake will automatically use all cores for compilation. However it can't always run the same makefile as nmake, which is why it has to be called a bit different.
Example of rebuild Release with multiple cores
Code:
set TARGET=Release
nmake clean
nmake source_list
nmake fastdep
nmake precompile
jom buildjom needs to be in the project directory or in the path for this to work. You can write something like
Code:
bin\jom buildMakefile setup
The first time the compiler uses the makefile, it will create Makefile.settings and Makefile.project.
Makefile.settings is intended to personal use and can contain setup like path to boost and similar computer specific data. It uses the flags CUSTOM_CFLAGS and CUSTOM_LDFLAGS.
Makefile.project is intended to be added to svn/git and contains data, which will be needed by everybody in order to compile the code. In addition to PROJECT_CFLAGS and PROJECT_LDFLAGS, it has the flags:
- PRECOMPILE_DEPENDENCIES - list of files, which forces the precompiled header to be generated again. Fastdep should take care of this in most cases
- SOURCE_DIR - relative path from the makefile to the source dir. Can use and even start with ..
- SUBDIR1 - name of a directory in the source dir, which contains cpp files, which should be included
- SUBDIRPATH1 - the path from SUBDIR1 to SOURCE_DIR. Defaults to ..\, which mean it should only be used if a directory tree is included
Note on speed: while it would be logical to assume 4 cores makes compilation 4 times as fast it isn't the case. Precompile and linking is still using only one core. Also when compiling 4 files at once it also mean a lot more file I/O at the same time. Waiting for disk access can become an issue. Still you will get noteworthy faster compilation. Defraging your HD could improve speed as well.
IMPORTANT FOR SINGLECORE CPUS: jom adds a little bit of extra overhead to gain support for multiple cores. This mean if you only have one, then DON'T use jom as it will likely just slow you down a little.
Jom can't build Profile or Debug targets
This is because Microsoft decided that symbols are written to vc70.pdb by the compiler for each cpp file. This means jom tries to have multiple threads write to the same file at the same time. The makefile will give a proper error message for this instead of trying, which gives hard to read error messages.
I recommend having two Release build rules, one with jom and one without it. The reason is that jom handles files in parallel, but they also write output in parallel. This makes reading error messages tricky as it goes
Code:
compile A
compile B
compile C
compile D
error B
error A
compile E
error C
error EShared boost and python libs
The makefile can use boost and python in the Civ install dir instead of in the project directory. EmperorFool and Asaf came up with the idea, though I implemented it a bit different.
At the start of the makefile is a variable called CIV4_PATH (commented out by default). If this is set, the compiler will look for boost and python in the directory stated. This mean it is the path to CvGameCoreDLL including CvGameCoreDLL if you use your installed Civ.
Firaxis didn't change or update either boost or python. This mean linking to warlords CvGameCoreDLL is fine even if you compile for say colonization or vice versa.
Environmental variables[\B]
The makefile now listens to environmental variables set in windows. They aren't needed, but they can be used to overwrite variables in the makefile. They are as follows:
CIV4_LIB_INSTALL_PATH overwrites CIV4_PATH
FASTDEP_FULL_PATH overwrites FD
This is useful if the makefile is added to svn/git because then the user can set this to the local system without modifying the file.
Guilde on how to set environmental variables in Windows 7.
Path to YOURMOD
I changed the default path to YOURMOD to" ..". This works for the majority of MODs with files and source distributed in the same directory, which appears to be common, specially for svn/git sources.
I added Visual C++ 2010 project files with a setup for all 4 TARGETs with fast option for Assert and Release. It expects jom to be in the bin directory.
Guide for writing fast compiling code:
Firaxis screwed up including headers and included everything in all files. Using fastdep allows us to recompile just the files including the modified header. This guide will tell how to remove unneeded includes with a great reduction in compilation time to follow. I measured a reduction of 66% when changing CvPlayer.h.
Spoiler :
Rule 1: Only include headers you really need.
Rule 2: try to avoid including headers inside headers.
This can't be completely avoided.
Rule 3: Declare class instead of include.
You don't need to include the header to make a pointer to a class. Say you need a pointer to CvUnit, you can write
instead of
Rule 4: adding headers is easy. Consider adding a new header if it is only included in two files instead of writing the change in a header included in 20 files.
Once you are done tweaking the new code and don't plan to modify it anytime soon again, you can copy it into the big header if you like.
Also be careful not to add 50 header files with less than 10 lines in each. Code organization shouldn't suffer just because you don't want to wait on the compiler.
Fix Firaxis mess
Apply the rules to CvGameCoreDLL.h
Firaxis wrote this file to include a lot of libraries and the headers in this file are precompiled. This is great for compilation performance.
This file should be the first one to include in any cpp file (top of the list)
What is not so great is the fact that it forces a recompilation of all files if any one of the included files is modified. Because of this it would be beneficial to remove likely to be modified headers from this file and include those files directly in the cpp files needing those.
I managed to remove:
#include "CvPlayerAI.h"
#include "CvMap.h"
#include "CvGameAI.h"
#include "CvPlot.h"
#include "CvUnit.h"
#include "CvCity.h"
#include "CyCity.h"
#include "CvInfos.h"
#include "CvTeamAI.h"
#include "CvArea.h"
#include "CvDeal.h"
#include "CvGame.h"
#include "CyGlobalContext.h"
#include "CvSelectionGroup.h"
#include "CvTalkingHeadMessage.h"
#include "CvCityAI.h"
#include "CvSelectionGroupAI.h"
#include "CvUnitAI.h"
CvGameCoreUtils.h is still included and that one includes CvMap.h, which includes CvArea.h and CvPlot.h.
I solved this by removing CvMap.h and moved all map related functions from CvGameCoreUtils.h to CvMap.h.
Once I was done testing these changes I committed the changes to Medieval Conquest. The changes can be seen here: https://github.com/Nightinggale/Medieval_Tech/commit/e4c77edc9667498ee0f97270c4db87afc4d5ea41
Sadly it appears to have modified too many lines. I have had a line ending issue, which appears to have hit again
Most of the changes are readable and the approach should be readable.
Rule 2: try to avoid including headers inside headers.
This can't be completely avoided.
Rule 3: Declare class instead of include.
You don't need to include the header to make a pointer to a class. Say you need a pointer to CvUnit, you can write
Code:
class CvUnit;
Code:
#include "CvUnit.h"Rule 4: adding headers is easy. Consider adding a new header if it is only included in two files instead of writing the change in a header included in 20 files.
Once you are done tweaking the new code and don't plan to modify it anytime soon again, you can copy it into the big header if you like.
Also be careful not to add 50 header files with less than 10 lines in each. Code organization shouldn't suffer just because you don't want to wait on the compiler.
Fix Firaxis mess
Apply the rules to CvGameCoreDLL.h
Firaxis wrote this file to include a lot of libraries and the headers in this file are precompiled. This is great for compilation performance.
This file should be the first one to include in any cpp file (top of the list)
What is not so great is the fact that it forces a recompilation of all files if any one of the included files is modified. Because of this it would be beneficial to remove likely to be modified headers from this file and include those files directly in the cpp files needing those.
I managed to remove:
#include "CvPlayerAI.h"
#include "CvMap.h"
#include "CvGameAI.h"
#include "CvPlot.h"
#include "CvUnit.h"
#include "CvCity.h"
#include "CyCity.h"
#include "CvInfos.h"
#include "CvTeamAI.h"
#include "CvArea.h"
#include "CvDeal.h"
#include "CvGame.h"
#include "CyGlobalContext.h"
#include "CvSelectionGroup.h"
#include "CvTalkingHeadMessage.h"
#include "CvCityAI.h"
#include "CvSelectionGroupAI.h"
#include "CvUnitAI.h"
CvGameCoreUtils.h is still included and that one includes CvMap.h, which includes CvArea.h and CvPlot.h.
I solved this by removing CvMap.h and moved all map related functions from CvGameCoreUtils.h to CvMap.h.
Once I was done testing these changes I committed the changes to Medieval Conquest. The changes can be seen here: https://github.com/Nightinggale/Medieval_Tech/commit/e4c77edc9667498ee0f97270c4db87afc4d5ea41
Sadly it appears to have modified too many lines. I have had a line ending issue, which appears to have hit again
Most of the changes are readable and the approach should be readable.
Starting the mod from the project itself
If the project is started using the default settings, it will try to execute the dll file, which is useless. However it is possible to set up the project to start the game exe and tell it to start the mod in question.
Benefits:
- Allows starting the game by hitting shift-F5
- F5 starts with the debugger attached
- The dll is recompiled if needed when started from the project
Here is how you set up the project to start the mod
You open the Project menu and select References.
Under Configuration Properties, you select Debugging.
Command|C:\...\Civ4BeyondSword.exe|Full path to the game exe
Command arguments|mod=" modname "| modname is the name of the mod you want to start
Working Directory|Full path to the dir with the exe|copy paste the line from Command and remove Civ4BeyondSword.exe
Note: even though Civ4BeyondSword.exe is used in the example, it works with any version of the civ4 engine, including Colonization.
Attachments
Last edited:

 has fitted me very well.

 )
)

")
