The Slave Trade
For Dummies
For Dummies
A Comprehensive Guide to Stealing Workers
With an update by kazapp.
Cabert said:building takes workers, workers need to be built
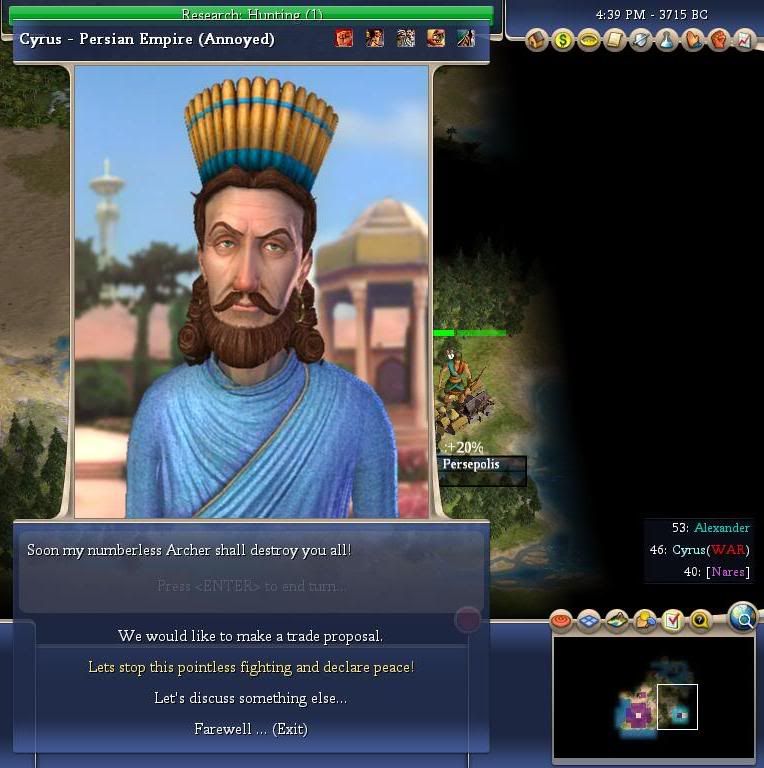
In response to some recent inquiry, and my own new found pleasure in nefarious pursuits, I've chosen to compile some sort of guide to the (very easy) task of enslaving enemy populations.
Difficulty Settings
This is a tactic primarily reserved for Monarch level and above. It is not until Monarch level that the AI receives a free Worker, though it is entirely possible to wait around for the AI to build a Worker and stealing that on Prince and Noble settings. I do not suggest using this on lower than Noble settings, as the AI receives a production malus, and, at those settings, you don't really need a free Worker anyway.
Some have questioned the validity of this tactic on the highest difficulty settings. The tactic is viable on all difficulty settings. However, the real difficulty of implementing the tactic is gauged based on the game speed. Slower game speeds (Marathon/Epic) will provide a more reliable means of producing a first Worker than faster game speeds (Normal/Quick).
This tactic suffers from a very odd difficulty curve. It is actually slightly more difficult to steal a Worker at Monarch difficulty than it is to steal one at Emperor or Immortal. Deity, of course, encounters a two Settler start, which has its own set of problems, and pissing off a civ at that difficulty when you're already so far behind is a choice you must make on your own, though the tactic is still as valid in theory on Deity as it is on other difficulty settings.
Why is it more difficult to do this at Monarch than at Emperor? Well, the answer is simple. On Emperor, every AI starts with two Archers and two Scouts (three Archers and two Scouts on Immortal). On Monarch, the basic civ starts with two Archers and no Scouts. However, only one Archer is "free;" the other is an upgrade to the free Warrior every civ starts with. As we all know, if you start with Hunting, then your free Warrior is converted to a Scout. This is true for the AI as well. On Monarch, civs that start with Hunting start with one Archer and one Scout.
The difficulty arises in that the AI will use an Archer to scout if it does not start with a Scout (in other words, most civs will scout with an Archer). The "wandering Archer" is a woe that many people encounter when trying to steal a Worker. Either it happens to be near them when they choose to act, and subsequently invades their (unprotected) capital, or the fleeing Worker (now captured) runs into the "wandering Archer" on its return to your capital. Naturally, the "wandering Archer" can recapture (or perhaps destroy; this is untested) the Worker, whereas the Scout cannot attack at all (and therefore is of no danger to your Worker). I consider this hardly more a problem than running into a random Barbarian Animal spawn on the return trip, but the "wandering Archer" is still something to keep in consideration.
Step 1: Reinforcements
The first step in stealing a Worker is to make sure you have a spare Warrior or two. The reasons for this are two-fold: 1) you want more explorers, and, quite frankly, Scouts suck, simply because they cannot steal a Worker if the opportunity arises; and 2) you may need to employ a second Warrior in order to properly capture a single Worker. As a result, I suggest building at least one or two spare Warriors before starting on a Settler (you're stealing your Worker, so why build it).
Step 2: Knowing Your Enemy
Obviously you need to find the other civs. The more you find, the better decision you can make as to who you're going to steal from. Factors to consider are a civ's location, what techs a civ starts with, what the civ’s UU is, a leader’s traits and a leader’s “natural disposition.”
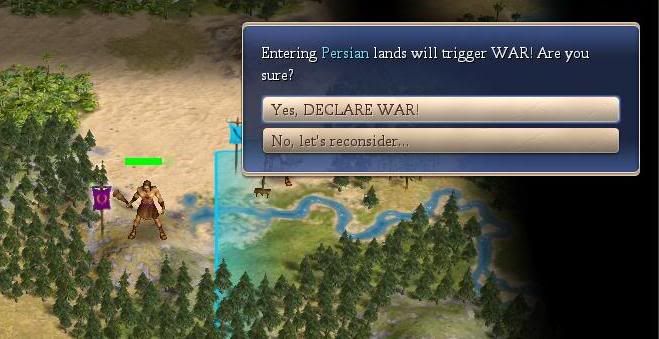
With regards to location, your ideal target is the first civ you intend on warring with. This is to prevent accumulating a negative malus with a civ that will survive long enough to become a problem. Preferably, this target is close. Close enough that assimilating
 their territory (namely their capital and one or two cities they may found before you invade) into yours will not economically bankrupt you. Once you’ve found the civ you want to steal from, you then need to consider a few other civ/leader specific factors.
I do not expect most players to know inherently what techs and traits a civ/leader starts with. For this, refer to the manual. With regards to technology, it is important to know what Worker techs the civ starts with, and if it starts with The Wheel or not. I will elaborate more on both of these later. Just make sure to take note of them now.
Knowing a civ’s UU is also important. For example, Mansa Musa’s Skirmishers make a highly formidable opponent for a Warrior, even if it is on a Forested Hill. Indeed, the only way to achieve combat parity (aka a 1:1 ratio) in a Warrior v. Skirmisher combat is to either have some combination of Forest, Forested Hill, Woodsman I or II boni, and/or a river crossing malus against the Skirmisher. Very rarely will this be possible, so Mansa Musa is a very poor target. Other key factors to consider are if the UU is early or not, if the UU is linked to a resource or not, and if the AI will fully utilize the UU or not. For example, Huayna Chapac’s Quechas are highly touted for their anti-Archer ability. However, AI Huayna makes little to no real use of them, but instead makes more traditional use of Archers. Alternatively, Montezuma’s Jaguars are not very scary when compared to Axemen, but they are far stronger than Archer or Warriors, and he will be much more of a nuisance once you cut off his military resource supplies (Copper, Iron, Horses) than other AIs can be.
With regards to leader traits, it is important to note if a leader is Creative or not. Early border expansion can cause some minor difficulty in stealing a Worker. While it’s not entirely impossible to steal a Worker from a level 3 capital, the number of potential tiles a Worker can be working that you can access from outside the cultural boundaries is greatly reduced. Ideally, your target is not Creative, and does not know The Wheel, though both of those conditions can be overcome or planned for.
A slightly lesser known feature of AI leaders is that they have inherent “personalities.” These personalities manifest in a variety of forms. Most straightforward is that (some) Aggressive leaders are more prone to attacking you, particularly if you begin piling up a “-X You declared war on us!” malus (X = 3 for each time you declare war). Counterbalancing this is that Aggressive leaders could care less if you declare war on civ’s they are Cautious with. Consider that in comparison to “optimistic” leaders, who will inherently consider a civ their “friend,” even at the base zero relationship. It is possible to piss off multiple optimists by repeatedly declaring war on a civ, to the point where you can even accumulate enough of a “-X You declared war on our friend!” (X = 1 for each time you declare war) to be equivalent to if you had declared war on the optimist themselves. Of course, a given optimistic civ will only consider another optimistic civ their “friend” if they’ve met, and this is a good way to determine if and how many “-1 You declared war on our friend” mali you might accumulate with non-targeted civs.
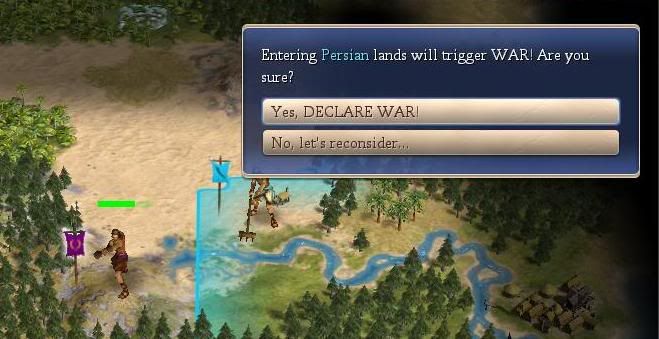
Step 3: Planning the Heist
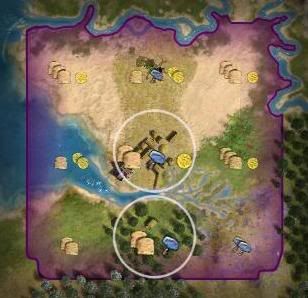
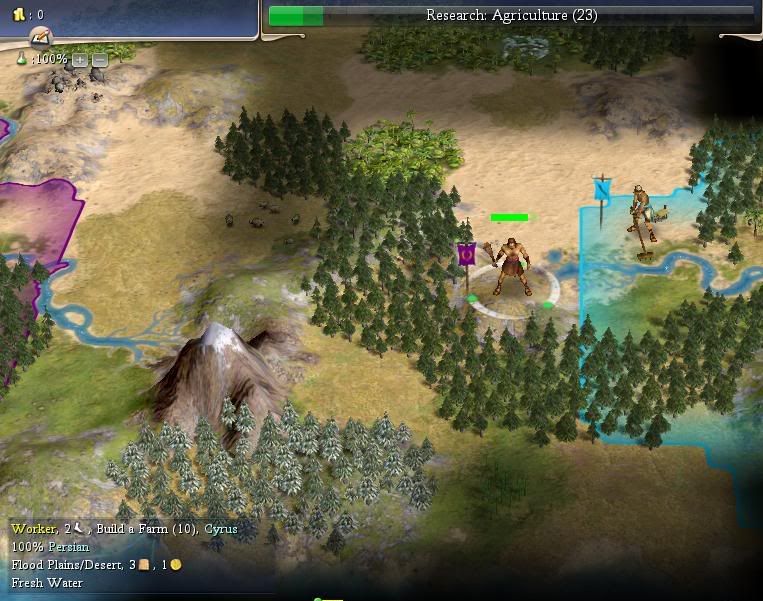
You’ve now picked your target, and are ready to steal a Worker. At this point, refer back to what technologies the civ starts with. Explore around the cultural boundaries of the target, and determine what (if any) resources may concur with the techs a civ starts with, or what tiles the AI is most likely to improve first. As was noted to me by Zombie69, you can actually determine the location of hidden resources based on the Food/Production/Commerce (FPC) of a tile.
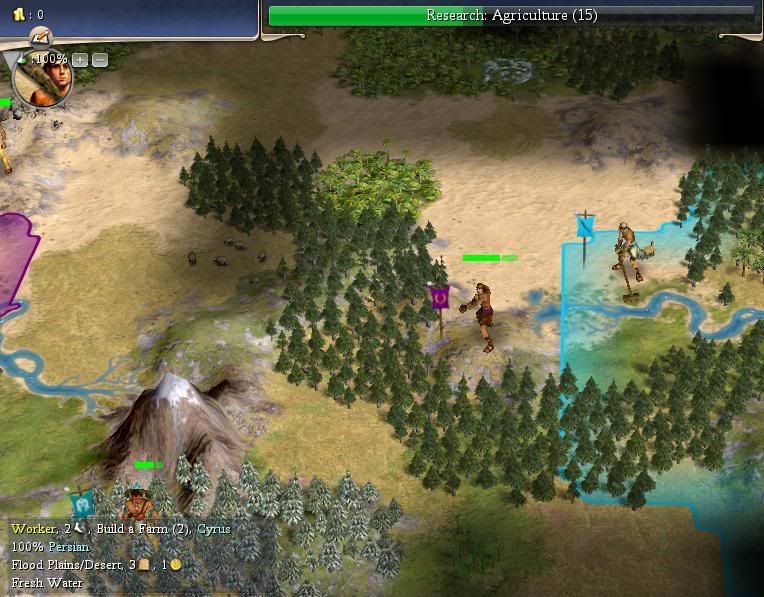
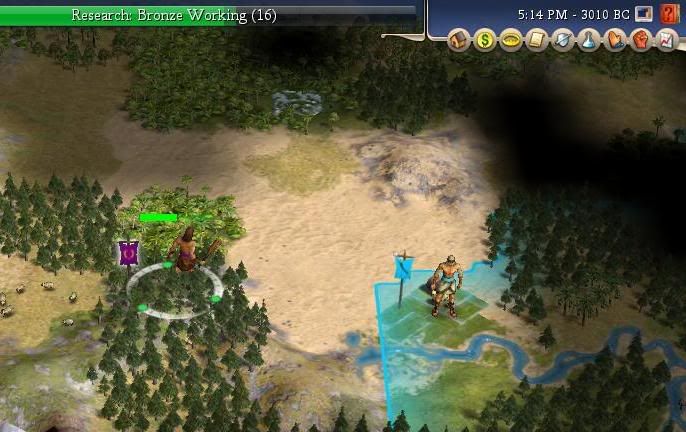
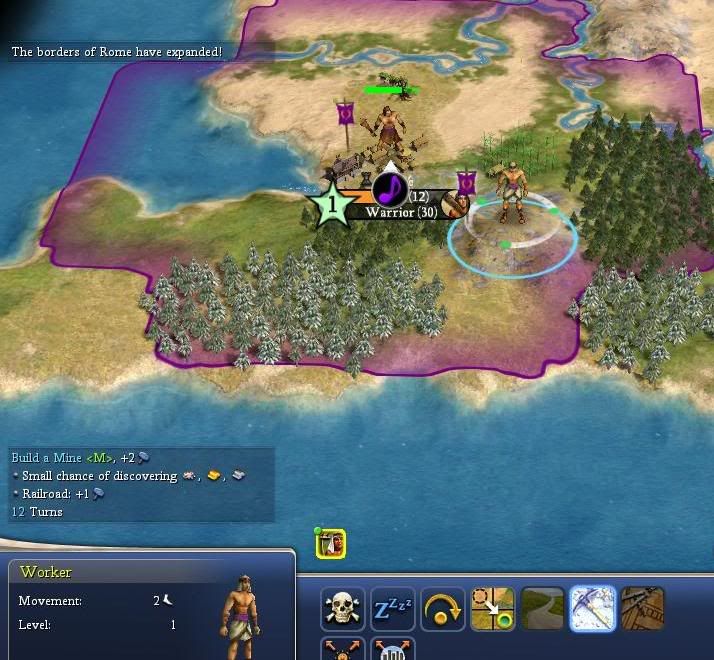
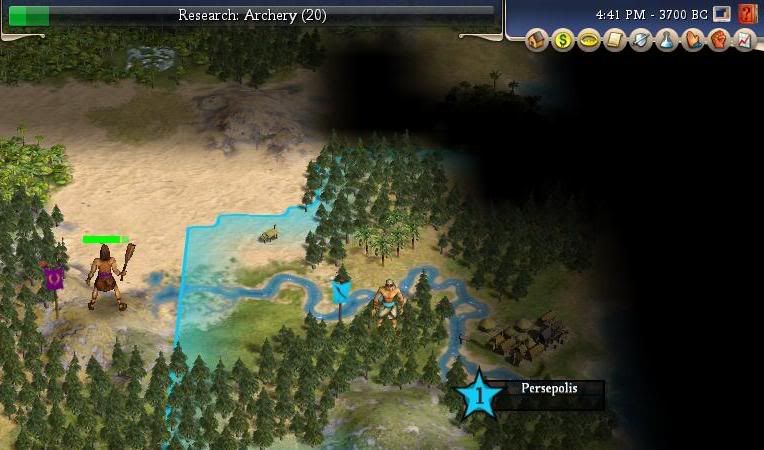
In terms of technology, if a civ starts with Agriculture, and there is a Agriculture based resource in the fat cross of its capital, it is almost guaranteed to improve that tile early (if not first). With regards to terrain, capturing a Worker mining a Hill is probably the best choice, as your Warrior will now have a 25% defensive tile bonus if attacked on the Incoming Turn (IT). There is almost zero chance of finding a Worker in a Forest (and therefore Forested Hill), unless it is building a Road in that Forest. While the AI does indeed enjoy going Road happy (and will Road every tile in the fat cross), the odds of encountering so ideal a situation are low, sadly. Even then, if the Worker is building a road in the first ring of the fat cross, your Warrior can be attacked freely from the capital. If the Worker is building a road in the second ring of the fat cross, that generally means that there is a road connecting that tile to the capital, and your Warrior will, as well, be attacked from the capital.
Tiles in the second ring of the fat cross are ideal, as, unless the civ has knowledge of The Wheel, it is almost 100% guaranteed that your Warrior will not be attacked on the IT. Additionally, tiles in the fat cross have 100% access from outside the cultural borders (versus only four of the first nine being accessible once the city is level 2, or, in other words, once its boundaries have “popped” once). If possible, you want the tile the Worker is improving to be separated from interior tiles (namely, the capital) by a river. Attacking across the river connotes a -25% malus on the attacking unit, increasing the odds your Warrior survives. Finding a Worker on a Hill separated from interior tiles (either the capital or the first nine) by a river is one of the best positions to be in, as, if an attack occurs, your Warrior now has superior combat odds to the Archer.
Step 4: Run Away
Now's the time to get that Worker back to your capital. Depending on Barbarian and difficulty settings, this can be more or less difficult. Raging Barbarians does not seem to spawn all that many more Barbarian Animals, so it is of little concern at this point in the game. However, difficulty does play a major role. As I noted in the Difficulty Settings section, some AIs will explore with an Archer on Monarch difficulty. On Emperor and up (including Deity), the AI will explore exclusively with Scouts. This does not entirely eliminate the “wandering Archer” problem, but it greatly reduces it (true “wandering Archers,” not the scouting kind, seem to be a response to the few Barbarian Animals that approach AI civs cultural borders; my assumption is the AI “knows” to kill them for free XP, or is performing some moderate form of fogbusting).
There are very few means of improving the odds that the Worker survives. One method is to employ some sort of escort. Warriors make poor choices in this role, due to the difference in movement speeds. An escorting Scout is really the only choice of escort. Employing it as a fogbuster (rather than a direct escort) is probably a better use of the unit.
What little to say about terrain is as follows. Move the Worker manually (you should be moving all units manually at this point in the game). My experience is that this (somehow) reduces Barbarian interference. It also greatly increases the number of times you’ll bang your head against the wall if you do happen to end your turn next to a Barbarian Animal. Do not move it onto a Hill. Hill tiles can be seen from two tiles away. A two-movement Barbarian Animal (Wolves and Panthers) can “see” the Worker, and will usually beeline for it on the IT(sometimes Barbarian Animals exhibit territorial behavior, and will wander a given set of squares, even if able to “see” the unit). Jungles and Tundra spawn Panthers and Wolves respectively (those being the two two-movement Barbarian Animals); try to stay away from them if possible). Similarly, Deserts spawn Lions (usually in great numbers), and Forests spawn Bears. Barbarian Soldiers (Warriors and Archers, as by Axemen and later you should not be employing or even have to employ this tactic) will almost assuredly beeline for the Worker (or any unit they “see”
") .
.It’s important to be prepared to lose the Worker. Of course, it helps to steal from a closer neighbor, but sometimes the nearest neighbor is not the best target (for example, if the nearest neighbor is Montezuma or Mansa Musa). This is the only time distance from your capital provides any real danger to the tactic.
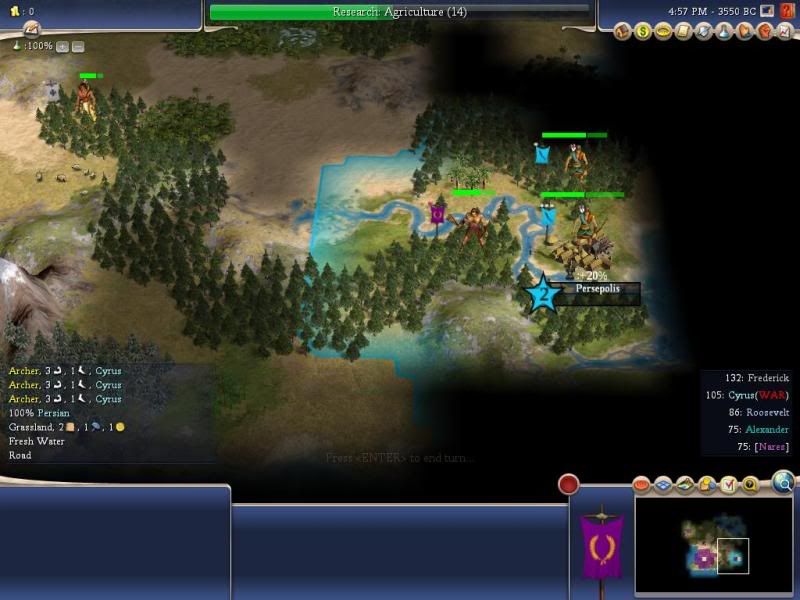
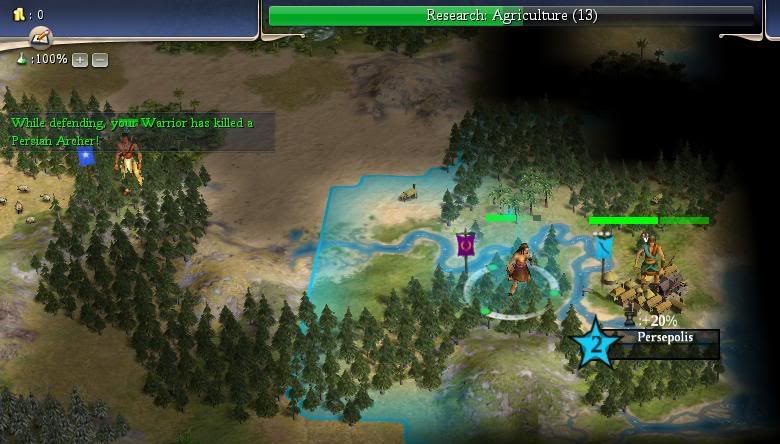
Step 5: Eye for an Eye
More often than not, the AI will attack your Warrior on the IT. An attack can be expected if you’re in the first nine of the fat cross, or if the AI knows The Wheel (and presumably built Roads in all of the first nine). Because what tile your Warrior will be defending from is determined by the AI, and that tile is usually highly undefendable, it is more than like that you are going to lose your Warrior if attacked. There are three possible IT responses to stealing a Worker: 1) Your Warrior is not attacked; 2) Your Warrior is attacked and, regardless of odds, survives; or 3) Your Warrior is attacked and is killed.
If your Warrior is not attacked, you are in the clear. I suggest moving the Warrior outside the cultural boundaries, though you can choose to move the Warrior to a more defendable position. However, if you do choose to stick around, be wary that, if the AI does attack (this is based on the combat odds it reads), it will sometimes, regardless of odds, kill your Warrior. If your Warrior dies, consider it as though your Warrior was attacked on initial IT and respond as I direct below.
If your Warrior is attacked and survives, you are again in the clear. You can leave the cultural boundaries or not, as you see fit. The AI is unlikely to attack your Warrior again unless the odds are extremely in its favor. I suggest leaving, however, as, if a Warrior miraculously survives an attack from an Archer, it is extremely liable to be heavily injured. Healing is greatly diminished inside an enemy’s cultural boundaries. I strongly suggest moving outside the cultural boundaries and healing. You can consider the Warrior a free unit with free experience, but there is no reason to waste it.
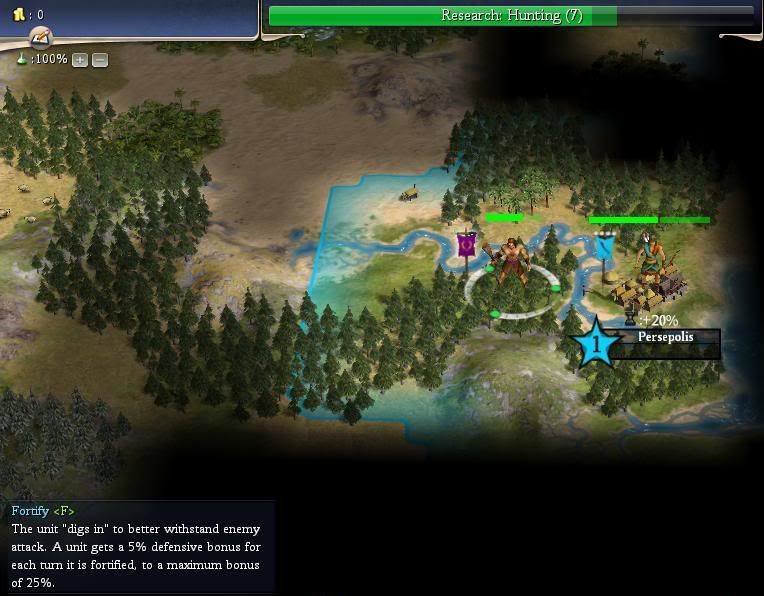
If your Warrior is attacked and is killed, you now need to bring in your reinforcements, reinforcements being the Warrior(s) you have been producing since the start of the game. Move it into a highly defensible tile and Fortify. You have your choice of tiles to defend from, and the goal here is to force the AI to sacrifice an Archer on your Warrior.
In all of these, the key is either to not fight at all or to kill one of the AI’s units. This is vital brokering peace, and will be discussed in the following step.
Step 6: Playing Nice
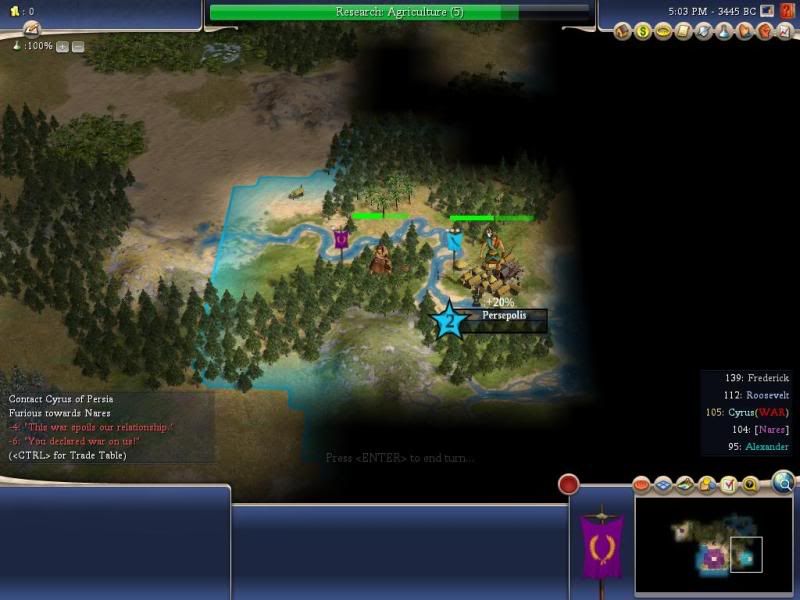
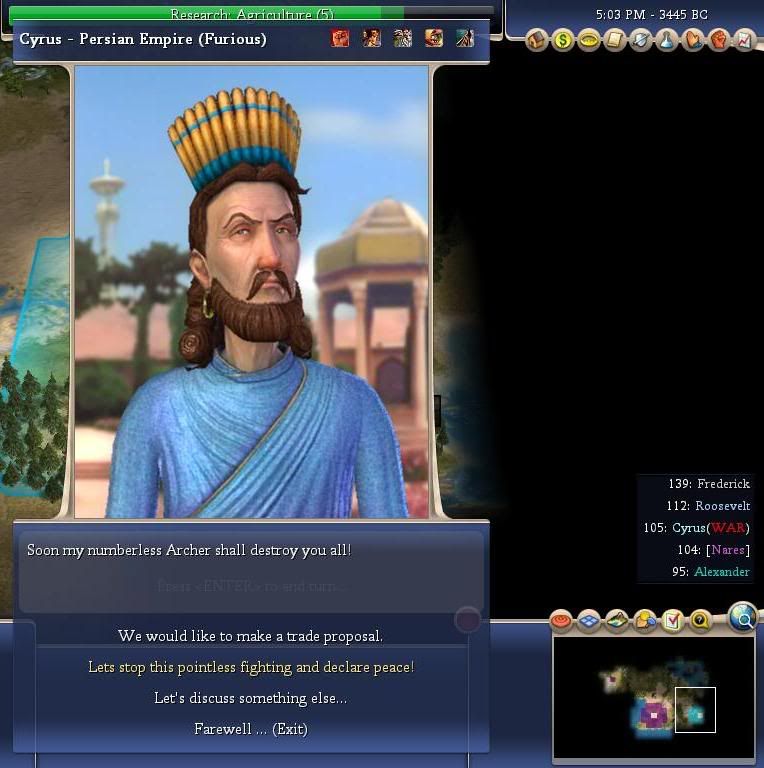
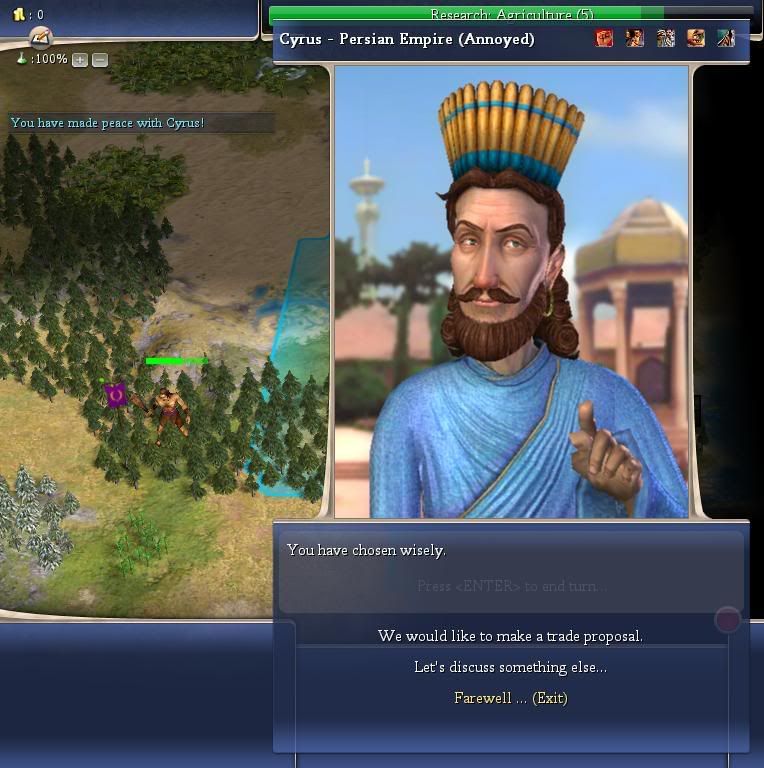
So, you've successfully stolen a Worker, have lost (or not lost) a Warrior in the process, and are still at war with a AI civ. Watch every turn to see when the AI is willing to talk to you (when it no longer reads "Refuses to Talk!"). You can immediately request peace if you've met one of the two following conditions: 1) the AI did not attack your Warrior at all; or 2) your Warrior (doesn't matter if it’s the first, second or third) kills an AI Archer (just one will do). Basically, the AI will not accept peace if it thinks it is stronger than you. It will only think this if it has killed one of your units, but has not lost any itself. It will always accept peace at this point in the game if it loses one of its units to you, even if it has killed multiple units of yours in the meantime. It will accept peace if it did not attack your initial Warrior at all.
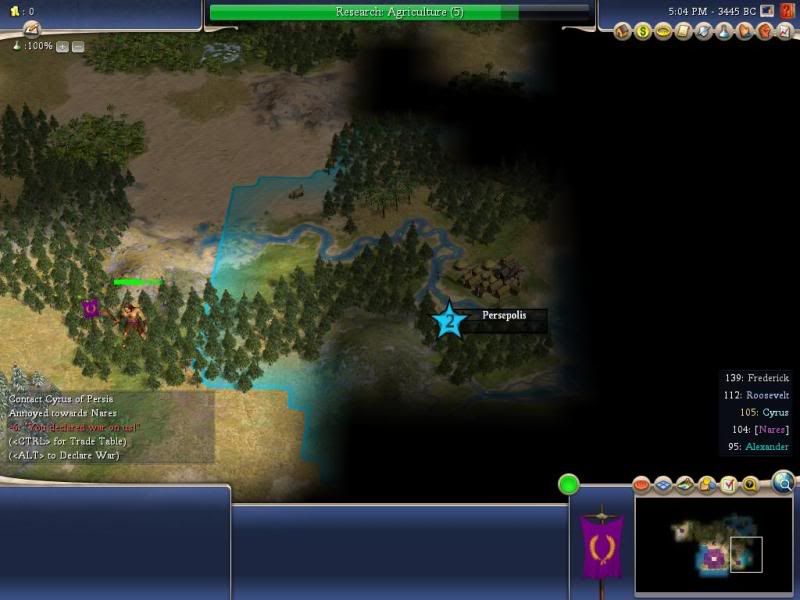
You want to establish peace for two reasons: 1) it avoids AI retaliation; and 2) it allows the AI to recover. At this point in the game, the AI can easily overrun you if it is inclined to do so. However, the AI is programmed to not respond with extreme force so early in the game. Consider, though, that a Stack of Death at this point in the game consists of a few Archers. You most likely do not even have the Archery tech, let alone much, if any city defense, let alone any Archers as city defense. You do not actually need city defense at this point in the game unless an AI is trying to kill you. So why stay at war?
Allowing the AI to recover is key. You want the AI to resume builder strategies. First, this can provide you the opportunity to steal another Worker. Second, it will improve the land you intend on invading. Third, it will allow the AI to expand moderately. That is to say, now that you’ve stolen a Worker from it, it’s not going to expand nearly as fast as an unmolested AI would. However, what little expansion it will do will serve to reduce Barbarian spawning over the next few centuries. That is well worth it, especially if you keep a fairly constant monitor of the AI and prevent it from accessing any military resources (leaving it relatively weak when you are capable of invading).
Further, allowing your target civ to expand moderatly prevents another civ from settling in that same land. You really only want to declare war on one civ at this point, and you don't want to lose land that could be yours to a second civ. Having to declare on them makes things tricky. They have more land than usual (because your target civ would have settled there), and, with that land, more research and production, making them a more formidable foe. It also means accumulating more "-X You declared war on us!" and "-X You declared war on our friend!" mali than you need to.
Phase 2: Planning the Next Attack
At this point, your options are open. You've succesfully grabbed a Worker. You've established peace with the AI you stole from. You've hopefully done this without offending too many (if any) other AIs (you receive a "-1 You declared war on our friend!" each time you declare war on an AI they know; this only applies for certain AI leaders; others, such as Tokugawa or Alexander, don't make friends very easily, and will not care as much, if at all, if you declared war on anyone but themselves, at least at this point in the game).
Now you're ready to do it again. At this point, AI friendships become more of a consideration. If executed properly, you will not develop more than a "-3 You declared war on us!" malus with the first civ you stole from (assuming you make peace as soon as it is available to do so). However, you can easily develop "-3 You declared war on our friend!" by pulling this trick on an AI multiple times, or worse if you pull it once on each member of a group of friendly civs. Working up to a "-6 You declared war on us!" with one civ and a smattering of "-2 You declared war on our friend!" and "-1..." mali is not as bad as stacking both penalties on multiple civs. Part of the strategy is that you're building so large a malus on the first civ you plan on attacking.
At this point in the game, it's really only an AI's natural inclination to start off with an optimistic attitude towards friendship or not that determines if you'll get the "-1 You declared war on our friend!" malus. As I said, AIs such as Tokugawa and Alexander don't care if you attack people, so long as you don't attack them. The only real positive boni that can be spread at this point are religions. It's easy enough to see who's sharing a religion and who's not. Of course, once you've picked your target, it's best to stick with it. You further stunt their development (but not their expansion; they'll continue settling cities during the periods of peace, and even during periods of war).
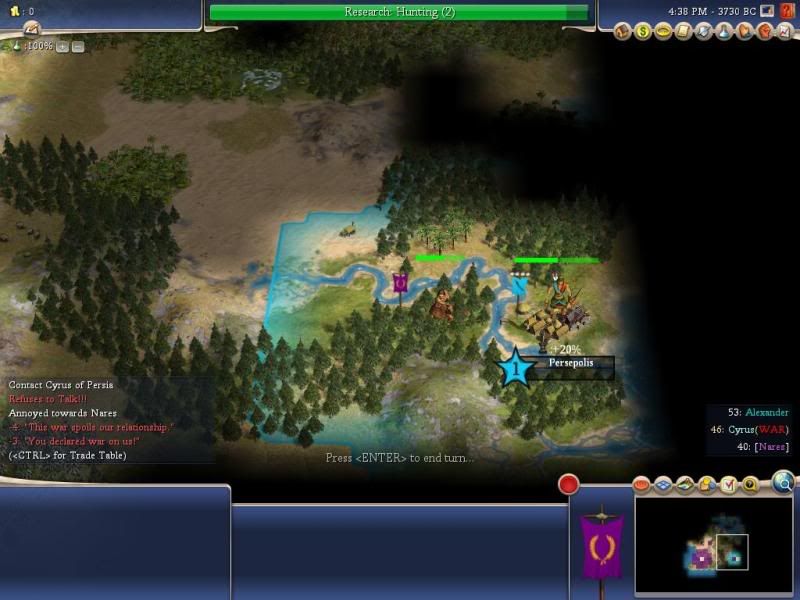
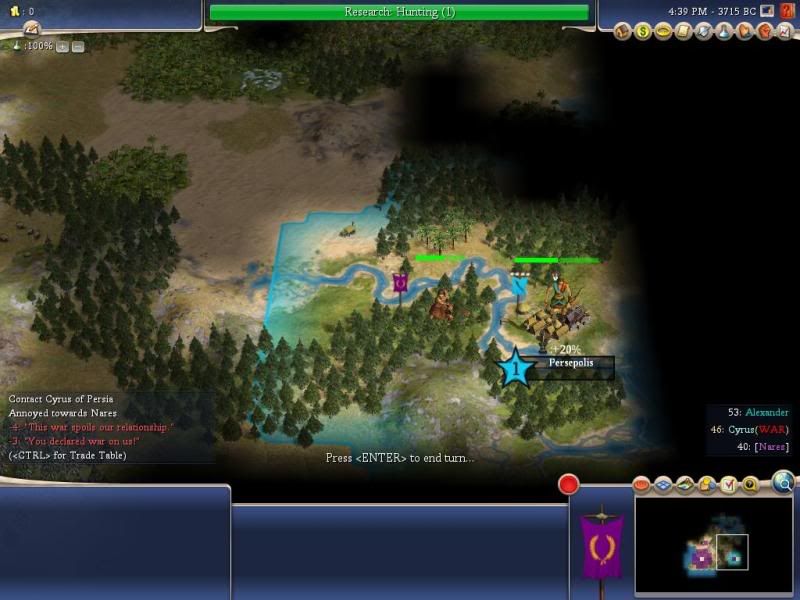
Sometimes, hanging around to grab a second, or even a third Worker is possible. In the example game (see below), I grab two Workers off Cyrus (and could have grabbed a third). In another game, I spotted a Copper source in the third ring of an AI civ's capital. I chose to camp my Warrior in the fourth ring of the capital, on a Hill, and when the AI went to link up the Copper, nabbed my second Worker from that particular AI. This served to not only stunt his development, and serve to improve my own (it was my second Worker of the game, with me actually producing my first some three turns later), but also prevented him from building Axemen, making my job of invading him far easier when I finally did so some ten or fifteen turns later. Eventually, that AI chased my Warrior down with a Archer, and got lucky on some longshot odds. I was two turns from invading him at that point, so it didn't make much of a difference. As it is, some AIs will wisen up (or start off wise from the start), and will learn to escort their Workers with Archers, at which point you either curse at yourself for having not rolled Incan, or wait around for a better opportunity (even escorts will wander off mysteriously at times, leaving the Worker open for attack).


 . Two turns remaining means that, on the next turn, your Worker (or the AI's Worker, for that matter), will automatically complete the improvement it is building. There are ways to avoid this happening with your own units, but there's no way to prevent it from happening to the AI. The trick here, however, is that the AI Worker will actually move on the same turn it completes the thing (though this response is entirely gauged off of a mistake made when nabbing from Ghandi, so it may not apply to other AIs; it's not a mistake I made again).