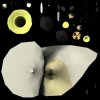
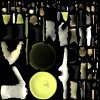
Looking for the steps to skinning one's own mesh

Blumonster

Chieftain
Joined
Oct 22, 2010
Messages
90
(For Civ 5)
I created a new unit mesh/animation in Blender. Is there a fairly simple way to add my own skin? It has no added texture at this point; I just want to create a dds file that will cover the mesh.

Specifically:
I unwrapped the mesh, have a 2D image (the UV map) that looks like how the game's units' dds files are laid out. Is there a way to use that as a base? I've tried editing it using the "external edit" button, but it's blank...obviously I guess the vertices aren't going to show up. I don't want to get too complicated with anything, just a simple skin. I've looked through a lot of tutorials, and the ones I've found either tell you how to create a texture in Blender or paint your mesh by using a pre-existing file. For example, a recent video tutorial on Blender 2.49 shows how to create a skin for a spaceship but he already has a .gif file to work from for the texture. How do I create that original file so that it matches up to what I have in Blender? (I hope all that makes sense, I don't know how much more to explain, lol.) Thanks!

EDIT: The closest thing I could find was Deliverator's thing about how to get Civ 4 units into Civ 5. In trying to apply those instructions to a new mesh, I wound up creating textures in Blender itself and then baking it into a UV map. I guess that's part of the answer. I tried saving that as a dds file and using it with Nexus Buddy, but the textures were all in weird places (in the game). I'd also like to use an external paint program. My UV map seems overly complicated...there are layers under layers (as a side note, I don't know what button I pushed but my mesh has way too many vertices now...is there a way to get it back to its original form?) Sorry for all the questions. Short of a tutorial, I think I just need to be pointed in the right direction, and I can probably figure it out from there. Thanks.
 
Well, I figured out how to unwrap the mesh using "Unwrap (smart projections)" in Blender, which gives me a UV map that looks more like a proper diff, how to bake my textures into the UV map (selecting "Textures" just gives me colors; I had to use "Full Render" to get my shading), and how to get the textures on the model into the game. Only problem is, they don't display on the right body parts. I guess eventually I'll figure this one out too. If anyone can tell me how to make the diff texture file display correctly, it would sure save me a lot of time and headache and I'd be eternally grateful. Thanks.
 
ok...i dont know exactly what u r talking about but, but there are various ways to make a dds for your units...usually, when u import a unit, buliding etc in blender, u can associate it with it's "vanilla" dds file by doing the following, have your 3d view in one window, edit mode, press A so all vertices/faces are selected, then, in another window, use your U/V image editor....select image....open....then select the vanilla dds file for the material u r working on..

now, if u have different materials, u can use the "bake method" or u can use the same basic technique of sizing, rotating, etc, as mentioned in deliverator's TUT or u can move verticies individually (sometimes this is helpful if the verticies are a little off)

one thing u can do if u want to add stuff or move it around is arrange your uv map in blender, then export a NIF...with the nif file, u can select the texture and export the "template", then use the template in your paint program to rearrange your texture or paint new stuff


i hope this partially answers your questions, you could post files so we could take a look at them if u like :)
 
Sorry, was trying to simplify my question. Here are some examples using a simple cube.

Unwrapped cube using basic "Unwrap" command in Blender (and then baking)...

Here's the dds file:
cube2_diffex.jpg

How it shows up in game (click for larger image):
cubbasun1.jpgcubbasun2.jpgcubbasun3.jpg
 
(For Civ 5)
I unwrapped the mesh, have a 2D image (the UV map) that looks like how the game's units' dds files are laid out. Is there a way to use that as a base? I've tried editing it using the "external edit" button, but it's blank...obviously I guess the vertices aren't going to show up.

In case this is useful to anyone, it turns out there is a command in Blender to do this. In the UV/Image window, click the "UVs" button. Under "Scripts" at the top click on "Save UV Face Layout". It'll then give you a screen to save it as a .tga file.
 
Omg, I think I finally figured it out! Here's what I did: unwrapped my mesh using standard "Unwrap," made sure it all fit onto the map, then instead of choosing an image size of 256 by 256 I chose 1024 by 1024. Baked it, made a dds, Nexus Buddy, start game, and it's there! After so many different kinds of attempts I'm not sure exactly what made the difference--if it was specifically the image size or something else I overlooked and did correctly this time. I dunno; I'm just glad I finally made a unit that doesn't look like a psychedelic bumble bee.

:wallbash:
Man, did I ever speak too soon. I can't re-create my results. I have a hundred blender saves, but for some stupid reason it doesn't look like I saved the working one. I feel pretty dumb at the moment.
:aargh:
I saved the dds file, however, and tried using it on an updated animation (exact same mesh though). Got the same weird results in game. I have no idea what I did right. I guess I've finally hit a wall when it comes to modding. I can't believe I learned how to make XML files and 3D animation but can't figure this out. Maybe because this was the one thing there was no tutorial for. Apparently other people can do this...how did they learn? Where can I find the same information? Why isn't this working?
:badcomp:

Working example:
working.jpg

What I get now:
notworking.jpg
 
I don't know Blender, but usually with automatic UV unwrapping systems there are options for padding, face angles to produce discontinuities, tendancy to keep consistent texel size, etc etc which could explain the differences. Your UVs, for example, look like the system is trying very hard to produce one single continuous skin and failing. Deliverator's looks more like it's attempting to produce constant texel sizes and regular polygon shapes and, at least mostly, succeeding.

Out of curiosity, why not just UV it manually? One of the benefits of the unit meshes is they are dead low poly so would take comparatively little time to UV and doing that, you could set it up however you liked and, moreover, set it up such that it would be considerably easier to produce a texture for it.

Thanks for the response.

From what I can find, there are two automatic unwrap options in Blender: a simple "Unwrap" command, which doesn't give any options at all. And a "Smart Projection" unwrap, which gives an option for angle limit (and which I've experimented with) but none of the other options you mentioned. That may be part of my question, but I wasn't knowledgeable enough to ask it: "how do you define texel size, padding, etc. in Blender?"...

As for unwrapping manually...umm...I don't know how to unwrap manually, lol. :cringe:
But I can copy the mesh to the UV map. So...would I flatten the front and back of the mesh and then copy it onto the map? or each side? If it's too involved to explain, maybe I can find something about it in the Blender manual. If there's a few easy pointers you could give me, that would be awesome too. Actually, I did try something like a manual unwrap, where I unwrapped each texture segment of the map (i.e., boots, pants, shirt, etc.) individually and then assembled them onto the map, which gave me something that looked more like a conventional diff. That didn't work either. I have a question about that: does it matter where you place the islands on the UV map? In reading Deliverator's tut it seems like he just placed them anywhere as long as they didn't overlap. But as an experiment I tried rotating the map or putting the islands in different places, and although I still got a weird skin in game, the textures were in fact in different places on the unit. :confused:

The weird thing is that I got this dds file to work (but I don't know how):
bkdbasuv1012img.jpg

It looks to me like it's unwrapping it from a top or bottom view for some reason.
One thing I haven't tried is not using Nexus Buddy; though I don't know why that would make a difference. I have a suspicion that the problem may not have anything to do with my UV map after all, that there's just some sneaky tweak that's simple but which I'm overlooking. Who knows? :dunno:

Smart projection does create something better laid out:
this.jpg
But this doesn't work either. :crazyeye:

One final thing I haven't tried, also, is just starting over from scratch, which I'm loath to do of course. Could it be that the mesh I made is over-complicated? Maybe that's putting it too nicely--perhaps, over-confused? Oh, wait, I forgot about my cube...that's not complicated. And that didn't work either. The fact that parts are missing from the cube even though the dds file is covered leads me to...much...more...confusion... :hammer2:
 
Okay, again I can't speak for specifically how Blender works but generally all 3D packages work in the same kind of way when it comes to texturing.

The process, simplistically, is something like:

1: Select a bunch of polygons
2: Projection map some UVs (using planar or cylindrical projection depending)
3: Open the UV editor
4: Tidy the UVs, position them on your map
5: Close the UV editor
6: Repeat.

UVing is easiest when you're working with easy to project areas of your mesh. For example, rather than selecting an entire arm and cylindrically projecting a texture onto it, select the topside of the arm, planar project, sort out the UVs then repeat with the bottom side of the arm.

--------------

Right, not sure if that will make much sense so I'll explain in a bit more detail.

There are basically two ways to generate UVs on a mesh or parts of a mesh. One is the way you're doing it - some sort of automatic unwrapping system. The other is projecting coordinates. This second way, you are limited to using primitive objects as your projections - plane, sphere, cylinder, box, etc.

So, if you were UVing a plane, you could use a plane as your projection and that's it, job done. Same for any of the primitive shapes.

Humans, obviously, are not primitives. So you have to UV in stages, selecting a bunch of polygons which approximate one of the projection primitives. So the torso can be UV'ed by projecting a plane from the front onto those polygons. Same goes for the back. Arms and legs can be done with cylinders, but doing it in two goes with planes is simpler as I mentioned above. The fewer polygons you select to project, the simpler it will be to edit the UVs but the longer it will take overall.

Once you've got all your mesh parts arranged nicely, you can stitch some of the bits together if you want to. Like the top and bottom of the arm will share one edge running down the length of the arm, and these vertices can be welded (there should be a mechanism for selecting two vertices in the UV editor and welding them).

Hmmm... it's extremely difficult to explain this without pics.

However, what I will say is that while it's hard to explain it really isn't hard to do. Annoying, definitely - I hate doing it almost as much as I hate doing the skin weights for animating ;) - but once you know what to do and how to do it, you'll be sorted.
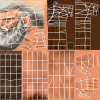
-------------------

EDIT: No it doesn't matter where UVs get placed on the map. It won't even cause anything to break if they overlap, just that you'll have multiple parts of your mesh using the same parts of the texture map. In fact, if your mesh is symmetrical, overlapping UVs will save you half your texture space and you'll end up with a texture that's twice the resolution.

For example:

attachment.php


My great prophet texture and UVs​

It's not as efficient as it could be and there's really no need for the hands to command so much space on the map as they do ;) But it's symmetrical so I've got a fair bit of space to play with and have allotted a pretty large chunk to having a nice detailed head. But imagine how much simpler UVs like this are to paint (or get photos for to adapt to) than an automatic system.
 

Attachments

  • GreatProphetTex.png
    GreatProphetTex.png
    107.9 KB · Views: 203
For example:

My great prophet texture and UVs[/CENTER]

It's not as efficient as it could be and there's really no need for the hands to command so much space on the map as they do ;) But it's symmetrical so I've got a fair bit of space to play with and have allotted a pretty large chunk to having a nice detailed head. But imagine how much simpler UVs like this are to paint (or get photos for to adapt to) than an automatic system.

That's great! Thanks again, that really gives me a specific format to emulate. (Btw, any thoughts about the cube? heh)
 
I should also add that if you make a model from scratch, the process can be even simpler. You could, for example, build a very very crude model using boxes and cylinders which can be UVed using simple projection, and then refine your mesh - inserting vertices, adding edges, refine, refine, refine... and when you finish all that detail will have inherited UVs from your basic model so you could pretty much just open up your UV editor and tweak them about and then that's it - done! :)
 
The missing polygons are a result of slightly flaky *.gr2 exporting within Firaxis' tools. There was nothing we could do to fix this within Nexus Buddy. The workaround is to use the Granny Viewer app to test your gr2 file after you've exported it and if there are holes, export again and keep doing so until the problem goes away.

It's a pain, this, but I'm afraid repetition is the only solution at this time.

Sorry, I missed this aspect of your problem because I got caught up in the texturing side of things.
 
Back
Top Bottom