zo-zo
_________
- Joined
- Jan 12, 2008
- Messages
- 208
You can start off in RGB mode, make all your changes to the picture with all the special features you want to add.
Once you are finished with your picture, then you have to go to indexed mode to get it down to 256 colors and then you have to make the last two colors the tranparant colors.
===============================
You are using GIMP:
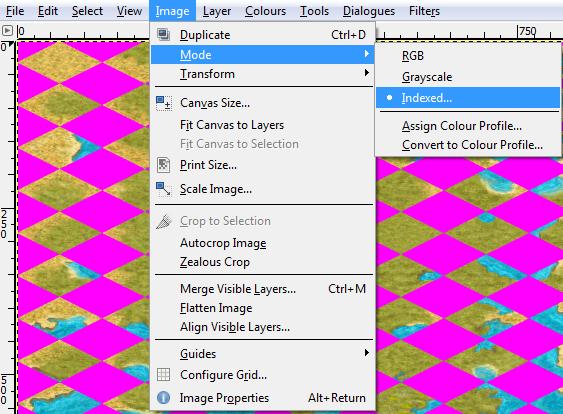
1) Pull down Image> Mode > Indexed
I'm using version 2.4.6, so if you have another version the pull downs and views may be a bit different.
2) Save as *******.pcx
This will generate a Color Map (palette) that is 256 colors (should be 0-255).
(After saving the pcx you may have to open it again if you see less than 256 colors (this is rare), this would only happen if the picture was mostly all the same color or if you previously saved it in GIMP format (*.xcf), opening the pcx again will guarantee a 256 color palette.)
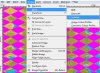
Below is a picture of a sample color map showing the postion of the green and pink that are used in most pcx's for the 2 transparant colors.
I circled the pink in position 255, (color index=255) (value=ff00ff).
Note: On the newer versions of GIMP the Colourmap can be found: Windows> Dockable Dialogues>Colourmap

3) Copy the image first, to be pasted shortly (select all, copy, don't paste yet).
4) Click on the color map, the last 2 colors (254 and 255) are the transparant colors, usually green (00ff00) and pink (ff00ff) are used.
Note: If green and pink are already used elsewhere in the colour map, then make note of what the values are for position 254 and 255 and change those other positions to those noted values so you retain all the colors that were in the palette. (Basically you are swapping the colors between the positions)
Change the values of 254 and 255 to 00ff00 and ff00ff respectively.
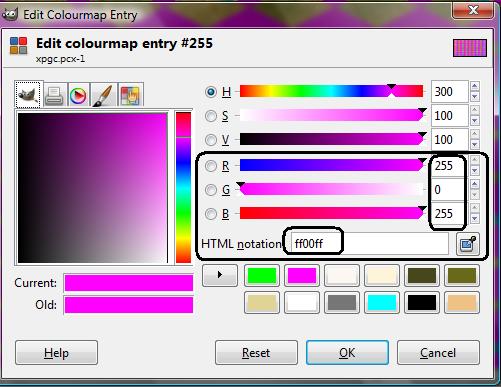
Double click on the palette color (on the color map) you want to modify and this window will come up.
Pink = 255, 0, 255 = 00ff00
Use the slide bars to change the RGB settings for each color you want to change in the palette.
5) Paste the copied image, and all the colors should be there with the transparant colors in place.
6) Save as *******.pcx
==========================
Once you are finished with your picture, then you have to go to indexed mode to get it down to 256 colors and then you have to make the last two colors the tranparant colors.
===============================
You are using GIMP:
1) Pull down Image> Mode > Indexed
I'm using version 2.4.6, so if you have another version the pull downs and views may be a bit different.
2) Save as *******.pcx
This will generate a Color Map (palette) that is 256 colors (should be 0-255).
(After saving the pcx you may have to open it again if you see less than 256 colors (this is rare), this would only happen if the picture was mostly all the same color or if you previously saved it in GIMP format (*.xcf), opening the pcx again will guarantee a 256 color palette.)
Below is a picture of a sample color map showing the postion of the green and pink that are used in most pcx's for the 2 transparant colors.
I circled the pink in position 255, (color index=255) (value=ff00ff).
Note: On the newer versions of GIMP the Colourmap can be found: Windows> Dockable Dialogues>Colourmap
3) Copy the image first, to be pasted shortly (select all, copy, don't paste yet).
4) Click on the color map, the last 2 colors (254 and 255) are the transparant colors, usually green (00ff00) and pink (ff00ff) are used.
Note: If green and pink are already used elsewhere in the colour map, then make note of what the values are for position 254 and 255 and change those other positions to those noted values so you retain all the colors that were in the palette. (Basically you are swapping the colors between the positions)
Change the values of 254 and 255 to 00ff00 and ff00ff respectively.
Double click on the palette color (on the color map) you want to modify and this window will come up.
Pink = 255, 0, 255 = 00ff00
Use the slide bars to change the RGB settings for each color you want to change in the palette.
5) Paste the copied image, and all the colors should be there with the transparant colors in place.
6) Save as *******.pcx
==========================