Tomorrow's Dawn
Heroes Never Die
Requesting sticky please.
This tutorial will help users learn how to compile their post game images
into an animated .gif file that will help Leoreth gather data on the performances
of civilizations throughout the course of an average game.
This of course, is perfectly applicable for RFC, vanilla BtS,
and pretty much any game that utilizes a replay screen.
Assuming you're like me, and rapid-fire hit PRT SCRN while playing the post-game replay
at full speed, you'll have a number of stock photos on hand.
Now, what you'll need is a copy of Adobe Photoshop CS5.5.
CS3 & CS4 are okay too.
Step 1:
Boot up your Photoshop software.
Step 2:
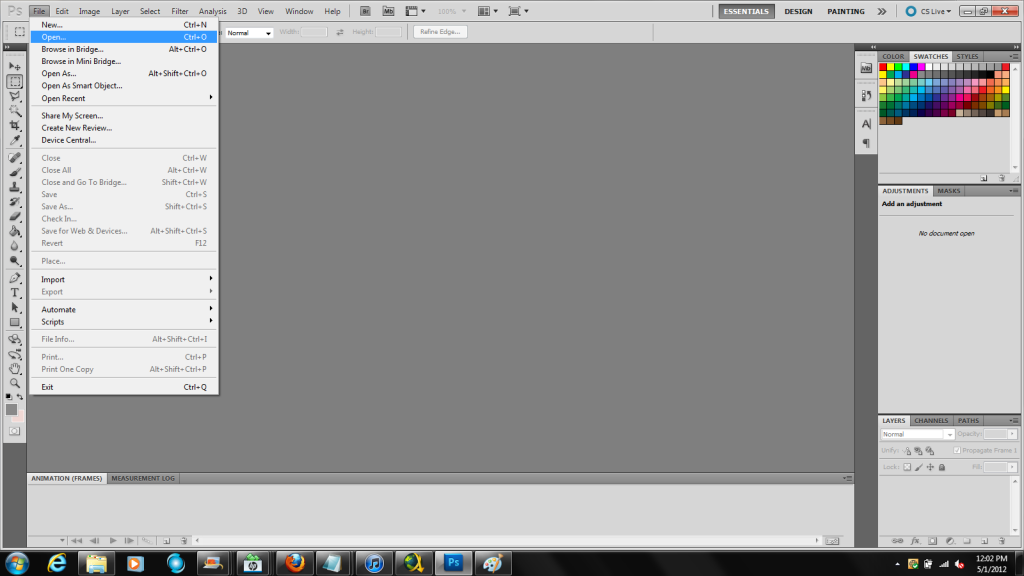
Go to File, which is at the top left of the screen,
scroll down and hit Open... (or press CTRL+O)
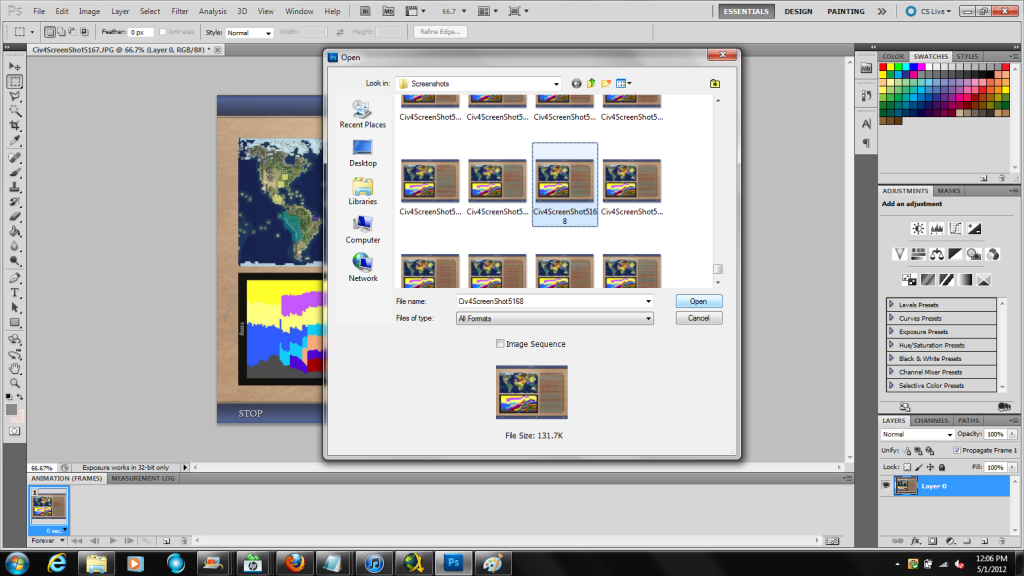
Step 3:
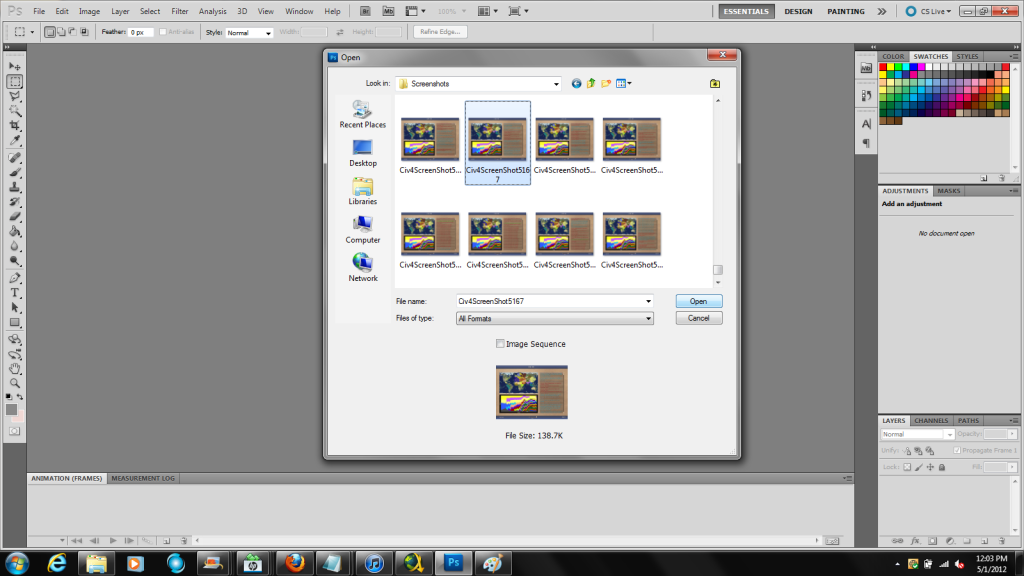
Choose your selected image; ideally this will be the starting point of the animation.
Step 4:

Go to Window, which is at the top of the screen and between View and Help.
Make sure that Animation is checked. If it is, then that bar that includes Animation (Frames) and Measurement Log will appear at the bottom of the interface.
Step 5:
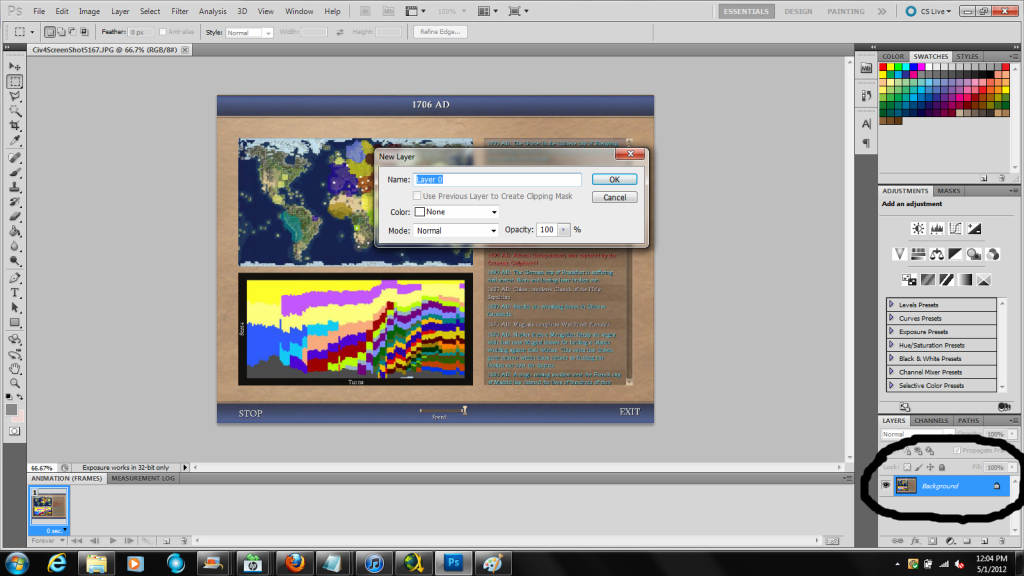
Mouse over to the Background layer, which I have circled.
Double-click on it. New Layer should pop up in the middle of the screen
and will prompt you to name the new layer. Just leave it Layer 0.
Step 6:

Your screen should look like this. Now that your image isn't locked, you can apply effects and stuff to it, which isn't what we need.
What we did need, was the ability to make our image transparent, which was the point of unlocking it.
Step 7:
Now open the next image you want to appear next in the sequence.
Step 8:
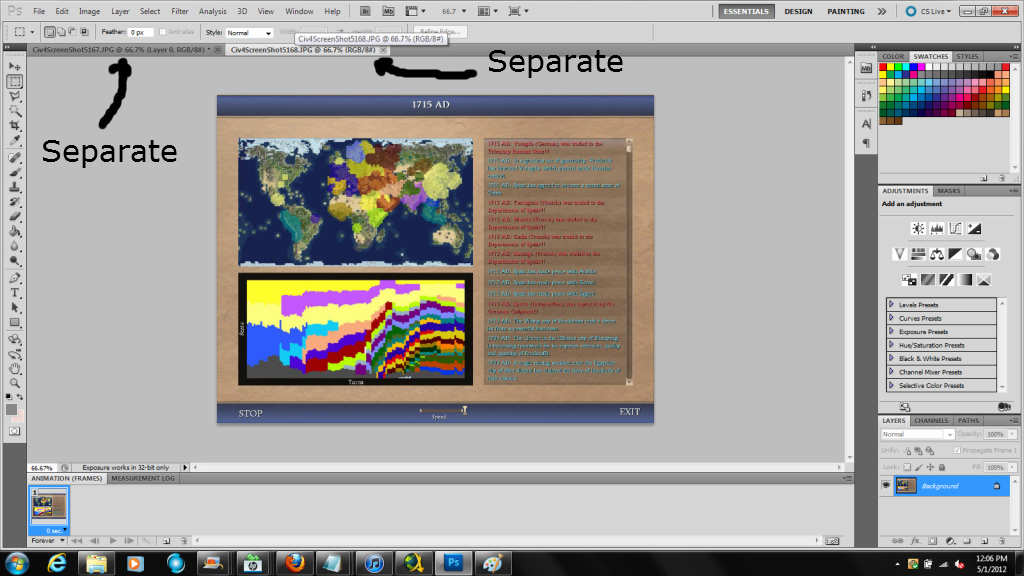
The selected image will be kept on a separate composition,
but you need to bring them together. So what you will need to do,
is mouse over onto your new image, press and hold CTRL+left click,
and drag it over to the leftmost tab, which is where your original image is.
Step 9:
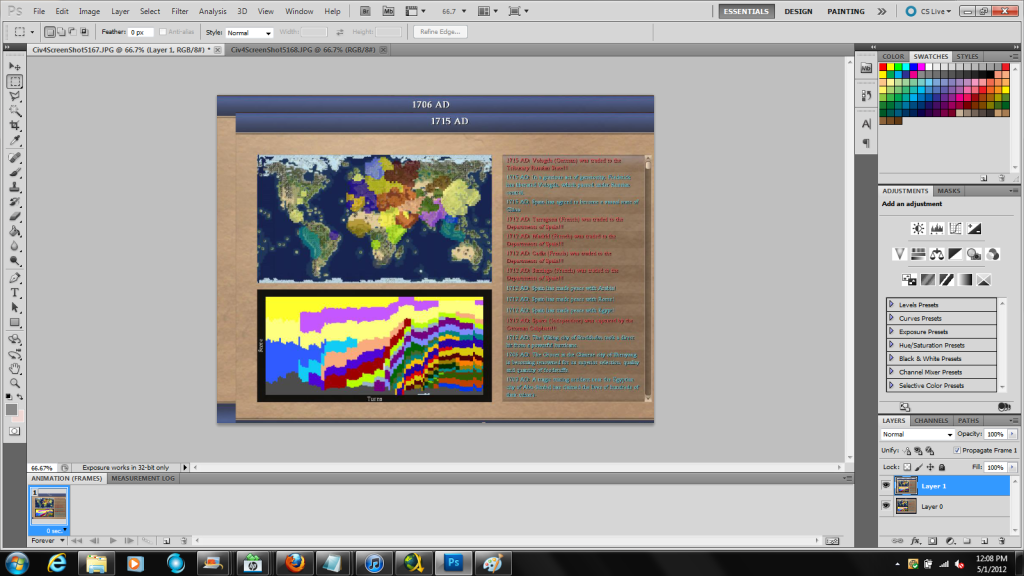
It should look something like this. Also, notice how there are now two layers in that
box in the lower right corner now. You will need to re-align the pasted image, so that
it doesn't look all weird like this. You can do that by clicking on the new layer while holding CTRL,
then letting go of CTRL while stile holding onto the left mouse button and moving it around.
The image will automatically snap to the edges of the composition, leaving it nice and neat.
Step 10:

Double-check to see if everything lines up correctly.
Step 11:
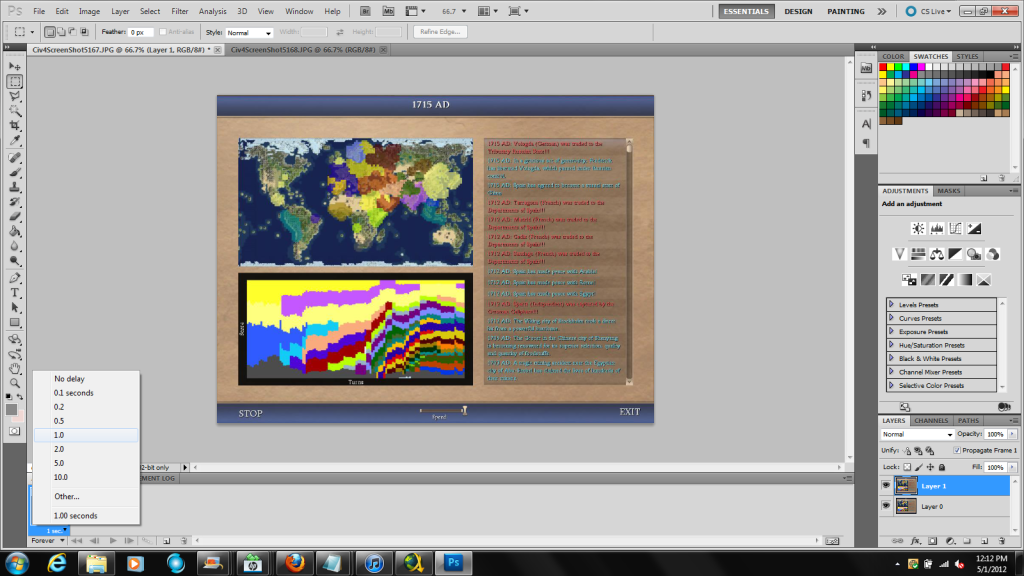
Now, in the lower left, where the Animation Frames are, right-click the little thumbnail of the image and set the time interval to 1 Second.
Step 12:
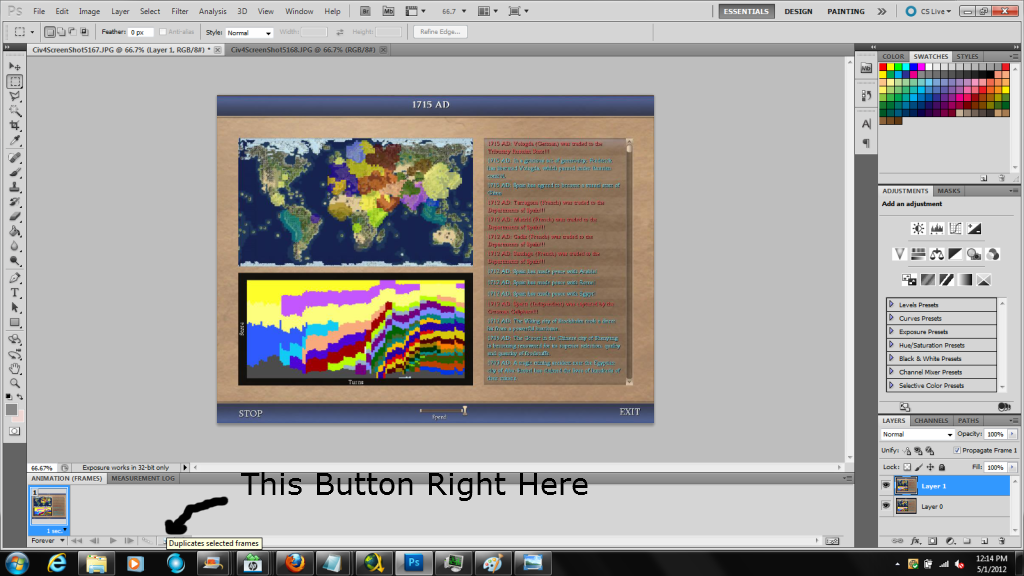
Next, mouse over to the button that I've pointed out, and click it.
It will duplicate the selected frame.
Step 13:
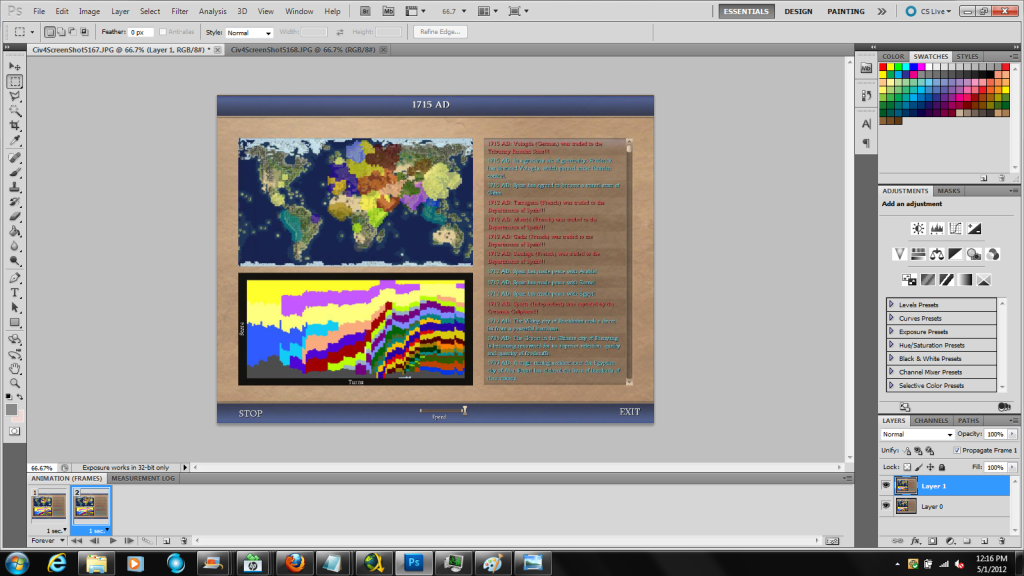
It should look like this now.
Step 14:
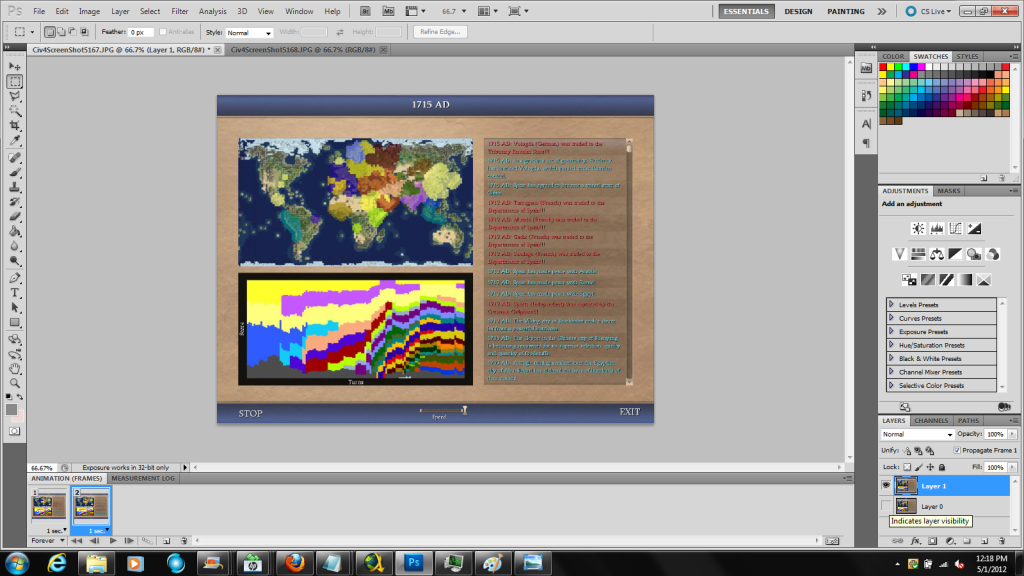
Now shift your attention to the lower right side of the screen where the layers are.
The little box next to each thumbnail needs to be checked off for the frame you want to use.
Basically, if there's an Eye in that box, that means that the layer is visible.
For the first frame, we only want Layer 0 to be visible, so we shut the Eye on Layer 1.
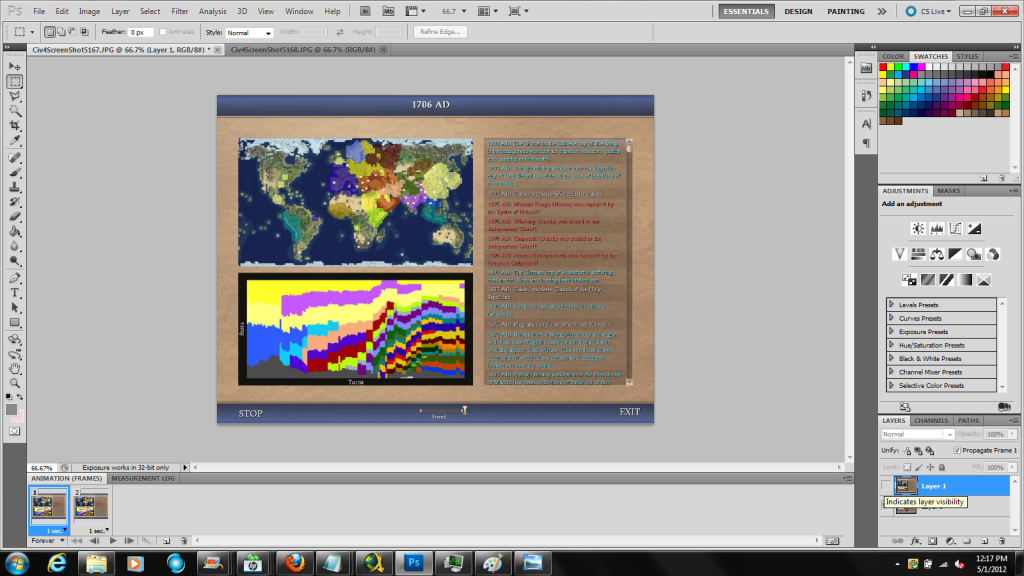
Step 15:
Now shift your attention to the lower left side of the screen where the animation frames are again.
Click on the next frame to make it the active frame you're going to make changes to.
Now shift your attention back to the lower right side like in Step 14.
See where this is going? In this frame, we want Layer 1 to be visible but we don't want
Layer 0 to be visible, so we shut the Eye on Layer 0.
Step 16:
Repeat Steps 7-15 (minus Step 11 and 14). Don't literally repeat Step 15. Use common sense.
If you make a third frame (Layer 2) and want to make it the only visible thing on the third frame of the animation,
keep the Eye open only on that layer, and turn off all the other Eyes on the other layers for that frame.
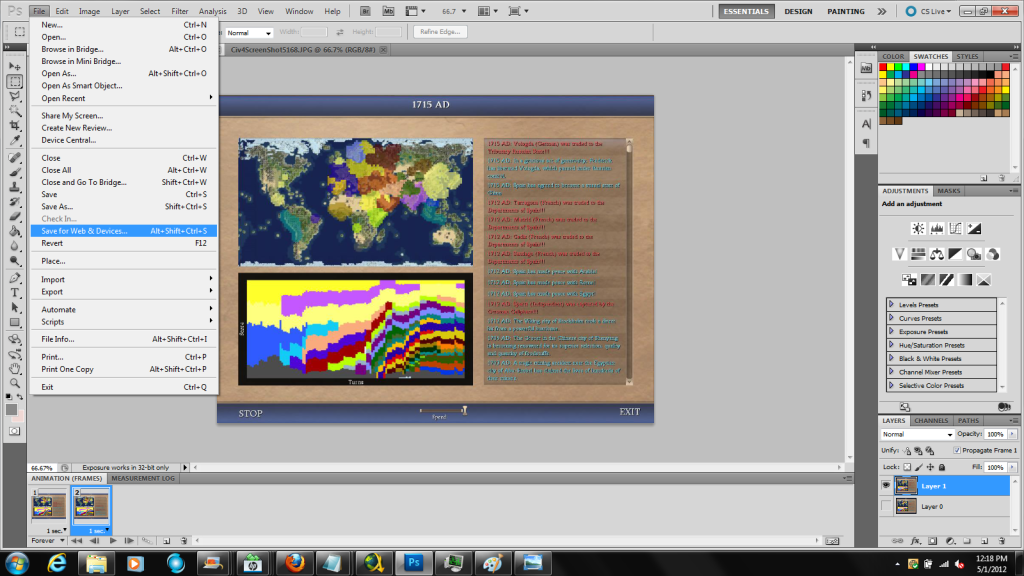
When you're ready to save your file, drop down from File again, and this time,
mouse over Save for Web & Devices... (or ALT+SHIFT+CTRL+S)
Step 17:
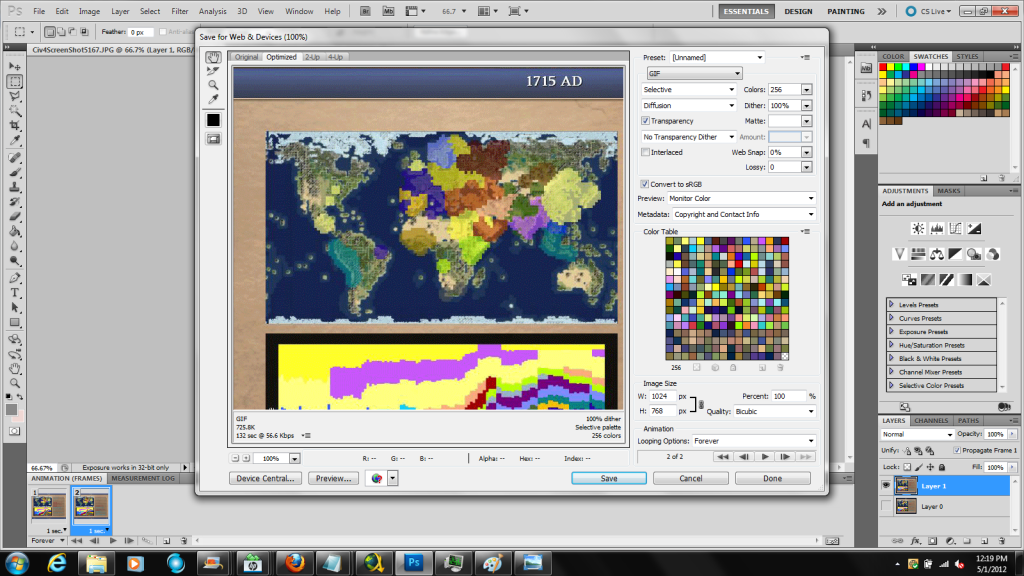
Make sure all of your settings are the same as mine (they should be default)
and then click Save (name the .GIF whatever you want).
You're done!
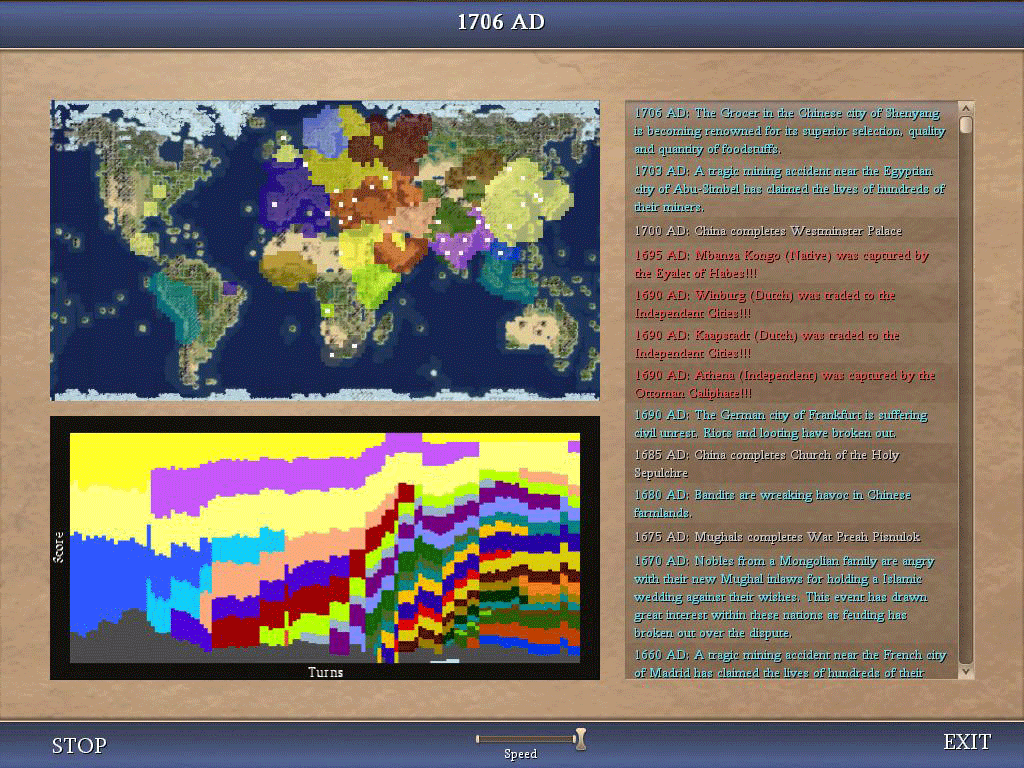
Here is a quick sample of a 2 Second, 2 Frame animation loop I made:
For those of you who want to help Leoreth get a better idea on how to balance different civs,
it's best to make a multi-frame .GIF demonstrating how different civs are doing throughout the game,
essentially, showing their progress instead of telling as those things get lost in translation.
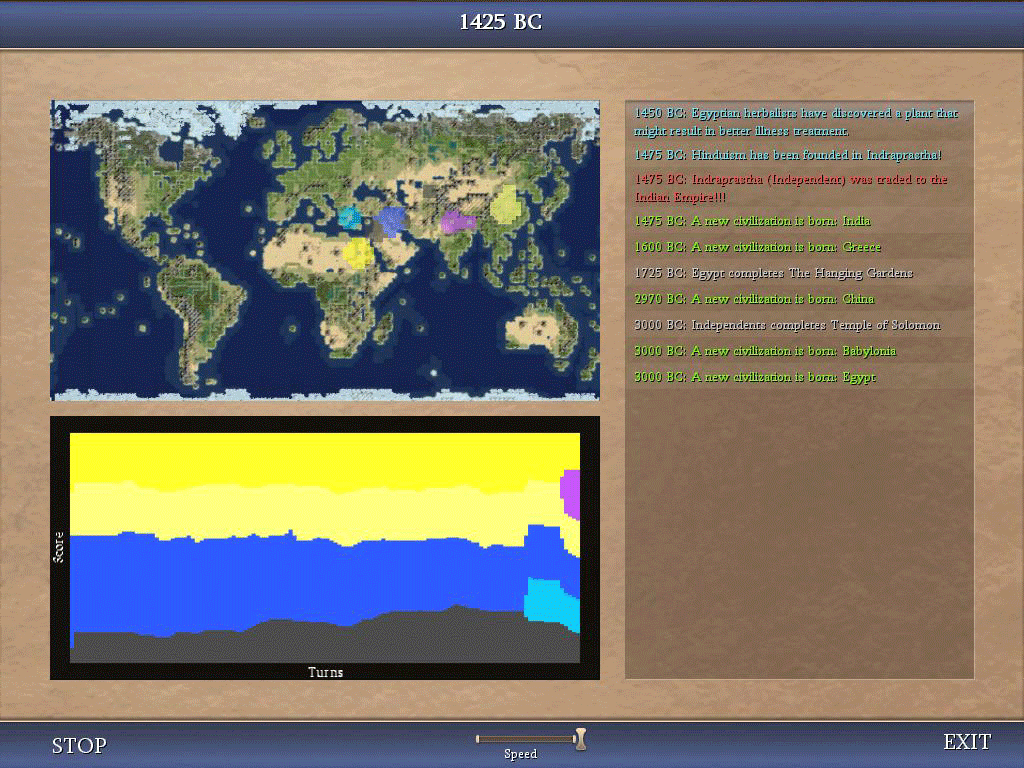
Use this .GIF as a reference guide when making one of your own regarding the rise and fall of civilizations:
This tutorial will help users learn how to compile their post game images
into an animated .gif file that will help Leoreth gather data on the performances
of civilizations throughout the course of an average game.
This of course, is perfectly applicable for RFC, vanilla BtS,
and pretty much any game that utilizes a replay screen.
Assuming you're like me, and rapid-fire hit PRT SCRN while playing the post-game replay
at full speed, you'll have a number of stock photos on hand.
Now, what you'll need is a copy of Adobe Photoshop CS5.5.
CS3 & CS4 are okay too.
Step 1:
Spoiler :
Boot up your Photoshop software.
Step 2:
Spoiler :
Go to File, which is at the top left of the screen,
scroll down and hit Open... (or press CTRL+O)
Step 3:
Spoiler :
Choose your selected image; ideally this will be the starting point of the animation.
Step 4:
Spoiler :
Go to Window, which is at the top of the screen and between View and Help.
Make sure that Animation is checked. If it is, then that bar that includes Animation (Frames) and Measurement Log will appear at the bottom of the interface.
Step 5:
Spoiler :
Mouse over to the Background layer, which I have circled.
Double-click on it. New Layer should pop up in the middle of the screen
and will prompt you to name the new layer. Just leave it Layer 0.
Step 6:
Spoiler :
Your screen should look like this. Now that your image isn't locked, you can apply effects and stuff to it, which isn't what we need.
What we did need, was the ability to make our image transparent, which was the point of unlocking it.
Step 7:
Spoiler :
Now open the next image you want to appear next in the sequence.
Step 8:
Spoiler :
The selected image will be kept on a separate composition,
but you need to bring them together. So what you will need to do,
is mouse over onto your new image, press and hold CTRL+left click,
and drag it over to the leftmost tab, which is where your original image is.
Step 9:
Spoiler :
It should look something like this. Also, notice how there are now two layers in that
box in the lower right corner now. You will need to re-align the pasted image, so that
it doesn't look all weird like this. You can do that by clicking on the new layer while holding CTRL,
then letting go of CTRL while stile holding onto the left mouse button and moving it around.
The image will automatically snap to the edges of the composition, leaving it nice and neat.
Step 10:
Spoiler :
Double-check to see if everything lines up correctly.
Step 11:
Spoiler :
Now, in the lower left, where the Animation Frames are, right-click the little thumbnail of the image and set the time interval to 1 Second.
Step 12:
Spoiler :
Next, mouse over to the button that I've pointed out, and click it.
It will duplicate the selected frame.
Step 13:
Spoiler :
It should look like this now.
Step 14:
Spoiler :
Now shift your attention to the lower right side of the screen where the layers are.
The little box next to each thumbnail needs to be checked off for the frame you want to use.
Basically, if there's an Eye in that box, that means that the layer is visible.
For the first frame, we only want Layer 0 to be visible, so we shut the Eye on Layer 1.
Step 15:
Spoiler :
Now shift your attention to the lower left side of the screen where the animation frames are again.
Click on the next frame to make it the active frame you're going to make changes to.
Now shift your attention back to the lower right side like in Step 14.
See where this is going? In this frame, we want Layer 1 to be visible but we don't want
Layer 0 to be visible, so we shut the Eye on Layer 0.
Step 16:
Spoiler :
Repeat Steps 7-15 (minus Step 11 and 14). Don't literally repeat Step 15. Use common sense.
If you make a third frame (Layer 2) and want to make it the only visible thing on the third frame of the animation,
keep the Eye open only on that layer, and turn off all the other Eyes on the other layers for that frame.
When you're ready to save your file, drop down from File again, and this time,
mouse over Save for Web & Devices... (or ALT+SHIFT+CTRL+S)
Step 17:
Spoiler :
Make sure all of your settings are the same as mine (they should be default)
and then click Save (name the .GIF whatever you want).
You're done!
Here is a quick sample of a 2 Second, 2 Frame animation loop I made:
For those of you who want to help Leoreth get a better idea on how to balance different civs,
it's best to make a multi-frame .GIF demonstrating how different civs are doing throughout the game,
essentially, showing their progress instead of telling as those things get lost in translation.
Use this .GIF as a reference guide when making one of your own regarding the rise and fall of civilizations: