Chapter 4 "Create the unit animation"
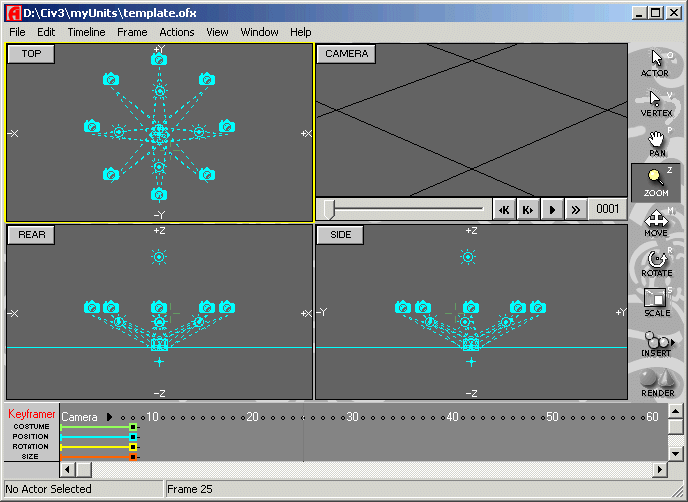
Now, it's time to animate your unit. We are using a template for the animation environment it inculdes 5 lights, a ground and 8 cameras. Please look at the
Create units with OpenFX thread to learn more about lights, cameras, models and all the other stuff.
Here you could download the
Template.
If you load the template into the animator you see the lights and the 8 cameras in the working views.
At first we set the animation lenght to the count of our model frames. Select "Frame->Set Animation lenght..." from the main menu and enter the frame count.
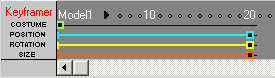
You could see that the keyframer shows the extented animation length. If you don't see the keyframer, select "View->Show keyframer".
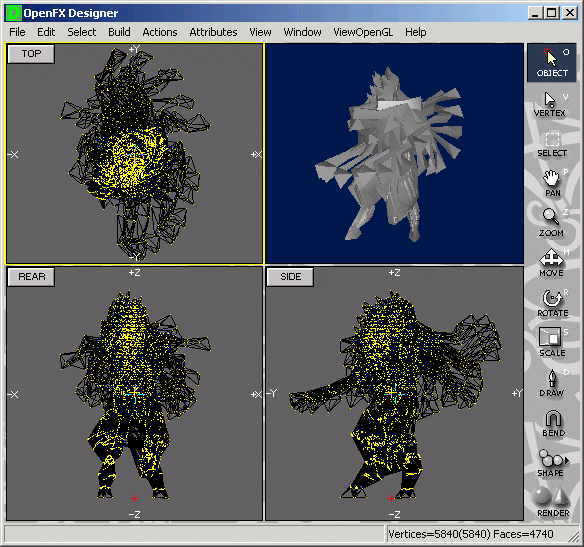
Now add the first frame of the model by using the "Insert" button fro the toolbar. Choose the model type and the open the first frame model. The model was added somewhere in the work sheet. Use "Edit->Select actor..." and choose the model, it's the last in the list. Perhaps you could see the selected model in the working windows.
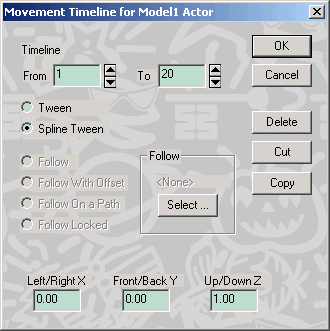
Execute a double click on the rectangle of the "position" section of the keyframer and a dialog will be opened:
Set X/Y/Z to 0/0/1 and you should see your model in the camera view. You could use the "Zoom" and "Pan" tool from the toolbar to zoom and center the working views to you model.
The line horizontal line in the "REAR" and "SIDE" view is the ground. You could use the "Move" tool from the toolbar to lift the unit so that the unit feet are exact in the ground. Do modify only the Z-position of the unit, you could use the position dialog to recenter the unit on X/Y if necessary.
Now move the "Costume" keyframer line to the first frame, by click on the rectangle of the costume keyframer and move to the left. If you get a signal and nothing happens you have the wrong tool active. If you want use the keyframer the "Actor" tool must be selected on the toolbar and your model must be selected!
The costume keyframer defines for which frames a model is visible and our first frame model should be visible only on the first frame.
Now, we could add the next frame model. Click in the free section of the costume keyframer to add a new model on this time frame. This is only possible because the "life" time of out frame models are don't overlap each other. If you want to add additional models like a weapon add the new model with the "Insert" tool like we done it first.
We add all frame models to the same costume keyframer to have automatic the same settings for the position and size.
After adding the new frame model move it to the second from position of the costume keyframer, then add the next frame until all frame model are added to the animation.
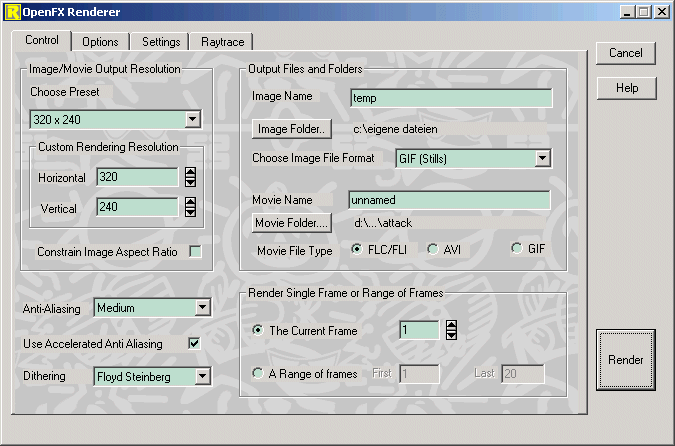
We are nearly finished with the animation, we only have to adujst the light settings. The template is made for space ship animations and has no shadow setting for the center light. Double click on the center light and choose the light type "normal" to add the shadow. The lights are possible to dark for the scene, to test this we render the first frame. The render a single frame or the full animation use the "render" button of the toolbar.
Don't change the output resolution or you get deformation effects! You could setup the output path to the single image rendering and the output path for animations. The movie file type should be FLC/FLI. The default is the render of the current frame, to render the full animation or parts of it select "a range of frames".
Simply press "Render" to render the the first frame.
In this sample I think the light settings are ok, how you handle light you could learn in the OpenFX thread.
To render the unit animation select the frame range in the render setup and render the animation. You get a preview, close it and the renderer and you are back in the animator.
Select the next camera by click to the camera in the "TOP" view and press "C" to use that camere. You see the changed view in the camera window. Now you could render the next direction animation. Render all 8 directions and you will have 8 FLC files. Don't forget the type the file name in the movie name text field or you over write the previous animation. One tip add the direction to the name like modelW, modelSW, modelN, ...
")


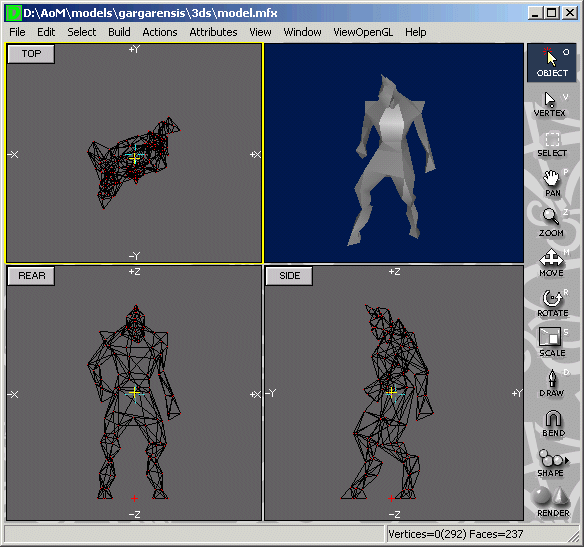
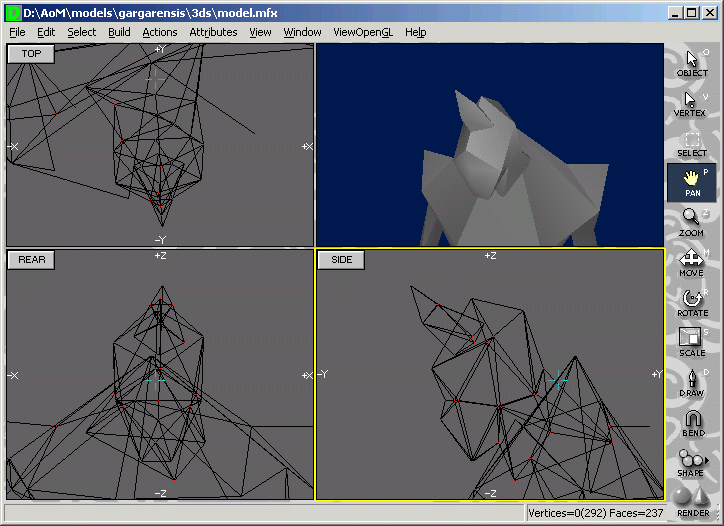
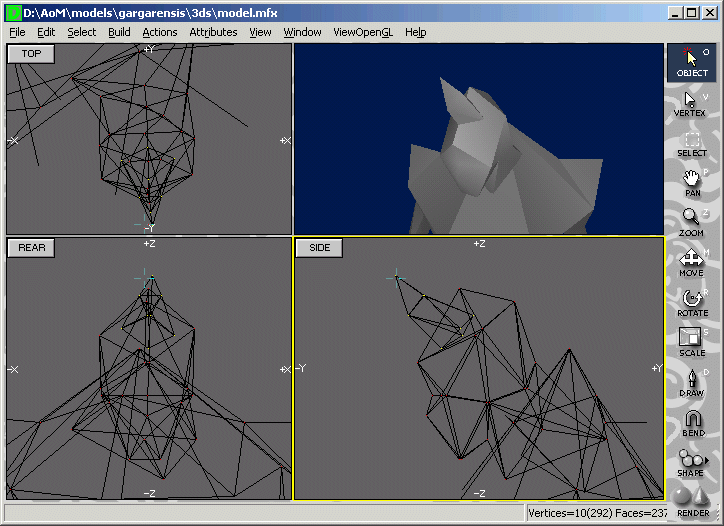
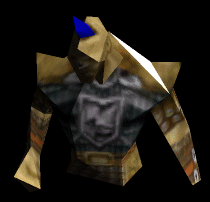
 . The file contains all animation frames as single objects, if you open the file with a viewer you see all animation frames as once, looks nice
  . But if you hide the other frames you could see the first frame of your model.
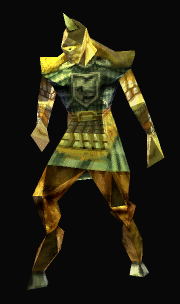

")