[BTS] BOTM 263: Mrs Santa Claus, Deity - Final Spoiler - Game Submitted

DynamicSpirit

Fear him of the pink tie
Moderator
GOTM Staff
Joined
Dec 23, 2005
Messages
6,781
Location
London, UK
BOTM 263: Mrs Santa Claus, Deity - Final Spoiler - Game Submitted


Use this thread to tell us what happened in your game, particularly anything after 1AD

Did you win? (Yeah, totally ridiculous notion, I know)

Reading Requirements
If you are participating in BOTM 263 then you MUST NOT read this thread unless
  • You have submitted your entry

Posting Restrictions
  • Do not post any savegame file from the game. Discussions and screenshots are fine but not actual games.
 
1540 Religious victory, a couple turns before I would have had Domination. Relatively easy for a Deity game so I assume there will be other submissions with 1000 AD wins. :rolleyes: As I'd sort of planned at the 1 AD mark, I soon went after Ragnar, who was rather stifled by the Dutch, with trebs and elephants, and then attacked the Dutch from two sides, vassalizing him. He'd bribed Victoria into our tiff, however, so I went after her next, and also vassalized. From there it was just a matter of time since I had at least twice as many cities as anyone else, though was still behind some AIs in techs. Germany and France, both very small, were wiped out next, and then Joao became a vassal and source of several techs via trading down the road. By that time I had grens and cannon, and sent everything south to go after Spain. She was in a war with America at the time and pretty easy pickings, but decided to become an American vassal after I'd captured 3 cities and was poised to take another two. Fortunately, there was no 10 turns of peace so after waiting a couple turns to heal up, reposition, and upgrade cannon to artillery, I attacked the America/Spain combo and had pretty overwhelming numbers by that time, plus those sweet sweet artillery. Unfortunately, both of them had frigates so I couldn't do much in the way of seaborne attacks, but cavalry moved things along pretty quickly by land.

It's always nice to get the (occasional) win at Deity, whatever its actual difficulty, so this was a pleasant holiday surprise! Thanks very much for the clever festive seasonal map, DS, and Happy Holidays to all!
 
I also had a Religious victory a few turns before domination... but I played the Adventurer Save which was challenging enough for me. I pretty much vassaled everyone but the Americans. Spanish were last, but the rest pretty much by proximity order. My vassal Portugal killed the Germans before they would capitulate, though. I took the RV because it was a long game of warring, and I didn't have the stamina to drag out a war with Americans who had military tech parity... infantry and artillery. It was a long hard slog just to get to this point... the extra settlers really made this game play like emperor/immortal difficulty, that plus the crowded map. I was glad to accept the postulate from the pre-game thread that we were located on the lower left side of a christmas-tree, and spent a turn or two moving eastward which allowed me to reserve some space for expansion. Then it was warring every time a new siege unit became available (or when I got attacked). I held off the American cavalry with longbows and muskets -- the first time I ever felt Chichen Itza was useful for me... they just stood there reducing cultural barriers by 2% per turn (from 125% originally), and I eventually destroyed them with grenadiers. Fun game! Thanks DS!
 
1350 AD domination victory. It went more or less according to my plan from the 1AD spoiler, with scientists bulbing Philo - Edu (x2) - Liberalism on the way to Steel, although since William was halfway through Education by the time I started Chemistry, I didn't take chances and just used Liberalism on that (around 500AD). Was lucky to get a bunch of Roosevelt's failgold (almost 600) for Paper and then got Steel in 700 AD. Got two Great Merchants by staying in Caste System past the golden age, so I could promote 10 catapults to cannons and gallic/axes to maces. Declared on Roosevelt (south) first, and when that was going well enough opened a second front against Isa (east). Before 1100 AD they both capitulated (Isa much earlier, due to a lower score and power), and thus the next target had to be the Portuguese and their Dutch and German vassals. At that point I had Military Science so I could upgrade my maces to grenadiers and make more. I had about 30 each of cannons and grenadiers/maces but I had to divide them between one lone Dutch city between Roosevelt and me, the Dutch branch to the east while protecting the narrow border with Portugal to the north. Joao had numbers but still only medieval units (despite all that alliance having Military Tradition, it took a long while for any of them to tech Gunpowder for Cuirs). When the Dutch were eliminated and Bismarck broke free of Joao and made peace, I started a war against Ragnar to get his branch past the Dutch cities. Both Joao and Ragnar capitulated in 1340 AD for the win. DeGaulle in the top-east branch was annoyed but didn't move the whole game.
 
My idea, adopted in the first part, to fight immediately with 2 AI turned out to be not the most successful. I suddenly didn't have enough units on the Spanish front. At 25 AD, I took the 2nd Spanish city and planned to take 1 more, and then take the technology for the peace. But when I approached the 3rd city with 18 units, I suddenly saw 12 units in it, including 6 axes. AI usually has fewer units in the rear than at the front. I had to wait for now, it will heal and more units will be suitable, but I decided that I don't have time for this. Therefore, in 100 AD, I made peace with Spain, took CoL, meditations, a world map and gold. A turn earlier, I traded the calendar for currency. Thanks to the world map, I saw the whole tree, except for the interior of France and Scandinavia. It turned out that Ragnar lives where I expected to see 2 invisible Dutch cities. And at Roosevelt has only 7 cities on the tree, and 8 in all - so there is an island to which he sailed through his culture.
At 125 AD for CoL, I received construction from Wilhelm. On the same turn, my 2nd army was going to attack his northern city, but saw a mini-stack of 8-9 units going to war with De Gaulle (Ragnar made peace with Wilhelm and switched to war with Bismarck). If I had to attack them in the city, it would mean extra losses, so I let them go north and attacked Dutch at 175 AD. in 225 AD, my first army joined the war - I decided not to repeat the mistake of fighting on 2 fronts. In 325 AD I captured 3 Dutch cities, the 4th city (1NE from silver) was captured by De Gaulle, and the 5th turned out to be in the south-east of America (on iron). So I made peace, took MC, HR and monarchy. In the last captured city, I got Kashi Vishwanath, ToA and Colossus, and the latter was built a turn before the capture :) In 400 AD, I resumed the war against Victoria with 20 units including 7 catas. I wanted to take 1 city and feudalism, but she was ready to give only the alphabet, so in 560 AD, England ceased to exist. The same thing happened with Spain, which I attacked in 475 AD and destroyed in 680 AD.
In the same 680 AD I attacked America with 11 catas, 33 gallics, 3 axes and 3 elephants. There were about 30 more units in 1-4 moves behind. 15 units took the last Spanish city, and 5-10 units each defended the border with the Vikings (GW and axes) and Portugal (WE and spears) in case of aggression. The former had berserkers, the latter had knights. America had maces, crossbows, longbows, pikes, and horse archers. Engineering, nationalism and guilds (but no iron). I expected some difficulties with taking the first city that had more than 20 units, but first of all, AI did not even build walls, and secondly, he attacked my stack on Gold with 11 units first. I lost 2 elephants and 2 gallics, killed 4 wounded units on the next turn and took the city a turn later. Then it was quite simple. In the 2nd city on the plain there was a castle and about 10 units, I hit when there was 80% left to speed up the conquest. The rest of the cities didn't even have walls.
In 800 AD, I launched GA and turned on science at 100% for 2 turns to learn the CS, after which I accepted bureaucracy and hereditary rule. In 940 AD, I captured all the American cities on the continent. In parallel, I could have captured the Dutch city, but in 400 AD William became a vassal of Joao. I was not ready for a war with Joao because of his optics (carracks). I already had about 15 elephants on land, more than enough to protect me from the knights.
This meant that I was missing about 35-40 tiles for dominance. Ragnar had 48 and it was an easy way, but I decided on principle to fight with Joao, who began to go into technological isolation and William (22 tiles on the continent). Therefore, I remained in slavery and did not accept Hinduism, which was practiced by all the remaining AI, in order to expand the boundaries of other religions too. Roosevelt was ready to give 1 of 2 cities and 2 technologies for peace, but I did not take the city, but took 4 technologies: paper, feudalism, machinery and compass. And turned on science again. I learned engineering,optics and guilds. Built 9 trebuchets, 11 knights. And 1-2 turns before the attack on Joao, i paused during which i changed my mind :). Joao learned chemistry and began to study military science. I can managed to capture the front-line city before the Grenadiers arrive, but then I would have to fight against the grenadiers in the castles. Of course, I would have won it anyway, but it meant building many times more units and more time (both game and real). So I turned my army against Ragnar... The Southern group, instead of the war with William, landed on Roosevelt Island. The war with Roosevelt lasted 5 turns, with Ragnar 8. Knights were not needed for it at all, trebuchets could be replaced with catas, and most importantly, it could be started 5 turns earlier. In the end, I could have finished 2 turns earlier, but I preferred to increase the points. As a result, a little trouble happened on the last turn - Joao captured my crab city with the help of culture, stealing 10k points :(.

Got domination victory at 1190 AD
 

Attachments

  • stat2.png
    stat2.png
    1.1 MB · Views: 30
  • stat1.png
    stat1.png
    791.1 KB · Views: 24
  • 680AD.png
    680AD.png
    1.7 MB · Views: 30
Last edited:
This game was a fantastic civ experience and a real challenge for me. Probably my longest game so far with the most up-and-down storyline throughout, always seemingly on a precipice.

The BC years had Ragnar take my capital and Roosevelt starting to plot war (against me?). Well, America did DoW me. Not a surprise but definitely an unfortunate turn of events for Mrs Claus. It led to a protracted border war adjacent to some marginal cities. I ended up getting a few useless cities out of it; one of which would later be lost to culture and two others than never amounted to anything (well there was ONE thing - right before my game ended). The biggest effect of the war was stunting Roosevelt slightly and but allowing Willem and Joao get further ahead.

I missed a bunch of stuff by 1-3 turns: Music, Philo, Liberalism, and no chance of Taj Mahal.

After peace was signed with the Americans, I took stock and it was obvious I needed more land… desperately. My only viable target was Isabella – who I had been siding with during the BC years. With a handful of cuirassiers I declared on Izzy and got a couple of her high value cities. At this point my attack momentum had slowed, she had masses of units defending inside a hill city, and… I could see that Willem was starting to research Assembly Line (1070 AD). This was a “now or never” moment in my game – I’m pretty sure Willem’s infantry would adjust my chances of winning this deity game to approximately 0%.

I immediately sued for peace with Isabella and moved my standing army to Willem’s borders, but not before he got Assembly Line. Luckily no Rifling yet, so I still had a chance if I was quick.

I declared and made a cuirassier border strike on him, claiming three cities. If I can take another two or three from him, he will be crippled and I will have a chance again in the game. I manage to bludgeon a further two cities and have my eyes on one last prize city, after which I will make peace and reset priorities. But I’ve moved too slowly and he gets infantry two turns before I can get there.

I have cuirassiers and macemen, plus a few cats/trebs vs his Infantry. What should I do? I have no way of working out if I can win or not - how do you know when pure numbers will win over quality (0% odds with best attacker)?

I have just one critical spy in position (Sean Connery?) – and I manage to successfully incite a clutch city revolt. Now I close my eyes and start throwing attackers one after another at the infantry. It’s not a happy sound as I continue to throw good money after bad in a sacrificial assembly line of martyrdom. My army is all but destroyed but I’ve done enough to take the city and sue for peace.

After this fight the game becomes winnable in my eyes and I have a positive plan for my next steps. Let’s set up a spy economy to get all of Willems tech, and use my relative tech advantage to make war on the weaker civs; Ragnar and Isabella. There’s no contest for what happens first - let’s wipe Ragnar from the map in remembrance of my lost capital back in the BCs.

My war on the Vikings is methodical, cautious and successful. It is around this time that my close friends Bismark and Victoria see my burgeoning power and become peaceful vassals. Bismark is useless as a two-city civ, but Victoria has a respectable empire and will come in handy.

After Ragnar’s memory is relegated to the library books (history is written by the victors), I pivot down the tree and finish off Isabella.

So now my chances of victory are concrete with just two legitimate rivals left. Roosevelt has land and is advanced and powerful. Joao isn’t far behind him and has De Gaulle as his vassal.

Final plan is to split Joao’s land between me and my vassals, and to pick up the research pace and get my spaceship done before Roosevelt. I found combat tactics very painful vs Joao when trying to make sure my correct vassal takes over the correct Portuguese city, but we each get an extra city or two from Joao.

On the research front, my spies have stolen all of Willem’s tech and now I’ve got three avenues for moving through the remainder of the tech tree: self research, steal from Roosevelt, and direct Victoria’s research for complimentary trades.

Player inexperience pops up again when I set up a nice tech trade opportunity with Victoria only to have her make the same trade with Roosevelt in between turns before I got the chance, thus locking me out. I was fuming and had to work around this by not letting her get any more monopoly techs.

Roosevelt beats me to Apollo Programme and Victoria builds it soon after me. Despite the slower start, I get my spaceships parts done much sooner than everyone else, even after losing one life support to spies.

With the spaceship launched I’ve now to decide how to enjoy these last “10 turns of Christmas”. Roosevelt still hasn’t apologised for declaring war on me in the early ADs. Obviously nuclear war beckons. His military is massive and more modern than mine. I can get the Manhattan Project in 5 turns which gives 3 turns to build nukes before I rebase them to my border (remember that ONE useless Elven city deep in American culture but crucially within 5 tiles of Roosevelt’s capital). I can also get 2 of my cities to +13 exp building new commando units that can travel on enemy roads to follow up on the nukes.

I end up building 4 nukes and taking 5 cities including his capital on the last turn of the game. Merry Christmas Roosevelt!

(Roosevelt gets his right of reply on Boxing Day and throws modern armor and mech infantry at his former cities – but not quite enough to turn anything blue. See Washington defiantly garrisoned by a single chariot-turned-gunship general!!).

Epic map, epic game, epic win - albeit not as finessed as others but my first BTS deity victory feels good.
 

Attachments

  • Keep washington Yuletide Junction1.jpg
    Keep washington Yuletide Junction1.jpg
    579.5 KB · Views: 25
Thanks, Jimmy, for the entertaining read! Perhaps the best thing about vassals, since they're usually pretty useless in attacking, is that you can direct their research (and steer them away from techs that you want to trade to them). In the diplo screen, click on "Let's discuss something else" and then "We would like you to research..."
 
Settling Location
As probably most people did, our Warrior's movement 1NW to the G For made it clear that our prediction of more land being eastward was correct.

Our Settler proceeded 2NE to the GH Riv For.

That location looked great, with 2 Deer, Gems, and 3 visible G Riv squares which were suspiciously absent of Forests.

Yet, our eyes were drawn to the PH For square, which would keep a Deer and the Gems, while giving us an extra Hammer every turn, which could prove critical in the early turns. More importantly, we'd be blocking off even more land, while our initial Warrior would still be sufficient for spawn-busting the west.

When a second Deer was revealed, the decision was confirmed.

There was also yet another PH For even 1S of there on the Coast, but we would have had to give up the Gems square, which did not seem like a worthwhile trade-off. With the Commerce from the Gems, we could afford to build an extra early-game Coastal City later, if we wanted The Great Lighthouse, and thus the capital did not need to be on the Coast.


Settler 2
After our initial Worker, we built a predictable Warrior.

With the extra Hammer from having settled on the PH square, we completed Warrior 2 at the same time that our City grew to Size 2. While it would be great to work a Gems square, it would be even better to block off some land.

Thus, at City Size 2, we immediately set to work on building Settler 2. With 8 AIs, things were likely to get crowded, and it seemed to be better to try to block off land than to get a few extra turns of Commerce.

Warrior 2 headed north-eastward and located additional Deer Resources. We settled next to one of them on top of a Banana Resource.


Next Cities
At City Size 4, our capital was already hard at work on Settler 3. It would get settled in the width-wise centre of the tree, at the corner of two beautiful Rivers, for Deer, Rice, and Stone. None of the Resources were in the big-fat-cross and thus the City took quite some time to really get going. Later, I made it my National Park, and had to regrow several of the Forests which had been Chopped by Willem in his nearby City.

We did run into a Warrior-Defended Barb City. Ohhhh, I suppose that this map is what some Deity Players would call an "Immortal Plus map," where the Barbs do not start with Archery. (Note that I am not such a player; if you won this game, I will gladly give you full credit for having beat a Deity-Level game! In other maps, where you are more likely to fight several Barb Units, only having to face Barb Warriors early on might make the map "Immortal Plus." Here, since most people probably followed the spawn-busting-with-Warrior-1 advice and with so many AI Units showing up to our east, there probably were only a couple of Barb Units that you had to face, at most, and thus the "Immortal Plus" title for a map without Barbarian Archery doesn't really mean much in this game.)

Having played many Hall-of-Fame Conquest games, particularly for one competitive Gauntlet, I am used to throwing away an early Warrior for a very small chance at razing an AI City which is defended by 1 Warrior (somewhere between 3% to 10% odds of winning--if you lose, you have to start a brand new Hall of Fame game on a new map--and then start another new game--and then start yet another new game, etc).

Here, there was just over a 20% chance of winning a fight, which is much better odds than I normally face, as a Barb City will not have Culture in it and we also start with Combat I. But, with 4 Barb Warriors, it's suicide to attack, since you won't live to promote your Unit, even if you do win.

An AI Archer from Isabella showed up and I joined it on the same square. Somehow, her Archer already had a Combat I Promotion, although she also had another Archer that was 2 squares away from the Barb City which did not have any Promotions.

One of the Barb Warriors left the City and presumably killed an AI Scout, as that Barb Warrior had 0.5 Health remaining.

With us being defended by Isabella's Archer, it was worth the risk of attacking. We were unlikely to capture the City, but winning would grant us 5 XP, meaning that we could have an early Woodsman II Unit (I wasn't thinking that we were Charismatic and would only need 4 XP). If we did win, Isabella only had 1 attacker against 2 defenders, and could not capture the City, as far as we could see.

We won the fight, with 0.2/2 Health remaining. Isabella also won a fight, as her Combat I Archer now had 2.0/3 Health.

The Barbs had stuffed their winning Warrior, now Combat I at 1.2/2 Health (but with 0 Fortification Bonus) back into the City, leaving the Barb City with 2 Warriors inside of it.

Meanwhile, Isabella's 2nd Archer (without any Promotions) was now also next to the City.

2 Barb Warrior defenders, 2 Isabella Archer attackers, and our Warrior.

We Promote to City Raider II, but our odds of winning are even worse than before, at just over 15%. Even if we did win, Isabella would just take the City with ease. Better to Heal a turn and see what happens.

Even with Show Enemy Moves and Show Friendly Moves enabled, as well as Quick Combat for Offence and Defence disabled, we did not get to witness the fighting.

However, we surmise that Isabella must have attacked or gone exploring with the unpromoted Archer, as it is no longer visible.

Her other Archer is even more wounded than it was previously, at 1.6/3 Health, meaning that it won a fight. Instead of, say, taking a Shock (Anti-Melee) Promotion, her Archer took a Medic I Promotion. Oh, and don't forget that our Warrior is on the same square. Did we heal an extra bit? I do not think so, as our healing action likely occurs at the end of our turn, before her turn begins.

We consider Healing now, but since we're in enemy territory, it will still take 4 turns to fully Heal, even with a Medic on the same square. Plus, the remaining Barb Warrior is the wounded one, which has only had 1 turn to Heal up to 1.4/2 Health.

We check our odds of attack and see that we have a greater than 70% chance of winning.

What would you do? We decided to try our luck, even though it could just as easily mean losing our Warrior and giving Isabella a guaranteed win.

We won the fight, and now we had a Barbarian City in our hands, which often means a City near a lot of Resources. Three Deer in the big-fat-cross fit the bill nicely, and Gems in our capital's big-fat-cross meant that we could keep a farther-away City.


Tech Path
My Tech path went:
Mining (for Gems) -> The Wheel (to be able to gain a turn or two for our Settlers 2 and 3) -> Bronze Working -> Fishing -> Sailing (for an early Lighthouse and for Trade Routes, as my Workers were Chopping instead of Road-Building) -> Masonry (for The Great Lighthouse)


The Great Lighthouse
I went heavy on building Workers and had 5 Workers at the time of completing my first Lighthouse.

As some of you did, I also Chopped, but I was willing to Chop even farther-away Forests for The Great Lighthouse, outside of my Cultural Borders, even those for 13 Hammers each. It doesn't sound like a lot, and it wasn't, but when you Chop multiple such Forests, they add up.

I admit that I hadn't even considered Chopping a Deer square's Forest as Jimmy Thunder had done; that idea was a bold and ingenious one!

I did Whip twice for overflow Hammers into The Great Lighthouse as well as Whipping The Great Lighthouse itself.


Further Steps
I built an early Axeman to defend the City near Isabella, in case she was going to get any funny ideas.

She settled down toward Roosevelt, getting multiple Cities in his area.

I captured a Barb City near Roosevelt using some of my first Gallic Warriors and then Liberated it to Isabella.

I also built 2 Cities for Roosevelt and Liberated them to him.

By 200 BC, I was about to settle the last of the filler Cities on our peninsula.

I have Construction, with an army of:
17 Gallic Warriors, 7 Axemen, and 2 Catapults

Roosevelt and Isabella got into a war and Roosevelt has just dragged me into the war.

On the plus side, Roosevelt is now Friendly toward us, which will help a lot, tech-wise.

I have just taken out one of Isabella's large stacks that was on its way to Roosevelt.


1 AD
I have built The Pyramids, but I only appear to have captured 1 City from Isabella by this point.

I'm doing all right in terms of tech. Roosevelt has Music (which he will trade to me but which I cannot afford to buy from him), and thus I missed that Great Artist.

I do have my Academy in the capital.

The Heroic Epic has been started in my Moai Statues City (the Double-Fish City).

My army is a bit larger than before, with:
19 Gallic Warriors, 7 Axemen, 6 Catapults, and 1 War Elephant

I appear to have lost 8 Axemen in battle but 0 Gallic Warriors. Nearly every Gallic Warrior has won at least one battle, giving them mostly Guerilla III, although one of them is a Healer, instead. The power of Gallic Warriors really seems to be apparent in this sample set.

I have 12 Cities (10 self-built), 68 Citizens, and plenty of AIs who will hand over 50 to 60 Gold for my techs like Literature or Code of Laws that I can cash in on, as needed.


Slow Warring
Slow-and-steady wins the race... to... Space. Perhaps not a competitive date, but more on that, later.

In 275 AD, I capture the last of Isabella's Cities on her peninsula, but let's not forget that she has some Cities by Roosevelt.

With the map filled at this point (even Roosevelt has settled the good spots in the Left Present Island), a lot of the AI-warring that other players described keeps happening in my game, too--one declaration followed by multiple chain declarations.

In 520 AD, we declare war on Victoria, but probably because someone asked us to do so, as the game's log doesn't show any evidence of either of us exchanging Cities.

It isn't until 600 AD that we finish off Isabella.

Willem is next, because he has been Chopping too many of my Future National Park Forests, but he drags in De Gaulle against us.

Knee-deep in Victoria + Willem's territory, our stack is on the brink of staying alive, while being attacked from two sides, with the help of a Super Medic, until De Gaulle shows up and swings the balance. We retreat the remnants of our stack (our Super Medic died) just as our first Knights are coming on to the scene.

In 860 AD, we decide that Willem's offer of a Cease Fire with no territory exchanged is an acceptable choice. The war for Saving the Forests has concluded.

We send a mini-stack toward De Gaulle to try to deter his future incursions by sitting on a defensive position near his lands, and then focus our attention on razing Victoria's poorly placed Cities.

Since I won't be able to keep all of the territory due to other AIs' Cultural Borders being likely to close in, I choose to Liberate a resettled City to Willem.

In 1000 AD, Victoria's last City has been razed.

In 1010 AD, I complete The Taj Mahal and two turns later, Ragnar starts losing his Cities to me.

I Cease Fired with him briefly, but something appears to have been amiss--my Units probably got unexpectedly trapped in his Culture, or perhaps my Workers couldn't get into his territory, as I declared war again almost right away.

Willem is the next target, and with support from Roosevelt attacking Willem's southern City, we begin to make progress against Willem.


Vassals Can't Save Them
Oh, the fun begins, as Bismarck joins Joao. Just after I Cease fire again with Ragnar, Ragnar joins De Gaulle.

However, they don't lift a finger to help Willem and I painstakingly wade my way through Willem's territory, taking him down, while also completing The Statue of Liberty--a great Wonder for this map.

It is in 1310 AD that I manage to convince the first AI to create a Colony, and the march toward increasing the Domination Land Limit begins.

Joao is the next target, and after he loses a City, Bismarck loses hope in him and renounces Joao's protection.


A Weird Bug
Meanwhile, in 1410 AD, I found Mining Inc. This part doesn't go smoothly, as I think that I have run into a weird bug.

Normally, when you want to Culture Flip a City, you need to make it go into Revolt two times.

Actually, sometimes, a City appears to Revolt many times and not flip.

I think that a City which you gift away cannot flip back to you. I also think that if you are at war, a City cannot flip to you. But, I seem to recall other cases when it was not a gifted City and not in a war where a City has Revolted at least twice which does not flip back to us. There must be a lot of complicated rules in this area of the code.

Yet, this time, it is the opposite case: It appears that if an AI player's Colony has Cultural dominance over your City's square from one of their squares, if your City fails the Revolt check, your City IMMEDIATELY becomes the property of that Colony!!!

I lost at least two Cities this way in this game, and one of them was my Double-Holy-Shrine, Mining-Inc-containing City!


Further Items
At this point, Joao is probably our toughest remaining competitor, given that Roosevelt continues to be Friendly toward us.

I seem not to have bothered to Cease Fire with Bismarck and just went on to go after his Cities after taking down Joao.

There were too many settled Great People and Great Generals in Cities which I had planned to raze and resettle with junky gift Cities for the AIs.

Instead, by greedily keeping a lot of Cities, I knew that I would be forced to increase the Domination Land Limit.

Thus, a tedious and extensive time period was spent causing the AIs to create a lot of Colonies.

Roosevelt stole some Wonders out from under my nose, including The Kremlin and Broadway. I think that having The Kremlin allowed him to whip Broadway earlier than I had expected that he could, with him daring to cut his capital's population in half just to secure it. Okay, if you really want it that badly, I will trade one of my excessive Resources back to you for the Resource that you "created."

With the exhausting work done of getting the AIs to create too many Colonies to count, I was able to populate nearly all of the branches of the tree and part of Right Presents Island, leaving a few scattered AI Cities in the north. Roosevelt kept most of the base of the tree trunk, except for a couple of Cities that I'd taken from Isabella which managed to hold out against massive Cultural pressure due to those two Cities of mine having built Cathedrals and The Hermitage.

Roosevelt's Land Area = 25%, and quite secure with that amount, with his multiple Wonders, including The Sistine Chapel.
Domination Land Limit = 74% (up from the original 60%).
With about 8 other AI Cities in existence, I was safe from triggering a Domination Victory.

Interestingly, after having eliminated all of the original AIs other than Roosevelt, both of Victoria and Isabella made comebacks and thus they existed at the end of the game, even after having died earlier in the game. Zombie AIs!

As for the Space Ship Parts, I started building them in multiple Cities before completing Research, as I didn't have amazing production in many Cities. I think that this approach worked out well for this map. Contrast this concept with some players saying that they don't build the Space Ship Parts until all of their Research has been completed, which might make sense on a map with multiple high-production Cities, such as on a map with more land or on a map with many more Mining Inc Resources.

I managed a Space date in the 1800s. The game will hopefully be competitive for Score, as I doubt that anyone else would have taken the time to increase the Domination Land Limit, with a focus on Sid's Sushi bringing our Citizen count up to 920 Citizens.

Thanks for the fun map setup! The presents were a nice touch. It seems that they were built without Modern Resources, meaning that we did not miss out if the AIs got to them first. Really cool write-ups from a lot of players! Keep up the great work!
 
Last edited:
how would you go about making/influencing AIs to create colonies?
Rules
The rules for an AI creating a Colony:
1. The player's Palace must exist on one landmass and the Potential Colony must consist of 2 or more Cities on a second landmass.

Obviously, the game's settings must allow players to create a Colony. If Vassal States are disabled, Colonies cannot be created.

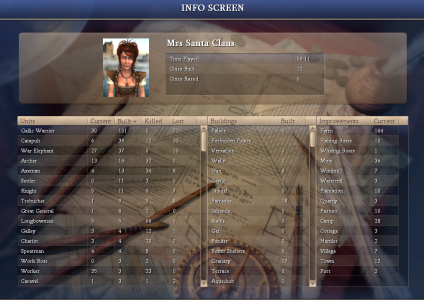
If you look at a City Screen view and hover your mouse over top of the Maintenance area, you will get a breakdown of the Maintenance types.

On a landmass where you are eligible to create a Colony (your Palace is not there and you own at least 2 Cities on that landmass), the Maintenance breakdown will list Colony Maintenance.

The AIs use this Colony Maintenance value in determining whether or not to make a Colony.

I believe that it goes something like the following, consisting of values from that particular player's Cities:
a) Add up all of the Colony Maintenance values on that landmass
b) Add up all of the Hammers, Flasks, and Gold earned from that player's Cities on that landmass

2. If a) is bigger than b), and possibly even if the values are tied with each other, then that AI player is eligible to create a Colony.

3. Next, I think that the rule is that this AI player must not be at war. It could instead be that there are no nearby threatening Units, but I've only had luck with an AI creating a Colony when they are not at war, and thus I believe that the rule is when the AI player is not at war.

I am uncertain how Minor Civs would count--in our recent 2023 game, we only had a single landmass and thus Colonies could not be created, anyway.

This point should make you start to realise that you need at least 2 landmasses. Even a one-square island can be sufficient as one of the 2 landmasses, since that one-square island can be the landmass which holds the Palace.

From your own experience in a multiple-landmass map, you may recall that 2 Cities on a separate landmass are quite affordable, and 3 Cities is about the maximum reasonably affordable amount, with any higher City count getting considerably more expensive for Colony Maintenance in all of the Cities on that landmass.


Strategies
It helps if you have disposable Cities that you are comfortable not being able to use for a period of time.

It helps if your disposable Cities have reached Size 2 at any point in time, while under the control of any player, so that they will not be auto-razed when captured. Replacing Cities with Settlers repeatedly can be quite expensive.

If you plan to reuse Cities, it can help to have 0 of your own Culture in those Cities for 2 possible reasons:
a) Upon recapture, the City will be in City Revolt for the maximum amount of time possible, which is 3 turns for a Size-1 City. That way, when we gift the City to set up the next Potential Colony, the City will contribute maybe roughly 1 to 2 Colony Maintenance (or perhaps still 0 Colony Maintenance; I am uncertain) and definitely 0 Hammers + Flasks + Gold.

b) Upon recapture, it might be possible to get credit for Liberating a City to an AI. If no player has Culture in the City, then distance rules come into play for Liberation credit. Note that distance to a Palace on another landmass is not the same as distance to a Palace on the same landmass, as another landmass is considered to be "much farther away" than our normal distance calculation. If another player has dominant Culture in that City, we might get Liberation credit if that other player's Palace is reasonably close (but does not necessarily have to be the closest).

In many cases, ideally, we want an AI to create a Colony out of 3 Cities. That way, it can be much faster to create successive Colonies. That fact is because an AI player will accept a gifted City on another landmass when that AI player has 3 or less Cities. Thus, a newly formed Colony could be gifted a City on another landmass. I'll leave it to the reader as an exercise to imagine some of the possibilities that these facts set up, although I will end up mentioning some of them.

If we want to have the same AI player create a second Colony on the same landmass that the AI player created its first Colony, all of the Cities of the first Colony must no longer exist on that landmass. It could be that you eliminate the Colony or it could be that said Colony survives in another City on another landmass.

In my experience, the AI may need as many as 7 Cities on the second landmass before that AI will create a Colony. I've been able to do it with the AI having 3 Cities. It may be possible to do it with 2 Cities, but I'm not sure that I have done it with less than 3 Cities. 1 City would be impossible.

Cities in Revolt MAY or MAY NOT contribute to the Colony Maintenance count--I am uncertain. However, they WILL NOT contribute to the Hammers + Flasks + Gold count. Thus, Cities being in revolt at the end of our turn are highly desireable.

If the Cities cannot be in Revolt, can we influence the AI not to earn Hammers, Flasks, and Gold?
a) How about... if the City is Size 1 and there is a G Pig (not a G Riv Pig) within that City's Cultural Borders? It provides 6 Food and thus it's likely to be the square that gets priority to be worked by the City's Citizen. 6 Food provides 0 Hammers, 0 Flasks, and 0 Gold. There is still the City Centre square and there are still Trade Routes, though.

b) What if a City is not Coastal, not on a River, and does not have any Roads or Railroads connected to it? It won't have any Trade Routes. Trade Routes typically become Flasks and/or Gold.

The "ease" of creating multiple Colonies comes from an AI only having 3 Cities in its Colony. If we need to provide at least 4 Cities, then there's not much concern with having to give away more Cities so that the Potential Colony's City count is 5, 6, or 7. Basically, if the AI isn't making a Colony with only 3 Cities, and I have extra disposable Cities on hand, and that AI's tech level is low enough that the garrison Units won't be too difficult to kill, I might just go ahead and gift up to 7 Cities, so that the creation of the Colony is almost guaranteed to happen on the following turn.

As for which garrison Units get created, they might be: Warriors if you are lucky, Muskets or Riflemen if it's later in the game, Infantry if you are unlucky, and Axemen/Macemen if is still earlier in the game but you give away a City settled on Copper/Iron and/or have not Pillaged all sources of Copper/Iron that are within the Potential Colony's Cultural Borders.


Tactics for an Existing AI's Cities on another Landmass
Privateers can help considerably with an AI's Cities which are not in Revolt. A Privateer can be used to set up a Blockade that cuts off Trade Routes. Trade Routes are one source of Flasks and Gold. Note that when you are at war, other boats can be used to set up a Blockade, but then the war would prevent the AI from creating a Colony.

If an AI has multiple Cities on another reasonably large landmass, you can gift/Liberate additional Cities to that AI on the same landmass to encourage that AI to create a Colony.


Tactics when using your own Gift Cities
Try to capture 3 Cities and while those Cities are still in Revolt, gift them to an AI which is eligible to form a Colony on that landmass. Eligible, as we recall, means their Palace on another landmass, that AI not being at war with any player, and that player's Vassals (which include Colonies) not having any Cities on the landmass where you would like to have a Colony created.

When moving a player's Palace to another landmass, you may get lucky with a Palace's movements, but the most reliable way of moving another player's Palace to another landmass is to first ensure that said player actually owns a City on another landmass and then capture all of that player's other Cities. With only 1 City remaining in the hands of that AI, said City will automatically become that AI's Palace City.

Be careful of Diplomacy. You'll need a lot of warring. It may not be wise to do this stuff at a point in time where you still need reliable trading partners, as your war declarations on multiple AIs are likely to anger all of the other AIs. Do remember that you have one potential weapon in your arsenal to counter this diplomatic effect: an AI will only count your war target as a Friend if the average relationship is Pleased or higher with every member of that Team, rounded down.

A Team will consist of a Master, its Vassals (and hence Colonies), and its Permanent Allies.


Summary
Overall, it can be a lot of work to influence an AI to make a Colony. The investment in resources can be pretty high.

Consider that by being less greedy, one could keep less Cities, could leave the original AIs in place with their large Cultural Borders, and could simply focus on making one's existing Cities be productive. Strategically, this approach is probably better on most maps.

That said, it can be quite a lot of fun to cause AIs to create Colonies.

It can also offer peace-of-mind on a map where you are likely to be ever-checking the Domination Land Limit, although I will caution you that you will want to plan to increase the Domination Land Limit much earlier than nearly reaching it, probably when you have about 35% to 50% of the world's Land Area. If you get too much more Land Area before you start causing the AIs to create Colonies, you might accidentally trip Domination when the changing Cultural Borders cause your other Cities to expand more culturally than you had planned.


Further Research Needed
As you can see, there is some code-diving that could help, here.

Does Colony Maintenance count at 0 or as a greater value than 0 when a City is in Revolt?

When there is a tie between of a) and b), can an AI create a Colony?

What XML factors may contribute to an AI being willing or unwilling to create a Colony? I have noted anecdotally that some AIs appear to be more willing to create a Colony than other AIs, and it could perhaps be that an XML value affects one of or both of a) or b) as a multiplying value.
 
Top Bottom