Sparthage
Fighting Tyranny
After writing stories for the first couple of events, I realized how long it would take me to write a story for every event. So, from now on this will be a Story/Game hybrid. But now, to the game.
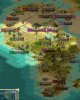
110 BC- The CDS Entremont finds the Arabians in Alaska. They aren’t advanced, but they are in the Middle Ages. That’s probably from an advanced West Coast civilization or the Persians who are a couple techs behind me.

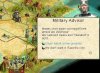
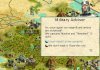
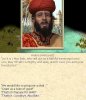
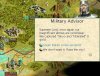
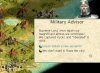
IBT- I wasn’t expecting much to happen but then the Sumerians moved a horseman into my territory followed by this message…

Well. That’s just great. I’m now at war with a North Asian power in the Ancient Age. I press enter and the horseman attacks and defeats a regular Pikeman in Gergovia. Surprisingly this is the only combat from the Sumerians. This is a first in the game, the first time an AI civilization has declared war on me. I guess that’s what I get for going with Super-aggressive AI. The pikeman will be avenged, but the Japanese are my main concern at this time, the Sumerians will face the wrath of the Celts eventually. Gilgamesh, after all, is a warmongering fool.
90 BC (IBT) - Two veteran Sumerian horsemen attack the 8th Gallic Swordsman in Gergovia, the first is killed without any trouble, and the second one results in the 8th GS being promoted to elite, my first.
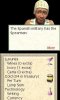
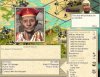
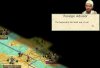
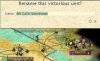
70 BC- With no Sumerians in my territory, I decide to make an incursion into Iroquois territory. To my surprise they have at least one Musketman guarding the city. I quickly build an embassy in Salamanca and…

They have SIX Musketmen in Salamanca alone. After this I try to get them into an alliance against the Sumerians, they refuse. But, they will take a ROP from me, an I agree. With my diplomacy done, I move in the 8th Gallic Sword to attack the original Sumerian offender…
The 8th Gallic Swordsman Division was the most experienced in the entire Celtic Army. Having been the defenders of Gergovia for over 40 years, and having fought and killed over 1000 Sumerians, they knew how to fight. But their current commander was not satisfied with this policy of defense and crossed the plains to the Iroquois border.
At dawn the Sumerians were shocked to see Celtic forces bearing down upon them. The officers rallied the men and mounted their horses. They then charged out of camp to give battle to the Celts. However, the Sumerians were operating at half-strength, while the Celts had 1000 swordsmen.
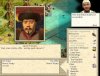
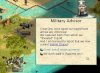
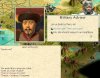
With first contact, the Sumerians were able to kill 200 swordsmen from their advantageous position above the Celts. But then they met Vercingetorix. He led his men to chop off the Sumerian horses’ legs and then butcher the fallen rider. After only an hour, all 400 horsemen lay dead. To commemorate Vercingetorix’s victory the Celtic Army named him a hero, and ordered him to Entremont. When he arrived they would decide what they should do with his awe-inspiring bravery.

So yes, I got my first leader out of a war I wasn’t expecting. Thank you Gilgamesh, your death will be swift because of your service to the Celtic people.
50 BC- Vercingetorix arrived in the capital and was greeted by King Brennus himself. King Brennus explained to him what he would be assigned to do for the remainder of his life, which would be as long as he fought well against the enemies of the Celts. Vercingetorix was assigned command over 2400 Celtic Knights, the most powerful division of the Celtic Army. With his command and immortality ensured, Vercingetorix was ordered to the Japanese border where he would lead the upcoming war.
With the arrival of Vercingetorix I built an army and filled it with 3 Knights and sent it to the border.
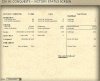
Meanwhile, the CDS Camulodunum makes first contact with the Koreans and Babylonians. The Babylonians have no visible coastal cities, and are not advanced. The Koreans have even fewer technologies than the Babylonians, and are the least advanced civilization that I know.


10 BC- The 13th Gallic Swordsman Division retreats after cutting an Enkidu Warrior’s numbers in half. Then the 11th Gallic Sword is killed by an elite archer taking 3/5’s damage. With my last available Gallic Swordsman, the 12th Division, I kill the Enkidu that had been halved earlier.
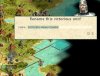
With combat outside of Gergovia done I move on to the Japanese. My forces are finally ready, and I make it know to Tokugawa that he is now at war with the Celtic Empire.

Immediately, my army, under the control of Vercingetorix, attacks and kills the two veteran spearmen who defended Tokyo.

But in taking Tokyo, the Army loses 1200 men. The mounted divisions (Gallic Heavy Cavalry and Knights) fortify northeast of the city and await the Japanese forces.
10 BC (IBT) - The Japanese move 6 units into the Jungle SE of Tokyo: 1 Spearman, 4 Swordsmen, and 1 Archer. They will be attacked by my forces next turn.
10 AD- The 4th Knight attacks and kills the spearman, and to my pleasant surprise, becomes my second elite unit. After this victory the 5th Knight Division kills a veteran swordsman. The 6th Knight has more trouble, and is redlined, but defeats another veteran swordsman. With two victories under my belt, I send in the 12th Gallic Heavy Cavalry. They are killed and only manage to knock one HP off of the top veteran sword. The 11th Heavy Cavalry is redlined, but kills another veteran swordsman, and becomes the third Celtic elite unit. With one loss and two promotions, I send in the 10th Heavy cavalry. It is redlined and retreats after doing nothing to the injured swordsman. Fortunately, it isn’t promoted, and I attack again with the 9th Heavy Cavalry. After losing 2/5 HP it kills the swordsman and only the archer remains. To finish off the stack, I send in the 1st Heavy Cavalry. Once again my unit fails to meet expectations and loses 3/5 HP before finally killing the veteran archer. The non-injured units then move into the jungle and wait, while the others move to Tokyo to be healed.
10 AD (IBT) - Japan tries to retake the jungle by sending two swordsmen. The first one halves the 5th Knight Division and they are promoted to elite, my fourth. This is followed by the 5th Heavy Cavalry being redlined, and then being promoted to elite as well. The Japanese see that taking the square isn’t worth their entire offensive force, and stop attacking. Instead, they fortify 2 spearmen divisions next to my mounted units.
30 AD- Japanese Front: The 5th Knight wipes out the pathetic spearman, and the 4th Knight Division butchers the other spear while it loses 1 HP. They are then pulled back to the Jungle, where several of my units have fortified. The 1st Army then wipes out a veteran swordsman who was in attack range.
Sumerian Front: The 12th Gallic Swordsman halves a veteran sword, is redlined and retreats.
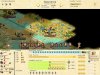
With combat out of the way, I renegotiate peace with Gandhi yet again. This time for an alliance against the Japanese and Education while I am forced to give them horses, not like they’ll use them. After trading for Education, I trade it to the Aztecs, along with 21 gold, for Invention. Another peace treaty is signed when I gain 2 gpt as tribute from the Iroquois.
30 AD (IBT) - A Sumerian horseman attacks a pikeman division that was outside of Agedincum. The Sumerian is redlined, but kills the pikeman. These Sumerian horsemen are brutal against fortified pikemen!
The Japanese are busy with the Indians. They attack and kill a warrior in addition to capturing a couple workers with a spearman. Gandhi retaliates by attacking and killing a redlined swordsman with an archer division.
50 AD- My orders to the 4th Heavy Cavalry Division are to liberate the 2 Indian workers who were captured by the Japanese in their turn. They smash the spearman, losing 200 men, and recapturing the two workers.
The main Celtic force had arrived on the mountain north of Kyoto. Vercingetorix ordered his army to attack Kyoto, and the Japanese sent 2,400 spearmen to defend against him. They arranged themselves in a deep rectangle formation that had each division backed by another. The first division was able to inflict 400 casualties on the knights, but was eventually wiped out and the Celts continued on to the second division. Vercingetorix led his men straight into the Japanese center where they penetrated deep into the spearmen, killing left and right. The only spearmen that remained between Vercingetorix and the gates of Kyoto locked shields and were able to kill nearly 600 knights before they too were killed.
Vercingetorix saw that his men were exhausted and ordered a retreat to the mountain camp where they would be safe. The honor of capturing the Japanese capital would fall upon the 14th Gallic Swordsman division who only had to face a swordsman division.
The commander of the 14th charged down the mountain against the unprepared Japanese and quickly made mincemeat of them. Kyoto and two workers were Celtic, and the rest of the Celtic army moved into it.

Sumerian Front: The 7th Knight division attacked an Enkidu Warrior, was halved, but killed the stupid AI unit.
50 AD (IBT) - The Japanese attack a pukeman on a hill south of Kyoto with a swordsman. As expected the pukeman is killed and the Japanese swordsman gets a promotion despite being halved. They then follow it up with yet another swordsman attack, this time against the 4th Gallic Heavy Cavalry who was on a mountain. The swordsman is killed, and the 4th is promoted to elite!
70 AD- Sumerian Front: The 12th Gallic Swordsman division kills 200 Sumerian swordsmen out of 800 while being redlined and retreating. This attack is followed by the 13th Gallic Swordsman who is also redlined, but kills the offending swordsman.
Japanese Front: The 4th Knight division with 1000 men, loses 200 and kills a veteran swordsman that had landed northeast of Kyoto.
70 AD (IBT) - Japan requests an audience, but is declined. I have no intention on making peace with you at this time, Tokugawa. With my Knights against your spearmen, what makes you think that I’ll let you keep that iron near Osaka?
90 AD- The CDS Richborough (G-05) sinks in the Arctic Ocean after meeting the Russians. Man, I’m losing too many galleys in seas and oceans.
Sumerian Front: We see a <spear> when the 8th Knight is killed by a redlined veteran archer! With my two other offensive units recovering in Gergovia, I don’t risk attacking it again.
Japanese Front: The 4th Heavy Cavalry kills a veteran spearman after losing 1 HP.
90 AD (IBT) - We see a Indian War Elephant, nice to see they aren’t using those horses that I gave them.
110 AD- Entremont completes the Epic of Vercingetorix, a tale of how he drove Sumerian fools from the lands of the Celts. This inspires many young Celts to joint the military.
Meanwhile the 13th Heavy Cavalry follows the tradition, and kills off 800 Sumerian swordsmen.
130 AD- The CDS Verulamium (G-06), a regular galley, sinks a Japanese ship near Madras after taking heavy damage. This is the first ever victory by a Celtic ship, and the Naval Advisor breathes a sigh of relief.
Japanese Front: Since the main Celtic Army is now healthy I move them to the hill south of Kyoto, providing a defense for them.
130 AD (IBT) - The Sumerians mass a huge attack on Gergovia and lose 3 Swordsman divisions while I lose a pukeman and Knight Division. This loss is followed by the loss of the 5th Knight division to an elite swordsman, who generates a great leader for them and is sent back to Osaka. Moments like these make me glad that the AI doesn’t use armies.
Chapter IV: The Medieval Wars
Part 1: A Two-Front War
Part 1: A Two-Front War
110 BC- The CDS Entremont finds the Arabians in Alaska. They aren’t advanced, but they are in the Middle Ages. That’s probably from an advanced West Coast civilization or the Persians who are a couple techs behind me.
IBT- I wasn’t expecting much to happen but then the Sumerians moved a horseman into my territory followed by this message…
Well. That’s just great. I’m now at war with a North Asian power in the Ancient Age. I press enter and the horseman attacks and defeats a regular Pikeman in Gergovia. Surprisingly this is the only combat from the Sumerians. This is a first in the game, the first time an AI civilization has declared war on me. I guess that’s what I get for going with Super-aggressive AI. The pikeman will be avenged, but the Japanese are my main concern at this time, the Sumerians will face the wrath of the Celts eventually. Gilgamesh, after all, is a warmongering fool.
90 BC (IBT) - Two veteran Sumerian horsemen attack the 8th Gallic Swordsman in Gergovia, the first is killed without any trouble, and the second one results in the 8th GS being promoted to elite, my first.
70 BC- With no Sumerians in my territory, I decide to make an incursion into Iroquois territory. To my surprise they have at least one Musketman guarding the city. I quickly build an embassy in Salamanca and…
They have SIX Musketmen in Salamanca alone. After this I try to get them into an alliance against the Sumerians, they refuse. But, they will take a ROP from me, an I agree. With my diplomacy done, I move in the 8th Gallic Sword to attack the original Sumerian offender…
The 8th Gallic Swordsman Division was the most experienced in the entire Celtic Army. Having been the defenders of Gergovia for over 40 years, and having fought and killed over 1000 Sumerians, they knew how to fight. But their current commander was not satisfied with this policy of defense and crossed the plains to the Iroquois border.
At dawn the Sumerians were shocked to see Celtic forces bearing down upon them. The officers rallied the men and mounted their horses. They then charged out of camp to give battle to the Celts. However, the Sumerians were operating at half-strength, while the Celts had 1000 swordsmen.
With first contact, the Sumerians were able to kill 200 swordsmen from their advantageous position above the Celts. But then they met Vercingetorix. He led his men to chop off the Sumerian horses’ legs and then butcher the fallen rider. After only an hour, all 400 horsemen lay dead. To commemorate Vercingetorix’s victory the Celtic Army named him a hero, and ordered him to Entremont. When he arrived they would decide what they should do with his awe-inspiring bravery.
So yes, I got my first leader out of a war I wasn’t expecting. Thank you Gilgamesh, your death will be swift because of your service to the Celtic people.
50 BC- Vercingetorix arrived in the capital and was greeted by King Brennus himself. King Brennus explained to him what he would be assigned to do for the remainder of his life, which would be as long as he fought well against the enemies of the Celts. Vercingetorix was assigned command over 2400 Celtic Knights, the most powerful division of the Celtic Army. With his command and immortality ensured, Vercingetorix was ordered to the Japanese border where he would lead the upcoming war.
With the arrival of Vercingetorix I built an army and filled it with 3 Knights and sent it to the border.
Meanwhile, the CDS Camulodunum makes first contact with the Koreans and Babylonians. The Babylonians have no visible coastal cities, and are not advanced. The Koreans have even fewer technologies than the Babylonians, and are the least advanced civilization that I know.
10 BC- The 13th Gallic Swordsman Division retreats after cutting an Enkidu Warrior’s numbers in half. Then the 11th Gallic Sword is killed by an elite archer taking 3/5’s damage. With my last available Gallic Swordsman, the 12th Division, I kill the Enkidu that had been halved earlier.
With combat outside of Gergovia done I move on to the Japanese. My forces are finally ready, and I make it know to Tokugawa that he is now at war with the Celtic Empire.
Immediately, my army, under the control of Vercingetorix, attacks and kills the two veteran spearmen who defended Tokyo.
But in taking Tokyo, the Army loses 1200 men. The mounted divisions (Gallic Heavy Cavalry and Knights) fortify northeast of the city and await the Japanese forces.
10 BC (IBT) - The Japanese move 6 units into the Jungle SE of Tokyo: 1 Spearman, 4 Swordsmen, and 1 Archer. They will be attacked by my forces next turn.
10 AD- The 4th Knight attacks and kills the spearman, and to my pleasant surprise, becomes my second elite unit. After this victory the 5th Knight Division kills a veteran swordsman. The 6th Knight has more trouble, and is redlined, but defeats another veteran swordsman. With two victories under my belt, I send in the 12th Gallic Heavy Cavalry. They are killed and only manage to knock one HP off of the top veteran sword. The 11th Heavy Cavalry is redlined, but kills another veteran swordsman, and becomes the third Celtic elite unit. With one loss and two promotions, I send in the 10th Heavy cavalry. It is redlined and retreats after doing nothing to the injured swordsman. Fortunately, it isn’t promoted, and I attack again with the 9th Heavy Cavalry. After losing 2/5 HP it kills the swordsman and only the archer remains. To finish off the stack, I send in the 1st Heavy Cavalry. Once again my unit fails to meet expectations and loses 3/5 HP before finally killing the veteran archer. The non-injured units then move into the jungle and wait, while the others move to Tokyo to be healed.
10 AD (IBT) - Japan tries to retake the jungle by sending two swordsmen. The first one halves the 5th Knight Division and they are promoted to elite, my fourth. This is followed by the 5th Heavy Cavalry being redlined, and then being promoted to elite as well. The Japanese see that taking the square isn’t worth their entire offensive force, and stop attacking. Instead, they fortify 2 spearmen divisions next to my mounted units.
30 AD- Japanese Front: The 5th Knight wipes out the pathetic spearman, and the 4th Knight Division butchers the other spear while it loses 1 HP. They are then pulled back to the Jungle, where several of my units have fortified. The 1st Army then wipes out a veteran swordsman who was in attack range.
Sumerian Front: The 12th Gallic Swordsman halves a veteran sword, is redlined and retreats.
With combat out of the way, I renegotiate peace with Gandhi yet again. This time for an alliance against the Japanese and Education while I am forced to give them horses, not like they’ll use them. After trading for Education, I trade it to the Aztecs, along with 21 gold, for Invention. Another peace treaty is signed when I gain 2 gpt as tribute from the Iroquois.
30 AD (IBT) - A Sumerian horseman attacks a pikeman division that was outside of Agedincum. The Sumerian is redlined, but kills the pikeman. These Sumerian horsemen are brutal against fortified pikemen!
The Japanese are busy with the Indians. They attack and kill a warrior in addition to capturing a couple workers with a spearman. Gandhi retaliates by attacking and killing a redlined swordsman with an archer division.
50 AD- My orders to the 4th Heavy Cavalry Division are to liberate the 2 Indian workers who were captured by the Japanese in their turn. They smash the spearman, losing 200 men, and recapturing the two workers.
The main Celtic force had arrived on the mountain north of Kyoto. Vercingetorix ordered his army to attack Kyoto, and the Japanese sent 2,400 spearmen to defend against him. They arranged themselves in a deep rectangle formation that had each division backed by another. The first division was able to inflict 400 casualties on the knights, but was eventually wiped out and the Celts continued on to the second division. Vercingetorix led his men straight into the Japanese center where they penetrated deep into the spearmen, killing left and right. The only spearmen that remained between Vercingetorix and the gates of Kyoto locked shields and were able to kill nearly 600 knights before they too were killed.
Vercingetorix saw that his men were exhausted and ordered a retreat to the mountain camp where they would be safe. The honor of capturing the Japanese capital would fall upon the 14th Gallic Swordsman division who only had to face a swordsman division.
The commander of the 14th charged down the mountain against the unprepared Japanese and quickly made mincemeat of them. Kyoto and two workers were Celtic, and the rest of the Celtic army moved into it.
Sumerian Front: The 7th Knight division attacked an Enkidu Warrior, was halved, but killed the stupid AI unit.
50 AD (IBT) - The Japanese attack a pukeman on a hill south of Kyoto with a swordsman. As expected the pukeman is killed and the Japanese swordsman gets a promotion despite being halved. They then follow it up with yet another swordsman attack, this time against the 4th Gallic Heavy Cavalry who was on a mountain. The swordsman is killed, and the 4th is promoted to elite!
70 AD- Sumerian Front: The 12th Gallic Swordsman division kills 200 Sumerian swordsmen out of 800 while being redlined and retreating. This attack is followed by the 13th Gallic Swordsman who is also redlined, but kills the offending swordsman.
Japanese Front: The 4th Knight division with 1000 men, loses 200 and kills a veteran swordsman that had landed northeast of Kyoto.
70 AD (IBT) - Japan requests an audience, but is declined. I have no intention on making peace with you at this time, Tokugawa. With my Knights against your spearmen, what makes you think that I’ll let you keep that iron near Osaka?
90 AD- The CDS Richborough (G-05) sinks in the Arctic Ocean after meeting the Russians. Man, I’m losing too many galleys in seas and oceans.
Sumerian Front: We see a <spear> when the 8th Knight is killed by a redlined veteran archer! With my two other offensive units recovering in Gergovia, I don’t risk attacking it again.
Japanese Front: The 4th Heavy Cavalry kills a veteran spearman after losing 1 HP.
90 AD (IBT) - We see a Indian War Elephant, nice to see they aren’t using those horses that I gave them.
110 AD- Entremont completes the Epic of Vercingetorix, a tale of how he drove Sumerian fools from the lands of the Celts. This inspires many young Celts to joint the military.
Meanwhile the 13th Heavy Cavalry follows the tradition, and kills off 800 Sumerian swordsmen.
130 AD- The CDS Verulamium (G-06), a regular galley, sinks a Japanese ship near Madras after taking heavy damage. This is the first ever victory by a Celtic ship, and the Naval Advisor breathes a sigh of relief.
Japanese Front: Since the main Celtic Army is now healthy I move them to the hill south of Kyoto, providing a defense for them.
130 AD (IBT) - The Sumerians mass a huge attack on Gergovia and lose 3 Swordsman divisions while I lose a pukeman and Knight Division. This loss is followed by the loss of the 5th Knight division to an elite swordsman, who generates a great leader for them and is sent back to Osaka. Moments like these make me glad that the AI doesn’t use armies.
Attachments
-
 First Contact Arabians.JPG45.4 KB · Views: 1,599
 -
 Sumerian declaration 1.JPG49.7 KB · Views: 1,422
 -
 Salamanca Embassy.JPG176.2 KB · Views: 1,435
 -
 First Contact Babylon.JPG37.6 KB · Views: 1,400
 -
 First Contact Koreans.JPG31.8 KB · Views: 1,380
 -
 First Great Leader.JPG45.1 KB · Views: 1,426
 -
 Tokyo Captured.JPG71.4 KB · Views: 1,384
 -
 Kyoto Captured.JPG56.3 KB · Views: 1,392
 -
 1st War with Japan.JPG89.8 KB · Views: 1,450