Blue Monkey
Archon Without Portfolio
Setting the colors manually is a bit more obscure in GIMP, you're right about that.
Here's a mini-tutorial. Probably much more detailed than you need, but for the sake of lurkers or people who stumble across it in a later search ...
Here's a mini-tutorial. Probably much more detailed than you need, but for the sake of lurkers or people who stumble across it in a later search ...
Spoiler GIMP Indexing PCX Tutorial :
The name could be anything but for purposes of the tutorial "pcx" layer refers to whatever layer you want your final image to be.
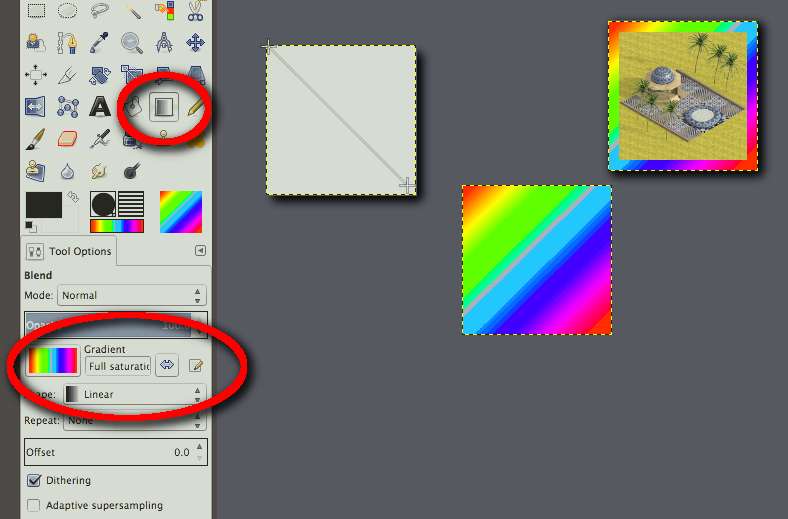
Make a Border
If your image has a lot of colors you can probably skip - or at least simplify - this step. Sometimes a border that is half magenta and half green works. But if you index with that or without a border at all you may end up with blanks. There's a later step where you can add more colors to the palette. Easy and quick if there are not too many.
If the image has only a few colors make a separate layer that is large enough to provide a border around the "pcx" layer. Then fill with a full spectrum or rainbow gradient. It is important to do the gradient at an angle. This insures that there is enough of the colors for the indexing process to notice them. This composite screenshot shows the layer by itself, then with the "pcx" layer visible on top of it.
Flatten the image or Merge all layers.
Index the image.
For some reason GIMP may set the number of colors to 255. This will most likely give you at least one blank slot in the palette. So manually set the number to 256.
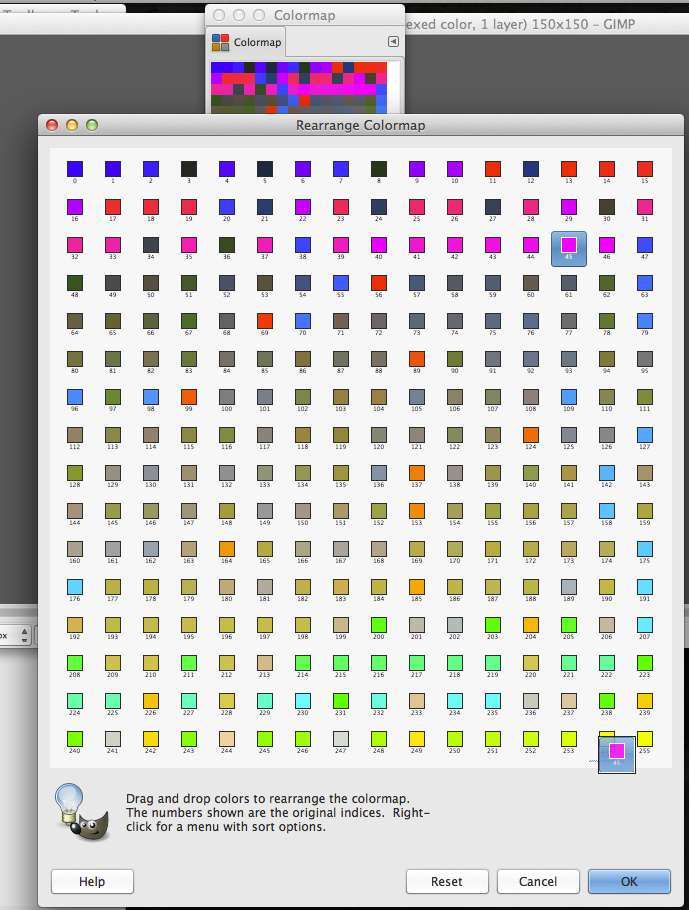
Rearrange the Colormap
GIMP uses "palette" to refer to premade palettes and "colormap" for the palette of a particular image. The palette of your indexed image will show up in the Palette dialog so this can be confusing. To edit it you need to work through the Colormap dialogue.

With the colormap in view, right-click and choose Rearrange Colormap. If you have blank spots (black squares toward end of colormap) use Add from Foreground or Background color before you start rearranging. Edit Color would let you change the exact color of whatever index location you have selected.(Editing Color explanation in GIMP online manual)

After selecting Rearrange Colormap the view changes. Here you can drag and drop until the colors are in the location you want.
Once it looks good click OK. If you open up the Colormap dialog again the green and magenta (or whatever else you use for the transparent colors) should be in the proper location.

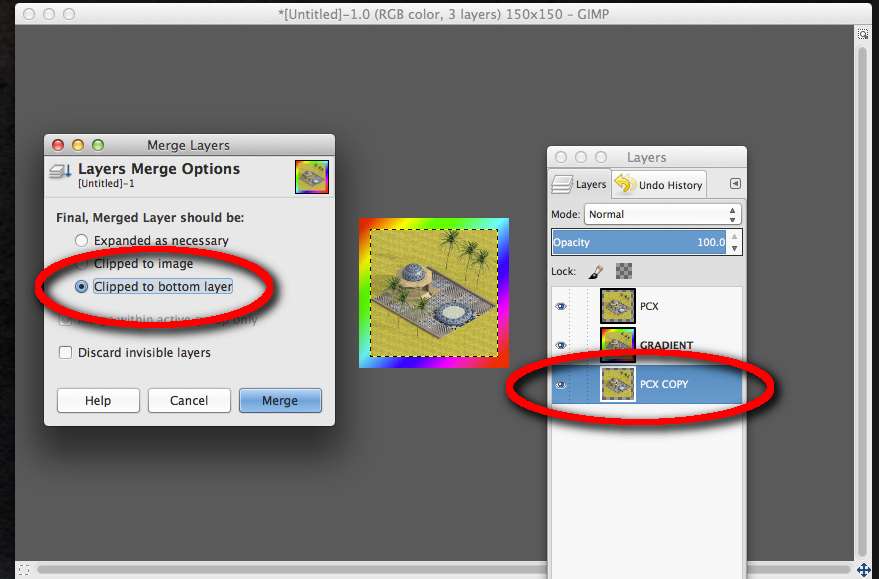
Crop the image
there are several ways to do this. Here's a trick that saves trying to select exactly the right pixels and is also good for merging several layers into a properly sized image. Duplicate the "pcx" layer and place it as the bottom layer. Then from the Image menu "Merge" all layers with the "Clipped to Bottom Layer" option selected.
Export the image
GIMP uses "Save" strictly for saving in xcf - GIMP's native format. "Save as" let's you change names or locations, but still only in xcf format. To get a .pcx you must Export.
After doing this a few times the process gets quick and the mind-hand-eye coordination sort of auto-piloted. When doing a whole batch of pcx images I've found that the sequence of: "merge (to crop), export, undo, delete layer, repeat" with an xcf file containing each pcx as a separate layer is a lot faster than going through the process with separate image files. But that's just my personal workflow. Do whatever works for you.
The GIMP online manual has fuller explanations. Sometimes it's hard to know how GIMP works - like the difference between palettes and colormaps. I've had the experience of not even knowing what dialogue or tool to look for, or what keywords to use in searching for online tutorials. As new versions are released tool locations and menus change, but a good book is still handy for knowing the quirky terminology and techniques GIMP uses. Personal favorite is Beginning GIMP: From Novice to Professional.
Make a Border
If your image has a lot of colors you can probably skip - or at least simplify - this step. Sometimes a border that is half magenta and half green works. But if you index with that or without a border at all you may end up with blanks. There's a later step where you can add more colors to the palette. Easy and quick if there are not too many.
If the image has only a few colors make a separate layer that is large enough to provide a border around the "pcx" layer. Then fill with a full spectrum or rainbow gradient. It is important to do the gradient at an angle. This insures that there is enough of the colors for the indexing process to notice them. This composite screenshot shows the layer by itself, then with the "pcx" layer visible on top of it.
Flatten the image or Merge all layers.
Index the image.
For some reason GIMP may set the number of colors to 255. This will most likely give you at least one blank slot in the palette. So manually set the number to 256.
Rearrange the Colormap
GIMP uses "palette" to refer to premade palettes and "colormap" for the palette of a particular image. The palette of your indexed image will show up in the Palette dialog so this can be confusing. To edit it you need to work through the Colormap dialogue.
With the colormap in view, right-click and choose Rearrange Colormap. If you have blank spots (black squares toward end of colormap) use Add from Foreground or Background color before you start rearranging. Edit Color would let you change the exact color of whatever index location you have selected.(Editing Color explanation in GIMP online manual)
After selecting Rearrange Colormap the view changes. Here you can drag and drop until the colors are in the location you want.
Once it looks good click OK. If you open up the Colormap dialog again the green and magenta (or whatever else you use for the transparent colors) should be in the proper location.
Crop the image
there are several ways to do this. Here's a trick that saves trying to select exactly the right pixels and is also good for merging several layers into a properly sized image. Duplicate the "pcx" layer and place it as the bottom layer. Then from the Image menu "Merge" all layers with the "Clipped to Bottom Layer" option selected.
Export the image
GIMP uses "Save" strictly for saving in xcf - GIMP's native format. "Save as" let's you change names or locations, but still only in xcf format. To get a .pcx you must Export.
After doing this a few times the process gets quick and the mind-hand-eye coordination sort of auto-piloted. When doing a whole batch of pcx images I've found that the sequence of: "merge (to crop), export, undo, delete layer, repeat" with an xcf file containing each pcx as a separate layer is a lot faster than going through the process with separate image files. But that's just my personal workflow. Do whatever works for you.
The GIMP online manual has fuller explanations. Sometimes it's hard to know how GIMP works - like the difference between palettes and colormaps. I've had the experience of not even knowing what dialogue or tool to look for, or what keywords to use in searching for online tutorials. As new versions are released tool locations and menus change, but a good book is still handy for knowing the quirky terminology and techniques GIMP uses. Personal favorite is Beginning GIMP: From Novice to Professional.
Last edited:
")

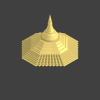
 ), yet it seems that currently this uv will look nice up to roughly half the zoom level you have it in the preview?