Don't know, sorry, but I wouldn't wonder. You could try to run it in compatibility mode (check the context menu and properties window of the exe) though.
Thank you for the wonderful fool-proof dummy's guide! It really helped an amateur like me to finish a flag job I really wanted done, but so far couldn't
There is actually nothing really wrong, I'd say. From your dds, I'd expect it to look like on your screenshot. The problem is, that the flag has a ratio of 4:3, but the flags dds needs to be quadratic (128x128 pixels). That's something you can't change, but if you aware of that behaviour, you don't need to either. Usually, you should ignore the rule that the dds needs to be quadratic at first. Simply create a flag thats ratio is 4:3, do all your changes and as last step resize your flag image to the quadratic size (again: 128x128 pixels). Then, the flag will be stretched when you look at the image file, but will be resized automatically when displayed within civ4.
I understand the ratio is 4:3, but I need an example in terms of Pixel size, because in game my image is stretched. I really don't understand what it should be.
As I mentioned in the introduction, there is also a second type of flags that consist of only two colours. Those colours are the teamcolours of the civilization the flag is assigned to. These flags are called decal flags. So let’s create such a flag! We will concentrate on methods here. That means that I will show you how to create a simple decal flag to teach you general facts. For more advanced techniques and GIMP specific tricks, search for tutorials focusing especially on GIMP.
Creating a valid flag image
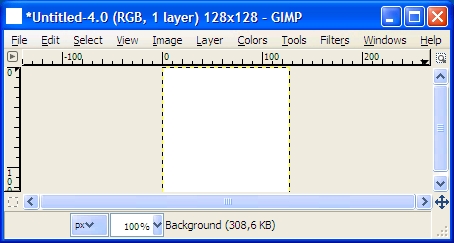
First step is to create a new image. Go to the main window, select File->New. In the opening window set both, width and height, to 128. This should create a white plain:
Spoiler:
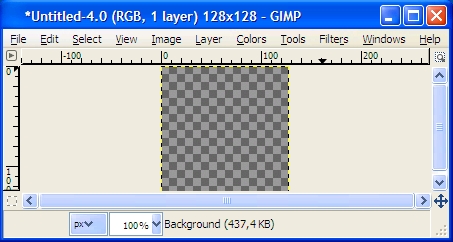
Now we’ll have to set up the alpha channel again. In the main window select Layer->Transparency->Add Alpha Channel, then Layer->Transparency->Threshold Alpha… A window will open which we already know from the non-decal flag part of this tutorial. From here on, there are two ways to continue. Either you push the bar to the right (or set the value to 255 if you prefer) and paint with the Paintbrush tool (from now on called method A), or you push the bar to the left (or set the value to 0) and then removing parts you don’t need (from now on method B). We will cover both methods here. No matter how you decide (which is, as we’ll see, truly only a question of taste), we going to use the toolbar window on the left now.
Method A.
Push the bar to the right or set the value to 255. Our image will turn into a squared plain, which means that it is completely transparent:
Spoiler:
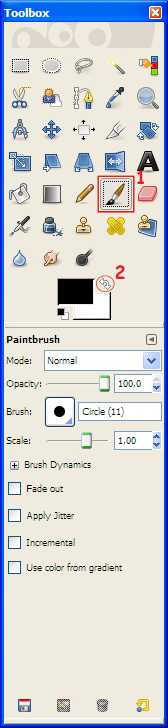
Now select the Paintbrush Tool from the toolbox on the left. I think the colour you will paint with, doesn’t make a difference, but for safety select white. Black and white should already be selected as default colours. Simply click on the double-sided arrow to swap their priority:
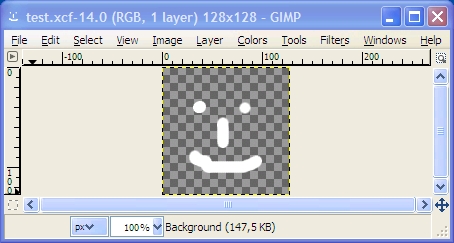
Now paint the structure that should be displayed in the civilizations secondary colour later. I will show you how to swap the colours in a moment, so even if you want to have this structure painted in the primary colour, this method is suitable. This is my result:
Spoiler:
Note: It is not necessary, that you paint your structure with the paintbrush tool. Instead you could also select something from another image and copy it to our image for example. As this is about the main ideas of creating civ4 flags, this is not topic of this tutorial. Search for a GIMP specific tutorial.
Method B.
Push the bar to the left or set the value to 0. Our image will keep to be plain white.
Choose the Rectangle Select Tool in the toolbox. Select an area you like to have in the civilizations primary colour and press DEL on your keyboard. The area will be deleted.
Note: Again, there are sincerely other tools and ways how to select the area to delete that may be more precise. For example you could select an area of a different image and use the selection for your civ4 flag image. Search for a GIMP tutorial for more detailed information.
Our picture is now ready. Save it via File->Save as… as dds. Keep care to save it as DXT3 (compression mode) and without mipmaps.
XML work
Last thing to do is XML work again. It’s very similar to what we’ve done when creating a non-decal flag. First of all we alter the CIV4ArtDefines_Civilization.xml file.
Again, make the <Path> entry suit to your flag file, but this time set the value of <bWhiteFlag> to 0. If you’d set it to 1, only your secondary colour would be used for the flag. The rest of it would be white. This could be useful in special cases. Think about the following: your civilization has two colours that absolutely don’t fit to each other. On the other side you don’t want to change them for some reason. In this case you could create a decal flag that consists of white and your civilizations secondary case. Well, that might conflict with the definition of a decal flag, but it is possible. But let’s come back to our XML files. We finished work on the CIV4ArtDefines_Civilization.xml. All we still have to do is setting the civilization colours and assign the colour set to our civilization. This has already been covered in the non-decal flag part of this tutorial and won’t be repeated here.
Alter the CIV4PlayerColorInfos.xml as described in the tutorials non-decal flag part.
This could be your Civ4_CivilizationInfos.xml:
(Highlighted text here should be the same as the one in the listing above.)
Conclusion
I will repeat some major points of creating decal flags here, because for beginners some things may be hard to understand at first. Also, when searching for and reading tutorials about GIMP you need to keep them in mind in order to figure out more advanced techniques of flag creation.
- Create a plain white image, wifth and height both 128 pixels
- Add an alpha channel and set its threshold. The threshold depends on the method you have decided for. Alpha channels usually control transparency, in our case they control which part of the flag will be displayed in which colour. Transparent parts (in GIMP shown as squared plains) will be displayed in your civilizations primary colour, the rest will be coloured in the secondary colour
- There are two methods to divide the flag in transparent and non-transparent areas: start with a plain white image and delete all unnecessary parts or start with a completely transparent image and paint the logo of your civilization; the alpha channel will be automatically updated when you make your changes, keep an eyes on the channel view during your work
- Set the bWhiteFlag tags value to 0
- This time there is no need to create two versions of the flag, unlike in case of non-decal flags
How to swap colours
This was part of another, old flag tutorial. I found that useful and thought it may be of interest for you. So I’ll show how to do that as well.
Theoretically you could simply swap the primary and the secondary colour of your civilization in the CIV4PlayerColorInfos.xml. But this would affect the borders colours as well, which may be undesired. Alternatively you could keep the xmls and work on the flag image instead. You would simply have to swap transparent and non-transparent areas there. That’s what we gonna do now, of course with GIMP.
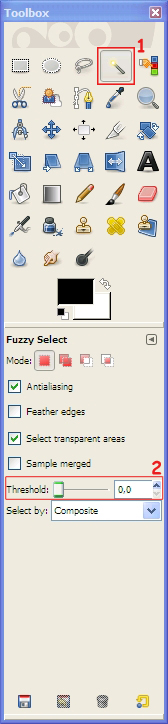
In GIMP, open a finished flag file that’s colours you’d like to swap. From the left toolbox window, choose the Fuzzy Select Tool which looks like a magic wand:
Spoiler:
1 - Fuzzy Select Tool
2 - Threshold of the Fuzzy Select Tool
With this tool, you can select whole areas of the same or similar colour of your image by clicking on that area. You can adjust its tolerance against similar colours (in other words how big the difference between the colour of the pixel you have clicked on and the colour of surrounding pixels can be in order to influence the size of the selected area or to ignore minor differences of the colours of neighbouring pixels) by changing the tools threshold (do not mix it up with the alpha threshold!). In this case you can keep the threshold as it is. With the Fuzzy Select Tool you can also select several areas (connected with each other or unconnected) by holding down the SHIFT key on your keyboard when selecting the areas. This way the new selection will be added to the already existing selection.
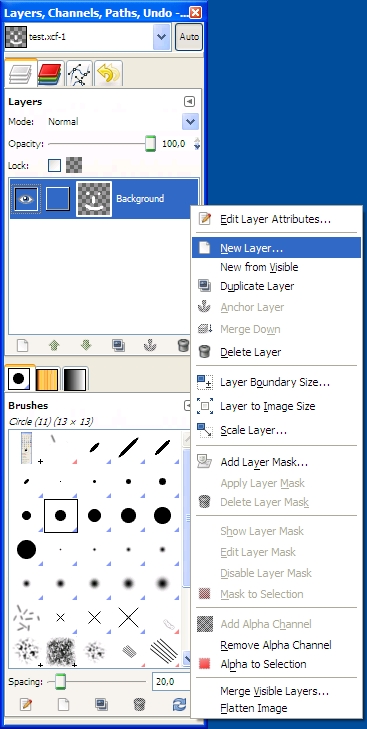
Again, you have two options to choose from: either select the transparent part, then choose Select->invert or select all non-transparent parts (without inverting the selection). Add a new layer. To do that, right-click on the existing layer in the layer view (right window) and choose New Layer… from the context menu:
Spoiler:
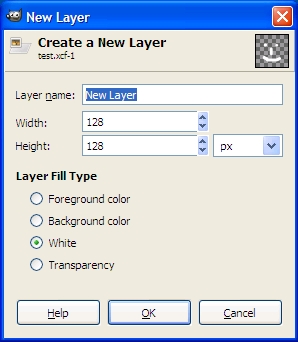
A window will open. Keep everything as it is except of the Layer Fill Type, which you should set to White:
Spoiler:
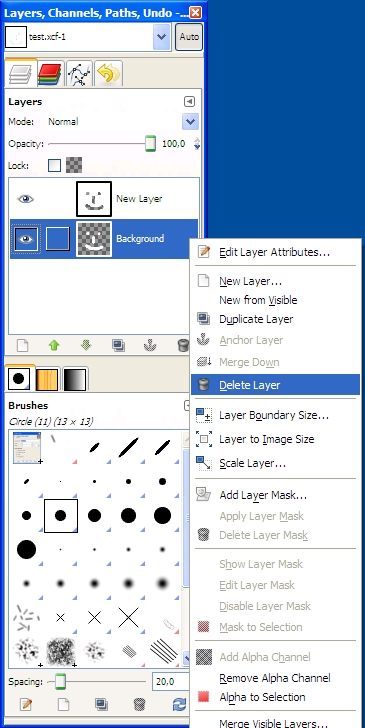
Your selection should still be active, as well as the new layer. Press DEL on your keyboard. Take a look at the layer view. You should see two layers, their transparent and non-transparent areas should be inverted. Now delete the old layer by right-clicking on it (make sure you haven’t clicked on the new layer) and select Delete Layer from the context menu:
Spoiler:
The result should be the exact opposite of your initial image. The alpha channel should be intact. Last thing to do, is saving the image as dds (compression mode: DXT3, no mipmaps). As mentioned before there is no additional xml work.
This site uses cookies to help personalise content, tailor your experience and to keep you logged in if you register.
By continuing to use this site, you are consenting to our use of cookies.
")