The Sound of Drums - A British Hearts of Iron II AAR
Part Fifty-Five
15th-17th October
The Battle of the Ionian Sea
The Italian naval build-up since the Great War had been designed to counter the British presence in the Mediterranean. Focusing on smaller, well-built ships, their aim was to avoid open combat while weakening the Royal Navys hold on British territories by striking their supply lines. Hit-and-run attacks on enemy fleets could be done with the larger battleships and heavy cruisers.
Domenico Cavagnari, chief of staff for the Italian navy, had not anticipated the large British build-up of forces in the Mediterranean. He was equally dismayed when the Kriegsmarine was destroyed in the North Sea, allowing the Grand Armada to reinforce the Royal Navy in the Mediterranean. With the loss of Libya, the need to continue the guerrilla tactics intensified, but with the sea thick with British ships the Italian fleet was barely able to leave port.
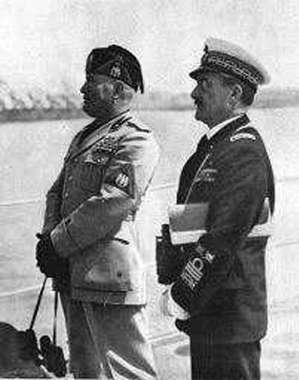
Mussolini and Cavagnari
The situation only became worse when the Grand Armada forced the First Squadra da Marina back to Sicily on the 3rd October. Terrified that the fleet would be blockaded like what had happened to the First Flotte at Rotterdam, Cavagnari ordered that the fleet receive minimal repair and sail east to Taranto at the earliest opportunity.
As it happened, Kozmos was not about to blockade Sicily, just to patrol the region around it. The speedy departure of the First Squadra was not anticipated by British Intelligence, and it managed to slip away undetected. Even when the escape was discovered, it was decided not to send Germanicus First Armada - then patrolling the Adriatic - to intercept as it was rightly believed the Italians would reach Taranto before them.
Admiral Brisonevi, leading the First Squadra were not heading for Taranto. Italian intelligence, displaying a rare moment of ability since the disastrous Libya campaign, discovered that the Second Fleet was about to enter the Ionian sea. A rare opportunity had presented itself - the weakest of the main Royal Navy fleets in the Mediterranean, the Second Fleet normally patrolled near the African coast or protected the supply convoys.
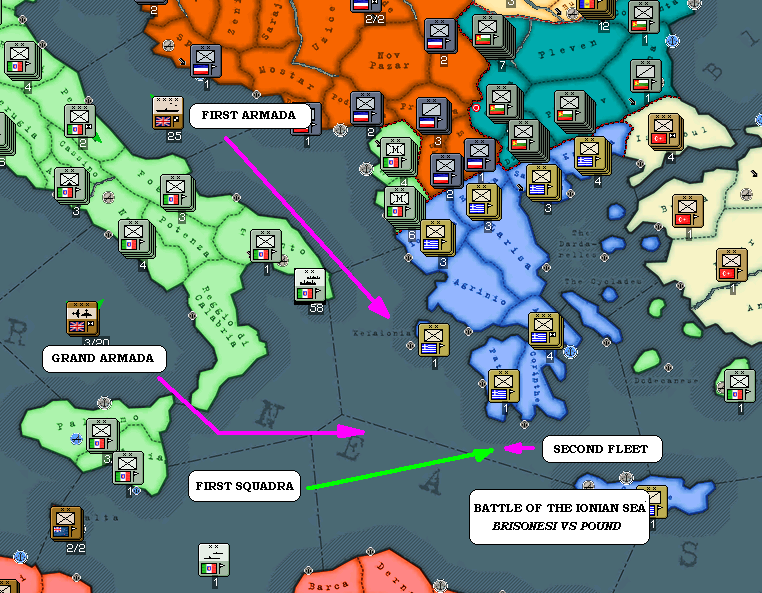
The set up for the Battle of the Ionian Sea
The First Squadra was redirected to intercept the Second Fleet. In terms of size and strength, the Italian fleet just outclassed the British counterpart - 4 battleships and six heavy cruisers could make short work of the Second Fleets 2 battleships and 2 heavy cruisers. The main British advantage was that of the HMS
Hermes, an older aircraft carrier. As long as it was capable of launching and resupplying its aircraft, they had the ability to scatter the Italian vessels.
Brisonevis main advantage was surprise. Admiral Pound of the Second Fleet still believed that the First Squadra was now in Taranto, a belief which had influenced his decision to come so close to Italian waters. It was as late as midnight on the 15th October, when the First Squadra was just under 100 miles away, that he received a warning that Intelligence were unsure of Brisonevis location. Even then he did little, ordering the Second Fleet to turn south towards safer waters.
The First Squadra achieved total surprise then, when it engaged the Second Fleet at 0854 hours. Taking an enormous risk, Brisonevi had his battleships steam directly for the British lines, ordering them to target the
Hermes alone. The opening salvos fatally damaged the unprepared carrier, causing it to sink by the bow and render its ability to launch planes useless. The main objective complete, the Italian battleships withdrew, covered by the heavy cruisers.
The loss of the Hermes
Pound decided the best action was to continue the fight. The Royal Navy were sending reinforcements - the First Armada could reach him in a day and a half, the Grand Armada in thirteen hours. As long as he stopped the Italians from escaping before the reinforcements arrived, the loss of the
Hermes could be justified. It was simply a case of British discipline under fire beating the sheer power of the numerous Italian guns.
At first it appeared the plan would work - for hours both sides fired at each other with little success. It was only when Brisonevi himself was informed of the nearby Grand Armada that he realised more direct action had to be taken, and once again ordered the battleships towards the British fleet at 1345 hours, this time supported by the heavy cruisers.
The assault scattered the British light cruisers, sinking the
Durbon, as well as crippling or severely damaging the
Calcutta, Capetown and
Delhi. The Italian battleships took several hits as well, but managed to get off a number of salvos that struck the British battleships, damaging the
Barham enough for it to be taken out of the battle. The British heavy cruisers didnt have a great time of it either, with the
York struck several times.
The attack had nearly destroyed the Second Fleet, and Pound had no doubt another strike would finish him off. Reluctantly, knowing that Kozmos Grand Armada was just hours away, he ordered the Second Fleet to break off and make for Alexandria. Brisonevi, also needing to escape, did not order any further action against the Second Fleet, and did not linger In the area.
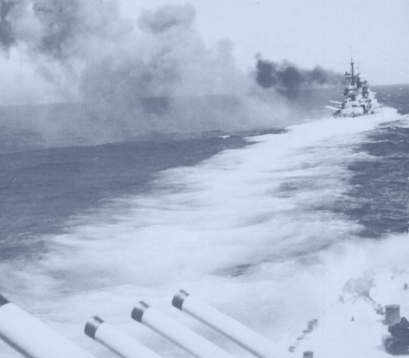
Italian battleships firing into the Second Fleet.
Admiral Kozmos arrived late in the evening, finding only a number of heavily damaged Italian destroyers to engage. Hoping that the First Armada would intercept Brisonevi, he began search and rescue operations for British and Italian survivors alike. The next day he was disappointed to see Germanicus vessels arrive - the Italians sudden good luck had prevailed once again and they had escaped, at last, to Taranto.
Admiral Pounds Second Fleet limped into Alexandria on the 17th October. Although assured that the mistakes in intelligence had been the primary culprit in the Italian victory and the loss of the
Hermes, Pounds offer of resignation was accepted. He had been the British commander during the Royal Navys first major defeat at sea, and his actions meant that the Second Fleet was effectively out of commission for several months. He was replaced by Admiral Cunningham, who had the unenviable task of bringing the Second Fleet back up to fighting condition