Create units with OpenFX

TheMorpheus

Welcome to the real world
Joined
Nov 10, 2002
Messages
531
Location
Germany
I write this tutorial to help unit creators to design units with a freeware tool called OpenFX. I'm making my units with this toolkit. OpenFX is a collection of programs, which are very helpful to create a Civ3 unit.
The main programs are the "designer" and the "animator", but there are many othe little programs like converter ans viewer of rendered animation sequences.
This tutorial describes how you could use the animator to create a unit from a 3D model. I'm using one of my current projects the 'NEGH'VAR' class battle ship.

First im explaining the basic components of an animation scene like the lights, ground and the cameras. Then we place our first model and try to render a still picture.

The next steps are to modify the model by using the keyframes to create a first simple animation.

Then we add more complex animations like phaser and topedos and we are adding some special effects like explosions

Later we add tranformations to models and complex explosions (we make a death animation ;) )

At last we left the space ship animations and try to animate a foot unit, we add a skeleton to a simple 3D model and use it as robot in the animator.

Any questions or suggestions are welcome, this is your tutorial and I need you to make it useful.

Oh, yes you find the toolkit at OpenFX.
 
The animator is our main tool to create a unit for Civ3, we are using it to animate and render the 8 directions of a unit animation.
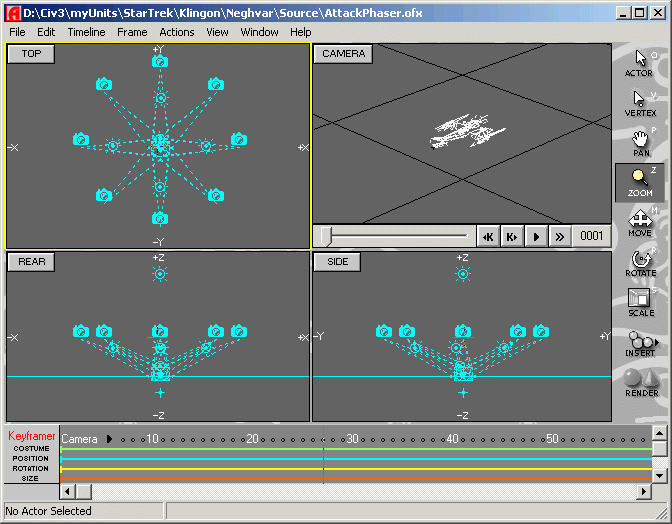
So we need a basic worksheet with 8 cameras, a ground and some lights to create a unit.

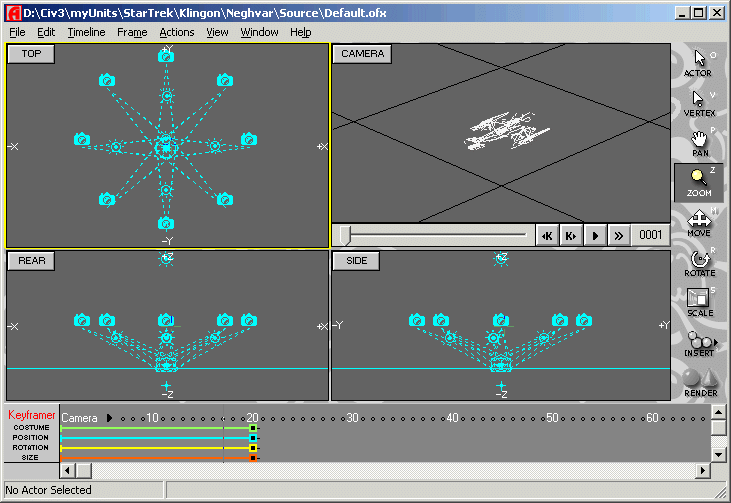
Here a screen shot of an animation scene with a placed model.


First, I explain the basic components, the lights, the ground and the camera. Then we build the basic environment, which could be used as template for all your unit animations.

The Lights
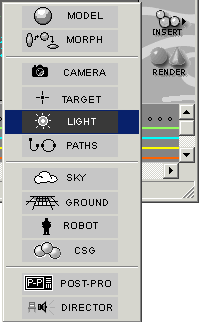
All components (light, ground, camera, model, robot, ...) could be added by pressing the button "Insert".


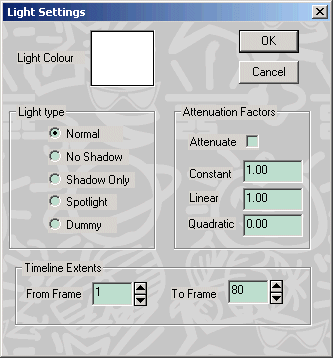
If you are choose a light, you will get a dialog to setup the initial settings of the light (you could change them later if necesary)


The light color could be used to setup the color and the brightness of the light. Mostly you are using white light, with grey to black to setup the brightness of the light.
The light type is the main switch for the usage of the light, the normal setting is a light to all directions and with shadows, no shadow is a light to all directions, shadows only could be used to generate shadows without changing the rest of the light environment, spotlight is a light with a spot to it's target. If you add a light the system adds it's target too. The dummy lights are used for special effects and will be described later in this tutorial (the Attenuation settings, too).
The timeline extents are used to setup the existence of the light, standard is from the beginning of the animation to the end. At this time we have only one frame ;)
More later if we setup the environment.
 
The basic animation environment

The basic animation environment could be used as template for all your units. If you don't want to create it by yourself you could download it here.
The basic animation environment contains 3 componets, the lights, a ground and the 8 cameras for the 8 directions.
A new animation has already a camera, we will use it and change the settings later.
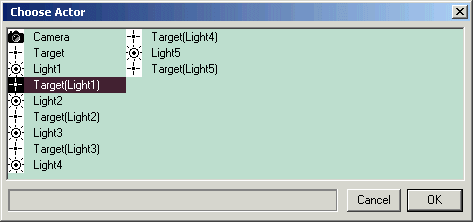
We start with the lights, which are described above. Add 5 lights by using the "Insert" tool. The first one has "normal" as light type the others "No shadow"! The system adds a target for each light we don't need them, so we delete the targets. To select a target select "Edit->Select Actor..."


Don't select the "target" of the camera! The light targets are having the light name as part of there own name. Select a light target and click "Ok". Now you could delete the target by pressing the "del" key. Delete all light targets.
Now select the first light and rename it with "Edit->Rename Actor...". Type "Main" as name.
Use the keyframer to setup the position of the light. If you don't see the keyframer, select "View->Show keyframer".
Double click on the rectangle in the position section of the keyframer and the position dialog opens.


Enter the following settings X/Y/Z = 0/-1/30
Now select the next light and rename it to "Spot1". The open the position dialog and enter the settings for Spot1 (see below). Execute the operations on every light.
Spot1: X/Y/Z = -15/-2/6,5
Spot2: X/Y/Z = 0/-15/6,5
Spot3: X/Y/Z = 15/-2/6,5
Spot4: X/Y/Z = 0/15/6,5

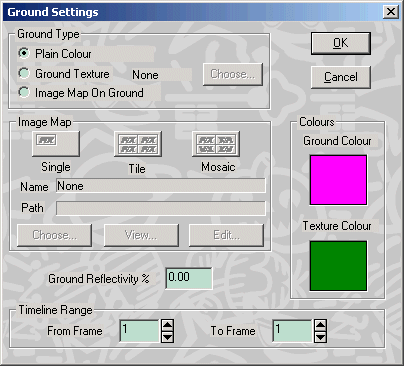
The next component is the ground. Insert a ground component with the Insert tool and choose magenta as ground color.


Select the ground actor and setup the position X/Y/Z = 0/0/0.

The last components of our animation template are the cameras. The first one we got for free at the begining of our new environment. Now add 7 more with the "Insert" tool.
We have to setup the lens and view of the cameras, to place them around the center light and to focus toe same point.
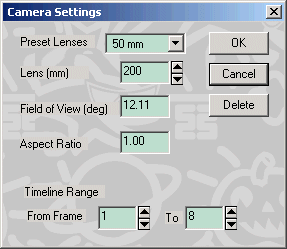
First the setup, double click on the first camera and setup the settings shown in the dialog.


Do this for all eight cameras, then select the first camera and double klick on the position marker in the keyframer and setup the following positions for the cameras:
Camera1: X/Y/Z = 0/-25/12
Camera2: X/Y/Z = -17.68/-17.68/12
Camera3: X/Y/Z = -25/0/12
Camera4: X/Y/Z = -17.68/17.68/12
Camera5: X/Y/Z = 0/25/12
Camera6: X/Y/Z = 17.68/17.68/12
Camera7: X/Y/Z = 25/0/12
Camera8: X/Y/Z = 17.68/-17.68/12

The targets of all cameras are having the position 0/0/1, select the camera targets and setup the position of the target with the
position marker in the keyframer.

Now we have the basic animation environment to create our units.
 
The default animation

Are ready the start the animation? No, we need something to animate, the model...
This tutorial uses a ready model in 3ds format. To import a 3ds model we need the designer from OpenFX. Start the designer and load the 3ds file with the "File->Open" selection of the main menu. You get a dialog with size settings, simple click "Ok" and the model is imported. To set the center point of your model to the current cursor position use "Attributes->Set model center". If you load a model the current cursor position is always in the center of the model, so it's easy to set the model center ;).
Now save it as mfx the OpenFX 3d model format and we could use it in the animator.

Switch to the animator and insert the model with the "Insert" tool. The model will be placed somewhere in the environment. Select the model and you will see in the keyframer that the model is present during the full animation sequence (costume part).
Now we place the model at 0/0/1, the view point of the cameras.
Use the "Scale" tool to setup the size of your model, the model will resized around it's model center so the position is still.


Now the animation stuff, we begin with a simple roll effect for the default animation. First we set the animation length to 20 frames. Select "Frame->Set Animation Length..." from the main menu and enter 20. All components are visible during the full animation sequence by default so we don't change the costume marker of the components in the keyframer.

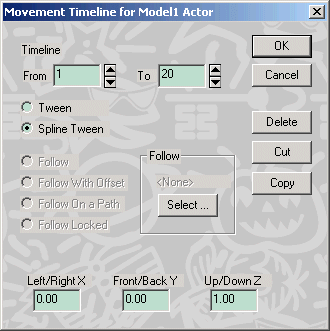
Select the model with "Edit->Select Actor..." and split the rotation line in the keyframer by klick at the yellow line itself. The system asks you if you want to add a new keyframe, yes we want.
Split the rotation into 5 sections as you see here:


Now we change the settings of the keyframes 2 and 4, double click on the rectange of the keyframe at frame 5 and frame 15.
Change the settings to
keyframe 2: Direction=0.00, Up/Down=0.00, Bank=-0.50
keyframe 4: Direction=0.00, Up/Down=0.00, Bank=0.50

Now the model seesaws a little bit to the left and to the right.

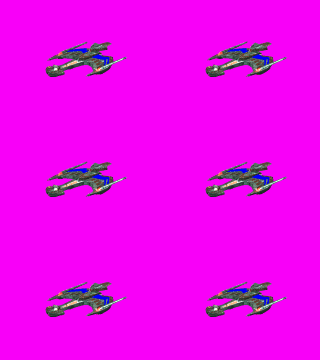
To render the unit use the "Render" tool from the toolbar, setup the "Movie name", the "Movie Folder" and select the "A Range of frames" setting. Now klick "Ok" and the renderer renders the animation. You will get somthing like this:


Now you could try your own default animation of a space ship :D
 
This chapter describes the creation of a cloak animation for klingon or romulan ships.

You need 10 models, each with 10% less transparency. The first model is your standard model of the default animation. Now you create 9 models with different transparency settings for the material and texture.
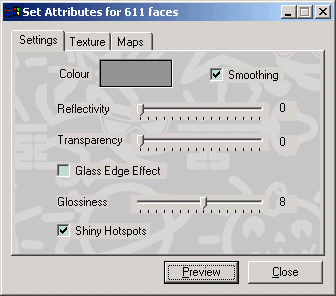
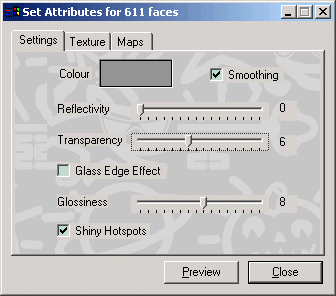
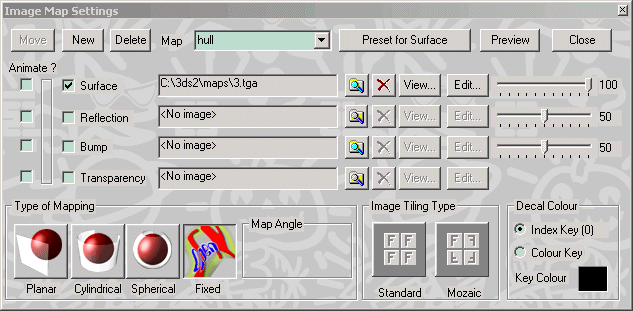
The following shots are showing the settings of the default model and thge 60% model.
Material settings for the standard model:

Material settings for the 60% model:

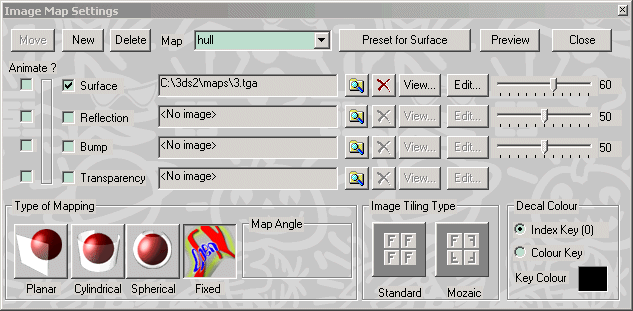
Texture settings for the 60% model:

Texture settings for the starnard model:


Each model is visible for a few frames will be replaced by a 10% more transparency one until it is invisible.

The second effect of the cloak (the optical waves) are done with the wave effect of the paint tool. The wave effect will be applied on the finished storyboard picture.

That's all, read to cloak?
 
I wonder something what formats can I use with this thing? Mainly can I use lightwave models with this thing?
 
Top Bottom