Afforess
The White Wizard
This is a guide to create an installer for users who play your mods, eliminating a source of many errors, from installing to the wrong folder, and making life simpler for everyone (except yourself, I'm afraid.)
There are many installers out there, some freeware, opensource, and some commercially used one's. For this guide, I will use and demonstrate InstallJammer, as it is free and opensource. However, other install creators are generally set up in a similar manner.
Commonly, after I make an installer, I find errors, where files did not go in the right place. Sometimes, fiddling is required to make files find the correct directory,
Also, feel free to fiddle with the screens and display text for users. It's all fairly basic, but it can add a nice feel to the installer.
Make sure you always test your installers and the run the game after installing.
If you have more detailed questions post them.
There are many installers out there, some freeware, opensource, and some commercially used one's. For this guide, I will use and demonstrate InstallJammer, as it is free and opensource. However, other install creators are generally set up in a similar manner.
- First off, grab the download for InstallJammer, it's made for Windows and Linux.
- After you've installed it, open it for the first time. You'll be at the "Start Page." To create a new project, either select 'CTRL-N' or From the File Drop-down menu.
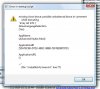
- Great, you should be at this screen now:
Spoiler :
- Let's fill in some basic information. Write the name of your mod in the space for "Application" and leave the company info blank (Unless you want to put your Mod Team's name their.) Also, fill out your version info.
- Now, open the "Project Features" tab, and look at that information. It all likes fine, so close it and open the "Install Language." So can disable or enable different languages here. It's useful for multilingual mods, if you also want to have a multilingual installer. Let's leave them all enabled. By default, every time you run the installer, it will prompt for a language.
- Close that tab and open "Project Preferences. " You might want to increase the compression level to 9, it will take up less space, but use more CPU extracting during the install. LMZA(Solid) is the most compressed format, but zlib has the best compression space to install speed ratio. It's really up to your personal preferences what you choose here. Leave the rest of the settings alone.
- Now, on the right panel, move to "Platform Information." We are creating an installer for Windows, but if you want to create one for Linux, feel free to do so.
- On the default destination directory in the "Platform Information" tab, change it to as follows:
This will always set the default path correct for 95% of users (Steam users or custom installs can just change it to the correct path themselves, in the installer). Also, the Program Files, inside the percent string means that it will always pick the correct Program Files (x86) for 64-bit Windows users.Code:
<%PROGRAM_FILES%>/Firaxis Games\Sid Meier's Civilization 4\Beyond the Sword\Mods
- Also, change "Require Administrator" to off, so that Vista and Windows 7 users don't get those UAC popups.
- Now, on the right panel, move to "Groups and Files" This is the heart and soul of your installer, choosing what files are used. I recommend keeping a backup of your mod files somewhere in case of a catastrophic failure. Now, if you have your mod in one clean folder (I hope you do),
- Delete the "Program Files" group. It's the default one, and it's not needed for our purposes. Now, click the blue folder icon, with the hover text "Create New File Group". Rename it with the name of your mod. (Note: if you screw up the name, on the left side, the "Name" field allows you to rename it their too.)
- Now, for some explanation of the left panel.
- "Active" means that this component will be included in the installer. This is useful if you have some buggy feature you need to turn off at the last minute, but will need the files later.
- "Alias" is just a second naming feature
- "Comment" is just comments for other people who will see this install setup file
- "Compression Method" allows you to set an non-default compression than what you selected eariler
- "Data" - I'm not sure, I've never used it
- "Destination Directory" is where the files/folders will be installed. <%InstallDir%> is where the user choose to install it on the installer. 99.9% of the time, installing files should be relative to the Install Directory,.
- "File Update Method" is how the installer chooses to overwrite existing files if it finds them. To avoid errors, I recommend "Overwrite Always."
- The rest, other than name are not really useful for anything for our purposes.
- Now, right click on your new file group that you created, and select "Add Directory." Navigate to where your files are kept for your mod, and select the main folder. DO NOT Select an archive (.zip, .rar .7z etc...) of your mod, you need an uncompressed version. Also note, if you selected a folder, as you change files in that folder, the installer will automatically update files in that folder to match yours.
- On individual files, you can also set destination directories and update methods too, this is useful for Modmoder's. If no information is given, the default settings are used.
- Now, we are done with that panel. Move to the next panel on the right side "Components"
- If you are making an installer for a mod, you just need 1 component, your core mod. You can later create separate components and file groups for additional features, if you so choose.
- The way components work is that a file group(s) are linked to a component. If a component is installed, so the corresponding file group.
- For a more detailed breakdown:
Spoiler :
- Great. You have everything almost working. Now, on the right panel, select "Setup Types"
- If you are making a mod where users install it, with no configurable options or additional addons, leave it as is. Otherwise, you can make custom set up's where non-standard features are added. It's fairly self-explanatory.
- Great. Now you have everything done. Go to the "Build Installers" tab, and Select "Build Installer" Once it's been made, run it, and give it a test run.
Commonly, after I make an installer, I find errors, where files did not go in the right place. Sometimes, fiddling is required to make files find the correct directory,
Also, feel free to fiddle with the screens and display text for users. It's all fairly basic, but it can add a nice feel to the installer.
Make sure you always test your installers and the run the game after installing.
If you have more detailed questions post them.