GIMP Scissors Tutorial

Gray Wolf

Winter Wolf
Joined
Jun 2, 2012
Messages
482
Location
Ravenswood
Note: A PDF file of this tutorial is attached below.

Ok, I just want to make a quick tutorial on how to cut something out of an image using the scissors tool in GIMP.

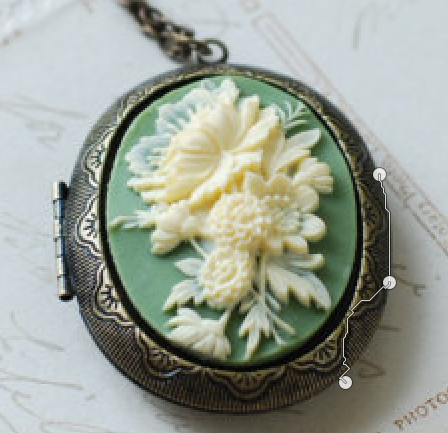
Ok, so I found this little locket image somewhere a long time ago...
Spoiler :


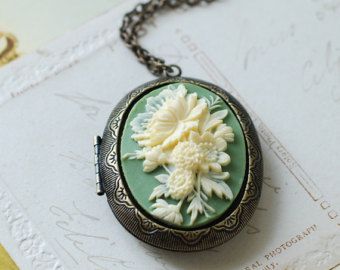
Let's cut the locket out of the image using scissors.

Open up the locket image (attached).
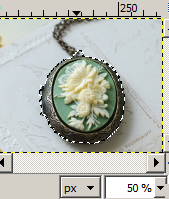
Zoom in on the image to about 200%. (View/Zoom/200%)
Tools/Selection Tools/Intelligent Scissors or click I for short.
Click the left mouse button to set your first scissor point which tells GIMP where to start cutting.
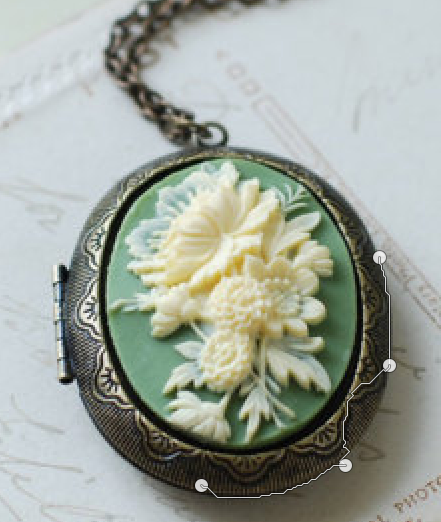
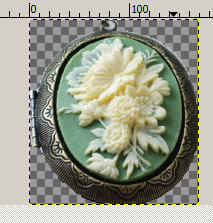
Click scissor points all the way around the image along the lockets' edges.
Then set the last scissor point (by clicking on the first scissor point).
This completes a circle of scissor points which looks like this:

Spoiler :


Note: Don't worry about the edges right now. This is just a quick example of how scissors work.

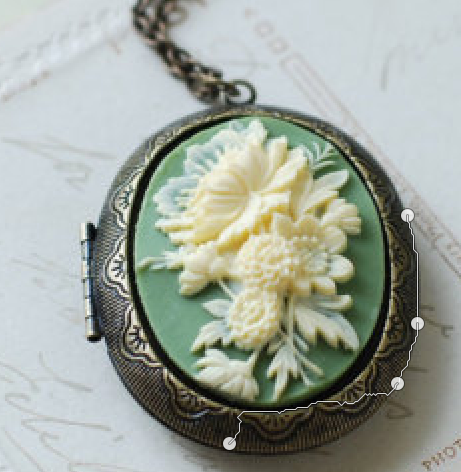
Once you have a complete circle of scissor points. Click on the inside of the circle.
GIMP will select the locket...

Spoiler :


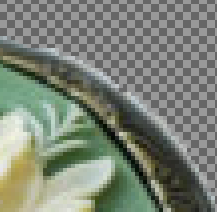
At this point, just do an Edit/Copy and an Edit/Paste as New Image.

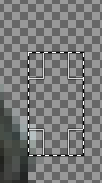
GIMP will paste the image on a transparent background for you like this:

Spoiler :


So, if this image was perfect along the edges, then you could use the image and paste it into any .pcx file you want, etc...
 

Attachments

  • Example Files.zip
    94.9 KB · Views: 162
  • GIMP Scissors Tutorial.pdf
    264.8 KB · Views: 212
Scissor Hints:

When you make a scissor point, put it sort of far away from the last point you made.
Then look and see if GIMP was able to find the edges of the object on its own.

Spoiler :


See how I set the 2nd scissor point sort of far away from the first/starting scissor point?
And GIMP was able to find the edge along the locket without any problems.

But then I clicked far away on the 3rd point and GIMP thought the edges were somewhere
inside the locket...

When the GIMP Intelligent scissors are "intelligent", great... just continue on making new points.

If GIMP puts lines on the wrong edge, then set a new scissor point ... sort of far away from the last one you did... like this:

Spoiler :


And then go back and move the 3rd scissor point up towards the 2nd scissor point ... onto a place where GIMP is finally able to figure out the edge you want... like this:

Spoiler :


Notice how the 3rd scissor point is fixed now and the edges look good. But the 4th point is now out of whack! So basically you have to set another new point in order to fix the 4th point. Basically you can move any scissor point except the starting point and the last one you made...

So, anyway, just keep setting new scissor points and fixing old scissor points until your circle is good.
 
Now let me show you some tools to clean up an image... let's use the locket that I cut out earlier. I attached it in the zip file for you so you can work on it with me.

It's called Transparent Locket.png.

Ok, open it up and zoom in about 400% (View/Zoom/400%)
So it has some edges that need to be cleaned up a little.

Spoiler :


Different Tools for Cleaning the Transparent File:

Fuzzy Select Tool
Tools/Selection Tools/Fuzzy Select or U for short.
Click on one of the white pixels outside of the locket:

Spoiler :


GIMP will select all pixels with that same color that are connected together.
Just click the delete button to clear out those pixels.

Also, watch out for the dreaded non-opaque pixels. They look like this:

Spoiler :


See the little pixel outside of the image that is selected... it definitely needs to be deleted.

To be able to see pixels like that, do a Fuzzy Select (U) and click on the edge of an object to select the
whole object. Sometimes you have to click different parts of the perimeter of the object to get GIMP to
select the whole object. Anyway, once it does, it selects what it thinks is part of the object.
And as you can tell from the image above, sometimes it thinks that some areas outside of the object
are part of the object. You need to delete those pixels. Otherwise, if you paste the image on a magenta background,
those kinds of pixels will become off-pink and make the image look bad.


Rectangle Tool

Spoiler :


Use the Rectangle Tool (Click R for short) and Draw a Rectangle around pixels that you don't want.
Then click delete.

Even though it takes a lot of time to keep drawing/moving rectangles along the edge of an object,
I think this is the best method to use.

Anyway, if you use those methods all the way around the locket, you can clean up all the edges and make a good transparent image.

Note: Since we aren't actually going to use this locket, I'm not going to finish it up.
I just wanted to explain the basics of how to use the scissor tool....
 
Zooming in your Image

The secret to making a good image is to take your time and to zoom in on your image every now and then.
To zoom in, use the plus sign (+) and to zoom back out use the minus sign (-).

Anyway, if you zoom in/out to different levels, you can judge where the edges are better. And the goal
is to make sure that each scissor point is on the edge and/or slightly inside the edge of the object that you want
to crop out. If you do that, then your transparent image will be much better.

Also, when you are using the Rectangle (R) tool to clean up an image, it's a lot easier to see the light
colored pixels outside of the edge when you zoom in.

Don't worry that your image will turn out too jagged if you delete too many pixels on the inside edge
of the object. When you are zoomed in at a high level, you are actually working on very small pixel areas.
And when you are finished your naked eye won't see anything jagged. It will look good when the image
is set back to 100%.

Anyway, it just takes practice but it's not too hard to cut out a good image with scissors.

Note: To zoom in, use the plus sign (+). To zoom back out, use the minus sign (-).
 
Well, I hope this tutorial helps someone who is trying to learn how to use scissors in GIMP.

I'm sure there are other ways to crop out images that are just as good or better than this, but I think GIMP scissors work pretty good.

Any feedback is welcome.
 
Top Bottom