Harappa Strategy Guide

You get extra food from excess health. E.g. 10 health - 2 sick faces = 8 extra health. Food growth +8 per turn.

Thanks for the info. But in the city screen, when I hover over the food difference (food produced - food consumed) and the health difference, I don't see anything like that in the tooltips, and I don't think I see anything extra happening in my city growth either. I do see a strange Dujiangyan positive food modifier in the food difference tooltip even though I don't have the wonder, but that also doesn't seem to affect my growth situation. And I'm still in the Ancient era. Is there a better way to test this? As far as I can tell, I'm not getting any extra food growth from having extra health.

Edit: I'm seeing that some of my cities are getting the excess health to food bonus while some of them aren't. And the strange Dujiangyan food modifier has the same number of excess health/food bonus to it.
 
Last edited:
Thanks for the info. But in the city screen, when I hover over the food difference (food produced - food consumed) and the health difference, I don't see anything like that in the tooltips, and I don't think I see anything extra happening in my city growth either. I do see a strange Dujiangyan positive food modifier in the food difference tooltip even though I don't have the wonder, but that also doesn't seem to affect my growth situation. And I'm still in the Ancient era. Is there a better way to test this? As far as I can tell, I'm not getting any extra food growth from having extra health.

Edit: I'm seeing that some of my cities are getting the excess health to food bonus while some of them aren't. And the strange Dujiangyan food modifier has the same number of excess health/food bonus to it.
+4 Food from excess Health (6 Health - 2 sick citizen icon)
2019-09-28.png
 
Weird Dujiangyan modifier that doesn't have any effect:
upload_2019-9-28_10-52-37.png

Dujiangyan was not built anywhere in the world.

I discovered this: I took away two 3 food tiles and now:
upload_2019-9-28_10-55-34.png

the extra food from excess health has disappeared. When your base food production <= food consumption, i.e. your base food situation is Stagnant or Starving, the excess health to food bonus disappears.

Another thing is, when I change production to a worker or settler:
upload_2019-9-28_10-56-56.png

what should be 6 excess food + 3 excess health = 9 total food surplus, becomes only 6 excess food in production. But this I think can be considered working as intended.

But the excess health bonus disappearing when base food production - food consumption <= 0 seems like a bug. If there are any civics or wonders that can be used in the Ancient Era that have food to production abilities, that would also potentially be buggy. For example, if by some strange situation Harappa got the Pyramids, where the city is able to grow even when producing settlers/workers, that excess health to food bonus might also disappear.
 
Last edited:
1. Tooltip error, probably need to ask Leoreth to have a look.
2. I guess the bonus applies AFTER it consider if the city is growing. If it's stagnant already, the bonus won't apply? (not sure can ask this in bugs forum)
3. If you build a worker, the city won't grow, so it should be working as intended (but you can try to put Pyramids wonder in Harappa via World Builder to see if the excess health bonus actually still exists or not. If not, (put it in bugs forum)
 
1. This is not an error, but a BUG feature. It shows what the effect of the Dujiangyan would be if you build it now. It will do this for every building, but currently the Dujiangyan is the only buildable building that has an effect on the food yield of the city.
2. The UP description is: "Positive health contributes to city growth during the Ancient era". If you are not growing (stagnation, building workers etc.) the UP does not apply.
 
Last edited:
Thanks for the replies!

1. This is not an error, but a BUG feature. It shows what the effect of the Dujiangyan would be if you build it now. It will do this for every building, but currently the Dujiangyan is the only buildable building that has an effect on the food yield of the city.
2. The UP description is: "Positive health contributes to city growth during the Ancient era". If you are not growing (stagnation, building workers etc.) the UP does not apply.

1. Didn't know that was a BUG feature, thanks very much.
2. I see, thanks. That seems like a weirdly technically odd way to explain it in the Civilopedia. If it's interpreted that way, that means you can't say the sentence, "The city growth is negative" in the context of this game because you're interpreting "city growth" as an inherently numerically positive thing. And using the word "contributes" without qualifying that makes it sound like it always contributes. In Harappa's case, for someone reading that Civilopedia description for the first time, it's natural to think that we don't know whether "a city is growing" or not until after we apply any bonuses to city growth, so to try to understand something like "The bonus to city growth applies if the city is growing" is kinda strange. Like, from the perspective of a new DoC player, shouldn't you be able to tell whether a city has positive growth or not only after you've applied all the factors that go into city growth?

But if the mechanic is working as intended (and I actually think the mechanic is fine as it is if it was intended to work this way), perhaps just change the Civilopedia description to something like "In the Ancient Era, if a city has positive health and positive net food, the excess positive health contributes to city growth" or something like that. Maybe also add a second sentence, "This excess health-to-food bonus does not apply if a city has stagnant growth or is in starvation, or its food surplus is being applied to production as in the case of building workers or settlers (unless wonders or civics allow city growth even when food surplus is applied to production) OR (the bonus does not apply even if there are wonders or civics that allow city growth when food surplus is applied to production)." (I personally don't see any point in being overly concise in UU and UP descriptions in the Civilopedia. I think it's ok to make the description longer if it becomes clearer. I mean, it's called the Civilopedia.) When I tested it with the Pyramids, I found that I don't get the excess health-to-food bonus when building a settler:
upload_2019-9-29_14-48-35.png

The city has +8 food from worked tiles, -4 food consumption from population, and +4 excess health. Worker production is 1 hammer +4 food (from base net food of 8 - 4), which is fine if that's working as intended. City growth is +4 food, also from base net food of 8 - 4. There is no excess health-to-food bonus. If I take production off the settler, the excess health-to-food bonus comes back, where net food for the city is base net food of (8 worked tiles - 4 food consumption) and then +4 from excess health. Whether this is working as intended or a bug, I won't assume.

The excess health food bonus showing up in the food bar tooltip only when there is a positive bonus contributes to the confusion. It would be nice if it always showed up even when there is no food bonus. Just have it say:
No :food: bonus from Excess :health:
or something like that when there is no bonus.

I might post this in the Suggestions thread :traderoute:
 
Harappa Strategy Guide for 1.16

Harappa's strategy is almost unchanged from 1.15, so I will just quote Autumn Leaf's guide for that previous version. My own notes/additions are in parentheses.

  • Immediately send your Militia SW to the coast then W along the coast to contact Babylon. Get past Shush before it builds a 2nd Archer. (Leave the Militia south of Babylon to maintain contact until the trade condition is met.)
  • Found Harappa on the spot. Build two City Builders, Militia, Reservoir, Granary or Smokehouse, then spam City Builders. (See note 1 below.)
  • Research Masonry, Pastoralism, Sailing, Tanning, Seafaring, then turn Research to 0% to avoid stability checks. (You can research Ceremony and change civics to Monarchy for extra happiness from garrisons, but halt research after that.)
  • First City Builder goes 2S, 1SW and founds Chanhu-Daro in your core. Build Militia, Reservoir, Granary or Smokehouse, then spam City Builders. (See note 1 below.)
  • Second City Builder goes 2N, 1NE and founds Rehman Dheri on Sheep. Build Militia, Reservoir, Granary or Smokehouse, then spam City Builders. (See note 1 below.)
  • You need three Reservoirs but only two Granaries & Smokehouses, so optionally two cities can skip a building each.
  • Micro-manage as required to ensure each city completes its builds in minimum time and doesn't grow unhappy. Stagnate growth at happiness limit.
  • Move each additional City Builder two squares from any city and found a new city. (See note 2 below.)
  • Nine extra cities should be enough as each starts with two population. If some cities grow you might only need seven or eight extra cities.
  • Don't found cities outside India due to lurking Barbarians. Found all extra cities except Quetta (on the spice west of Harappa) going E or SE from your three main cities.
  • Hinduism will spread to your cities after India spawns. Adopt it as your state religion - it increases each city's happiness limit by one.
  • There is no need to adopt Slavery or build Workers. All goals can be achieved by growing to the happiness limit then working hammer tiles.
Note 1: You can lessen the need for micro-management by skipping Militia builds in order to build Reservoirs, Granaries, and Smokehouses first; wait to build a Militia after the buildings are up. Militias are only useful for maintaining happiness—barbs don't invade Harappa—so by skipping Militias until the builds are finished, you can finish the builds that much sooner. You will have to turn off growth early and then turn it on again late after building garrisons, but that will make no difference to how the game goes.

Note 2: After you have capped growth of your three cities you will be able to see how many additional cities you need. This of course will vary depending upon how large you let your three core cities grow: with Monarchy, you can let them grow to 16 pop units, which means you will need 7 additional cities (7 x 2 = 14) to meet the 30 pop goal. (While the cities build up, you can build Militias, Archers, or other units; there should be enough time to let the core cities grow before you have to start spamming out City Builders.) After building the necessary City Builders, maneuver them into position but do not build the cities. Instead, wait until all the necessary units are in place, then build them all at once. Because of the way the third condition is written ("30 population points by" the deadline), building them will trigger the last victory condition at the start of the next turn.

CAUTION: It is possible to see your victory undone at the next-to-the-last minute with barbarian units spawning directly beside your City Builders. If this I happens, I find that lots of cussing doesn't save the situation, but it does make me feel better.
 
Last edited:
I wanted to try and do the Harappan UHV without cheesing it via City Builders, and while it was difficult at first, the instant I looked up their historical extent online, everything became rather simple.

Indus_Valley_Civilization,_Mature_Phase_(2600-1900_BCE).png

upload_2020-2-18_22-25-11.png

This strategy relies on the fact that you can get all the required techs in time for UHV1 with trade commerce alone and settle Rakhigahri after discovering seafaring for extra growth and so that you have a grace period before needing to disable research, enough so that you can switch to Monarchy for the extra happiness.

Techs: Pastoralism, Property, Masonry (Switch to Despotism and Slavery), Sailing, Trapping, Seafaring, Mythology, Ceremony (Switch to Monarchy), Disable Research

Harappa: City Builder (Settle Mohenjo-Daro), Worker, Start Granary, Switch to Reservoir ASAP, Finish Granary, Smokehouse, and then build whatever you need

Mohenjo-Daro: City Builder (Settle Dholavira), Start Granary, Switch to Reservoir ASAP, Finish Granary, Smokehouse, and then build whatever you need

Dholavira: City Builder (Settle Sotka Koh), Reservoir, and then build whatever you need

Sotka Koh: City Builder (Settle Rakhigahri when you discover Seafaring), and then build whatever you need.

Rakhigahri: Build Reservoir and Monument ASAP, improving and working Rice is required to win and as you see above, if you take too long to build them, India will end up flipping it towards the end of UHV3's timespan

Worker: Marble, Wheat, Sugar, Cow, and then build whatever

I did a good amount of micromanaging what tiles are in cities' borders, but I kept Citizen Automation on the entire time.

Harappa and Mohenjo-Daro can each easily build the 2 Granaries, Smokehouses, and Reservoirs within the time frame, and Dholavira can pick up the last. Make sure the Quarry is always being worked by a city.
 
upload_2020-2-19_11-26-29.png

I got another where I didn't need to disable Science. Apparently you only need Harappa, Mohenjo-Daro, and Dholavira for the first two UHVs, though I've yet to find a method of completing UHV3 with less than 5 cities.
 
I wanted to try and do the Harappan UHV without cheesing it via City Builders, and while it was difficult at first, the instant I looked up their historical extent online, everything became rather simple.

View attachment 546467

View attachment 546466

This strategy relies on the fact that you can get all the required techs in time for UHV1 with trade commerce alone and settle Rakhigahri after discovering seafaring for extra growth and so that you have a grace period before needing to disable research, enough so that you can switch to Monarchy for the extra happiness.

Techs: Pastoralism, Property, Masonry (Switch to Despotism and Slavery), Sailing, Trapping, Seafaring, Mythology, Ceremony (Switch to Monarchy), Disable Research

Harappa: City Builder (Settle Mohenjo-Daro), Worker, Start Granary, Switch to Reservoir ASAP, Finish Granary, Smokehouse, and then build whatever you need

Mohenjo-Daro: City Builder (Settle Dholavira), Start Granary, Switch to Reservoir ASAP, Finish Granary, Smokehouse, and then build whatever you need

Dholavira: City Builder (Settle Sotka Koh), Reservoir, and then build whatever you need

Sotka Koh: City Builder (Settle Rakhigahri when you discover Seafaring), and then build whatever you need.

Rakhigahri: Build Reservoir and Monument ASAP, improving and working Rice is required to win and as you see above, if you take too long to build them, India will end up flipping it towards the end of UHV3's timespan

Worker: Marble, Wheat, Sugar, Cow, and then build whatever

I did a good amount of micromanaging what tiles are in cities' borders, but I kept Citizen Automation on the entire time.

Harappa and Mohenjo-Daro can each easily build the 2 Granaries, Smokehouses, and Reservoirs within the time frame, and Dholavira can pick up the last. Make sure the Quarry is always being worked by a city.
Confirmed on Regent, Epic. Very elegant strategy! Much more gratifying than spamming city builders. Next time I'll try again without turning off research, to be completely cleansed of cheesiness.
 
I wanted to try and do the Harappan UHV without cheesing it via City Builders

One question - what level were you playing (Regent,Monarch, Paragon)? This is not a criticism, I just want to fit it in context! It looks like a very nice strategy, but many strategies that work on Regent come apart on higher difficulty (mine works for Regent and Monarch, but falls apart on Paragon, when you can't research the techs in time).
 
One question - what level were you playing (Regent,Monarch, Paragon)? This is not a criticism, I just want to fit it in context! It looks like a very nice strategy, but many strategies that work on Regent come apart on higher difficulty (mine works for Regent and Monarch, but falls apart on Paragon, when you can't research the techs in time).
Regent
 
Hey there, I thought I'd chime in by saying that I've been trying to crack a solution to Harappa UHV that doesn't rely on spamming City Builders on the last turn and works on Monarch, and after several attempts I succeeded! My first couple of attempts were just trying to refine 1SDAN's great guide, maybe with different city locations etc. But I found that no matter what I did I'd miss out on UHV1. There just wasn't time to get all the techs if you're whipping away your population growth. So I started on plans that skipped researching Property, which solved UHV1 easily enough but made UHV2 the challenge. There aren't a LOT of highly productive tiles nearby, but it turns out there are JUST enough.

Techs: Masonry (Switch to Slavery), Pastoralism, Tanning, Sailing, Seafaring, Mythology, Ceremony (Switch to Monarchy)

Harappa: (1E of spawn) City Builder x2, Militia, Reservoir, Granary, Smokehouse, Militia/City Builders/Archers

Rehman Dehri: (on sheep) Worker, Militia, Reservoir, Granary, Militia/City Builders/Archers

Muhenjo-Daro: (between the spices) Reservoir, Smokehouse, Militia, Granary, Militia/Archers

Other Cities: I went with Sotka Koh, Chanhu-Daro, and Mumbai, but they'll each only have time to grow once (maybe twice if you get your worker down there or build another one) so the exact locations don't matter a whole ton.

Chill with the first 3 cities until you get the first 2 goals. The closest call is going to be Harappa, but wise use of the worker can get you the production you need. A Slavery-boosted Quarry is no joke. My successful run I improved the marble first, then mined the hill, and finally the cow, which was JUST enough to get everything done in time. It might actually be better to go cow first, and benefit from the faster growth that affords, but I'm not positive and, well, my way worked well enough. As for city locations, the starting tile is a little better, but IME India has always razed Indrapasthra if I use the eastern location, and it's a lot more random if I try any other site. But it's a small sample size so your mileage may vary. Rehman Dehri and Muhenjo-Daro are non-negotiable though. The spice tiles are the only halfway-decent production that your core will have other than your capital for a while, and that specific location is the only way to capture both with the eastern Harappa. It also leaves room for Chanhu-Daro as a later expand, which is a decent location and is helpfully in your core. Rehman Dehri is very important to this strat because it is, easily, the quickest place to build that early worker, and has the production to contribute Militias/City Builders as needed. It also auto-connects the sheep when you research Pastoralism, which is VERY useful with our UP.

I did end up turning off research, though my stability was always positive (even after I briefly lost Sotka Koh to an Elamite Chariot), so I feel I would have been fine to continue it, albeit probably at a low rate so it may not matter too much. Just didn't want to risk an attempt that I was pretty sure I had locked down once I got UHV2. Overall it's a neat little puzzle and I'm glad I eventually solved it. I have a save at turn 55 just after getting the 2nd UHV that I think I'll see about continuing later and seeing if I can last until the Mughal spawn. Or maybe I'll see if I can go higher than Monarch, though I doubt it tbh.

Harappa_Monarch.jpg
 
Last edited:
Not really on the UHV topic but I did continue my turn 55 game and I'm surprised at how simple it's been to keep my head above water. My research was SLOOOOOW toward Leverage and Calendar but once I had those things started to pick up nicely and while I'm not way out ahead I'm more or less keeping up; getting good trades out of India, China, and Tamils, and had some decent ones with Rome, Egypt, and Ethiopia before I lost contact with them. I was lucky enough to found Buddhism, which greatly boosted my economy, and snagged the Dujiangyan which has kept Harappa growing nicely. Anyway, here's a pic of a stable, decently developed 51-pop empire in 500 AD; I think from here I just try to get up Aqueducts to bounce back from the plague and then spam military and hope I can hold off the barbs from Persia and Afghanistan.

Harappa_500AD.jpg
 
It was quite difficulty, but I won Harappan UHV on Paragon/ Marathon in 1.16!
On Paragon it is no time to explore many technologies, so I finished Pastoralism, Sailing, Tanning, Seafaring and Masonry (I explored them in this order. Yes, I didn’t explore Property and adopt Despotism, but I had time to build 3 reservoirs without hurrying them, but about it hereinafter).
First of all, I sent the militia explore the coast. Then, I sent it to the tribal village on the north. There I got a scout (it is very important! We need a scout that he collects gold in tribal villages. So we can keep research on 100% until exploring all necessary technologies.)
In turn 19 my militia crossed Elamite border. Babylonian borders already had expanded, so I couldn’t pass to Babylon. But in turn 22 their borders expanded again and my unit was moved to Arabian Peninsula. So I explored Babylon and left militia there.
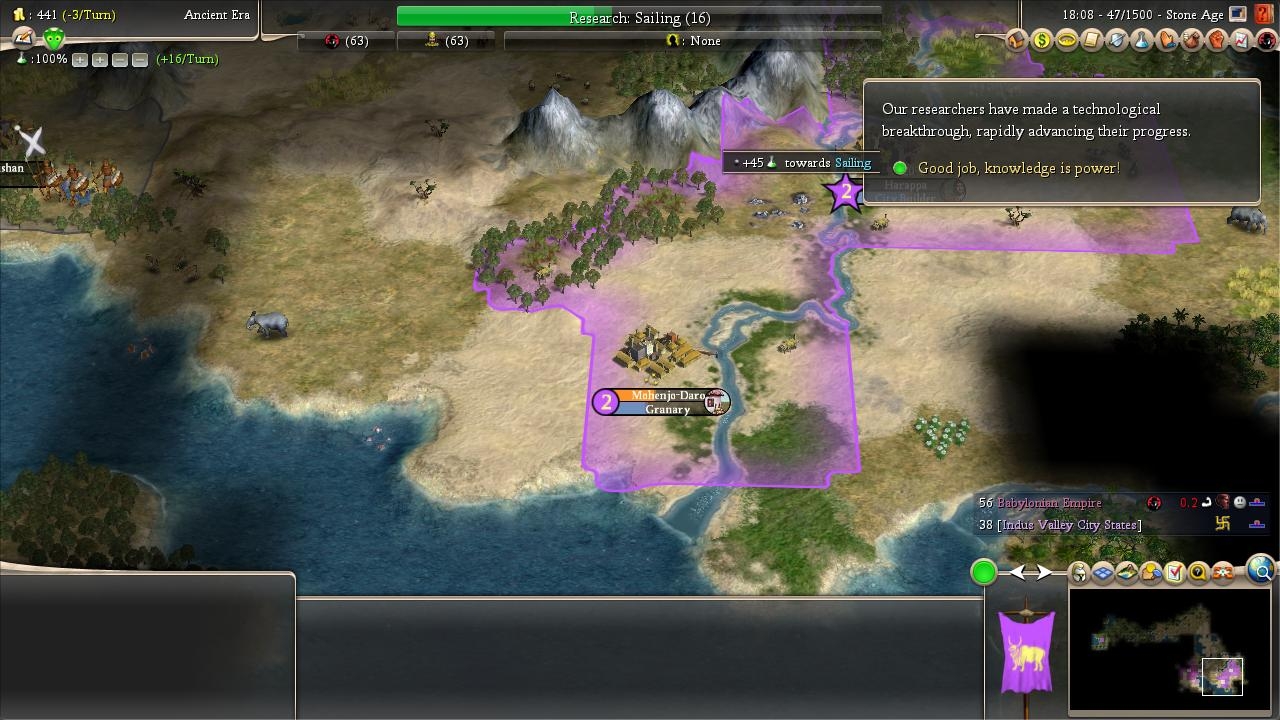
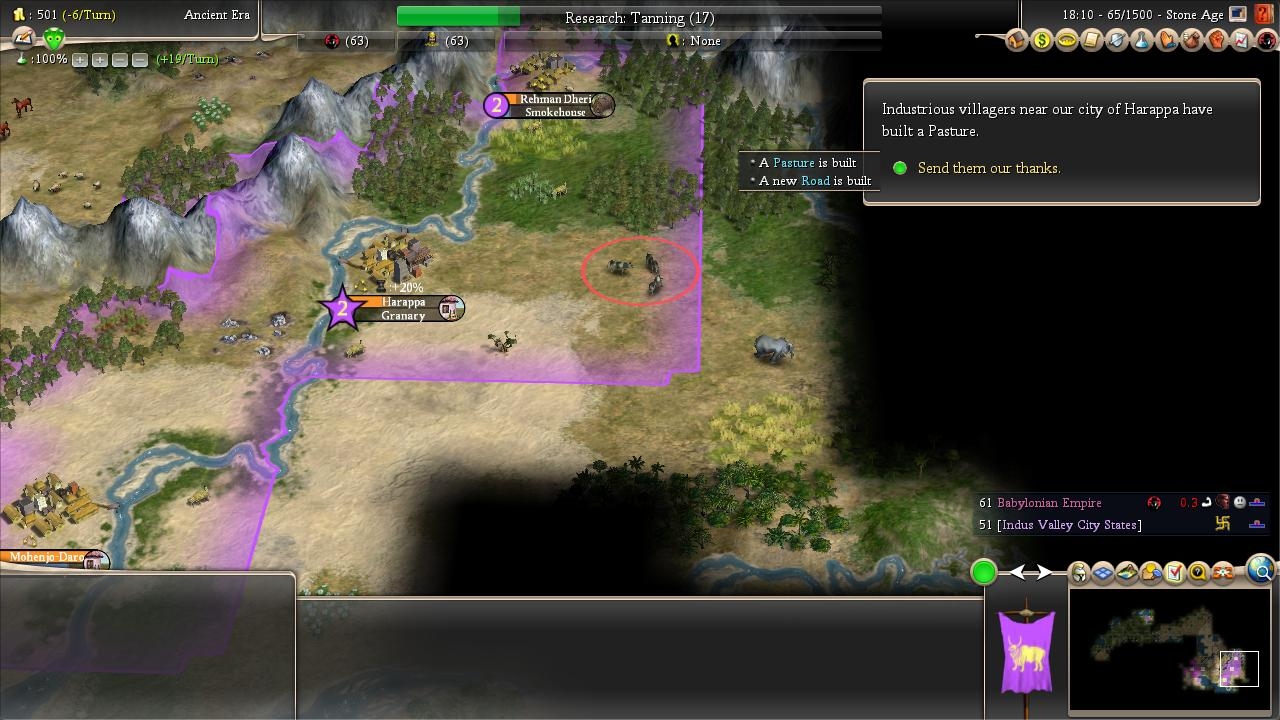
In turn 33 I found Mohenjo-Daro, in turn 63 – Rehman Dhery. Besides there were two important events without them I definitely couldn’t win this game. In turn 47 I got 45 research point, in turn 65 a pasture and a road were built in the cow tile to the west of Harappa.
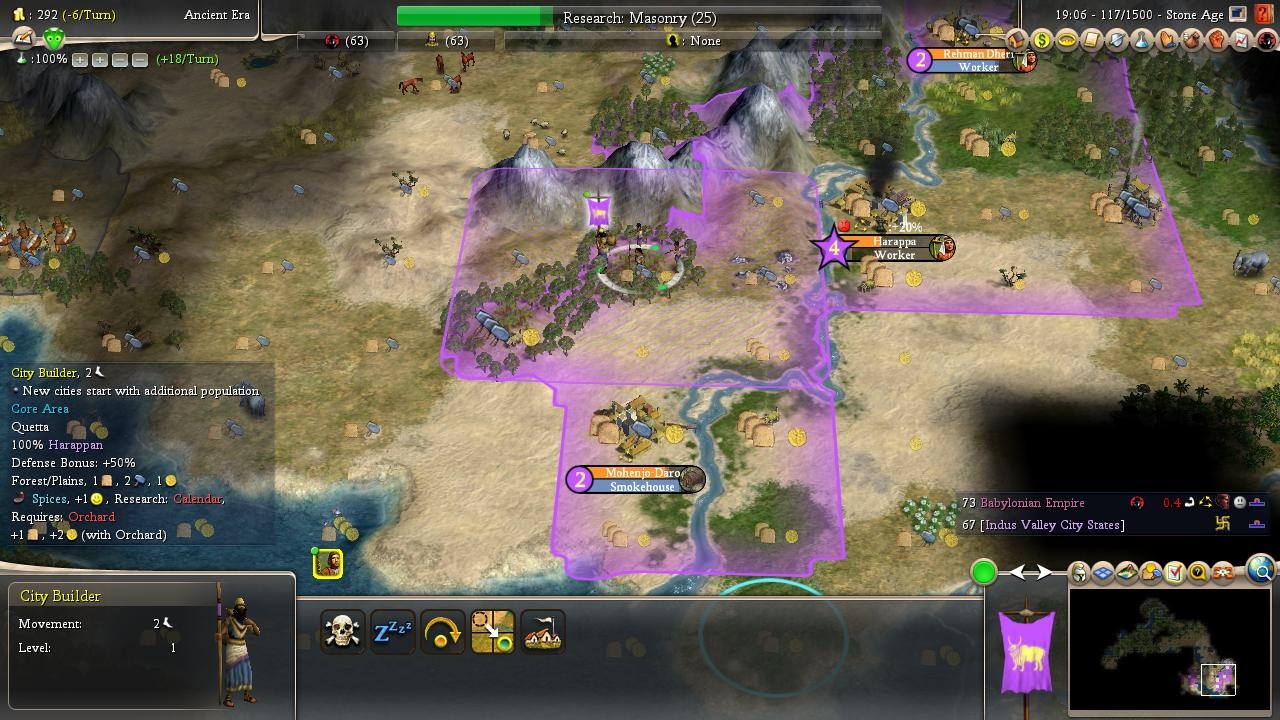
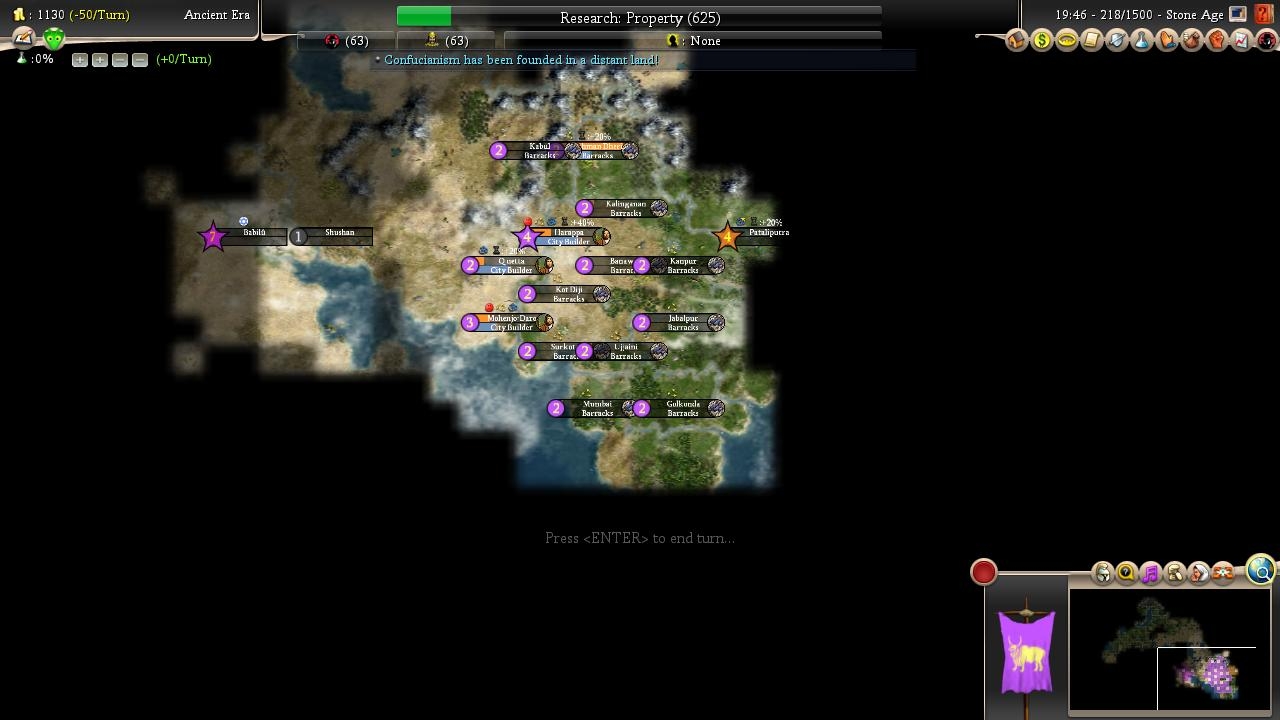
I found out that city with 7 hammers can build reservoir for 26 turns. In Harappa (thanks to the pasture) and Rehman Dhery there were. If I found Quetta in it there were only 6 hammers. But if I built 2 workers and built the quarry on the marble tile Quetta it built reservoir for 27 turns! In turn 117 I found Quetta and if I explored Masonry by turn 138 I would win! Managing workers in cities I could do it and saved enough food in these cities. So I performed the second goal in the last turn. Then I built 10 city builders and found 10 cities in turn 218. And I won!
Spoiler Event №1 :

Spoiler Event №2 :

Spoiler The key moment :

Spoiler The last turn :
 
Wow, that's incredible, I gave up on difficulties higher than monarch pretty much as soon as I saw the increased tech costs and the lower base happiness haha. Part of me wishes you had found it impossible so I don't feel bad about abandoning it. I'll take a little solace in the amount of luck it took.
 
upload_2021-4-12_9-36-38.png
Came back and won without any ahistorical cities. Harappa NE is a food powerhouse. Still need Sotka Koh to get those last 2 pop though. Regent/Normal. No micromanagement outside of changing tile ownership (no more than once necessary) and switching to prioritize food after fulfilling UHV2.
 
Hope noone minds necro-ing this post : ) but I guess if I was interested in tips on how to beat this one, someone in future might find this thread too.

[1.16] I've managed to win on monarch by turn 69 without too much micromanagement... Key was to place 5 cities super early to begin with so building buildings wasn't that hard. (I placed capital city on sugar, then I set queue : 2 settlers. I moved first settler into plain-mountains (so he gets sweet 2:2 base production and ordered 2 more settlers (while capital was finishing second one). Then I just.. Ordered each city to build some buildings until it was fine... With 5 cities it didn't require super complex planning.. In fact most eastern city produced 2 workers early on, instead of helping with UVH2.

It was actually very hard to begin with and took me most tries, so far (egypt took ~5 tries and it was most fun to play. Babylon took ~7+much frustration, this one? ... 10), but after I tried playing with 4 cities (instead of 3) (and I failed population quest 26/30), I thought with 5 cities early on it would be easy. I got some luck with goodie huts (sweet gold) and no barbarian attacks... But I believe getting technology in time wouldn't be issue even without extra gold (if you ignore 'whipping' technology, then tech line is really chill). I placed 6th city to make 3rd quest faster, which caused me to overextend severely.. And I didn't wanted to just leave this beautiful civilization to die :D so I played for 100 more turns and managed to put this country into relative stability...
 

Attachments

  • h.png
    h.png
    3 MB · Views: 94
Last edited:
Nice. It's doable with 4 cities though, on Monarch:

Turn 0: Settle Harappa on the Sugar, Militia goes down the river then west along the coast (eventually breaching Shushan's territory), research Masonry.
Turn 9: Another City Builder on queue, go settle Kolhapur 3E of Harappa (1N of the Dye), contact with Babylon, the Militia heads north on one of the hills for diplomatic contact.
Turn 11: Kolhapur is founded and build a Worker.
Turn 16: Research Pastoralism.
Turn 17: Go south to settle Kot Diji 1S1E of the Marble, Harappa builds a Granary.
Turn 19: Kot Diji is founded and builds a Reservoir. The flood plain 1N of it is worked by Harappa for faster growth.
Turn 24: Kolhapur completes its Worker that goes improve the Marble, starts building a Reservoir, favors food (works flood plain + grass forest).
Turn 26: Research toward Seafaring. Harappa hits 4 pop and its happiness cap, favors production (works the unimproved Sheep, two grass forest hills, one grass forest). Worker starts building Quarry on Marble.
Turn 27: Kot Diji also hits its happiness cap (works one flood plain, the Marble and the plain hill for production).
Turn 29: Same for Kolhapur, favors production (works one grass forest and two grass forest hills).
Turn 32: Quarry completed, the Worker goes build a Mine 1N. Harappa builds a Reservoir.
Turns 37-39: All three Reservoirs completed, Kot Diji builds a Granary and the other two Smokehouses. The Worker goes improve the Sheep.
Turn 45: Kot Diji completes its Granary and starts building the last City Builder. The other two cities will complete their Smokehouses and can start favoring food (Harappa: Sheep, grass forest hill, flood plain, Kot Diji's mine).
Turn 46: Worker finishes the Sheep and goes improve the Wheat. Harappa finishes its Smokehouse and builds a Militia.
Turn 48: Kolhapur finishes its Smokehouse and completes UHV2, starts building a second Worker (works all three flood plains). Research is up to complete Seafaring next turn.
Turn 49: Seafaring is researched, research toward Ceremony.
Turn 50: UHV1 is completed and triggers a Golden Age (you can leave the Militia to keep the trade route going or bring it back for happiness, it doesn't really matter at this point). Kot Diji works the Marble, unimproved Spice and one flood plain. Harappa builds a third Worker.

Turn 51: Kot Diji finishes its City Builder who goes settle Mohenjo-Daro on the desert tile 1S2E, builds Militias/Archers until the end of the game, works two flood plains and the Marble.
Turn 52: Mohenjo-Daro is founded and build a Granary. Worker completes Wheat and goes build a farm 1S of Harappa.
Turns 54-55: India spawns and eats some of Kolhapur and Harappa's tiles. Workers are completed in both and go build farms. Harappa builds a Worker and Kolhapur a Granary.
Turns 56-57: Adopt Hinduism if it spreads, the territory flipped by India goes back to you. Workers improve the Cow. Harappa works the new farm.
Turn 58: Cow is improved, Kolhapur works it along with whichever tiles will make the completion of its Granary coincide with the next pop growth. Research is up to complete Ceremony next turn.
Turn 59: Ceremony is completed, adopt Monarchy and Slavery. Research doesn't matter at this point. Workers build farms everywhere (don't bother with the Rice, it will flip to India). Mohenjo-Daro favors production to make sure its Granary is built by the next pop growth.

At this point it's just a function of managing growth evenly so that every city grows a bit in the remaining turns. 30 population is doable (I did it by turn 85).
 
Last edited:
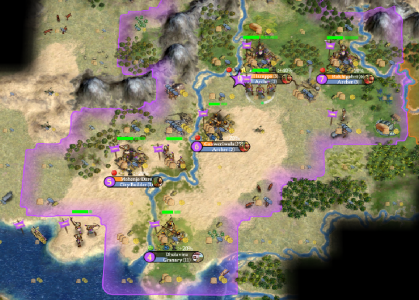
Dang, has it really been 3 years? Well uh, apparently I just learned that Ganweriwala is an insanely OP city location, it's perfectly situated to share the hill with Harappa and Mohenjo-Daro, the marble with Mohenjo-Daro, and the cow with Harappa and Rakhigahri. It results in a bit of city crowding, but it allowed me to forgo despotism and beeline Arithmetics for Redistribution. Regent Normal as usual, I won at turn 76, so there's a solid amount of room there. I went for Masonry and Pastoralism first so I needed to do make sure I was never working non-commerce tiles until I knew I was going to get seafaring in time and I did need to juggle the cow, marble, and hill between cities a few times.
 

Attachments

  • 1709570379088.png
    1709570379088.png
    1.2 MB · Views: 68
Top Bottom