Gray Wolf
Winter Wolf
Note: A PDF file for this tutorial is attached in the zip folder below.
Tech Tree and Script.txt Tutorial (using GIMP 2.8 and notepad++)
In this tutorial, I'll explain how to add a new tech in the .BIQ editor, create pcx files for it, put it on a tech screen, make the advisor say something when you hover over the new tech, and also how to put arrows on your tech screen and connect all your new techs.
Before you do anything, I highly recommend that you always save a copy of your mod and .BIQ file first.
----------------------------------------------------------------
Ok, let's start by adding a new Tech called Harvest which will be required for advancement.
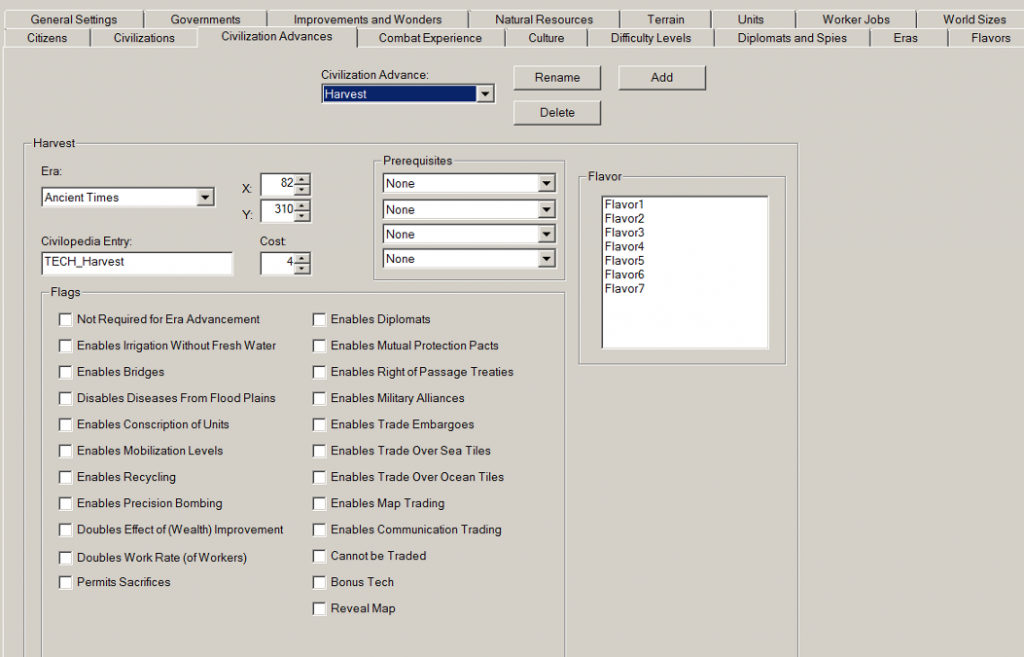
1. Create a new Tech (the Civilization Advance tab in the .BIQ editor)
Click on the Civilization Advance tab. Click Add.
Type in: Harvest
Era: Ancient Times
x: 82 y:310 (see note below)
Civilopedia Entry: TECH_Harvest
Cost: 4
note: I am using my example of where I put my Harvest tech on the ancient tech screen... at 82, 310. If you don't have space available there to put a new tech, for learning purposes, just put the tech at x:800 y:480 which is on the right hand side of the ancient tech screen.
Example:
---------------------------------------------------------------------
2. Make Pediaicons.txt Entry
Put this at the end of the Tech "small.pcx" section. (after Fascism)
#TECH_Harvest
Art\tech chooser\Icons\Harvest_small.pcx
Put this at the end of the Tech "large.pcx" section (after Fascism)
#TECH_Harvest_LARGE
Art\tech chooser\Icons\Harvest_large.pcx
note: If you see a tech in the pediaicon.txt file that is not in your .BIQ file tech list, you can safely delete it. But it won't hurt anything if you leave it in the file...
-----------------------------------------------------------------------
3. Make Civilopedia.txt Entry
Find the section where all the #TECH_technames are located. The order doesn't matter so just paste this below one of the other tech's.
#TECH_Harvest
^
^Harvest.
#DESC_TECH_Harvest
^
^Harvest.
note: If you see a tech in the civilopedia.txt file that is not in your .BIQ file tech list, you can safely delete it. But it won't hurt anything if you leave it in the file...
---------------------------------------------------------------------
4. Make the Harvest-large.pcx file
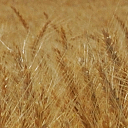
4.1 Download a picture of some Wheat on Wikipedia and open it in GIMP.
We'll use this image on the civilopedia screen to represent a Harvest.
4.2 Image/Scale Image: 128 W x 128 H
4.3 Image/Mode/Indexed
4.4 Generate Optimum Palette
4.5 Maximum colors: 254
4.6 Leave everything else alone
4.7 Convert
4.8 File/Export
4.9 Name: Harvest-large
4.10 Set the "Save in Folder" to: Art/tech chooser/Icons (you need to create this folder in your scenario/mod...)
4.11 Click the + sign where it says Select File Type
4.12 Scroll down to the bottom and choose ZSoft PCX image
4.13 The filename should say: Harvest-large.pcx now
4.14 Click Export
4.15 Open up the Harvest-large.pcx file you just saved/exported.
4.16 Windows/Dockable Dialogs/Colormap
4.17 Resize the Colormap window so you can see all the colors
4.18 Double Click on Color Index=255
4.19 Set Color Index=255 to pink (ff00ff)
4.20 Double Click on Index=254
4.21 Set Color Index=254 to Neon Green (00ff00)
4.22 Scan the palette and look for anything that looks white
4.23 If anything is ffffff, change it to fffff3
Palette/Color Map:

4.24 File/Overwrite/Harvest-large.pcx
4.25 The Harvest-large.pcx file is done
Example:
----------------------------------------------------------------------------
5. Make the Harvest-small.pcx file
Do the same steps you did to create a Harvest-large.pcx file
except (1) Scale the image to 32 W x 32 H and (2) name the image Harvest-small.pcx.
Note: This small image file is the image that shows up on the tech screen. (I'm using a different image for this part...)
Example:

Make sure your -large and -small files are under Art/tech chooser/icons.
---------------------------------------------------------------------------
6. Edit the Script.txt file
OK, now you have to edit the script.txt file to get your new tech to have words when you hover over it.
For example, when you hover over Masonry, the tech advisor's dialog box shows this: "With Masonry we can build walls and large monuments."
We need Harvest to say something too.
6.1 Copy the Script.txt file.
First, find the Script.txt file in the Conquests/text folder.
Copy the file and paste it in your mod's text folder, right beside civilopedia.txt, pediaicons.txt, and diplomacy.txt (if you have one).
6.2 Now open/edit your version of the Script.txt file (not the original one)
Ok, unlike the Pediaicons.txt file and Civilopedia.txt file, the script.txt file needs to have the exact same techs used in the .BIQ editor and all of them have to be in the same exact order...with no extra ones that aren't being used...
6.3 For people using Conquests version 1.20 or greater.
The radio tech was removed in version 1.20 so you will need to delete the Radio tech from the script.txt file.
The Radio tech looks like this:
#SCIENCEADVICETECH64
The {Radio} will enable communication in real-time across vast distances. What could be better?
Go ahead and delete it.
After you delete it, the techs will need to be renumbered. #SCIENCEADVICETECH65 will need to be renamed to #SCIENCEADVICETECH64. #SCIENCEADVICETECH66 will need to be renamed to SCIENCEADVICETECH65, etc...
There are 83 techs that come with the game that are listed in the script.txt file (0 to 82) so you'll need to renumber 65-82.
Fascism will end up being tech #82. And our new tech, Harvest, will be #83 at the end.
And the last part of the section will look like this:
-------------------------------------------------------------
#SCIENCEADVICETECH81
What if we tack some iron plates on the sides of our wooden warships, then we'd have {Ironclads.}
#SCIENCEADVICETECH82
If we're going to war, then there's nothing like a little {Fascism} to bring victory to the troops.
#SCIENCEADVICETECH83
Let's learn how to yield a bigger {harvest}.
#ADVISORANGRY
#advisor Angry
I'm not even supposed to [be] here today!
#comment
-----------------------------------------------------
6.4 If you are using the Radio Tech
If Radio is a tech that is listed in your conquests.biq file, then leave it in the script.txt file.
Just make sure all techs in the script.txt file are exactly the same as the ones in the conquests.biq file and are in the same exact order ... and have the correct science advice orders also (#SCIENCEADVICETECH0, #SCIENCEADVICETECH1, #SCIENCEADVICETECH2, etc.)
6.5 Line Spacing, Carriage Returns, and Line Feeds
Don't worry about how many spaces are in between each section. Just make sure there is a CR/LF at the end of each line.
6.6 Your advisor should say something now when you hover over Harvest...and he should say something when you hover over any other tech in the tech tree also...
note: If you want to see the hover over text for each era, you have to go into debug mode...
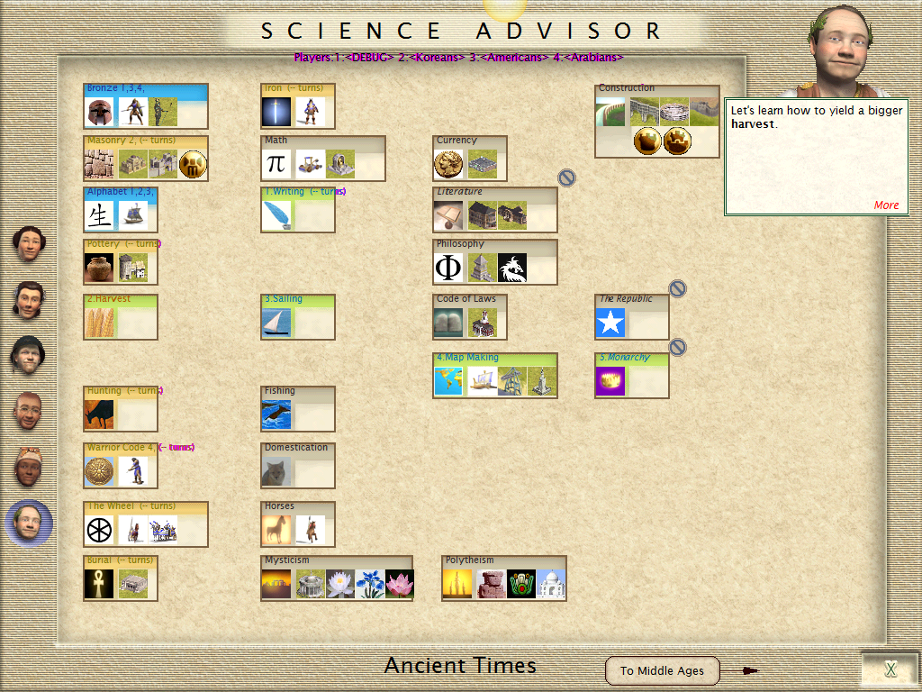
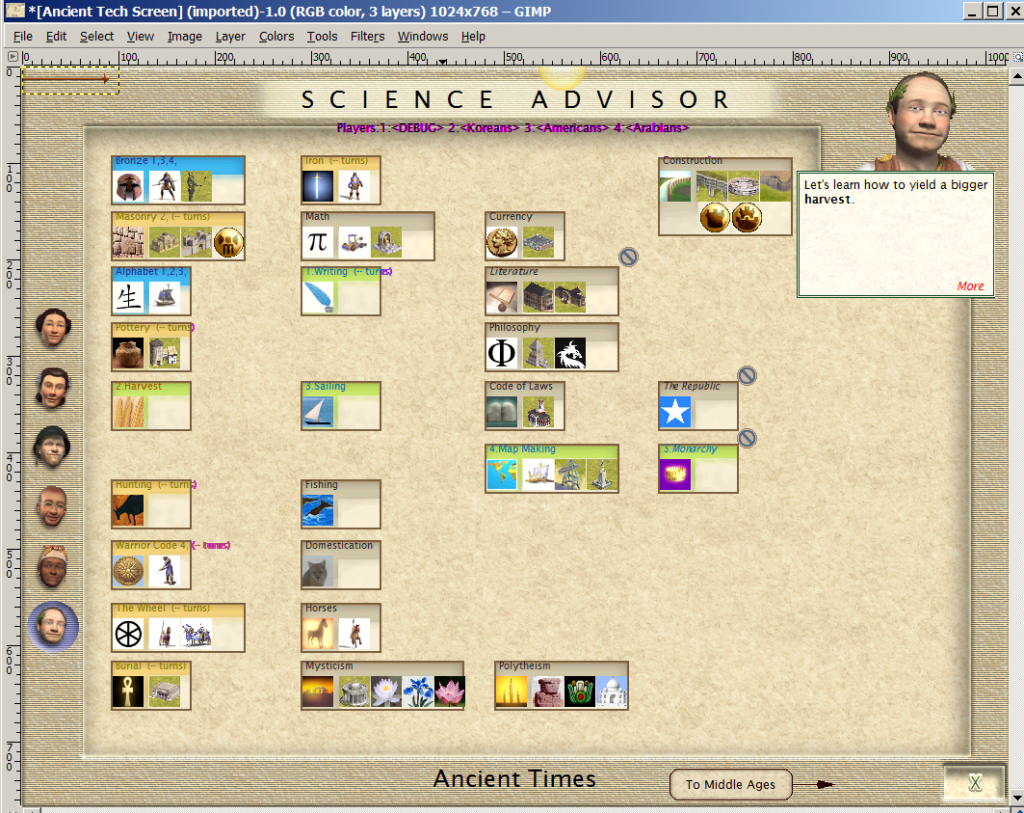
Ok, my tech screen looks like this. You can see the Advisor text on the top right. And my tech image for Harvest.
Note: I don't have arrows on my screen. I'll explain later. Anyway, your screen should have arrows everywhere
except for where the new Harvest Tech is located...
--------------------------------------------------------------
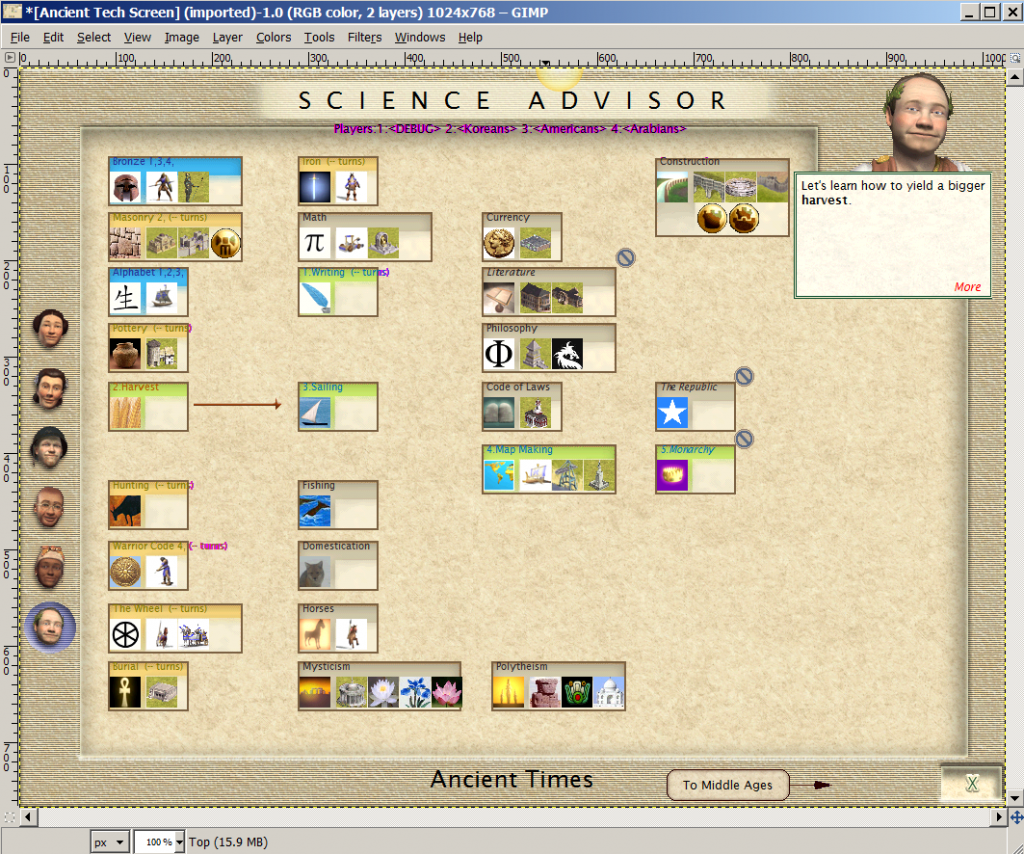
7. How to add arrows to your New Tech(s) on the Tree Screen using a 2nd layer in GIMP.
7.1 Download the files that I attached (which came from Kal-el's tutorial).
7.2 Copy the science_blank.pcx file and put it in your Art/Advisors folder.
Put the file in your folder and rename it science_ancient.pcx
Note: If you start a new game now and look at the Ancient Tech screen, you will see that it has no arrows on it.
7.3 Print Screen Button
Click the Print Screen Button to save the image.
7.4 Open up GIMP. Edit/Paste as/New Image.
Now you have a copy of it in GIMP. Let's call it the "Tech Screen Without Arrows" image.
7.5 Add a layer on top of the "Tech Screen Without Arrows" image.
Layers/New Layer
Layer Name: Top
Leave default width and height (1024 and 768)
Layer Fill Type: Transparency!
The title bar should say "RGB color, 2 Layers" now. And you are currently on the 2nd layer.
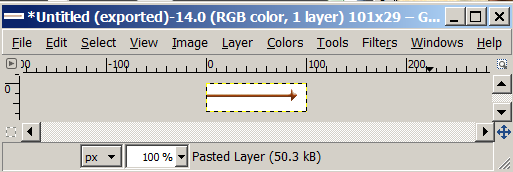
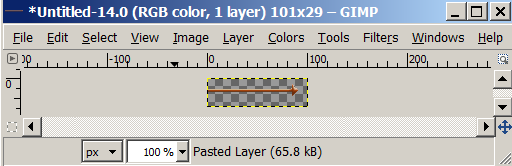
7.6 Open up the arrows.bmp file (made by Kal-el in 2001)
It has arrows with different lengths, shapes, curves, angles, etc.
7.7 Add an arrow to the 2nd layer of the "Tech Screen without Arrows" image.
Note: Like I said above, you are currently on the 2nd layer. We want to always add arrows to the second layer.
What you need to do is:
7.7.1 Find an arrow that you want
7.7.2 Copy it and Paste it as a New Image
7.7.3 Make the background color of the new arrow image transparent
Click U (Tools/Selection Tools/Fuzzy Select).
Click on the white part outside the arrow.
Hit the delete key.
Select/None
7.7.4 Edit/Copy the new arrow image that has a transparent-background
Edit/Copy
7.7.5 Edit/Paste As/New Layer into the "Tech Screen image with no Arrows"
It puts the arrow in the top left of the screen. It becomes "Layer 3" on top of "Layer 2".
7.7.6 Click 'M' to move the arrow and drag it where you want to put it
7.7.7 Layer/Merge Down to lock it into place
This Merges Layer 3 back down into Layer 2
7.7.8 Edit/Copy
This copies the 2nd layer (the arrow only part of the image)
7.7.9 Open the blank science.pcx file
It has 1 layer right now
7.7.10 Edit/Paste Into the blank science.pcx file
This puts the arrows file on top of the blank_science file and creates 2 layers.
7.7.11 Layer/Merge Down (this merges it back down to 1 layer)
7.7.12 Export the file as your new science_ancient.pcx file
Put it in your Advisors folder.
7.7.13 Open up the game and go to the Ancient tech screen and you will see the arrow you just added.
Note: So if you can add 1 arrow, you can add any number of arrows using the instructions above.
I recommend adding 1 or 2 at a time. I also recommend saving copies of the "arrows-only image"
as you progress...so that you can roll back to a previous version if you need to...
-----------------------------------------------------------------
8. Final Notes
These are the files for each tech screen:
Science_ancient.pcx = ancient tech screen.
Science_middle.pcx = middle age tech screen
Science_industrial_new.pcx = industrial age tech screen (I'm not sure why but it needs to have _new)
Science_modern.pcx = the modern age tech screen
------------------------------------------------------------
9. Techboxes.pcx
You can add this to your advisors folder if you want better techboxes.
---------------------------------------------------------
10. Why I don't like Arrows
10.1 It takes a long time to do all this work for each arrow you want to add.
10.2 The arrows look ugly on the screen anyway.
10.3. The arrows aren't needed because when you click on a techbox it will light up all of the pre-requisite techs.
10.4 It's more fun if the game forces you to click on techs and research them to find out what they do
and what the pre-requisite techs are, etc.
Anyway, after spending HOURS and HOURS making arrows for tech screens using this 2nd layer GIMP approach,
I finally realized that it's not worth the trouble. In fact, the game is better without them. Just my opinion of course.
But, still, I thought I'd share the 2 layer approach because it is an easy and fast approach overall. You just add some arrows to the 2nd layer and lock them in. ( No need to manually keep track of the x,y coordinates of any arrow's position, etc).
Ok, that's it. I hope this helps everyone.
Tech Tree and Script.txt Tutorial (using GIMP 2.8 and notepad++)
In this tutorial, I'll explain how to add a new tech in the .BIQ editor, create pcx files for it, put it on a tech screen, make the advisor say something when you hover over the new tech, and also how to put arrows on your tech screen and connect all your new techs.
Before you do anything, I highly recommend that you always save a copy of your mod and .BIQ file first.
----------------------------------------------------------------
Ok, let's start by adding a new Tech called Harvest which will be required for advancement.
1. Create a new Tech (the Civilization Advance tab in the .BIQ editor)
Click on the Civilization Advance tab. Click Add.
Type in: Harvest
Era: Ancient Times
x: 82 y:310 (see note below)
Civilopedia Entry: TECH_Harvest
Cost: 4
note: I am using my example of where I put my Harvest tech on the ancient tech screen... at 82, 310. If you don't have space available there to put a new tech, for learning purposes, just put the tech at x:800 y:480 which is on the right hand side of the ancient tech screen.
Example:
Spoiler :
---------------------------------------------------------------------
2. Make Pediaicons.txt Entry
Put this at the end of the Tech "small.pcx" section. (after Fascism)
#TECH_Harvest
Art\tech chooser\Icons\Harvest_small.pcx
Put this at the end of the Tech "large.pcx" section (after Fascism)
#TECH_Harvest_LARGE
Art\tech chooser\Icons\Harvest_large.pcx
note: If you see a tech in the pediaicon.txt file that is not in your .BIQ file tech list, you can safely delete it. But it won't hurt anything if you leave it in the file...
-----------------------------------------------------------------------
3. Make Civilopedia.txt Entry
Find the section where all the #TECH_technames are located. The order doesn't matter so just paste this below one of the other tech's.
#TECH_Harvest
^
^Harvest.
#DESC_TECH_Harvest
^
^Harvest.
note: If you see a tech in the civilopedia.txt file that is not in your .BIQ file tech list, you can safely delete it. But it won't hurt anything if you leave it in the file...
---------------------------------------------------------------------
4. Make the Harvest-large.pcx file
4.1 Download a picture of some Wheat on Wikipedia and open it in GIMP.
We'll use this image on the civilopedia screen to represent a Harvest.
4.2 Image/Scale Image: 128 W x 128 H
4.3 Image/Mode/Indexed
4.4 Generate Optimum Palette
4.5 Maximum colors: 254
4.6 Leave everything else alone
4.7 Convert
4.8 File/Export
4.9 Name: Harvest-large
4.10 Set the "Save in Folder" to: Art/tech chooser/Icons (you need to create this folder in your scenario/mod...)
4.11 Click the + sign where it says Select File Type
4.12 Scroll down to the bottom and choose ZSoft PCX image
4.13 The filename should say: Harvest-large.pcx now
4.14 Click Export
4.15 Open up the Harvest-large.pcx file you just saved/exported.
4.16 Windows/Dockable Dialogs/Colormap
4.17 Resize the Colormap window so you can see all the colors
4.18 Double Click on Color Index=255
4.19 Set Color Index=255 to pink (ff00ff)
4.20 Double Click on Index=254
4.21 Set Color Index=254 to Neon Green (00ff00)
4.22 Scan the palette and look for anything that looks white
4.23 If anything is ffffff, change it to fffff3
Palette/Color Map:
Spoiler :
4.24 File/Overwrite/Harvest-large.pcx
4.25 The Harvest-large.pcx file is done
Example:
Spoiler :
----------------------------------------------------------------------------
5. Make the Harvest-small.pcx file
Do the same steps you did to create a Harvest-large.pcx file
except (1) Scale the image to 32 W x 32 H and (2) name the image Harvest-small.pcx.
Note: This small image file is the image that shows up on the tech screen. (I'm using a different image for this part...)
Example:
Spoiler :
Make sure your -large and -small files are under Art/tech chooser/icons.
---------------------------------------------------------------------------
6. Edit the Script.txt file
OK, now you have to edit the script.txt file to get your new tech to have words when you hover over it.
For example, when you hover over Masonry, the tech advisor's dialog box shows this: "With Masonry we can build walls and large monuments."
We need Harvest to say something too.
6.1 Copy the Script.txt file.
First, find the Script.txt file in the Conquests/text folder.
Copy the file and paste it in your mod's text folder, right beside civilopedia.txt, pediaicons.txt, and diplomacy.txt (if you have one).
6.2 Now open/edit your version of the Script.txt file (not the original one)
Ok, unlike the Pediaicons.txt file and Civilopedia.txt file, the script.txt file needs to have the exact same techs used in the .BIQ editor and all of them have to be in the same exact order...with no extra ones that aren't being used...
6.3 For people using Conquests version 1.20 or greater.
The radio tech was removed in version 1.20 so you will need to delete the Radio tech from the script.txt file.
The Radio tech looks like this:
#SCIENCEADVICETECH64
The {Radio} will enable communication in real-time across vast distances. What could be better?
Go ahead and delete it.
After you delete it, the techs will need to be renumbered. #SCIENCEADVICETECH65 will need to be renamed to #SCIENCEADVICETECH64. #SCIENCEADVICETECH66 will need to be renamed to SCIENCEADVICETECH65, etc...
There are 83 techs that come with the game that are listed in the script.txt file (0 to 82) so you'll need to renumber 65-82.
Fascism will end up being tech #82. And our new tech, Harvest, will be #83 at the end.
And the last part of the section will look like this:
-------------------------------------------------------------
#SCIENCEADVICETECH81
What if we tack some iron plates on the sides of our wooden warships, then we'd have {Ironclads.}
#SCIENCEADVICETECH82
If we're going to war, then there's nothing like a little {Fascism} to bring victory to the troops.
#SCIENCEADVICETECH83
Let's learn how to yield a bigger {harvest}.
#ADVISORANGRY
#advisor Angry
I'm not even supposed to [be] here today!
#comment
-----------------------------------------------------
6.4 If you are using the Radio Tech
If Radio is a tech that is listed in your conquests.biq file, then leave it in the script.txt file.
Just make sure all techs in the script.txt file are exactly the same as the ones in the conquests.biq file and are in the same exact order ... and have the correct science advice orders also (#SCIENCEADVICETECH0, #SCIENCEADVICETECH1, #SCIENCEADVICETECH2, etc.)
6.5 Line Spacing, Carriage Returns, and Line Feeds
Don't worry about how many spaces are in between each section. Just make sure there is a CR/LF at the end of each line.
6.6 Your advisor should say something now when you hover over Harvest...and he should say something when you hover over any other tech in the tech tree also...
note: If you want to see the hover over text for each era, you have to go into debug mode...
Ok, my tech screen looks like this. You can see the Advisor text on the top right. And my tech image for Harvest.
Note: I don't have arrows on my screen. I'll explain later. Anyway, your screen should have arrows everywhere
except for where the new Harvest Tech is located...
Spoiler :
--------------------------------------------------------------
7. How to add arrows to your New Tech(s) on the Tree Screen using a 2nd layer in GIMP.
7.1 Download the files that I attached (which came from Kal-el's tutorial).
7.2 Copy the science_blank.pcx file and put it in your Art/Advisors folder.
Put the file in your folder and rename it science_ancient.pcx
Note: If you start a new game now and look at the Ancient Tech screen, you will see that it has no arrows on it.
7.3 Print Screen Button
Click the Print Screen Button to save the image.
7.4 Open up GIMP. Edit/Paste as/New Image.
Now you have a copy of it in GIMP. Let's call it the "Tech Screen Without Arrows" image.
Spoiler :
7.5 Add a layer on top of the "Tech Screen Without Arrows" image.
Layers/New Layer
Layer Name: Top
Leave default width and height (1024 and 768)
Layer Fill Type: Transparency!
The title bar should say "RGB color, 2 Layers" now. And you are currently on the 2nd layer.
7.6 Open up the arrows.bmp file (made by Kal-el in 2001)
It has arrows with different lengths, shapes, curves, angles, etc.
7.7 Add an arrow to the 2nd layer of the "Tech Screen without Arrows" image.
Note: Like I said above, you are currently on the 2nd layer. We want to always add arrows to the second layer.
What you need to do is:
7.7.1 Find an arrow that you want
7.7.2 Copy it and Paste it as a New Image
Spoiler :
7.7.3 Make the background color of the new arrow image transparent
Click U (Tools/Selection Tools/Fuzzy Select).
Click on the white part outside the arrow.
Hit the delete key.
Select/None
Spoiler :
7.7.4 Edit/Copy the new arrow image that has a transparent-background
Edit/Copy
7.7.5 Edit/Paste As/New Layer into the "Tech Screen image with no Arrows"
It puts the arrow in the top left of the screen. It becomes "Layer 3" on top of "Layer 2".
Spoiler :
7.7.6 Click 'M' to move the arrow and drag it where you want to put it
7.7.7 Layer/Merge Down to lock it into place
This Merges Layer 3 back down into Layer 2
Spoiler :
7.7.8 Edit/Copy
This copies the 2nd layer (the arrow only part of the image)
7.7.9 Open the blank science.pcx file
It has 1 layer right now
7.7.10 Edit/Paste Into the blank science.pcx file
This puts the arrows file on top of the blank_science file and creates 2 layers.
7.7.11 Layer/Merge Down (this merges it back down to 1 layer)
7.7.12 Export the file as your new science_ancient.pcx file
Put it in your Advisors folder.
7.7.13 Open up the game and go to the Ancient tech screen and you will see the arrow you just added.
Note: So if you can add 1 arrow, you can add any number of arrows using the instructions above.
I recommend adding 1 or 2 at a time. I also recommend saving copies of the "arrows-only image"
as you progress...so that you can roll back to a previous version if you need to...
-----------------------------------------------------------------
8. Final Notes
These are the files for each tech screen:
Science_ancient.pcx = ancient tech screen.
Science_middle.pcx = middle age tech screen
Science_industrial_new.pcx = industrial age tech screen (I'm not sure why but it needs to have _new)
Science_modern.pcx = the modern age tech screen
------------------------------------------------------------
9. Techboxes.pcx
You can add this to your advisors folder if you want better techboxes.
---------------------------------------------------------
10. Why I don't like Arrows
10.1 It takes a long time to do all this work for each arrow you want to add.
10.2 The arrows look ugly on the screen anyway.
10.3. The arrows aren't needed because when you click on a techbox it will light up all of the pre-requisite techs.
10.4 It's more fun if the game forces you to click on techs and research them to find out what they do
and what the pre-requisite techs are, etc.
Anyway, after spending HOURS and HOURS making arrows for tech screens using this 2nd layer GIMP approach,
I finally realized that it's not worth the trouble. In fact, the game is better without them. Just my opinion of course.
But, still, I thought I'd share the 2 layer approach because it is an easy and fast approach overall. You just add some arrows to the 2nd layer and lock them in. ( No need to manually keep track of the x,y coordinates of any arrow's position, etc).
Ok, that's it. I hope this helps everyone.
 I have to disagree with you on this: Radio is used, you can see it in the Industrial era bottom-right corner.

 or this