Blender: Error importing/exporting Civ5 CN6 files to Civ6 modding

Check the Vertex Groups for the old mesh and you should have both sets of bone named Vertex Groups in it.
These are vertex groups. and now Civ6 Field Cannon is stacking over the Civ5 Cannon
Working with Blender4 (Set parent4).jpg

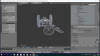
What happened now is civ6 field cannon stacked over civ 5 cannon. Is this result Correct? And what's next? (or undo the process?) So is it time to add 'main' vertex for Civ5 Cannon yet? because the old cannon didn't get 'main' vertex made automatically.
 
The A key will select/deselect all in Edit Mode. You want to deselect everything. Then when you select each Vertex Group you can use Select to see which vertices are part of that Vertex Group.

When you parent the old Civ 5 mesh to the Civ 6 Armature using Ctrl-P you should pick "Create Empty Groups". Then you'll have the old Vertex Groups and the new ones all available to the mesh. You can then select each Vertex Group of the old mesh and assign it to the corresponding Vertex Group on the new mesh.

upload_2019-9-1_16-21-31.png


So Is this the correct asignment? (Again i've do these steps a new so to assign vertices as you said. Not setting parents yet) I think this is a correct group.
 

Attachments

  • upload_2019-9-1_16-10-38.png
    upload_2019-9-1_16-10-38.png
    428.2 KB · Views: 111
Alright this one must be correct. But i ended up losing entire meshes when exported!!!

Could you please check it out what I did wrong? and if possible return with fixed versions. I think i've rigged the whole thing correctly.
 

Attachments

Alright this one must be correct. But i ended up losing entire meshes when exported!!!

Could you please check it out what I did wrong? and if possible return with fixed versions. I think i've rigged the whole thing correctly.

Main problem is that you had Cannon (the Mesh object) set to be the parent of Root object (the Armature object) when it should be the other way around: Armature Object (Root) should be the parent of the Mesh object (Cannon). Swapping them over allowed me to export to .cn6 and then successfully convert to .fgx using CivNexus6. You need to be in Object Mode and Select All with the A key before exporting just to make sure you're picking up everything.

Also checking the rigging to the new bone vertex groups I noticed that the spokes of the right wheel were assigned to the leftWheel vertex group, which I have corrected - see attached ZIP.

upload_2019-9-2_12-17-41.png


upload_2019-9-2_12-18-20.png
 

Attachments

YEh I did notice that too. but it came as default but I have no idea how to correct that to the detail. What i can do is that to make a new vertex group that correspondent to C6 FC.
What's next. How do I apply a skin into this siege cannon sir? (And is it still possible to paint a better skin on Blender? Because creating a 2d skin files requires some papercraft skill. and must know where in the files goes where in the mesh.)
 
YEh I did notice that too. but it came as default but I have no idea how to correct that to the detail.

You can use Remove as well as Assign to alter the vertices that are assigned to each Vertex Group.

What i can do is that to make a new vertex group that correspondent to C6 FC. What's next. How do I apply a skin into this siege cannon sir?

You need to make an Asset .ast file for your new Cannon. This is how I would do it:
1) Make a copy of the Civ 6 Field Cannon .ast file (not sure what the exact filename is).
2) Rename the file and set the Name field at the bottom of the XML in the file to be exactly the same as the filename without the ".ast".
3) From CivNexus6 with your new Cannon .fgx open use the "Create GeometrySet .xml for .ast file".
4) Take the generated GeometrySet xml and copy-paste it over the GeometrySet section in your .ast file using a text editor.
5) Import your Civ 5 Textures in the Asset Editor - this will create both .dds and .tex files.
6) Create a new Material file for the Civ 5 Cannon that points to your imported Textures.
7) Edit the Material entry in the GeometrySet to point to your new Material.

Open the Asset .ast in the Asset Editor and check for any errors in the Output tab at the bottom. This should guide you how to fix any remaining issues.

(And is it still possible to paint a better skin on Blender? Because creating a 2d skin files requires some papercraft skill. and must know where in the files goes where in the mesh.)

I normally just use Paint.NET and sometimes Photoshop to edit the DDS textures, and then test in the Asset Previewer which no will automatically pick up changes when you save the DDS you have imported from. Very rarely is paint in Blender a better option. Some people use Substance Painter to paint 3D model but that costs money.
 
So in which case should I edit M_name at the buttom of Asset files and does it has to be exactly the same as the name given?

View attachment 534015
like this hignlighed line i've just done?

It can be anything - whatever name you choose - but the filename and m_Name text must be the same. So if the file is "MyLovelyCannon.ast" then the XML should have <m_Name text="MyLovelyCannon"/>.
 
Also at 5. I'd use the preexisting Civ5 cannon dds files (It comes with Civ5 Unit Conversions for Civ6, downloadable here in Civfanatics. came as separate cannon and crew pieces) Just copy and paste on 'textures' folder and what's next? Do I still need to make texture in Asset Editor separately or just do Step 6 via Asset Editor? Also this cannon dds texture files in questions are
Working with Blender5 (Skinning).jpg

I think one with _t is tint mask . I don't know about the others with _diff or _sref, what are they?

(Personally I don't like how the original civ5 cannon skins look (ribbed bronze barrel pieces), as a decade old graphics are played in modern day engine and it turns out bad, but first I must finish the first released version of my mod SOON and these imported units art direction must go well with Civ6 standards. making a new skin takes a considerable time even it might turn out better later on.)
 
Done. Skins applied (It takes several attempts to make JUST ONE right material file) Just as one problem solved, another shows up.

Animation test shows this!
upload_2019-9-3_23-47-36.png

THE CANNON IS DESTROYED IN THE TEST FIRING SHOT! WHAT DID I DO WRONG? during Blender session i've rotated the old cannon 90 degrees in the same alignment as Field Cannon since i don't know where's the correct alignment of the cannon in question. I guess it has something to do with armature alignment isn't it? could you please check out again?
 

Attachments

Done. Skins applied (It takes several attempts to make JUST ONE right material file) Just as one problem solved, another shows up.

Animation test shows this!
View attachment 534030
THE CANNON IS DESTROYED IN THE TEST FIRING SHOT! WHAT DID I DO WRONG? during Blender session i've rotated the old cannon 90 degrees in the same alignment as Field Cannon since i don't know where's the correct alignment of the cannon in question. I guess it has something to do with armature alignment isn't it? could you please check out again?

You are very close - well done for getting this far. :goodjob: It looks like an issue with the position/rotation prior to export. One this you need to do before exporting is to do Ctrl-A to Apply Transformation - Rotation, Position and Scale to the mesh to make sure that the object data reflects what you are seeing visually. Try that step and if that doesn't work, then possibly the position/rotation of the Cannon relative to the armature is not correct.
 
After fixing that aforemented Siegecannon issued (Reimported the latest CN6 file you've returned) and armature fixed. The second firing test ended with success. What the inagural blaze of glory in Nekopolis Miocastle Arsenal :P :D

Siege cannon Testfire.jpg

You're right. The Armature and the mesh shall be aligned before export.
 
Last edited:
After fixing that aforemented Siegecannon issued (Reimported the latest CN6 file you've returned) and armature fixed. The second firing test ended with success. What the inagural blaze of glory in Nekopolis Miocastle Arsenal :p :D
You're right. The Armature and the mesh shall be aligned before export.

Excellent! Well done.
 
A second project comes up just in same time. This time the Siege Rifle (American Civil War new weapon)

Is this a correct pre-export selection that will not incurs mesh loss? What else should be selected so to successfully export the entire piece.

It looks correct yes. I normally just do "A" key to select all objects. Providing any parts that are no longer needed are still in your Blender session then you should be fine.
 
Now Siege Rifle is complete. well almost
What's left now is skinning. A proper skinning

upload_2019-9-5_23-28-1.png

The rigging gives a correct result. New Siege Rifle works as it should be. But its texture doesn't seems so. (The Siege Rifle has iron hitches and holes on the tail end, intended to fit with handspikes which needed to finetune aiming of a gun, the correct texture requires this hole to show up at that spot)
1. Did I save with a wrong algorythm? (I uses Kaiser Algorythm, a recommended texture DDS file to save) or wrong texture layer in Materials entry ? (I've photoshopped to exclude the gun crew which I decided not to use default ones anymore and instead give'em Field Cannon animations instead.)
2. And Gloss layer looks like this

SiegeRifle_Gloss.jpg

I think I must, again divide this picture in half. Which side goes to Gloss layer? and where the other goes? AO or Metalness?
 

Attachments

Last edited:
The rigging gives a correct result. New Siege Rifle works as it should be. But its texture doesn't seems so. (The Siege Rifle has iron hitches and holes on the tail end, intended to fit with handspikes which needed to finetune aiming of a gun, the correct texture requires this hole to show up at that spot)
1. Did I save with a wrong algorythm? (I uses Kaiser Algorythm, a recommended texture DDS file to save) or wrong texture layer in Materials entry ? (I've photoshopped to exclude the gun crew which I decided not to use default ones anymore and instead give'em Field Cannon animations instead.)
2. And Gloss layer looks like this
I think I must, again divide this picture in half. Which side goes to Gloss layer? and where the other goes? AO or Metalness?

1. The key thing for saving in Photoshop is to save as Uncompressed DDS. Kaiser Algorithm is for generating mipmaps. These days I don't bother generating mipmaps when saving as the Asset Editor does it when you import your textures there.
2. That's because it's a monochromatic greyscale but it's interpreting the input as Red channel. Not sure how to correct that, but you can probably change the color space or something. I often just work in PNG for this reason and then re-save as A8B8G8R8 format dds in Paint.NET for this reason (or ABGR8 format in Gimp 2) - Photoshop handling of DDS seems awkward.

You definitely wont have the image be half and half for different purposes. Only one texture can be the Gloss map, and other the Metalness and so on.

Ah so the model is from union_confederate_artillery. The reason for the two cannons is that there must be two different cannon models re-using the same texture.

Here a made a starter Gloss map you'll probably want to darken it a bit for Civ 6.

upload_2019-9-6_13-13-0.png


You'll need to resave as DDS before import in the AE. Often for the other Civ 6 maps it is just a question of playing around and seeing what works often a solid white/very pale grey can work well for the AO. If you want to get more advance you can Bake an AO from the mesh in Blender. For Metalness fully white is often too much and a medium grey can look good.
 

Attachments

  • upload_2019-9-6_13-12-55.png
    upload_2019-9-6_13-12-55.png
    2.9 KB · Views: 121
Last edited:
Tried but skins didn't shown up correctly. Compared to the original Rifle Cannon units.
upload_2019-9-6_23-53-59.png

PERSONALLY I want my SIEGE RIFLE to show its skin THIS WAY. Can you send me a correct (and separate) File for siege rifle. (And do you think skin and model rotations are realted? I did flip the skinning files horizontally and it shows holes wrongly.
 
Back
Top Bottom