Convert Civ 4 units to Civ 5 (Temp)

Heh, I ran into several snags along the way of learning how to convert improvement models, and still don't think I've got the process perfectly understood... so I know it happens. It's just so helpful when someone can at least say "Oh, you did this wrong" so I can learn from it. X3

That said... I've found the .nb2 file now, but can't figure out how to import it into Blender 2.7. I know where the script window is in 2.49, but the interface seems completely different. I managed to figure out from the manual how to add the scripts -- I think -- by going through User Preferences -> Add-Ons and Install from File. But even if the script is activated, I'm not sure how to import the .nb2, since it doesn't show up as a valid choice for the Import function...

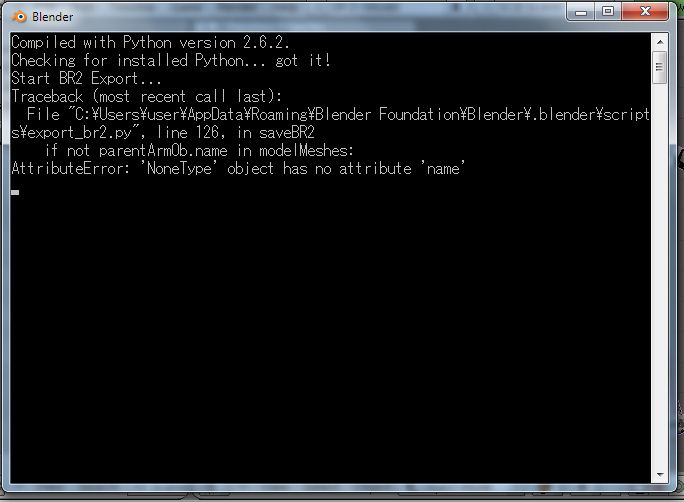
I have to admit, I think this is the step that's always been the big hurdle for me. Even opening up 2.49 and checking the scripts window, I can't find the .nb2 import. (I may have had it before, but then when I messed up and overwrote my old copy of 2.49 I probably screwed it up.) I'm pretty sure I must not be installing the scripts correctly, although most of the tutorials I've read simply say "open the scripts folder and put the .py files in". I may have messed something up in the filepaths?

Importing scripts into Blender:

NOTE: In order to see the "AppData" directory you may first need to select the "Show Hidden Files and Folders" checkbox in Windows! Follow these steps:

1) Open Folder Options by clicking the Start | Control Panel | Appearance and Personalization | Folder Options.
2) Click the View tab.
3) Under Advanced settings, click Show hidden files and folders, and then click OK.

Blender v2.49b:

1) Copy the .py files to the "C:\Users\%username%\AppData\Roaming\Blender Foundation\Blender\.blender\scripts\" directory (where %username% is the user account)
2) Open Blender and switch to the Scripts view pane.
3) Click on Scripts and choose Update Menus... from the menu
4) Your newly copied script should be installed into one of the sub-menus

Blender v2.7+:

1) Copy the .py files to the "C:\Users\%username%\AppData\Roaming\Blender Foundation\Blender\2.7x\scripts\addons\" directory
2) Open Blender and go to User Preferences | Add-Ons and select the checkbox for the newly installed script
3) If the installed script is not found you can select Install from File and browse to the desired script to install. Repeat step 2 after installing
4) Your newly installed (or active) scripts can be found in the File | Import/Export menu (usually)

Hope this helps. :)
 
Hope this helps. :)

That was incredibly helpful!

Guess who's in Blender 2.49? Mr. Paratrooper!

Paratrooper1_zpsfbqgpf5n.jpg


Okay... now to try and use Wolfdog's tutorial. This part seems pretty intimidating, since I'm not very familiar with vertex groups.

Also, I have to ask... is there any way to change the focus of the screen away from the origin? The origin is at the models feet, so if I try to zoom in I just end up zooming in on his feet. I can't move the actual model, since if I try I just move the vertex groups away from the skeleton, it seems...

Paratrooper2_zpsv89nddxh.jpg
 
That was incredibly helpful!

Guess who's in Blender 2.49? Mr. Paratrooper!

Spoiler :
Paratrooper1_zpsfbqgpf5n.jpg


Okay... now to try and use Wolfdog's tutorial. This part seems pretty intimidating, since I'm not very familiar with vertex groups.

Also, I have to ask... is there any way to change the focus of the screen away from the origin? The origin is at the models feet, so if I try to zoom in I just end up zooming in on his feet. I can't move the actual model, since if I try I just move the vertex groups away from the skeleton, it seems...

Spoiler :
Paratrooper2_zpsv89nddxh.jpg

Awesome! Glad you found that useful - I had to search forever to find that info myself the first time I installed Blender.

To scroll the view in Blender:

In/Out: Scroll middle mouse button (you already knew that but just here for reference)

Up/Down: Hold Shift + Scroll middle mouse button

Left/Right: Hold Ctrl + Scroll middle mouse button

That's probably one of the things that gets tricky -- there's so many little things to learn like that. Thanks for the tip with scrolling!

Okay, so now for the next step. I've got my Paratrooper blend open in one window, and want to open the T800 in another. Should I use my nif import, or the obj one? The obj one doesn't seem to have any vertex data that I can find. Given that there's a few different ways to import models at this point, which is the easiest, do you think?

If I use Wolfdog's tutorial, he says to rename the vertexes to match... but I can't figure out how to rename them. And I have 19 vertexes on the paratrooper, and only 16 on the T800 -- is that going to be an issue?

If you are doing a rig (i.e., the T800 will use Paratrooper animations) then you don't want any vertex groups from the T800. You only want the mesh. Using Ekmek's bone weight copy tutorial, align the T800 over the Paratrooper as closely as possible and copy the vertex groups from the Paratrooper to the T800 (the tutorial explains this). If the unit you want to rig onto the original unit has vertex groups it wont work. Delete them. Once you have copied the vertex groups to the T800 mesh and you are satisfied that they closely match the original Paratrooper's, then delete the Paratrooper mesh and export the T800 using its mesh rigged over the Paratrooper skeleton (making sure to do the Ctrl+A and Ctrl+P to the objects per the tutorial first).

This is why I use .obj - no vertex groups, just mesh. Open the .obj in a second file and save it, Copy Paste Objects to buffer (from the scripts menu) and paste it into the model you wish to emulate (using the same script). Basically you are making a Doppelganger of sorts, copying all aspects of an existing mesh to that of one you want to import into CiV.
 
Hmmmm... all right, I'll give it a try tonight. Although I suspect the Paratrooper may end up being a poor choice -- the default standing animation for it doesn't have the arms outspread the way the T800 mesh is, so I'm worried they won't line up well. I was having problems getting the Marine .gr2 into NexusBuddy, though, so might have to try and find an alternative?

I'll give Ekmek's tutorial a try.

The location of the mesh for your new unit doesn't matter in its default position; you will likely have to scale and rotate parts of the inserted mesh into position to match the paratrooper. Some of the units I have created needed a LOT of scaling and rotation before they were ready. It may be a little bit (or a lot) of work; the key is to match the bone locations so that the new unit will animate as close to perfectly as the original unit.

Two things determine the success of an animated unit: the location of the mesh and how well it "rigs" over the original skeleton, and how precisely the vertex groups are assigned to the mesh. Obviously if you have leg mesh assigned to an arm vertex group then you will have deformation in the animation. Match the two units up as closely as possible via scaling and rotating the new mesh as necessary, then perform a bone weight copy from the original mesh to the new mesh. In a nutshell, that pretty much sums up the concept of rigging.

Ahhh... is it possible to maniuplate parts of the mesh to try and map to the existing model better? For the moment, I'm suspecting not. I did my best to scale and rotate the mesh I had to overlap the paratrooper, but since the T800's arms are outspread while the paratrooper's arms are folded in, I'm guessing they aren't going to map well. XD

Still, if I can get anything, even a horribly deformed robot, to appear in the game, I'll consider that a step forwards. :P

So, I went through Ekmek's tutorial, and appear to now have vertexes on my T800 mesh:

T800-2_zps2n8hxhjt.jpg


At this point, the tutorials are a bit vague about what to do -- how do I export the T800 mesh/vertexes at this point? Ekmek's tutorial doesn't go beyond this point. Wolfdog's tutorial says I can delete the original paratrooper mesh, and then "If you are happy with your new unit press ‘CRTL+A’ and select ‘Scale and Rotation to ObData’ then save. Go to your scripts and export to BR2." Is this the next step?

Sorry to ask for so much hand-holding, but your help has gotten me miles farther than I'd have been able to do on my own. XD
 
you can select the arms of your mesh and move them into position and they do the boneweight copy. Which tutorial of mine are using? the bone-weight or my civ4 leaderguide

I was using the bone-weight guide. I just finished the bone weight copy, so I'm not sure what to do next. Should I delete the vertex groups? I just noticed the final instructions in your tutorial seem to suggest that.

I'm also not sure how I could select the arms of my mesh separate from the rest of it -- if I click on the mesh and try to move it, the whole mesh moves.

Your imported mesh shouldn't have vertex groups; that is what bone weight copy is for. You want to assign vertex groups to the new mesh from the original mesh. The vertex groups tell the mesh how to deform when the bones are animated; since you want the imported mesh to behave like the original mesh you do a bone weight copy (also why you need to align both meshes up as closely as possible). You will not be deleting the vertex groups, but you will delete the original mesh after you do the bone weight copy and verify their vertex groups are nearly identical (since the new mesh will be replacing it).

You need to be in edit mode to scale and rotate mesh. This tutorial (Wolfdog's) explains the process fairly well in section "E". Ekmek's bone weight copy tutorial replaces the portion in that section with regard to assigning vertex groups. I would recommend reading them both a couple of times to better understand the process.

While in edit mode, here are a couple of quick keys for selecting/deselecting:

Select/Deselect: Right-click
Add to current selection group: Shift + Right-click
Lasso Select (adds to current selection group): Ctrl + Hold Left mouse key
Remove from current selection group: Ctrl + Shift + Right-click
Lasso Select (remove from current selection group): Ctrl + Shift + Hold Left mouse key

Move current selection: G
Move along defined plane: G + (X, Y, or Z), enter number for distance
Scale: S
Rotate: R
Rotate along defined plane: R + (X, Y, or Z), enter number for rotation

Place Cursor: Left-click (I recommend using 3D cursor for rotations, not median point. It can be selected in the toolbar of the 3D View pane).

For the rest, all I can say is read tutorials and practice, practice, practice!
 
Your imported mesh shouldn't have vertex groups; that is what bone weight copy is for. You want to assign vertex groups to the new mesh from the original mesh. The vertex groups tell the mesh how to deform when the bones are animated; since you want the imported mesh to behave like the original mesh you do a bone weight copy (also why you need to align both meshes up as closely as possible). You will not be deleting the vertex groups, but you will delete the original mesh after you do the bone weight copy and verify their vertex groups are nearly identical (since the new mesh will be replacing it).

Yeah, this is the point I'm at now -- I did the bone weight copy, and now my T800 mesh has the vertex groups from the Paratrooper. I'm just trying to figure out what the next step is. Wolfdog's tutorial says to export to .br2, but I want to make sure I'm not missing something first...

EDIT: Okay, was using the wrong .br2 export script for 2.49, so got it to show up. But now I'm getting an error from the export...

T800-3_zpsjmen4fw5.jpg

What is the script error? It should display in the console (the command line window that opens when in Blender)
 
What is the script error? It should display in the console (the command line window that opens when in Blender)

T800-4_zpsuycokwwl.jpg


EDIT: Also, for practice I've tried converting a couple of the vehicle models I've downloaded. I think I've been getting the hang of the process of adding the bone weights from an existing model (either a Modern Armor or a Mechanized Infantry) to the meshes I've created, but I'm still running into the exporting error.

OK, it reads:

"if not parentArmOb.name in modelMeshes:" and then creates an error.

What the code is saying is that the parent armature object for your model mesh does not have a name (or it doesn't exist). Immediately what comes to mind is that you did not use Ctrl+P to make your mesh parented to the armature of the existing skeleton. Since it was probably pasted into Blender it has no parent armature and, therefore, the parent armature doesn't have a name (because it doesn't exist for that object). Make certain you perform the Ctrl+A and Ctrl+P on your imported meshes or you will have problems (Ctrl+A is unrelated to this error but will give you other problems if you forget to do it).

This procedure is outlined in the tutorial; if for some reason that isn't the problem let me know.
 
I decided to get on the model conversion bandwagon too. :)

For testing, I selected a B-47 Stratojet and rigged it to the Stealth Bomber bones - at first I used the bone weight tool, but since that made it look weird I edited the vertex groups a bit. Also, NexusBuddy 2.0 beta 7 seemed to import the br2 file better than 2.1, which seemed to load the model into the list twice and then went a bit funny once I saved it.

After a few hiccups, I actually got it in game, but for some reason it's oriented vertically rather than horizontally. How would I fix that? Do I need to rotate it back to the horizontal before exporting it to a br2 from Blender?
Spoiler :
rsvntk.jpg

2nak32x.jpg

29y2sdk.jpg
Don't get me wrong, I'm stoked I got this far, but obviously I don't want everything I convert to be pointing 90 degrees the wrong way. :p Here's my files if that helps.
 
OK, it reads:

"if not parentArmOb.name in modelMeshes:" and then creates an error.

What the code is saying is that the parent armature object for your model mesh does not have a name (or it doesn't exist). Immediately what comes to mind is that you did not use Ctrl+P to make your mesh parented to the armature of the existing skeleton. Since it was probably pasted into Blender it has no parent armature and, therefore, the parent armature doesn't have a name (because it doesn't exist for that object). Make certain you perform the Ctrl+A and Ctrl+P on your imported meshes or you will have problems (Ctrl+A is unrelated to this error but will give you other problems if you forget to do it).

This procedure is outlined in the tutorial; if for some reason that isn't the problem let me know.

Hrm... there must be steps that I'm missing, then. After performing the bone weight copy, Wolfdog's step E-5 says I can delete the original mesh, so I do that, leaving my new mesh with the vertexes and an armature. I then select the new mesh, use Ctrl-A with Scale and Rotation to ObData, and then use Ctrl-P, and then try to export. But then I get the error.

Am I not selecting things properly? The armature looks like it's still separate from the mesh -- am I supposed to select them both and then use Ctrl-P to link them?

I've included three .blend files I've been using, one for each step after the bone weight copy process -- Striker1 is right after the bone weights are copied, Striker2 is after I delete the original mesh, and Striker3 is after I use Ctrl-A and Ctrl-P. Could you take a look at them, and tell me if I'm missing something?

Striker2_zpsy6scvwfu.jpg


(You'll note that I've switched from experimenting with the T800 and its more complicated armature for a variant on the Mech Inf, with a much simpler armature to try and line up with, for the time being!)

EDIT: I just took a look at Typhlomence's files, and his files look completely different from mine. I can see how his mesh is connected to the armature, which is connected to a WORLD_center, but mine doesn't have any of that. Not sure if it's just a difference in the files used as a base...?
 

Attachments

I see what the problem is... you need to make sure the mesh is a child of the parent object of the armature (in this case, "point_WORLD"). You can type it in manually in the OB box under Links and Materials,

Also, be sure to pack the textures you use, otherwise we just get a nice pink tank lol
 
I see what the problem is... you need to make sure the mesh is a child of the parent object of the armature (in this case, "point_WORLD"). You can type it in manually in the OB box under Links and Materials,

Also, be sure to pack the textures you use, otherwise we just get a nice pink tank lol

I'm usually looking at it in object mode so I'm not seeing the textures anyways. XD

While talking to Typhlomence on Steam, I kept poking at it, and in Striker2.blend was able to select the mesh and the armature, and when I hit Ctrl-P I got a window asking which to make the parent, Armature or Object. So I went with Armature and then got a window asking if I wanted to create vertexes. At Typhlomence's suggestion, I chose "No", and then the two were linked in a fashion similar to his B-47. I tried a .br2 export and didn't get an error.

I have no idea how that happened... it must be that I wasn't selecting the armature and mesh properly before using Ctrl-P, because I never go the option to pick which was the parent before.

This seems to have made the mesh a child to the armature now, so I'm guessing that's where the problem was.
 
Back
Top Bottom