I'll do a big title, just in case somebody is looking for this later... - it doesn't really deserve a new thread.
HOW TO DO SMOKE IN OPENFX
Ok. You have a nice looking unit, but there is something missing... SMOKE. This is how to do it, or at least, how I do it:
Firstly you need to know about postpro effects in OpenFX. They are cunning and slippery things, and are always out to get you in one way or another. At the moment my renderer will only sometimes render smoke at all, other times it crashes... The postpro effects can be found by scrolling in the keyframer, but won't come up there if you select them in the select actor thingy. They also live at that spot (0,0,0) where you can never find them unless you know they're there. THEY ARE EVIL.
That being said, here we go:
There are two types of smoke. Expanding smoke, and, errr, not expanding smoke. I have been mainly using the second type in my units, and you need to have had the postpro running for a while before you get going, so it's best not to do it in the first 4 or so frames if you want non-expanding smoke. Start anytime after frame 4 and it'll work fine.
Step 1: Render WITHOUT smoke... just do, don't argue - you'll see why later
Step 2: Set up a dummy light, and set it up to attenuate
Step 3: Add a fireball postpro, and sort out the colours on the preset grayscale at the bottom (dark darkest, then centre, then outer). I find the explosion setting is the best, but you might want to experiment with this. Then set the postpro to you new dummy light.
For smoke trails: (for rockets etc...)
Step 4: Position your dummy light just behind your object Step 5: Give it another position keyframe at the end of the animation, setting this to a point for the smoke to blow to. Note down how much it moves each frame, each bit of smoke will have to do about the same amount of movement or it'll look odd.
Step 6: Start the costume keyframe the frame AFTER you set it behind the rocket (this is optional - but I feel it looks better)
Step 7: Move the animation on one keyframe. Repeat untill you have the desired amount of smoke.
Step 8: Continued after repeating smoke part
Repeating smoke (for vehicle dust trails, exausts, etc.)
Step 3: Decide how long you want the trail to be. You will have to use 2-5 smoke puffs, depending on the length.
Step 4: Posistion your first dummy light where you want the first piece of smoke to appear.
Step 5: Increment your position keyframer so that each part runs for 3 (or whatever) frames before returning back to the original position.
Step 6: Just before each of the new keyframes put another keyframe. This one will be where the smoke is moving to, and should be up, and maybe in some other direction.
Step 7: NOTE DOWN THE POSITIONS FROM WHICH IT IS COMING FROM AND TO. You will need to use these alot.
Step 8: Repeat the process, shifting all the keyframes for the new dummy light to the right one (for the final one you may have to do some maths/guessing to work out where it will be)
Step 9: Repeat until you have done all the smoke puffs.
This is quicker than smoke trails, as you only have to do 2-5 lights and alot of it is repetition. If the object is moving you have to think a bit with relativity - always have the smoke moving relative to the start point.
Now you have your smoke you're ready to render - but I have to go and eat, so I'll continue this later (I'll reserve the next post...)

 lol
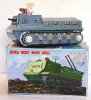
lol Or I should say that the camera is more zoomed-in in the preview, so the tank takes up more pixels and more detail can be seen.
")