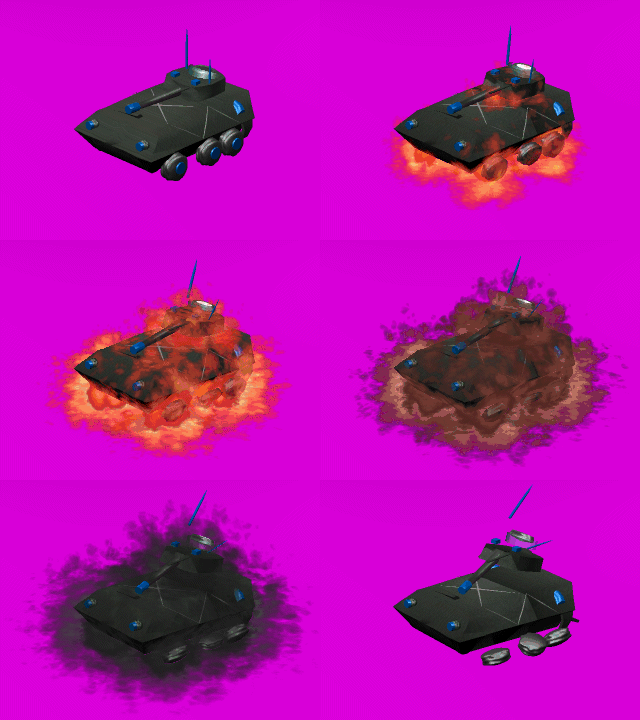
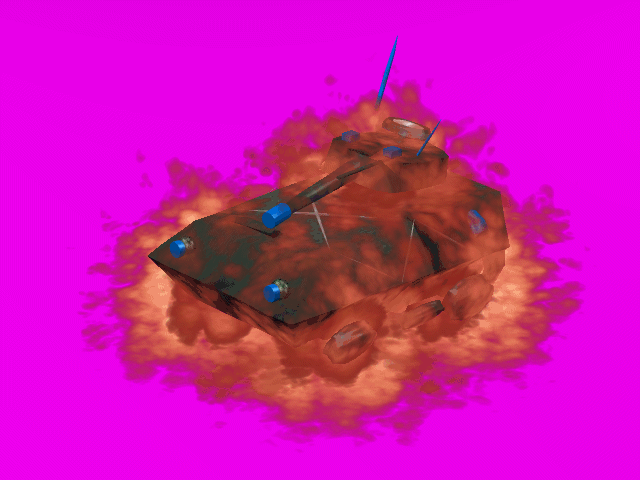
Create units with OpenFX

Dease, please send me your model, animation and all the other stuff I need to render the animation and I will check what wents wrong :spear:
BTW: nice work, hope to see the unit soon :)

Tzar Sasha the animation is very good :goodjob:
But the torpedo and the laser are went white if they are leaving the cube model, this happens with the laser post-pro, I never got run them well :cry:
So I'm using models for the weapon animations.

Kenta'arka here my federation pulse model used by the Defiant.
 
TheMorpheus said:
Tzar Sasha the animation is very good :goodjob:
But the torpedo and the laser are went white if they are leaving the cube model, this happens with the laser post-pro, I never got run them well :cry:
So I'm using models for the weapon animations.

Thanks for the complement.

I'm going to try and see what I can do to make the lasers and torpedo not change color. I think it has something to do with the background color. Since I have to modify the image anyway, a color change for the background is not a hard step to do. I let you know if I can get them to come out good.

Adler
Yes, I did use another fireball for the torpedo explosion. I also used a fireball for each laser effect in, hold and effect out. On this model that's a total of 7 fireballs
 
Dease the quadratic morphing seem does not work with internal textures. I have created a external texture from a screenshot of your model and attached it to the map.

The result ist this:
cougarV2.gif


If you use the Cougar with external texture model then you have to reassign the texture file to the map, because OpenFX stores the local path to the texture in the model file an this path will be another on your computer.
Great model, I think you could help me with the tutorial and write a design tutorial of a model from scratch :)

Oh, I see I have forgotten one object on the top of the model :crazyeye:

Another tip, you animation is too large you have to scale it down the maximum size you have for the full animation is 240x240 pixel, but the cougar should be much smaller. Check out the other tank units to get a feeling about the size.
 
Thanks a lot Morpheus!!!!!! :D
It took awhile to understand what you were saying but it all worked out in the end :D.
TheMorpheus said:
Another tip, you animation is too large you have to scale it down the maximum size you have for the full animation is 240x240 pixel, but the cougar should be much smaller. Check out the other tank units to get a feeling about the size.
I wasn't making this animation specifically for CivIII right now, I just wanted to experiment to learn how to use the program first, then I'll get into the seemingly frustrating aspect of making it good in Civ.
TheMorpheus said:
Great model, I think you could help me with the tutorial and write a design tutorial of a model from scratch :)
I don't think I would be much use trying to explain how I made the model, I basically just messed with basic shapes and spent hours selecting the correct verticies to adjust(VERY ANNOYING) thanks for the compliments though :D

Here's what one frame looks like now! MUCH BETTER :thanx:
temp.gif

EDIT: is there a way to "intensify" the lights? because the model is a bit dark and I want to see the textures more.
NVM, I realized the lights were dark so I just lightened them :D (we need a "Duh" smilie ;)
EDIT2: I wanted to make the death look more "real" (ie faster and with gravity) so I made a 3rd model and split the keyframer for the model into 3 parts, 1 for each model normal->exploded->aftermath. I flagged quadratic morph for each but in the exploded->aftermath part there is no morphing, it just goes to the aftermath model automatically, is there anything wrong with having three sections with the keyframer??? :confused:
Also, what is the best setting for shadows, should it change for each direction?
Yet ANOTHER comment after adding the shadow (overhead light worked the best) I realized that my tank was flying :eek:, therefore I think you should specify the 0,0,1 position for flying units, and 0,0,0.5 for ground units (0,0,0 put half of my tank underground ;))
 
Here are the results of my testing. If the ground color is set to black, then the lasers and torpedos show the proper color after leaving the background of the model. However, upon converting the background to magenta (after rendering) for the unit pcx file the explosion clouds become messed up.

Other worthwhile info, if when rendering you set the image to 240 x 240 instead of the default 320 x 240 it will render properly. The preview image during rendering is skewed but not the final product. Of course, the model size or position may need to be adjusted. But that is the case with any model at any image size. This may help to cut down on the post rendering/pre civIII flc work.

I'll keep playing with it. Maybe I can get something to work with a magenta background without having to use a model for the phasers and torpedos.
 
Usually I render my models on 320x240 and reduce it to 240x180 using SBB.
I wish you could set Anti aliasing to ignore the ground color, then there would be no problem with the post pros :(
 
Hmmm, I never used the morphing feature, I always animate the whole scence by my self, so I have the full control of it. Sometimes not :lol:

To "intensify" the lights, just choose a brighter color for the light you could change the color by double clicking the light actor.

I'm using the top light (highest Z axis) as the only one, which generate a shadow for ground units (space units have no shadow).
 
TheMorpheus said:
Hmmm, I never used the morphing feature, I always animate the whole scence by my self, so I have the full control of it.
Could you explain this a bit more? I didn't think you could select individual parts if it was imported as a model, or are you importing it as a robot?

EDIT: If you get time do you think you could explain the image maps and texture features, i can't for the life of me figure the image maps out, it appears different in the preview but not when i render it :mad:
 
I think I've got the hang of this lot, I can make a sphere fly about and everything but when I try to use a mesh I find online OpenFX tells me that there's too many verticies. Is there a way to lower the detail level or something?
 
I got that problem with my Bird-of-Prey which got more than 142K vertices. I solved it by splittin the mesh into 4 parts (wings, and 2 body parts). If you do that, don't forget to include the "area" around the cut in both meshes you create or some parts would miss if you put them together in the animator
 
Two quick questions:

How can I select the "SELECT" action more easily? Is there a hotkey I can use?


2. If i have some objects, is there any way I can "group" them together, so if I were to pick a vertice, all vertices in that "group" would be highlighted?
 
TheMorpheus said:
Ohh, that's a real problem, the tools to simplify a mesh are expensive :(
The only way to reduce the vertex count is to delete the unnecessary parts of the mesh.
Which model do yo have? Perhaps I have an useful model for you in my library.

I believe there is a plug-in called "simplify" in the default Designer, have you tried giving that a shot?
 
I have finally got back from a break and I'm now ready to make my animations compatible with civ. My questions are -
1- what positions on the palette are for what?
2- what's "alpha blending" for?
3- Which position(s) are transparent?
 
1. question:
Now you open flicster, load any unit animation, doesn't matter which. Go to export, set it to Storyboard, set frame size to 240x180, frame count to 20, set the folder where you want ti, and hit the export button. Now you import the SBB created Storyboard into the storyboard glicster just created (keep an eye on the pallet, the first 64 colros of the pallet are civ-specifics, the next 80 colors usable, the next 111 for shadows and the last (magenta usually) is transparent(I think the position of the transparent depends on your program, for Corel Photopaint it's the last, in PSP it's the first (not sure))) after saving the Storyboard you open the .mfx file (flicster created it together with the storyboard, and 2 pallet files) check if everything looks correct (check alpha blend to see if magenta is transparent). If everything is file, go to export, set the name and hit export button
2. question:
The "alpha blending" shows the shadows of your unit
3. question:
See the quote ;)
 
Was there ever a solution to alder's (maybe Kenta'arka's) problem with different shades of magenta caused by the anti-aliasing? That, and finding a good palette editor(can't seem to save in Pedit 0.8 :confused: ) are the only things preventing me from continuing my unit.
 
Follow these step and you should not get the multi shade magenta background. NOTE: This is what works for me. It may not work for you. There maybe other paths to get to the same goal. Some maybe better. Some maybe worse.

BASIC STEPS FROM FINAL RENDER TO EXPORT TO UNIT
1) Anti-aliasing is your choice. I don't. I think it helps.
2) See what a standard Civ3, PTW, C3C unit pallete looks like in flicster.
3) Export that unit as a storyboard (with image size and # of frames you want for your unit, with whatever name you want to use.)
4) Open a BMP or GIF from your rendered animation in your paint program. I use NeoPaint, it's tryware for 30 days. (Hope to have the $50 dollars to buy it by then.) It also allows me to work with PCX files and that is what is important.
5) Open the storyboard you created in flicster.
6) Open the pallete editor when your rendered image is active.
7) Use a pencil and paper to write down the RGB values for all your important colors. NOTE: It maybe a 256 color image but 96 colors are already spoken for. You can use some of the prexisting colors within those 96, but you'll need to be careful.
8) In the pallete editor load the Civ3 unit storyboard pallete (not alpha blend, it will make it easier)
9) Note the row of RED entries with a Magenta on one end (32 entries). Do not change these. They are the alpha blend entries.
10) Starting at the red entries change the color values to your list of RGB values. Do not change the 64 entires on the other end of the pallete those are for civ color.
11) Save the pallete with a different name.
12) Close the pallete editor and apply the changes. Make sure that you tell it to match to nearest solid color. (this is the only time you are allowed to do this) ((This moves all the various magenta shades into one entry, thus eliminating them))
13) Does it look good? If not then additional colors need to be added to the modified pallete.
14) When you are satisfied with the pallete, apply it to the storyboard.
15) Open and apply the new pallete to all your other frames then copy and paste into the storyboard. (NOTE: If two pictures have the same pallete they will copy with no problem. But if two picture have different palletes, it will not copy well. The copy and paste process does not realign colors. It only applies the pallete based on what color entry a particular pixel used in the old image.)
16) Return finished storyboard to flicster, but first, open the alpha blend pallete and write down the values for the alpha blend entries of the former red/magenta row.
17) Reload your new/modified pallete and change the red entries to the alpha blend values. Save as the alpha blend pallete for your new storyboard.
18) Close the open mfx file in flicster. Reopen. It should now have your new pallete applied to your new unit.
19) If the animation is good, export to a unit. If not, see where you need to adjust your work and make any necessary adjustments.


Once you have a feel for the pallete, you can use the alpha blend pallete instead of the magenta default. This may help to get the smoke/explosions into the transparent entries. However, you have to be careful because some of your unit's body color may pick a transparent alpha blend color when you apply the modified pallete. This is why I work with the magenta version of the pallete.

Should anyone have a better solution to getting rid of the multi-shades of magenta, please share as this will be an ongoing problem for all creators of units.
 
1. I render the units with anti aliasing
2. I use Stephs SBB to put all frames into a storyboard
3. I use Corel Photo Paint's color replacer tool to replace the wrong magenta colors in the storyboard. As I set it's sensitivity to 10, usually all magenta shades are replaced in one step.
 
Back
Top Bottom