HowTo: Creating New Specialists.
This tutorial assumes you read through Kael's guide and understand the basics of ModBuddy.
Step 1: Creating the Graphics for your Specialist
Specialists require 6 unique .dds files to display in game. The first 5 are similar to custom graphics for buildings or units. The 6th exists specifically to display the specialists in the City View screen.
I have included a .rar file with all of my current custom .dds files as well as .png versions of the original CityView files so that you can use them as a template.
The easiest (though not prettiest) way to add a new specialist is to select a currently existing one in Photoshop (you will need the .dds plugin available here. NOTE: You cannot use 64 bit PS for this, only 32.). Simply lasso or box the colored versions of the Citizen, apply a black and white filter, then Tint it to the new color of your choice.
When saving, make sure to:
1. Flatten the image first.
2. Choose DXT3, 2D Texture, and No MIP Maps on the NVIDIA screen.
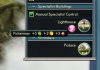
For the multiple Citizen files 128, 180, 256, 512, and 1024 make sure to include the same colors in the same spots. This is important. Also, write down which spot each of your citizens is in on the grid. For example, the Brown citizen on my grids is my Bureaucrat. The Pink one is my Monk, Dark Blue is my Philosopher. So, I would write down:
0. Bureaucrat
1. Monk
2. Philosopher
Note that numbering starts at 0 and not 1.
For the individual .dds file (ex. citizenbureaucrat), do not add a tint to the lowest of the 4 icons, as it represents an empty slot.
Step 2: Add your Graphics to the Icon Atlas
Add all of your new .dds files to your ModBuddy project. Make sure that for every single .dds, you change its Properties to include Import Into VFS as True.
You will need to come up with a name for your Custom Specialists Icon Atlas. Try to keep it unique. I named mine SNCIT_ATLAS (Sneaks Citizen Atlas).
Add an XML file to your project in ModBuddy:
Replace the Atlas name with your Atlas name and each File name with what you named your files.
Step 3: Add Your Citizens to the XMLs
In a new XML, or the same, add the following:
Obviously, replace Bureaucrat with the name of your specialist and alter/delete/add the yields you want. Add Great Person points and a Great Person association if you choose as well.
Most importantly, make sure to put in the name of your Icon Atlas, and for <PortraitIndex>, put the number your Specialist appears in your Atlas, as we listed above.
Onward to part 2.
This tutorial assumes you read through Kael's guide and understand the basics of ModBuddy.
Step 1: Creating the Graphics for your Specialist
Specialists require 6 unique .dds files to display in game. The first 5 are similar to custom graphics for buildings or units. The 6th exists specifically to display the specialists in the City View screen.
I have included a .rar file with all of my current custom .dds files as well as .png versions of the original CityView files so that you can use them as a template.
The easiest (though not prettiest) way to add a new specialist is to select a currently existing one in Photoshop (you will need the .dds plugin available here. NOTE: You cannot use 64 bit PS for this, only 32.). Simply lasso or box the colored versions of the Citizen, apply a black and white filter, then Tint it to the new color of your choice.
When saving, make sure to:
1. Flatten the image first.
2. Choose DXT3, 2D Texture, and No MIP Maps on the NVIDIA screen.
For the multiple Citizen files 128, 180, 256, 512, and 1024 make sure to include the same colors in the same spots. This is important. Also, write down which spot each of your citizens is in on the grid. For example, the Brown citizen on my grids is my Bureaucrat. The Pink one is my Monk, Dark Blue is my Philosopher. So, I would write down:
0. Bureaucrat
1. Monk
2. Philosopher
Note that numbering starts at 0 and not 1.
For the individual .dds file (ex. citizenbureaucrat), do not add a tint to the lowest of the 4 icons, as it represents an empty slot.
Step 2: Add your Graphics to the Icon Atlas
Add all of your new .dds files to your ModBuddy project. Make sure that for every single .dds, you change its Properties to include Import Into VFS as True.
You will need to come up with a name for your Custom Specialists Icon Atlas. Try to keep it unique. I named mine SNCIT_ATLAS (Sneaks Citizen Atlas).
Add an XML file to your project in ModBuddy:
Spoiler :
Code:
<GameData>
	<IconTextureAtlases>
		<Row>
			<Atlas>SNCIT_ATLAS</Atlas>
			<IconSize>256</IconSize>
			<Filename>SnCit1024.dds</Filename>
			<IconsPerRow>4</IconsPerRow>
			<IconsPerColumn>4</IconsPerColumn>
		</Row>
		<Row>
			<Atlas>SNCIT_ATLAS</Atlas>
			<IconSize>128</IconSize>
			<Filename>SnCit512.dds</Filename>
			<IconsPerRow>4</IconsPerRow>
			<IconsPerColumn>4</IconsPerColumn>
		</Row>
		<Row>
			<Atlas>SNCIT_ATLAS</Atlas>
			<IconSize>64</IconSize>
			<Filename>SnCit256.dds</Filename>
			<IconsPerRow>4</IconsPerRow>
			<IconsPerColumn>4</IconsPerColumn>
		</Row>
		<Row>
			<Atlas>SNCIT_ATLAS</Atlas>
			<IconSize>45</IconSize>
			<Filename>SnCit180.dds</Filename>
			<IconsPerRow>4</IconsPerRow>
			<IconsPerColumn>4</IconsPerColumn>
		</Row>
		<Row>
			<Atlas>SNCIT_ATLAS</Atlas>
			<IconSize>32</IconSize>
			<Filename>SnCit128.dds</Filename>
			<IconsPerRow>4</IconsPerRow>
			<IconsPerColumn>4</IconsPerColumn>
		</Row>
	</IconTextureAtlases>
</GameData>Step 3: Add Your Citizens to the XMLs
In a new XML, or the same, add the following:
Spoiler :
Code:
<GameData>
	<Specialists>
		<Row>
			<Type>SPECIALIST_BUREAUCRAT</Type>
			<Description>TXT_KEY_SPECIALIST_BUREAUCRAT</Description>
			<Strategy>TXT_KEY_SPECIALIST_BUREAUCRAT_STRATEGY</Strategy>
			<Visible>true</Visible>
			<Cost>0</Cost>
			<CulturePerTurn>-4</CulturePerTurn>
			<IconAtlas>SNCIT_ATLAS</IconAtlas>
			<PortraitIndex>0</PortraitIndex>
		</Row>
	</Specialists>
	<SpecialistYields>
		<Row>
			<SpecialistType>SPECIALIST_BUREAUCRAT</SpecialistType>
			<YieldType>YIELD_PRODUCTION</YieldType>
			<Yield>4</Yield>
		</Row>
		<Row>
			<SpecialistType>SPECIALIST_BUREAUCRAT</SpecialistType>
			<YieldType>YIELD_SCIENCE</YieldType>
			<Yield>4</Yield>
		</Row>
		<Row>
			<SpecialistType>SPECIALIST_BUREAUCRAT</SpecialistType>
			<YieldType>YIELD_GOLD</YieldType>
			<Yield>-4</Yield>
		</Row>
	</SpecialistYields>
	<Language_en_US>
		<Row Tag="TXT_KEY_SPECIALIST_BUREAUCRAT">
			<Text>Bureaucrat</Text>
		</Row>
</Language_en_US>Most importantly, make sure to put in the name of your Icon Atlas, and for <PortraitIndex>, put the number your Specialist appears in your Atlas, as we listed above.
Onward to part 2.
")