How do I use POV-Ray

1. & 2. You could try something like this:


#include "colors.inc"
background { color Magenta }
camera {
location <0, 2, -8>
look_at <0, 1, 2>
}
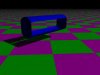
// create a sphere object with a blue stripe in the middle in x/z -plane
#declare aaglosadvice =union{ //declare an union called aaglosadvice
sphere { <0,1,0>,0.5 pigment { color Blue } }
intersection{ //start creating the red stripe
sphere {<0,1,0>,0.5001 pigment {color Red}} //slightly larger sphere
box{<-1,-0.1,-1>,<1,0.1,1> pigment {color Red}} //the stripe
} //close the intersection
} //close the union

light_source { <12,14, -13> color White}
light_source {<-12,14,-13> color White shadowless} //illuminate a bit the other side, but don't cast any shadows
object {aaglosadvice translate z*(25-25*cos(radians(180*clock)))} //put the object to the scene, and use traslate-modifier to do all the movement
 
Ack, I tried it, and look what happened (please note, I made the sphere red, and the stripe blue):
 

Attachments

  • sphere.gif
    sphere.gif
    3.8 KB · Views: 126
Uh-oh... :blush:

the measures for the box should be
box{<-1,0.9,-1>,<1,1.1,1>


because the sphere is not is <0,0,0> (it's in <0,1,0>)

I believe if you've tried, you could have figured that out by yourself.
 
If I should have been able to figure that out, then I'm falling behind :(. Well, thanks. I guess I should try the box tutorial again (maybe I missed something).
 
Cheer up! ;)

Tips:

1. Learn the cordinate system of pov-ray.

2. Know where your camera is and where it's looking at.

3. Go through the tutorials, do all the images they do - even if you don't understand what they did. Change one parameter at time, render and see what has changed due to that parameter change. That's the way I learned to use povray ;)
 
Okay :). The coordinats system is going to be hard to learn (I think, the left and right handed stuff really confused me), but once I get it, it should obviously be extremely helpful. Okay, I'll do the tutorials, even if I dont understand, and edit stuff a tiny bit at a time.

Everyone: you can expect to see a POV-Ray unit from me in a couple of months, but it (hopefully) will be much better than the 2-D ones I have made in the past.

Thanks Aaglo :)!
 
Originally posted by Gogf
@vbraun: :eek: That is complicated. How did you do that?

Not really once you've looked at aaglo's stuff :eek: all i did is pretty much start as a big box with a bok on it and a cylinfer coming out. The i took out stuff and added smaller shapes and i kept on getting more persices as i went.
 
Originally posted by vbraun


Not really once you've looked at aaglo's stuff :eek: all i did is pretty much start as a big box with a bok on it and a cylinfer coming out. The i took out stuff and added smaller shapes and i kept on getting more persices as i went.

True about Aaglo's, it's amazing. I just assumed that something that looked as simple as yours wasa lot shorter than it was. And I was wrong. I need to get to work with those tutorials!
 
Okay, I've been experimenting with the box, and Aaglo's angles.

something like this:

camera {orthographic location <0,66,-124>*5.8
angle 27
look_at <0,4,0>*5.8 }

I don't rotate camera around the unit. I rotate the unit. If you seen my pov-files, near the end there is this line
#declare yrot = -130 ;

and by changing that number I rotate the unit:
0=W, -40...-50=SW, -90=S, -130...-140=SE, 180=E, ect.

One question:

Why does

Code:
  #include "colors.inc" 
  #include "stones.inc"
  background { color Magenta }
  camera {orthographic location <0,66,-124>*0.2
angle 27
look_at <0,4,0>*0.2 }
   box {
    <-1, 0,   2>,  // Near lower left corner
    < 1, 0.5,  5>   // Far upper right corner
    texture {
      T_Stone25     // Pre-defined from stones.inc
      scale 4       // Scale by the same amount in all
                    // directions
    }
    rotate y*20     // Equivalent to "rotate <0,20,0>"
  }                                     
  light_source { <2, 4, -3> color White}
  
[B]  #declare yrot = -90 ;[/B]

Yield the exacty same thing as

Code:
  #include "colors.inc" 
  #include "stones.inc"
  background { color Magenta }
  camera {orthographic location <0,66,-124>*0.2
angle 27
look_at <0,4,0>*0.2 }
   box {
    <-1, 0,   2>,  // Near lower left corner
    < 1, 0.5,  5>   // Far upper right corner
    texture {
      T_Stone25     // Pre-defined from stones.inc
      scale 4       // Scale by the same amount in all
                    // directions
    }
    rotate y*20     // Equivalent to "rotate <0,20,0>"
  }                                     
  light_source { <2, 4, -3> color White}
  
[B]  #declare yrot = -130 ;[/B]
? I bolded what should change the direction. It's not workign though :(.
 
I'll try that. Maybe it's the number of spaces after (I know that the stuff after // has no effect ;)).

EDIT: Nope, no effect.
 
since you are only looking at the box, you should

1. put the #declare yrot = -130; before[b/] the box (right after the camera settings.

2. then you should change the rotate y*20 (the box transformation element) to rotate y*yrot

Thus, the #declare -line doesn't do anything on it's own. You just declare a text string called yrot to give somekind of value.

Remember, #declare doesn't affect on anything on it's own. That just gives 'names' to different complex things (you can see in my pov files - in the end part there is a large collection of things beginning like #declare ship = union{[insert a ton of various objects here]}
And notice also, that the objects used in the unit are also declared previously in that file (or in some other file included in this file). Complex? Naah :mischief:
 
Lol. Well, I should be able to figure it out one piece at a time. Meanwhile, I got the part concerning my box ;).

EDIT: It works!

Code:

Code:
  #include "colors.inc" 
  #include "stones.inc"
  background { color Magenta }
  camera {orthographic location <0,66,-124>*0.1
angle 27
look_at <0,4,0>*0.1 }
#declare yrot = -130  ;            //0,-48,-90,-132,180,132,90,48
   box {
    <-1,0,(5-6*cos(radians(70*clock)))>,  // Near lower left corner
    <1,0.5,(7-6*cos(radians(70*clock)))>   // Far upper right corner
    texture {
      T_Stone15     // Pre-defined from stones.inc
      scale 4       // Scale by the same amount in all
                    // directions
    }
    rotate y*yrot     // Equivalent to "rotate <0,20,0>"
  }                                     
  light_source { <2, 4, -3> color White}

I would make it into an 8 direction FLC (I figured out how to use SBB), and then a gif, so show off my almost useless (but better than before) work, but it would take too long, sorry.
 
Hmm, I have some questions:
--------------------------------------------------------
declare Hull = cylinder {
<1.5,2,-10>,
<1.5,2,4>,2.5
scale <1,1,0>
translate <0,3.8,0>
pigment { Blue }
}

object { Hull
clipped_by { box {
<-0.5,1,-11>,
<3.5,9,5>
}
}
rotate y*45
}
--------------------------------------------------------
How can I make the "hull" solid when I cut a bit of it? Also, is this a totally wrong approach?
 

Attachments

  • fiat_cr_32.jpg
    fiat_cr_32.jpg
    23.9 KB · Views: 83
Ooops, used intersection instead and it worked fine.... But is this kind of cutting chunks off the initial object a good approach at all?
 
Risbinroch - that's the way I do all the time. My unit files are full of intersections, unions and differences. :)

BTW, I would suggest not to use the scaling vector <1,1,0>
... that zero in there can screw things up badly (in my experience). Besides, it's quite surreal
 
What exactly are hulls, intersections, unions, and differences? I think they are a group of objects put togeather, but what is the difference between them, and are they how you make a bunch of objects move as one?
 
the intersection makes a new object/shape out of areas where the components overlap eachother.

union, is just two object made into one object.

hull? If you look at my text above, its just the name I gave to the fighters hull...

difference... unsure about that, but I think it is similar to the intersection in a way. cut out a piece of an object... haven't really tried that much yet
 
Back
Top Bottom