Sirian
Designer, Mohawk Games
Although my initial assessment of the tech tree was highly unfavorable, I have since come to understand this game mechanism better, and there are many elements I do like. Part of the problem with the tech tree in the standard game is that the tech pace moves way too fast. The techs blur past in an endless march, and by the time you can put a tech to use, you've already researched a better one. This "tech blur" prevents the player from having the chance to evaluate individual techs, and thus prevents the player from interacting with the tech in any meaningful way and also shuts down interaction with what is the most vital aspect of the strategy.
I have come to see things a little differently. In MOO1, you could skip over certain techs entirely. This gave the player the chance to speed ahead to specific techs of interest to the strategy. That remains lost to MOO3, but all the other elements of MOO1 tech are here. The techs do matter. They matter a lot. They matter so much, that until you gain familiarity with them on the whole, in general for starters, and in detail eventually, you aren't actually playing the game yet.
Until you realize the difference a single tech can make, you won't understand the depth of strategy the game can offer. Once you do understand, then the "randomized" elements of the tech tree you draw in any given game start to mean something.
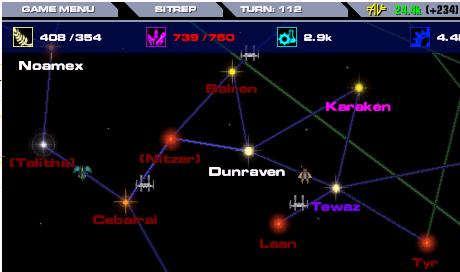
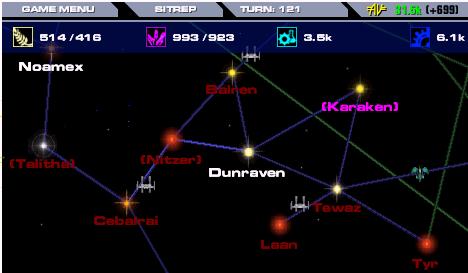
With a fresh perspective after a lot of mod play, I came to my turn this round with a fresh eye, ready to inspect our tech tree and tech situation and forge some long term strategy. Well, was I in for a shock or what. WOW. In all my games, I've not see a worse tech tree than this one. We're missing some of the most important techs in the game, and lots of them. I made it one of my priorities to see what, if anything, I might be able to get in trade from our friends. More on that later.
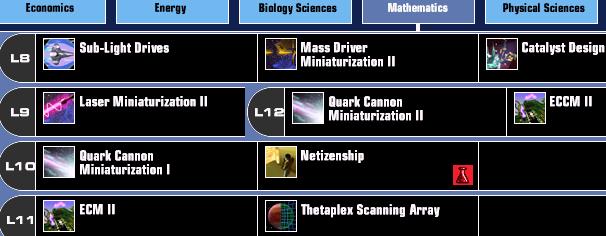
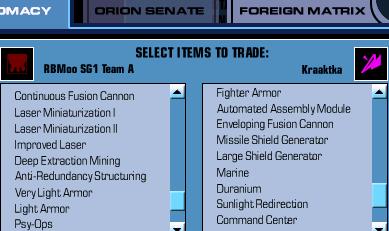
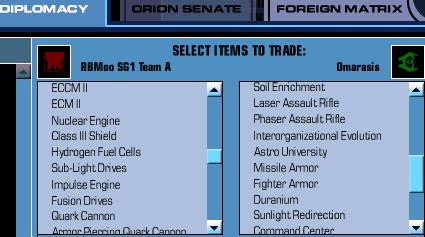
First up, an overview. The tech Matrix is your friend. Check it, see what we've got, see what's coming up soon, see what's coming up eventually. (None of this matters when you don't have a clue about individual techs, but this is what you do once you do know). You can also see what tech other races have, and what they may have that is missing from your tree. You can see this in the tech screen by checking the matrix from their view, but you can get a faster sense by offering to Exchange Items and then looking down a list of items they have to offer, none of which you possess. The only danger of this is determining what they have that you can't get via research (because it's absent from your tree this game) vs what you can get but aren't up to yet.
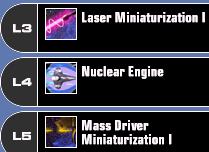
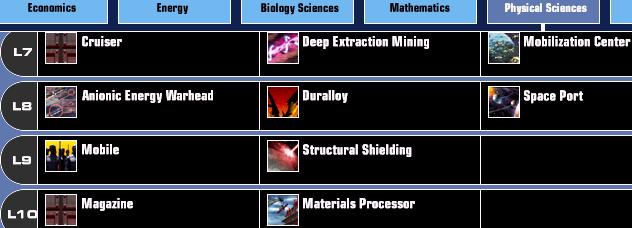
Tech Icons! These are how to identify techs quickly. Almost all the icons make sense. A few don't, but we'll come back to that. You can tell the general application of a given tech by its icon.
Here is a shot of our entire Economics matrix to date.
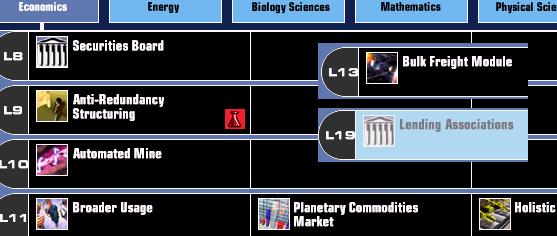
Normally this is one of the thinner trees anyway, but in this game we seem to be even thinner.
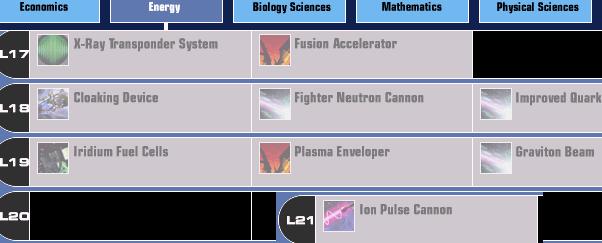
The Greco-Roman columns icon indicates a Government DEA Upgrade tech. Both Securities Board and Lending Associations are government DEA upgrades. These can extend the reach of a given government, and also extend the degree of effect, which means (I believe) more tax income available and more unrest reduction.
The yellow icon for Anti-Redundancy is an HFOG reduction tech. These help slow the growth of the Heavy Foot of Government. You don't do anything with them, but the more of them you have, the slower the pace of inflation on production costs.
The pink icon showing a drill is a Mining DEA upgrade. Get this tech, your viceroys will construct these at your mines (on their schedule, and no more than one per turn) IF you have some resources being spent on the Economic slider (as opposed to the MBQ, PBQ, Terraform slider, and Tech slider). More minerals you can support either more industry DEA's or more industry upgrades.
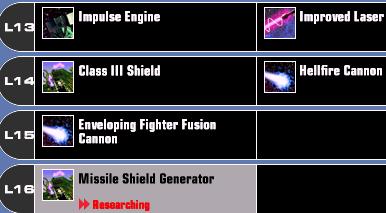
There are passive techs and active techs. The yellow-icon HFOG techs are all passive. So are techs like Broader Usage and Holistic Planning. These increase productivity slightly in ways hard to gauge until you have to play without them because they aren't in your tech tree! Then you'll miss them, and understand what they really do. That will take time, though. In the mean time, there's little to say about them.
The bar-chart icon represents financial or infrastructure tech. The Commodoties Market is a planetary upgrade, meaning you build one per planet and it's built in the PBQ.
All planetary items are built in the PBQ while regional items are handled by the viceroys and built with the Economic slider. The economic slider has a queue three items long, just like the MBQ and PBQ, but since the regional-level items are supposed to be handled by locals, the viceroys, and not by you, you can't see what's in the Regional Queue. You do need to understand that the Regional queue works the same way as the MBQ and PBQ, though. You can be doing three items at a time, and the economic queue will only finish one item per turn. That includes DEA's, DEA upgrades, and regional facilities (like the Hydroponic farm). You can open up the regional panel at any time to check on your DEA's, upgrades, and regional facilities.
ONE PROBLEM: the viceroys do not build regional facilities based on need. They do it strictly by the numbers. They will start at the bottom of the list of DEA's and work their way up. In this regard, the "more important" DEA's are the ones at the bottom, since those will always be the first to get new facilities, even if there are no DEA's there. (Yes, that's stupid, but at least for now, that is how it works).
In terms of players complaining that sometimes they can't get DEA's built... often that is because the viceroy is in love with regional facilities and keeps filling the econ queue with more and more of them. In my view, QS ought to ditch their "you aren't meant to micromanage" philosophy and grant the player access to the economic/regional queue. Not that the player should HAVE to run this queue, any more than the PBQ, but the option frankly should be there, now that I realize what is going on. And the reason the option should be there is what I just listed: the complete and utter STUPIDITY of the viceroys when it comes to regional facilities. At times when you are being starved out and the viceroy ignores your DevPlan that says to prioritize food at starving planets, you should be able to go in there and override its stupidity and insist it finish that Bio DEA or Hydroponic Farm next. At the moment, though, you can't do that.
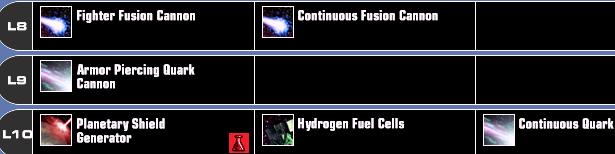
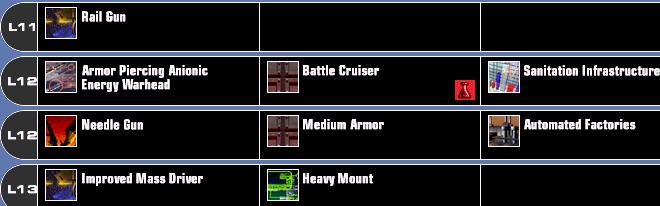
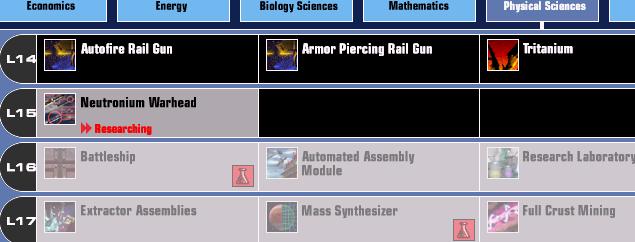
Finally, from the above graphic, the Bulk Freight Module. That space icon does double duty. That's the icon for Space Ports and their upgrades, and also the icon for Planetary Terraforming techs. These are some of the most important techs in the game.
The first/cheapest Terraforming tech is called "Sunlight Redirection". It's a Physical Sciences tech, about TL10, so it comes fairly quickly. Each terraforming tech allows you to improve a planet by one habilitability ring. They also reduce your losses at outposts in hostile environments. As soon as you have one Terraforming tech, you can turn Y1's into G2's, which vastly increases max pop for the planet and also growth rate. You can turn Y2's into Y1's, which allows farming. And you can settle those R1's and turn them into Y2's, which are worth bothering with.
Frankly, this is the first game I've noticed where the player did not draw Sunlight Redirection. Ouch! We're still without any terraforming tech, though by the time my round ends, we do have one finally being researched. It will come in on Jaffa's round.
I have a lot more to say about tech, but that's all I can say for now. Got to run.
- Sirian
I have come to see things a little differently. In MOO1, you could skip over certain techs entirely. This gave the player the chance to speed ahead to specific techs of interest to the strategy. That remains lost to MOO3, but all the other elements of MOO1 tech are here. The techs do matter. They matter a lot. They matter so much, that until you gain familiarity with them on the whole, in general for starters, and in detail eventually, you aren't actually playing the game yet.
Until you realize the difference a single tech can make, you won't understand the depth of strategy the game can offer. Once you do understand, then the "randomized" elements of the tech tree you draw in any given game start to mean something.
With a fresh perspective after a lot of mod play, I came to my turn this round with a fresh eye, ready to inspect our tech tree and tech situation and forge some long term strategy. Well, was I in for a shock or what. WOW. In all my games, I've not see a worse tech tree than this one. We're missing some of the most important techs in the game, and lots of them. I made it one of my priorities to see what, if anything, I might be able to get in trade from our friends. More on that later.
First up, an overview. The tech Matrix is your friend. Check it, see what we've got, see what's coming up soon, see what's coming up eventually. (None of this matters when you don't have a clue about individual techs, but this is what you do once you do know). You can also see what tech other races have, and what they may have that is missing from your tree. You can see this in the tech screen by checking the matrix from their view, but you can get a faster sense by offering to Exchange Items and then looking down a list of items they have to offer, none of which you possess. The only danger of this is determining what they have that you can't get via research (because it's absent from your tree this game) vs what you can get but aren't up to yet.
Tech Icons! These are how to identify techs quickly. Almost all the icons make sense. A few don't, but we'll come back to that. You can tell the general application of a given tech by its icon.
Here is a shot of our entire Economics matrix to date.
Normally this is one of the thinner trees anyway, but in this game we seem to be even thinner.
The Greco-Roman columns icon indicates a Government DEA Upgrade tech. Both Securities Board and Lending Associations are government DEA upgrades. These can extend the reach of a given government, and also extend the degree of effect, which means (I believe) more tax income available and more unrest reduction.
The yellow icon for Anti-Redundancy is an HFOG reduction tech. These help slow the growth of the Heavy Foot of Government. You don't do anything with them, but the more of them you have, the slower the pace of inflation on production costs.
The pink icon showing a drill is a Mining DEA upgrade. Get this tech, your viceroys will construct these at your mines (on their schedule, and no more than one per turn) IF you have some resources being spent on the Economic slider (as opposed to the MBQ, PBQ, Terraform slider, and Tech slider). More minerals you can support either more industry DEA's or more industry upgrades.
There are passive techs and active techs. The yellow-icon HFOG techs are all passive. So are techs like Broader Usage and Holistic Planning. These increase productivity slightly in ways hard to gauge until you have to play without them because they aren't in your tech tree! Then you'll miss them, and understand what they really do. That will take time, though. In the mean time, there's little to say about them.
The bar-chart icon represents financial or infrastructure tech. The Commodoties Market is a planetary upgrade, meaning you build one per planet and it's built in the PBQ.
All planetary items are built in the PBQ while regional items are handled by the viceroys and built with the Economic slider. The economic slider has a queue three items long, just like the MBQ and PBQ, but since the regional-level items are supposed to be handled by locals, the viceroys, and not by you, you can't see what's in the Regional Queue. You do need to understand that the Regional queue works the same way as the MBQ and PBQ, though. You can be doing three items at a time, and the economic queue will only finish one item per turn. That includes DEA's, DEA upgrades, and regional facilities (like the Hydroponic farm). You can open up the regional panel at any time to check on your DEA's, upgrades, and regional facilities.
ONE PROBLEM: the viceroys do not build regional facilities based on need. They do it strictly by the numbers. They will start at the bottom of the list of DEA's and work their way up. In this regard, the "more important" DEA's are the ones at the bottom, since those will always be the first to get new facilities, even if there are no DEA's there. (Yes, that's stupid, but at least for now, that is how it works).
In terms of players complaining that sometimes they can't get DEA's built... often that is because the viceroy is in love with regional facilities and keeps filling the econ queue with more and more of them. In my view, QS ought to ditch their "you aren't meant to micromanage" philosophy and grant the player access to the economic/regional queue. Not that the player should HAVE to run this queue, any more than the PBQ, but the option frankly should be there, now that I realize what is going on. And the reason the option should be there is what I just listed: the complete and utter STUPIDITY of the viceroys when it comes to regional facilities. At times when you are being starved out and the viceroy ignores your DevPlan that says to prioritize food at starving planets, you should be able to go in there and override its stupidity and insist it finish that Bio DEA or Hydroponic Farm next. At the moment, though, you can't do that.
Finally, from the above graphic, the Bulk Freight Module. That space icon does double duty. That's the icon for Space Ports and their upgrades, and also the icon for Planetary Terraforming techs. These are some of the most important techs in the game.
The first/cheapest Terraforming tech is called "Sunlight Redirection". It's a Physical Sciences tech, about TL10, so it comes fairly quickly. Each terraforming tech allows you to improve a planet by one habilitability ring. They also reduce your losses at outposts in hostile environments. As soon as you have one Terraforming tech, you can turn Y1's into G2's, which vastly increases max pop for the planet and also growth rate. You can turn Y2's into Y1's, which allows farming. And you can settle those R1's and turn them into Y2's, which are worth bothering with.
Frankly, this is the first game I've noticed where the player did not draw Sunlight Redirection. Ouch! We're still without any terraforming tech, though by the time my round ends, we do have one finally being researched. It will come in on Jaffa's round.
I have a lot more to say about tech, but that's all I can say for now. Got to run.
- Sirian
") Where was I?
Where was I?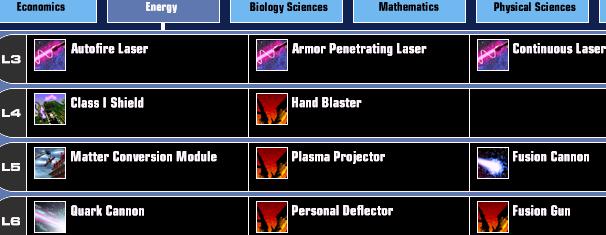


 So you either need to know how to make sure that your expedition ships come up first in the alphabetical roster (which I do not yet know how, myself) or you need to empty your reserves of ships you don't want to send (by deploying them), leaving only the Antarran ships in the reserve, guaranteeing that when you send an expedition, it sends the right ships.
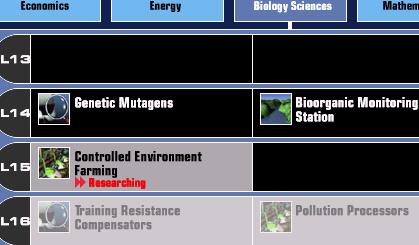
 This is a huge hole in our tech tree! This planetary facility gives a 40% boost to production from population points (not DEA's). Much of the production of a planet comes from DEA's, but some comes just from the population, and these facilities boost those outputs. Not getting this tech leaves a significant hole in our productivity empire-wide.