SGOTM 13 - One Short Straw

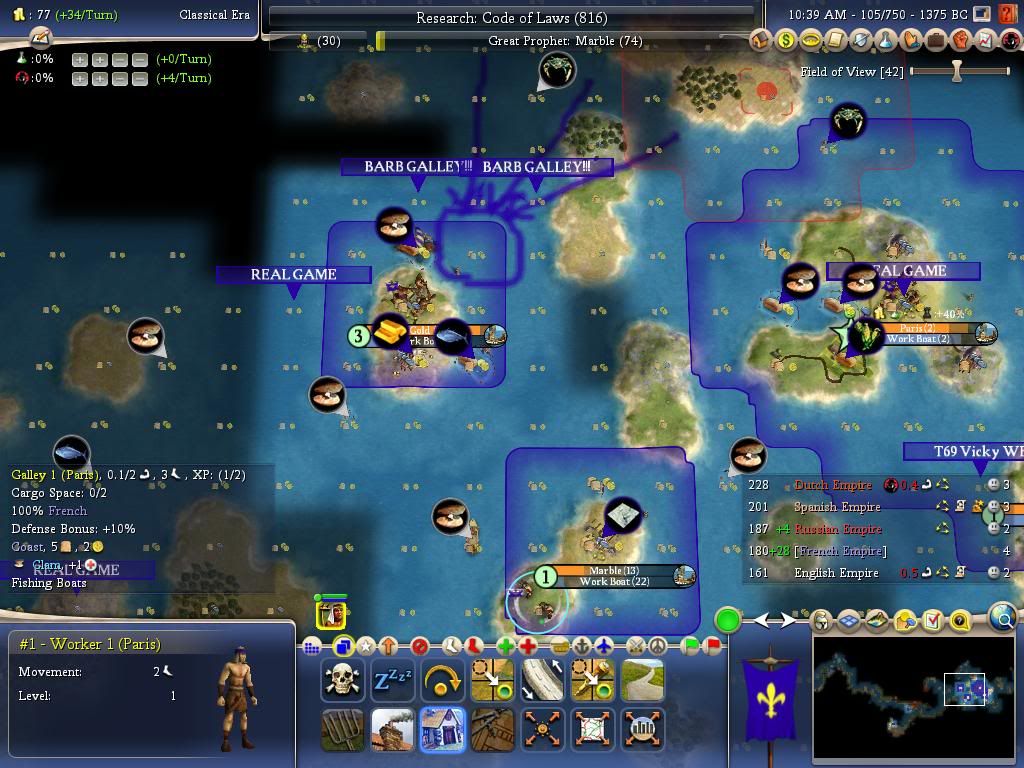
Ok, looks like I'm taking the next set. I can play the next turn by moving the galley on to the northern clams. Oracle for MC. Anything else I need to keep in mind?
 
Dhoom might test his hypothesis that there is other code that increases the likelihood of autospread, based on OBs.
Well, I tried it.

Here is was what I did:
I placed a bunch of 1-square islands on the map spaced out by Coast, as LC suggested. Note that I programmatically did so by writing a script to alter the saved World Builder file--I did not want to do so manually in the World Builder!


I put our Civ in the middle, with 4 other Civs towards each of the cardinal directions (east = Peter, north = Charle, west = Zara, and south = Gandhi). Civs were randomly selected and I just happened to draw Napoleon at random... is it fate? ;)


Each Civ, including ours, got 9 Cities, spaced out in a 3 by 3 grid-like pattern.

Here are some interesting observations:
1. Each Civ, when only having a single Domestic Trade Route per City, will trade with the bottom-left City in the 3 by 3 grid. That happens for all 8 Cities that aren't the target City, and that target City then trades with the left-most City that is in the "centre row." This fact was consistent regardless of where the Civ was placed on the map relatve to us--with us being close to the centre of the map.

2. When I Opened Borders with Peter in the east (I kept Borders Closed with all of the other 3 Civs), each of his Cities would "map" to an identical City of mine in terms of relative positioning. So, my bot left City would trade with his bot left City. His middle right City would trade with my middle right City, etc.

3. I gave myself all of the Religious techs after a few runthroughs of frequently having to enter the World Builder in order to delete newly-founded Religions. However, I ended up founding all of the Religions on about turn 7, similar to what you'd see in an Advanced Start game.

4. So, in addition to giving myself the Religious techs, I made a Barb City in the far corner of the map and gave it the other Religions, minus the Holy Cities. It seems that if a Religion exists somewhere on the map, it won't get founded. The fact that I "knew" the Religous techs probably was an irrelevant detail and would not have affected this outcome (but I didn't check if having the Religions exist and then having a player learn a Religious tech would found a Religion, although I doubt that it would).

5. I've seen the following behaviour before but now it is conclusive: if you remove a Religion from ANY City in the World Builder, that corresponding Religion's Holy City flag is removed from the Holy City. In my example, I used Buddhism as the Religion to spread. At one point, I figured that I would "keep the odds fair," by removing Buddhism from any City that it spread to, so that each Civ would still maintain an equal number of Religionless Cities... otherwise, you risk having the effect of changing the probabilities of obtaining a Religion since there are less "target Religionless Cities" per Civ. Well, that idea backfired, in that I not only had to manually remove Buddhism from each City that it spread to, but I had to re-add the Buddhist Holy City every time. I was able to do so consistently, but it was such a pain in the butt that I only performed one test with this method.

6. Random number generation definitely affects Religious spread, so I tried to create Barb Galleys and my own Galleys and would just have an increasing number of fights with the Barbs for subsequent test runs, in order to help reshuffle the random number generation.

7. It seemed to make sense to place a Religion in the bottom left City of every Civ, so that them getting a Religion there wouldn't change the effect on Trade Routes. So, I either put Islam (which didn't have a Holy City on the map and therefore would not auto-spread) in each AI Civ's bottom left City or I put Buddhism there. Since Peter had Open Borders with us, and since each of our Cities has Buddhism, he would have a Trade Route to a Buddhist City in every test. To keep the results fair, I also gave him the same Religion to start with in his bottom left City (Islam or Buddhism) that the other AIs got. I did NOT count the Religion in the bottom left City in terms of the totals for how many Cities received Buddhism--I only counted natural spread.

8. More of a comment than an observation, but I played the test games up until Turn 63, 2425 BC. That time was about the time that the first AI was learning Writing, although in one test, Zara had learned Alphabet by that time. In order to prevent him from Opening Borders with the other AIs, I had the AIs declare war on him and make peace with him on the same turn, using the World Builder. I did so several times in order to sour the relationships. I didn't want to leave them in a war status, in the off chance that doing so would affect the results.


Okay, here are some results. Still, it's such a small sample set that I'm not sure that it is fair to draw conclusions from it. You can be the judge on that.

The numbers represent how many AI Cities received Buddhism.

If Islam is in the AIs' Bottom Left Cities, it means that: only Peter's Cities had Trade Routes with Buddhist Cities, while everyone else had Trade Routes with an Islamic City, except for their bottom left Cities that could not receive a Religion since those Cities already had Islam.

If Buddhism is in the AIs' Bottom Left Cities, it means that: all AI Cities that can receive a Religion via auto-spread had Trade Routes with Buddhist Cities.


Test 1: Islam in AIs' Bottom Left Cities
Peter = 4
Charle = 3
Zara = 2
Gandhi = 2
Total = 11
Total without Peter = 7

Test 2: Islam in AIs' Bottom Left Cities (the same test as Test 1 but with different random number generation)
Peter = 2
Charle = 1
Zara = 1
Gandhi = 4
Total = 8
Total without Peter = 6

Test 3: Islam in AIs' Bottom Left Cities + Remove all auto-spread Buddhism immediately
Peter = 2
Charle = 2
Zara = 4
Gandhi = 3
Total = 11
Total without Peter = 9

Test 4: Buddhism in AIs' Bottom Left Cities
Peter = 3
Charle = 0
Zara = 4
Gandhi = 3
Total = 10
Total without Peter = 7

Test 5: Buddhism in AIs' Bottom Left Cities (same test as Test 5 but with different random number generation)
Peter = 3
Charle = 3
Zara = 2
Gandhi = 4
Total = 12
Total without Peter = 9


Analysing the Results
Tests 1 through 3 had Peter coming in 1st place, 2nd place, and then tied for 3rd place. In these kinds of tests, if Trade Routes affected Religious auto-spread, you would expect Peter to win more often than the others.

For comparision, we see that Gandhi won an identical number of times:
Gandhi came in 1st, 2nd, and tied for 3rd.

However, Peter did do better than the other two AIs:
Zara came 1st, tied for 3rd, and tied for 3rd.
Charle came 2nd, tied for 3rd, and tied for 3rd.


For Tests 4 and 5, it doesn't matter who got the Religions auto-spread to them, since every AI City had a Trade Route with a Buddhist City. Here, though, we'd expect to see that on average, there would be more total auto-spreading if Trade Routes did affect Religious auto-spreading.

We can only fairly compare Tests 4 and 5 against Tests 1 and 2, since Test 3 allowed for more opportunities for Religions to auto-spread.

It's also probably not fair to count Peter's auto-spreads in the comparison, since he always had Trade Route access to Buddhist Cities.

So, for the two Tests without Buddhist Trade Routes, Tests 1 and 2, without counting Peter's results, we got 7 + 6 = 13 auto-spreads. With the two Tests with Buddhist Trade Routes, Tests 4 and 5, without counting Peter's results, we got 7 + 9 = 16 auto-spreads.


Conclusion
So, overall, the numbers do show a slight weighting towards Trade Routes positively affecting Religious auto-spread in both comparisons.

However, one can "challenge" this analysis by pointing out that Gandhi seemed to do just as well as Peter in the first 3 Tests, even though Gandhi did not have Buddhist Trade Routes. Of course, that would discount the results of Zara and Charle, so it's kind of like complaining how you "often lose 90%+ odds to win battles" when ignoring all of the 70% odds to win and 40% odds to win and even 10% odds to win battles that you won.

One could also challenge by saying that the sample sets are too small to draw conclusions, and I would have to conceed to the strength of such an argument.
 
Dhoom, let's start over. This is easier than you're making it, I think. ANd with your clever way of building maps (could you send me your script so I can see what you're doing?) even easier. I think it's enough to do the test like this:

0. Use the random seed setting, so that the random seed is different each time. (Not sure how this works but that's what klarius did.)
1. We have one city with all seven religions.
2. There are two AIs, east and west, with as many cities as fit on the map.
3. OBs with one, not with the other.
4. Turn off hitting <enter> to cycle through turns (just let the turns run...)
5. Play for one hundred turns.

All we care about is OBs. Forget about the TR stuff. Why? Because we can't control that, so it's irrelevant. The only dependent variable we care about is OBs: yes or no.

--------------

One thing your testing does show, I think, is that Silu was wrong about OBs doubling the likelihood, right?
 
ANd with your clever way of building maps (could you send me your script so I can see what you're doing?) even easier.
It was really simple, actually. Plots (aka squares, tiles, whatever)--they are called "plots" in the World Builder file--have a given x and y co-ordinate values.

You could use whatever your favourite programming language is to iterate over each of the plots then update the relevant plots to have either a land-based terrain type or a Coast.

I simply set values of "TerrainType=TERRAIN_PLAINS" or "TerrainType=COAST," depending upon which x and y values were used.

As long as you know some basic input and output (reading in a file and either writing to a file or writing to standard output) for your programming language of choice, then the solution that I used was pretty simple, since all that I did was set the terrain type.

However, what you're suggesting now makes me want to update the script to also place Cities, which shouldn't be that much harder to do once you know the format (giving the City an owner, a name, a population, any religions that you want to be in it, etc).


0. Use the random seed setting, so that the random seed is different each time.
Good idea. It's been so long since I used that setting that I'd forgotten about it.


1. We have one city with all seven religions.
Okay, that part is not going to work. An AI will only get a Foreign Trade Route in ONE of their Cities.

In order to make things work, we will have to have an equal number of Cities as an AI (or have more Cities). However, if I script in the City-building, it shouldn't be too hard to do so.

The tricky part is going to be keeping the two AIs from researching Writing. Actually, it shouldn't be tricky at all--I'll just do what I did in the other game--have one declare war on the AI in the World Builder so many times that they'll never Open Borders with each other, even if someone does research Writing.


2. There are two AIs, east and west, with as many cities as fit on the map.
LOL, that many Cities, huh? I'm assuming that we can be slightly realistic here... i.e. not building in an "Infinite City Sprawl" Civilization-1-style and will stick to the 1-square-islands tactic. I'll also leave a bit of border space at the edge of the map, like I did with the saved game that I uploaded, so that it is visually easy to see where one edge of the map ends and the other begins.

Of course, with horizontal world-wrap turned on, I'm not really sure that this "edge distinction" even matters, but it's only approximately 1 missing row of Cities--not worth worrying about missing them.


3. OBs with one, not with the other.
I wonder if the AI itself matters... like, would a Religious-nut like Zara be more prone to receiving a Religion? Probably not, since most of an AI's characteristics are defined by differences in the XML, but I figured that I'd throw the idea out there.

I suppose that if you ran 2 tests, where you swapped which AI had the Open Borders agreement, things would presumably balance out even if such a difference existed.


4. Turn off hitting <enter> to cycle through turns (just let the turns run...)
Not a bad idea. I was force-ending the turns, which may end up being just as fast. Actually, force-ending the turns (by clicking on that green circle button that turns into a red circle button) might be faster, as I'm attending to any AI pop-ups that appear, such as "give me Meditation or else," or "Open Borders with me already," etc. With auto-Enter keypresses, the game will still stall at these points, so it's not like I'll just be able to walk away from the computer and let it run.


5. Play for one hundred turns.
Which should be possible with pre-soured relations between the AIs, so that I don't have to monitor who learns Writing and whether or not they are Opening Borders.


All we care about is OBs. Forget about the TR stuff. Why? Because we can't control that, so it's irrelevant. The only dependent variable we care about is OBs: yes or no.
What? My theory is not based on having Open Borders. It would apply even with only Domestic Trade Routes. The theory says that if you see another City's name in your City's list of Trade routes at the left-side of the screen, then you are more likely to receive a Religion from auto-spread that is a Religion that is contained in the City or Cities in the list of Trade Routes.

Open Borders is only an enabler for Foreign Trade Routes--a necessary but not a sufficient condition, as they might suggest in a logic class. In fact, it's not even necessary, since the theory is that Domestic Trade Routes work just as equally.


Now, the trouble with testing Domestic Trade Routes is that which City is used can change from turn to turn.

However, if we use Foreign Trade Routes with an equal number of Cities on both sides, and if the AI does not learn Currency, then by definition of the fact that they can only receive one Foreign Trade Route per City of ours, plus the fact that Foreign Trade Routes with us will trump their Domestic Trade Routes, we can easily guarantee that each of their Cities will have a Trade Route with one of our Cities.

If all of the Cities are at about the same size as each other, and none have Harbours, The Temple of Artemis, etc, then the Trade Routes will likely remain constant from turn to turn.

However, we don't even care if the AI's Cities DO switch WHICH of our Cities gets used as a Foreign Trade Route in which of their Cities, since each of our Cities will have all of the relevant Religions.

NOW, it is POSSIBLE that there is a distance factor for this Trade Route theory, in that a Trade Route with a nearby City is more likely to spread the Religion than a Trade Route with a distant City. I'm not sure that I'd have a reasonable solution to this issue on a massive scale, so we likely won't be able to test for this possibility easily.


What is a minor concern is that the AI that DOES NOT get Open Borders will still have Domestic Trade Routes, which, according to my theory, will work just as equally well. So, the most that I can use is 6 Religions, leaving the 7th Religion for the City that will get all of the non-Open-Borders AI's Domestic Trade Routes.

When all of that AI's Cities are equally-sized, and without Harbours, The Temple of Artemis, etc, it appears that the bottom-left-most City will get used for all but one of the Domestic Trade Routes. I can probably just increase the population of this City to Size 5 or something and give it a Lighthouse to start with, so that it will maintain this status of receiving all of the Domestic Trade Routes (all of the Domestic Trade Routes minus the Domestic Trade Route that this Size 5 City will have, since it can't have a Trade Route with itself). Placing the 7th Religion in that City will act as a control to our study. I can put the same Religion in both of the AIs' bottom-left Cities, so that we have a control for our control and so that we can easily switch which AI gets Open Borders for a second test.


One thing your testing does show, I think, is that Silu was wrong about OBs doubling the likelihood, right?
It's hard to say. What value gets doubled? One extension to the theory is that the distance between the City that receives the Religion and the City that it has a Trade Route with will have an influence, just as much distance from the City that receives the Religion to the Holy City has an influence.

If that's true, then the value that gets doubled may not appear as a +100% chance.

Then there's the whole concept that in Civ 4, many "+100% bonuses" only act on a base value and don't actually translate into +100% of your current value (take Science multiplying buildings for example--an Academy does not multiply the Flasks that a Library has earned you, so it doesn't truly increase your Science Rate of the Flasks received from that City by 50% if you already have a Library in the same City).
 
(edited)

Okay. I get what you're doing with the TRs.

Test 1: Set up the map however you want it. RUn it once. THen give us Mercantilism and run it again. That should tell you all you need to know about foreign trade routes.

Test 2: Run the map with one AI with OBs, one without. That will give you the comparison of foreign versus AI domestic trade routes.

-----------------

It seems to me you can just set it up so that both AIs have as many cities as we have TR slots available and give us GLH, Currency, Economics+Free Market or something like that. I still think you can put all the religions in one city. That's easier because it makes all the distances equivalent. We know that distance is the primary factor.

COme to think of it, an interesting control in all this is for us to have an equivalent layout of cities, so you can also compare our spread, which should be equal.

If you want to spice up the test, use just 4 religions and give two of them shrines. The shrine is knowb to double the lieklihood, so those two religions should be twice as frequent. That's another control factor. But beware that Judaism will spread the most, because it comes first on the list.
 
Played a turn.

We are...
Spoiler :

Victorious! :woohoo: 0.1 health left :lol:

Civ4ScreenShot0050-1.jpg


Took MC off Oracle. Before I start plotting the next PPP, is there anything I need to know as "left overs" from LC's set? I know we need to build some WB's for marble and gold. I think the goal of my set is two fold: (1) get a GS and (2) build another city. I'm inclined to choose fur but I can see a few other viable spots too, depending on where we plan on taking this game. Namely double clam and the clam/fish to the west of marble.

Also, do we want to try making contact with Ragnar or hold off on it? He doesn't tech trade until pleased so he'll only be useful for OB's. But he may be the nearest target to us.

Lastly, Izzy revolted to slavery. Not that it matters much.
 
Took MC off Oracle. Before I start plotting the next PPP, is there anything I need to know as "left overs" from LC's set?
You can probably use the spreadsheet from message #1055 as a starting point.

Some of the details, particularly later in the spreadsheet, are either wrong or may have changed slightly, since when we made updates to the spreadsheet, we often left in the data from prior trials, which means that some of the info will not seem to fit.

Still, it will give you a good start.


Another thought is that Worker 1 (the one that just finished Chopping the Forest into The Oracle) is now going to be slightly delayed in getting out east, since we moved the Galley out of position. Fortunately, with the Galley surviving, the delay won't be too big. :goodjob:

Even though our Galley is wounded, I still think that you will want to pick up this Worker and send him to the Stone, as per the original plan. In the meantime, you can just have him partially-building a Workshop on his current Grassland square (SW of Marble City) until the Galley is in place to pick him up and send him further eastward.

Since our Galley is so badly wounded, you'll probably want to send the Galley into Stone City and heal it in the City for the fastest healing possible at this time.


I know we need to build some WB's for marble and gold. I think the goal of my set is two fold: (1) get a GS
In that regard, Gold City should switch back to building the Library. Whip it on the turn that we grow to Size 5 (which has been confirmed to be the best approach). Overflow the Hammers into the Monument (which we will need), then be prepared to hire Scientists such that:
1. We have a Scientist hired plus are working the Fish + Gold + Clam
AND
2. If we are going to grow into Unhappiness, take the Clam citizen and temporarily turn him into a second Scientist (once the City has 16 turns of Whipping Unhappiness, you can work the Clam again, so that we'll grow at the same time as arriving at 15 turns of Whipping Unhappiness). I think that you may need to swap the Clam for a 2nd Scientist for around 1 to 2 turns... I believe that it was 1 turn previously but then we found that we could get the Library 1 turn sooner, which may or may not translate into 2 turns of hiring a Scientist instead of working the Clam (it still might be 1 turn--I haven't checked).


and (2) build another city. I'm inclined to choose fur but I can see a few other viable spots too, depending on where we plan on taking this game. Namely double clam and the clam/fish to the west of marble.
Do you think that you could provide some screenshots of the areas that you are talking about? I may or may not have time to open the game and tomorrow (for about a week) I won't have access to the game... plus, then it means less people opening the real game.

My understanding was that the next City that we were going to build was Pig + Magical Fish (since we have already built our 4th City as Stone City). However, we are definitely flexible in where we settle City #5 and if you find a replacement location (such as possibly one of the locations that you suggested--I'll wait for the screenshots before casting a vote), then we can potentially justify avoiding Research on Animal Husbandry for now while beelining Code of Laws.

Or, as you said, perhaps it would just mean that we'd settle City 6 somewhere other than Fur City, while still settling by the Pig + Magical Fish.

Alternatively, we could settle City 5 somewhere other than Pig + Magical Fish but could still settle Fur City since Hunting is cheaper than Animal Husbandry and Hunting is cheap enough that we can delay Research on it until the last minute. That extra Happiness may come in handy (it won't be as useful after building The Pyramids but may be useful before then).


Also, do we want to try making contact with Ragnar or hold off on it? He doesn't tech trade until pleased so he'll only be useful for OB's. But he may be the nearest target to us.
If we plan to get some cheap techs in trade, then it's actually better to delay meeting him. That way, we won't take a We Fear You Are Becoming Too Advanced hit for getting the cheaper techs in trade, such as any of Hunting, Animal Husbandry, Monotheism, Math, Iron Working, etc.

It also means that he won't get a bonus to Research on techs which we know that we don't want him to get, such as Metal Casting.

The tradeoff is that we wouldn't be able to trade with him as soon as we learn Alphabet, but, if, as you say, he won't trade with us until Pleased, then it can actually be worth our while to DELAY meeting him until around the time that we have learned Alphabet. Doing so lets us gift him a cheap tech for +4 Fair and Forthright Trading. If we meet him earlier, then gifting him a cheap tech at the time of learning Alphabet might be only worth +1 or even 0 in terms of the Fair and Forthright Trading Diplo modifiers, meaning that we'd have to gift him too many techs in order for him to become a useful trading partner.

So, yes, I think that delaying meeting Ragnar is a good idea.


Lastly, Izzy revolted to slavery. Not that it matters much.
It tells us that she wasn't in the middle of researching a different tech, such as Writing.


If you do plan to push for a different settling location and if that location isn't built into the test game, feel free to update the current date's test game and then upload it. I won't have access to the game for about a week, so I won't be able to help out with testing during this time, but maybe someone else would be able to pitch in.

Another thing that might be worth checking with the test game is whether or not the Barbs have Sailing--if they do not, just give it to them, so that you'll have a reasonably accurate feel for how many Barb Galleys will be heading our way.

Other than those changes, though, the test game should be sufficiently up-to-date that you can use it to refine your PPP before playing. I hope that you will enjoy putting together a plan! :)


The other consideration is that we have talked about building Triremes. I think that it is worth staying on track in Paris for a 4-pop-whipped Forge, which overflows into The Pyramids, then fitting in some Triremes into Paris' build order to be whipped. The timing of when we build and whip a Trireme will have to be balanced with when we build and whip Settlers from out of Paris, so it might still be a number of turns before we build our first Trireme.
 
Trade Routes for Religions Auto-spreading Testing Revisited

If I give Open Borders to Charlemange and keep Closed Borders with Peter, it means that:
1. All of Charlemange's Trade Routes are with a City of mine that is equally distant from his City... i.e. his bottom-left-most City trades with my bottom-left-most City, while his middle-right City will trade with my middle-right City.

2. All of Peter's Trade Routes are with the same City, his bottom-left-most City, which has a "non-auto-spreadable" Religion in it. The exception case is the bottom-left-most City, which has a Trade Route with a different City... but the bottom-left-most City already has a Religion (the "non-auto-spreadable" Religion), so it doesn't matter that its Trade Route is from a different City.

The opposite is true when I reverse who gets Open Borders.


I got most of the kinks worked out, except that on Turn 2, the AIs will like to Revolt to a different Religion if they don't get their current State Religion (Judaism) in one of their Cities.

For the first test, I let the fact that Charlemange convereted to Islam slide. Since he didn't have Open Borders with me so during his 9-or-so turns of Anarchy, he had no Trade Routes... which should hopefully be the equivalent of having Trade Routes to a City with a non-spreadable Religion, as far as this testing is concerned, particularly since Religions would still spread during a period of Anarchy. Peter stayed with Judaism in this test.

For the second test, Peter stayed with Judaism (although the RANDOM SEED ON RELOAD setting was enabled, and I'd reloaded a couple of times, so this fact was randomness as opposed to duplication of the first test). However, I "cheated" after reloading a few times and not getting both of them to stay in Judaism, by giving Charlemagne Judaism in one of his Cities on Turn 1 and removing it on Turn 2. As usual, that meant that I also had to re-add my Jewish Holy City in our capital after having removed Judaism from Charlemagne's City.

Since each AI has 151 Cities eligible for auto-spreading and since I played out 100 turns, this 1-turn-worth of 1 City having a Religion that would block auto-spreading should only have negligibly altered the results at best.


The results:
Test 1: Open Borders with Peter, Closed Borders with Charle, played out for 100 turns, with 151 eligible Cities per AI for auto-spreading
Peter = 112 auto-spreads
Charle = 105 auto-spreads

Test 2: Open Borders with Charle, Closed Borders with Peter, played out for 100 turns, with 151 eligible Cities per AI for auto-spreading
Peter = 114 auto-spreads
Charle = 108 auto-spreads


Hmmm, now that I look at those values, I wonder if my methodology was foiled by having my Holy Cities slightly closer to Peter.

Initially, I tried to centre my capital, but then I had issues with Cities going into Revolt from Religious Cultural pressure, so I deleted and moved a bunch of Cities. Only now do I realise that I have an even-numbered width worth of Cities, which puts all of the 6 Holy Cites (the same City for all 6 Religions--our capital) slightly closer to Peter.

So, it's still not a conclusive answer, since I obviously messed up with the testing methodology by having the Holy Cities being slightly clsoer to Peter, but we also didn't see a major swing due to Trade Routes. Not entirely conclusive, but the results certainly cast doubt on the idea that a Trade Route could influence auto-spreading of a Religion.

That's it for now, though... maybe I'll pick this stuff up again in a week, but until then won't have Civ access.

I'll attach the saved games, for anyone who is interested, but to correct things, I'll have to move around some columns of Cities for multiple players, which won't happen for at least a week.
 
MESSAGE FROM mdy:
We need pigs to grow to size 7 by the time we are ready to revolt to CS/pacifism, in order to do this I suspect we will need to found it as city 5-especially as we are considering to delay it to whip a trieme.
Each turn we delay pigs growing to size 7 after the revolt effectively delays astro by 1T, so I think this is fairly important.

I wouldn't delay exploration for WFYABTA issues, given the amount of trade we are likely to do I can't see this ever becoming an issue.


mdy​
 
Ok, I haven't crunched the numbers but here's the general idea:

Paris: WB(2) -- whip -- forge (5) -- whip -- Mids (1) -- trireme (2) -- whip -- Mids -- settler (6ish) -- whip -- Mids

Gold: library(1) -- whip -- monument (?, working fish/gold) -- WB -- start farming GS at size 5 or 4?

Marble: WB -- whip -- granary -- whip -- trireme

Stone: monument (2) -- warrior (5) -- WB (9)

No changes for OB plan. WB near Willem tries to make contact with Ragnar on the way back.
 
From mdy:

Ok, I haven't crunched the numbers but here's the general idea:

Paris: WB(2) -- whip -- forge (5) -- whip -- Mids (1) -- trireme (2) -- whip -- Mids -- settler (6ish) -- whip -- Mids

Gold: library(1) -- whip -- monument (?, working fish/gold) -- WB -- start farming GS at size 5 or 4?

Marble: WB -- whip -- granary -- whip -- trireme

Stone: monument (2) -- warrior (5) -- WB (9)

No changes for OB plan. WB near Willem tries to make contact with Ragnar on the way back.

I think that gold will need to start working the scientists at size 5 to enable it to grow quick enough. We will need a monument here to allow us to grow to size 9, so we may as well start building it straight after the library, provided we don't need any WB anywhere urgently.
 
What's our barb strategy? Both fogbusting and emergency defence? Barb galleys tend to show up in numbers, in my experience. I know we have plenty to build other than triremes, but we could at least put a turn of hammers into it in a city or two with whip potential. Our one galley is now gonna take lots of turns to heal and we won't even have the option to take a defensive battle for a while.
 
We can't really fogbust as we don't have any units available for that job. I can put a turn into triremes in both gold and Paris for emergency whips but that's about it. Gold is a bit strapped for :) right now so Paris will probably be better. I would like to put in the hammers after the current WB build though, as we want to get a WB over to Marble ASAP.

Another alternative is to have stone city build a few more warriors down the road to plant on the northern islands as anti-barb measures.
 
Paris: WB(2) -- whip -- forge (5) -- whip -- Mids (1) -- trireme (2) -- whip -- Mids -- settler (6ish) -- whip -- Mids
My understanding was that we'd start on a Forge right away (since we now know Metal Casting) and that we'd whip the Forge as soon as we grew to Size 8 for a 4-pop-whip. Since we've already grown into Unhappiness, I'm not sure that we'd really be best off by first whipping a Work Boat (a 1-pop-whip). I mean, it doesn't seem worth it to get +2 Food in Marble City from the earlier Work Boat if it costs us:
a) not being able to work a citizen in Paris due to the extra 1-pop-whip. I'd rather see +1 citizen put to work in Paris and miss out on those few turns of Food in Marble City than the opposite
and
b) several turns of Unhappiness + Unhealthiness due to delaying the whipping of the Forge while we are currently Unhappy and Unhealthy in Paris until the Forge gets sufficient Hammers in order to become a 3-pop-whip

I would tend to think that we'd want to "rip the band-aid off as quickly as possible" by growing to Size 8 as soon as possible then whipping the Forge immediately for 4-pop-points. By building the Forge until we grow (2 turns, if I recall correctly--I am going completely from memory here), we will have more overflow Hammers that will go into the Work Boat that will receive the Forge's enhanced Hammer bonus. Building the Work Boat pre-Forge does not net us said bonus Hammers.

So, that's 3 reasons for building the Forge before the Work Boat in Paris.


I'm not sure what happens with Settlers once we have a Forge... can they still be 3-pop-whipped? If yes, I would tend to think that 3-pop-whipping them is the best case, but if not possible, then 2-pop-whipping with max overflow Hammers into The Pyramids is probably the next best bet.


Gold: library(1) -- whip -- monument (?, working fish/gold) -- WB -- start farming GS at size 5 or 4?
Library is best whipped after immediately growing to Size 5, whenever that happens.

Yes, we need a Monument immediately after the Library.

Yes, hire a Scientist at City Size 4 in Gold City. In fact, you will likely have 1 or 2 turns where you will have to hire 2 Scientists before growing to Size 5 (remove the Clam citizen) until we are at 16 Whipping Unhappiness, at which point the 2nd Scientist works the Clam again, so that when we regrow to Size 5, we will regain our Happy citizen (i.e. having exactly 15 Whipping Unhapppiness). At Size 5, we will hire 2 Scientists from then on.

From what I recall, we will grow into a bit of Unhappiness later, but it probably can't be helped unless we get a State Religion in Gold City.

Anyway, definitely play out a test game where you focus on what goes on in Gold City (even if it means ignoring the rest of your empire) in order to see what I mean about the timing of hiring 2 Scientists temporarily before regrowing to City Size 5.


Marble: WB -- whip -- granary -- whip -- trireme
Yes, it's going to be very preferable to get the Granary before whipping the Trireme, if the Barbs will allow us to do so.

When do you plan to whip the Work Boat? My suggestion would be on the turn that we are about to grow to City Size 3, since doing so worked out the best for me. I even tried "being cute" and whipping the Work Boat when we had 2 turns to growth to City Size 3 and doing so was inferior... in fact, whipping any time sooner than that just gets even worse.


Stone: monument (2) -- warrior (5) -- WB (9)
What's the early Warrior for? Do you plan to send him to spawn-bust an island? I don't think that we'll need one for Military Police duty anytime soon.


Any plan to detail your Worker actions? You could pretty much stick to the spreadsheet PPP for these details, with probably the only difference being that Worker 1 would pre-build a Workshop for longer next to Marble City... it used to be for 1 turn but now it is possibly for roughly 3 turns... if he can move onto the Galley but the Galley will end its turn next to Marble City, then that's a turn too soon to load up the Worker. This way, Worker 1 will no longer need to pre-build a Workshop next to Stone City, as the Road to the NE on the Des Hills square should have already been completed for him by Worker 2.
 
What's our barb strategy? Both fogbusting and emergency defence? Barb galleys tend to show up in numbers, in my experience. I know we have plenty to build other than triremes, but we could at least put a turn of hammers into it in a city or two with whip potential. Our one galley is now gonna take lots of turns to heal and we won't even have the option to take a defensive battle for a while.
If we were to build a Trireme in Marble City pre-Granary due to desperation, would we be able to grow to Size 4 soon enough or should we consider pre-investing in a Trireme there now, so that it will be 1-turn-away from being a 1-pop-whip?

It'll take a bit of micro to avoid accidentally making it a 1-pop-whip, but if we make it a 2-pop-whip that can become a 1-pop-whip within a turn of base Hammer production, then we'll have good flexibility here.

We hopefully won't lose any (or at least not many) invested Hammers if we end up not needing the Trireme until after 2-pop-whipping the Granary there.
 
Back
Top Bottom