@Sir Bugsy, I think the Blue Dot is where it is because it matches the RCP10 that Tokyo is on. Seems, the team still needs to decide if RCP is the way to go, and if so, how far out should it be maintained. IMHO Your position is much better, for the cow but also because it's a true choke point. The Blue Dot still lets units waltz by the city on the west side.
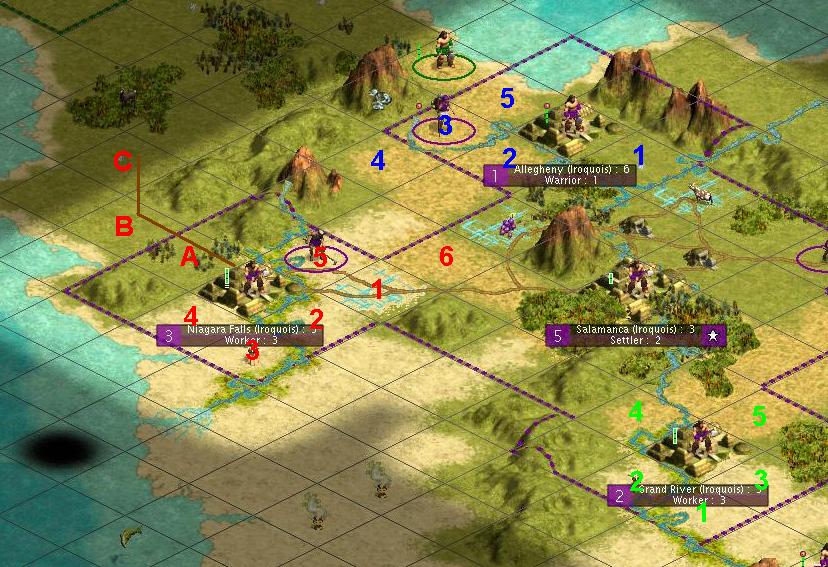
Because it hasn't been addressed yet, and the comments are three pages back I'l like to talk about Niagra worker turns for a minute.
Originally posted by scoutsout
Q1. I'm going to have him quit, and move 1 tile NE, to begin roading it on the next turn. We need a road going NW in the worst way...
Quitting after 3 of 4 turns irrigating is a huge waste of worker turns. The road that you propose doesn't really help that much in terms of movement until the tile north of that is also roaded. Since neither tile is within our border yet we get very little benefit. Also the worker factory, which needs ALL of its FP irrigated to function every three turns will lose the extra food for at least 8 more turns.
Originally posted by alerum68
q1) I'd let him finish, then move him sw, then south, to irigate the FP+wheat there. If this is to be our worker factory, then let us get some food!
Good to let him finish but wasteful to move him to the wheat from here. You blow 1 turn to cross the river, another to move to the wheat. Note that you will grow in 3 turns*. Any FP irrigated will be another food tile to use. It doesn't have to be the wheat as long as we have enough citizens to work the improved tiles. This city needs to be size 6 with all FP being worked. Then mine the Plains.
*I believe the real question is, knowing there is 1 turn to go, what micromanagement can be done to get us further. The answer is you can move the forest tile to the FP the worker is on right now. The worker finishes at the end of the turn, the town makes +6 food instead of +4 and will grow in 2 instead of 3. The worker will be delayed because the forest isn't being worked but that's OK. The forest will get selected on the growth turn so you only lose 1 sheild.
The goal for this town is SIZE. With two workers here, you will Grow every four and finish the improvements the turn before growth. If you concentrate all worker actions on this town, in the long run you will have a worker army to make your road to the N (just before you need it).
As I said to Alerum, the better players don't do anything unless its part of the current objective. Given our high food, low shield start, we've been forced into a builder objective for now. Capitalize on our settler factory, fill the area and GROW. To get shields, we need workers. So they are the priority. Once that phase is over everything will be switched to military and we CONQUER. Then all back to infrastructure until we want war again. There is very little middle ground. Playing the extremes makes you powerful. (This goes for just about every aspect of the game. i.e. Science slider at Max or Min, never 50%. All out attack, then peace, never "send a unit here, send a unit there". That's what the AI do and they suck.)


")
 I started typing my post on page 30 and posted it on page 32
 And yes, I've installed Civ at work for my last day of loafing.:devil2:
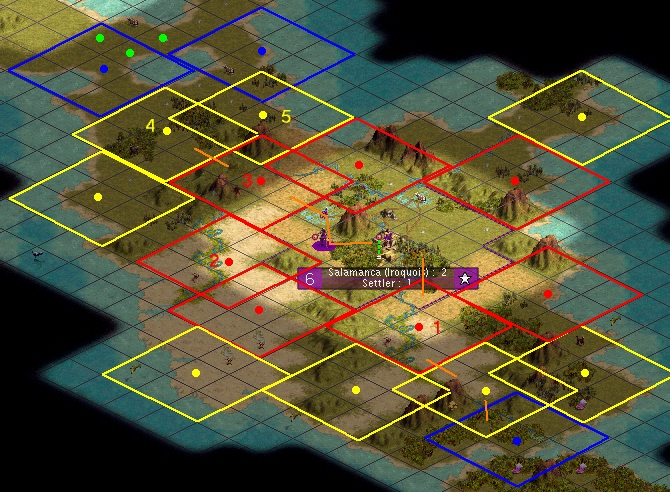


") )
)