- Home
- Forums
- OUR ARCHIVES
- List of Archived Forums
- Civilization IV Archives
- Civ4 - Democracy and Team Games (last round)
- Civ4 - BTS Multi-Team Demogame
- Team SANCTA
You are using an out of date browser. It may not display this or other websites correctly.
You should upgrade or use an alternative browser.
You should upgrade or use an alternative browser.
Office of Exploration
- Thread starter azzaman333
- Start date

Ronnie1
Deity
Can't barbs only be created in tiles covered by FoW? If that's true then keeping the warrior where it is leaves 1 unseen tile that can create barbs, where as moving will leave more than one tile unseen on a few occasions. (Although as you psted that I'm reckoning I'm wrong on the barb creation bit...)
You are actually right I beleive. Barb generation is a factor of total fogged tiles/t. But defogging the sea tiles probably reduces that # a tiny bit.
Krill
Deity
Hudson: South to check for barbs. T43 move NE to check for two mover barbs. Turn 44 if no two movers present move Worker General_W SE to check for barbs, if none, road. We can then either leave Hudson in place to check for two movers or cover General_W (I think cover is better).
Houtman: Fort in place to fogbust?
Stuyvesant: SE
Houtman: Fort in place to fogbust?
Stuyvesant: SE
AutomatedTeller
Frequent poster
Barentsz is healing? At some point, we should bring him back around to scout and send one of the other warriors NE to fogbust.
Krill
Deity
Well, as we don't know how far that peninsula extends (it could be a land bridge to another continent ie Africa), we don't know how long W1 will be exploring, so planning on him turning back and not continuing exploration is kinda unproductive.
Krill
Deity
stupid dp.
Krill
Deity
W1: 39
W2: fort
W3: 9?
W4: SW (changed)
W2: fort
W3: 9?
W4: SW (changed)
Ronnie1
Deity
Stuyvesant SW.....
Ronnie1
Deity
Barentzs N................
Viva_Chingon
Condition 1
Stuyvesant : SW
Barentz: S, SW - I think posting him on the hill 1N of the last Western most Peak would be good for keeping an eye on barbs till we're ready to settle the horses/gold city.
Then again, there's also that passage through the mountains SE of C3 to explore...it looks to me like there are trees/jungle over there, so I'm betting its a pass.
Krill
Deity
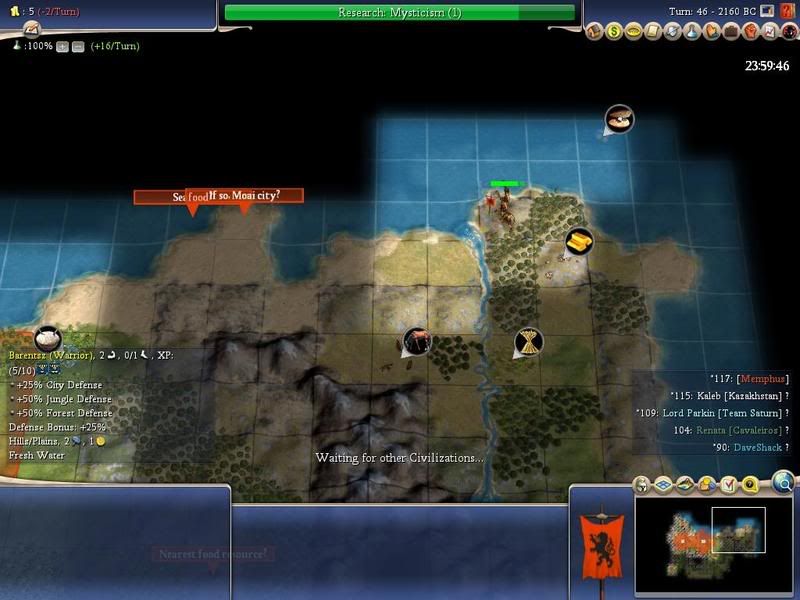
I think the choice for Barentz is three fold; either move back east to the desert tile (not worth it IMO now, we can wait until we are ready to found the gold city), move to the northern most tip of the western desert and check for sea food, as that would be a contender for the Moai city (2 desert hills, 4 desert tile, 9 coastal tiles, 5 ocean tiles) along with a city planted for the clams and gold, or on that eastern desert tile if it has sea food, or head straight south west and follow the peaks.
I favour the third option for now, as this lets us utilise the woodsman 2 promo to the fullest; but ten I also favour settling city 4 for the wheat and horses down south, and using 1 chariot to scout and fogbust the east until we are ready to settle for that gold.
I favour the third option for now, as this lets us utilise the woodsman 2 promo to the fullest; but ten I also favour settling city 4 for the wheat and horses down south, and using 1 chariot to scout and fogbust the east until we are ready to settle for that gold.
Viva_Chingon
Condition 1
...or head straight south west and follow the peaks...
I don't get it? What are you talking about doing?
And on second thought, to get back to the pass I would think 2S,1SW would utilize the forest best...I keep forgetting this guy has woodsman II.
Krill
Deity
We can head straight SW (1111) with Barentz, and come back to our side ofthe peaks, and then head south and look for holes in the peaks to go through to another area.
Spoiler :
Viva_Chingon
Condition 1
I get ya...that's kinda what I was talking about earlier but if we trekked the open land/hills or used the forest for cover it would still take 4 turns either way though. Isn't there still a lion roaming over there? I'd rather use the woods.
")
Similar threads
- Replies
- 14
- Views
- 1K
- Replies
- 8
- Views
- 582
- Replies
- 34
- Views
- 2K