Once again, Yilar and I played the turn together and discussed strategy at move down to the last detail. The situation again looked rather grim and possibly hopeless. We completed only one build this turn, a regular cavalry that proved critical to our success. The complete battle log is in the following spoiler.
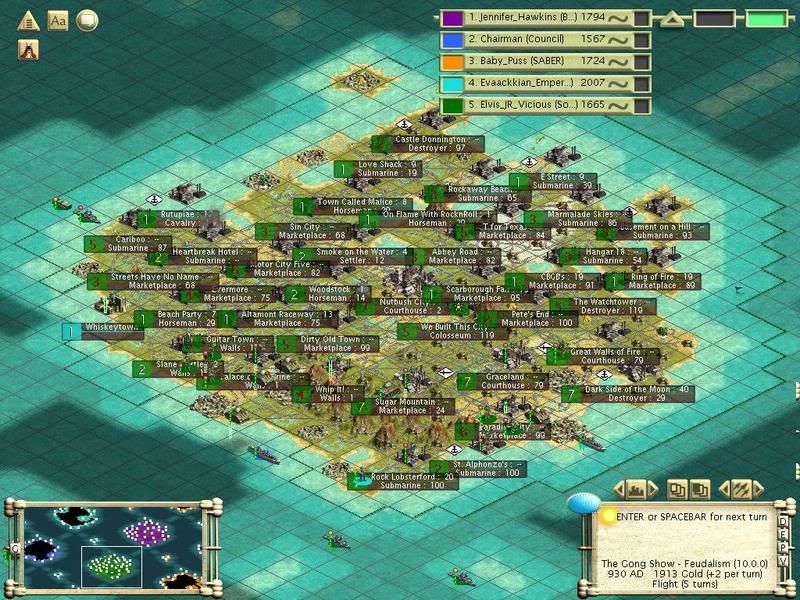
And here is the zoomed out map of the Gong Show after all actions this turn.
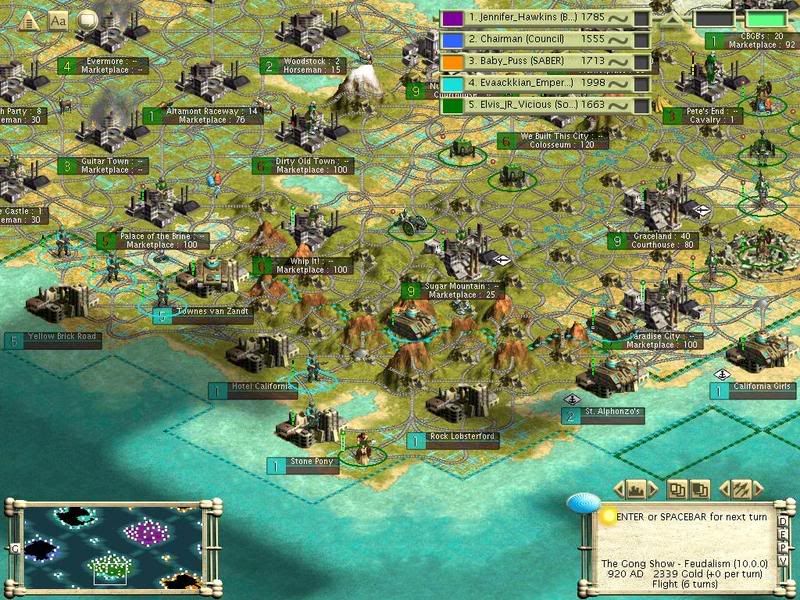
In the picture, you can just make a stack of 8 Free tanks that were airlifted in on yet another airfield this turn. This was immediately our target. We first cleared a tank in but at the expense of using 2 units just to force a retreat. Our prospects did not look good after the initial bad luck, and was almost made even worse as I mistakenly allowed Charlie Reid to take a free-shot from a tank on its way to attacking at St. Alphonzo's.
Fortunately, Team Free left Rock Lobsterford and Hotel California undefended, but we were forced to use an injured cavalry to capture Hotel California. We then used its movement to scout at the mountain overlooking Yellow Brick road revealing the 8-airlifted tanks there. This was unexpected as they only had only airlifted 1 tank on the previous turn and after suffering maximum 100% should have not been able to produce that many this turn. It is possible they had rushed those units and turned all citizens in those towns into specialists in anticipation of war-weariness, so we are not crying foul. I have sent to note asking the administrators to check the save to see if scrolling ahead to prevent disorder was done as it is against the rules, but could easily be overlooked as it is allowed in most games.
It was critical we destroy the airfield and the only way to capture Yellow Brick road was to use cavalry and we only had our regular and a 2/4 Veteran. The odds went against us in removing another tank in our way as our new veteran guerilla lost without doing a scratch to an injured tank despite a 70-80% chance of victory. It took an astounding 6 units and 2 bombardments to remove this obstacle.
Artillery bombardment revealed two marines in Yellow Brick Road. We would need both of our cavalry to win their battles if we had any hope of preventing Free from using their stack of tanks against us next turn and to keep them from landing even more on our island. Our first cavalry redlined but in a close battle won against a 2hp marine. We finally had a bit of good fortune as our last cavalry was able to win against a red-lined marine and destroy Free's airfield.
Next we needed to capture Palace of the Brine which was also defended by a tank and two of Free's healing marines. Another tough battle followed and we needed two artillery and 7 units to capture the town and another artillery. Palace of the Brine is in range of attack from 3 red-lined tanks and two veterans, but has ten of our units in defense and is expected to hold out next turn at almost 100% odds. Only the capture of this town will allow them to use their stack of 8-tanks on us next turn.
We've been forced to abandon some coastal towns which Free was in range to capture as we can not allow them to unload a transport with more tanks to attack and capture even more towns. I've abandoned the island of Kokomo as its capture would allow them to quickly build up forces to attack us and possibly bomb us if they chose. We've upgraded most of our obsolete units and sent 1913 gold to the Babes which we should get back next turn to complet the upgrade of our forces.
Team Gong's military now consists of 2 workers, 5 spearmen, 1 pikeman, 3 cavalry, 13 infantry, 7 artillery (courtesy of Free), 1 cannon, 3 medieval infantry and 6 guerilla's. We should be able to draft four-six more infantry next turn and will poduce another regular cavalry. We may also be able to rush 2 submarines and even more soon as Team Free does not appear to possess destroyers or even be aware of much of navy. These will be able to scout unseen and if needed attack transports directly, even if escorted by cruisers. We can still expect some losses next turn and possibly might lose some towns.
After next turn we will have no more cities to draft units and little to no production, so we will revolt at the end of turn and become a Monarchy in 960AD ending the effects of war-weariness and allowing us to convert to an all cash economy to rush units and effective infrastructure. Flight is now due in 6 turns and we hope to be able to deliver this to the Babes soon. We should be able to rush tanks in Monarchy if necessary as the Babes are close to finishing research on motorized transportation.
We have heard no word from Team Saber in reply to our note, but we can expect them to understand it is in their interests to keep Team Free under wraps in a pro-longed war with us and continued trade of our luxuries. They have made no captures in Babes territory last turn and are being much more cautious and careful in their attacks on Team Babe. The Babes have destroyed some of Sabers ships and damaged some of their carriers so we can expect the Babes to hold out quite a while.
Finally, since Team Council was as weak as us just two turns ago and have been expressing a desire to stop Free a long time, we have sent an accepted Mutual Protection Pact offer to them in hopes they understand it is in their interests to stop Free now while we have slowed their production with maximum war-weariness for a long time to come. Hopefully we'll hear from them soon and start discussions on the benefits of such an arrangement. I believe if we are allowed to fall soon, the Council will only be destroyed by an even stronger Team Free with the ability to mass-produce veteran units who has learned from their mistakes. Team Gong may no longer be attempting a peaceful 100K, but I believe we should be determined to win without being an aggressor either. Team Free has payed a heavy and over-whelming price for not destroying us quickly and we shall not let them off the hook for their mistaken and failed sneak attack easily. The resistance will continue...
") I'll see if I can get an MSN account going in the next few...making
I'll see if I can get an MSN account going in the next few...making
")