You are using an out of date browser. It may not display this or other websites correctly.
You should upgrade or use an alternative browser.
You should upgrade or use an alternative browser.
SBB : storyboard builder
- Thread starter Steph
- Start date
The kneeling infantry is the attack animation. The standing infantry is the fidget animation
sprnv8
King
I love this Program you have made Steph.
Just have a few questions:
1) My animations don't fit in the frames, what is this size too big?
if so what size do you suggest?
2)When you convert the colors to 256 colors, what settings should you use? I use windows ME and I have a few choices.
3)Is there anyone who would like to make some F-15 sounds or point me in the direction of a free sound editor?
4)This is more of a suggestion: Could you put in a sound mixer or something to add the Sound into the file also.
EXAMPLE: when you want a Wedge of 3 units and you delay the animation, maybe you could have something to add the sound and delay it with the animation.
Most of the time, I use 200x150. You can also use tight formation. And don't forget, if the unit doesn't fit at tall in the grid you can see in the preview, it won't be displayed correctly in the game (as it will overlap adjacent cell).Originally posted by sprnv8
I love this Program you have made Steph.
Just have a few questions:
1) My animations don't fit in the frames, what is this size too big?
if so what size do you suggest?
You should ask Kryten for this one, he knows PSP better than me.Originally posted by sprnv8
2)When you convert the colors to 256 colors, what settings should you use? I use windows ME and I have a few choices.
Sorry no, I have never programmed sound yet, and I don't have time to learn. I have a lot of work with my next project.Originally posted by sprnv8
4)This is more of a suggestion: Could you put in a sound mixer or something to add the Sound into the file also.

sprnv8
King
Thanks alot for your help")
Maybe sometime in the future?(When you have time)
Maybe sometime in the future?(When you have time)
Gingerbread Man
Dark Magus
I'm getting lost in the convert to 256 colours and apply palette stages.
to convert to 256 colours im opening the munit bmp in MS paint, and saving it as a 256 colour bitmap.
and I'm totally lost in the 'apply palette' stage. how on earth do you apply a palette? does it have something to do with the *.pal files? what program is used?
In the end the civ specific and transperant clours get mixed up.
Originally posted by Gingerbread Man
and I'm totally lost in the 'apply palette' stage. how on earth do you apply a palette? does it have something to do with the *.pal files? what program is used?
Yes, you can apply palette using .pal file in paint shop pro
Gingerbread Man
Dark Magus
oh ok. THANKS HEAPS!
Lynx-Eyed
Chieftain
Great job!!!!! I love it
GrandAdmiral
Deity
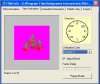
I have a new problem. Well at least its new for me. After I open my new PCX file in flicster when I check alpha blend the pink background doesn't disapear and turn gray. It just stays pink. Also, when I change the civ specific color the figures colors turn into a mess. The munit uses the American Rifleman, American Anti-Tank and American Heavy Machine Gunner units from PTW so I can't post the files but I have attached a screen shot. I have already read through the thread to see if this is coverded and I couldn't figure it out. My guess is it has something to do with the palette. If it is I don't understand why it affects all three figures when I am using the palette from one of the units.
Attachments
GrandAdmiral
Deity
GrandAdmiral
Deity
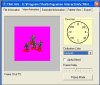
Well I fixed that problem by changing the palette but now my shadows disapear along with the background when I select alpha blend in flicster.
Kryten
Smeee heeeeed
See if this helps......
1) use FLICster to open the flc file
(a new window appears in the FLICster window)
2) click 'export' and change the frame size and frame count if you have to, then click 'export' again
(another window has appeared in the FLICster window, making a total of two of them.
Click 'view animation' to see the figure animation, then drag FLICster to one side for the moment, still running)
3) change the storyboard that FLICster has just created to the nice grey Alpha.pal palette....remember to 'maintain indexes', then run it through Steph's SBB utility
(this will create a multi-figure bmp file)
4) open the bmp file in your paint program and change that to the alpha.pal palette that you used above
(the background will change to dark blue or orange insted of grey...this is normal)
5) use the 'colour replacer' tool to change the dark blue to the same shade of grey that the original pcx storyboard has
6) now save the bmp file as a pcx file with exactly the same name as the original pcx file
(say 'yes' to the overwrite warning message)
7) go to 'file' and 'save' this new pcx file, then go back to FLICster and move around in the FLICster directional 'clock-face' to see how it looks in all directions
(use the FLICster 'Alpha Blend' button to see if the shadows are correct)
8) if your happy with it, click 'export' in the TOP FLICster window (the one called FXM _info), then in the same window (which has changed appearence) click 'export' again
(this will tell FLICster to permanently change the original flc file, and saves your new creation in a form that Civ3 can understand)
9) now close BOTH the FLICster windows so that FLICster is empty, but leave FLICster open, because you will need it for the next animation.
As a quick check, now open the same flc file again with FLICster just to make sure that the original flc file has been changed
(go back to step one and follow through it again till step two, just to see what it looks like)
Steph, can you do anything about the preview disappearing when i look at it. the only way to get it back is to exit totaly out of the program and then start it up, which is annoying after a while. it isn;t a major bug, but it will get on your nerves after a while.
sela1s1son
King
How do I get to the point where I can make my own MultiFigure units? It looks for (forget the type) of file and they don't exist. According the manual I need some sort of software?
Also, why don't the units work in PTW? (or can they?)
Also, why don't the units work in PTW? (or can they?)
Fr8monkey
Deity
I am doing everything as the instructions say; yet as I load the storyboard, and set the formations all I get in the preview section is a gray square with nothing in it. If anyone can explain what I am doing wrong, please tell me.
i am getting the problem GrandAdmiral is when i change the color to a different civ color instead of default.
Take this storyboard and don't alter it whatsoever. just pen it in flicster and change the civ color to 0 or a different color besides default.
www.civfanatics.net/uploads3/MusketInfantryAttackA_StoryBoard.zip
Take this storyboard and don't alter it whatsoever. just pen it in flicster and change the civ color to 0 or a different color besides default.
www.civfanatics.net/uploads3/MusketInfantryAttackA_StoryBoard.zip
Originally posted by Civanator
Steph, can you do anything about the preview disappearing when i look at it. the only way to get it back is to exit totaly out of the program and then start it up, which is annoying after a while. it isn;t a major bug, but it will get on your nerves after a while.
Sorry I can't. I can't reproduce it on my computer.
Similar threads
- Sticky
- Replies
- 4
- Views
- 157
- Replies
- 0
- Views
- 901