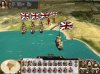
I unfortunately didn't get the best screenshot from this battle, but it began in the way shown in the screenshot attached. I was fighting Denmark, and had conquered Hamburg, and sent two armies north, one to Arhus and one to Stockholm. The Arhus one died spectacularly to a larger Danish force while assaulting the city, leaving my crown prince dead in the process. The Stockholm force was still trekking across the Swedish forests, while a third army arrived in southern Denmark. This army, led by the pictured general, defeated an army of about 1200 Danes with a force of about 600, avenging the former crown prince.
However, the Danes still had another army of about the same size on the way from Stettin. They bypassed the well-defended Hamburg, entered southern Denmark, and attacked me from the north. It was a close battle in a forest until my catapults inadvertantly fired flaming rocks right into my dismounted feudal knights, and all my infantry fled. My knights (and general) were away on a flanking maneouver, and managed to kill about a third of the enemy, including nearly all their archers, while the Danes chased down my fleeing infantry. After my knights routed, I had forty men left, the forty seen in the first few regiments here. They retreated to the walls just outside Hamburg.
The enemy attacked again, and fortunately Hamburg reinforced. My general bravely took on the enemy single-handedly while my reinforcements set up positions. A few dozen crossbowmen met their doom in the charge my general led, before retreating back to join the main force. The basic plan was a longbow slaughter, with mercenary spearmen and what dismounted feudal knights I had forming a shield. The remaining Danish crossbowmen were pitifully outnumbered by my longbows and nearly destroyed from the air, before fleeing when my two Feudal Knights charged them. Then the enemy foot soldiers arrived, and still outnumbered my infantry after closing the gap.
Despite the heavy air assault, the enemy broke through my dismounted knights, and their Town Militia were threatening a melee with my rightmost longbows, whom I had ordered to stand ground, having nowhere to retreat to. My general and his four remaining bodyguards thus charged the militia, hoping to strike their side and inflict heavy casualties while they flanked the middle section of my infantry wall. The charge didn't really work, but my Knights did inflict some casualties in melee. However, they refused to retreat when I ordered them to! Helplessly I watched as they fought on, until finally, with all the bodyguards dead, my general decided to fall back. As his horse trotted back towards the Longbow lines, arrows visibly whizzed right by him on both sides as well as just over his head, all from his own longbows. A single Longbowman firing in the wrong direction and he would have been dead. This is the image I hoped to have, but I was too awed by the danger to hit Print Screen. Fortunately he survived, and stayed behind the lines for the rest of the battle, which was a Clear Victory. The enemy general, too, nearly met his fate to the longbows, when he tried to lead a charge as his infantry faltered. Meeting a hailstorm of arrows and losing a good part of his bodyguard, he abandoned the idea and retreated, leaving Hamburg to English control, and my general to retreat behind the safety of the city walls.
")

