Quick guide on using the latest version of Blender and Deliverators new scripts to convert a unit. This tutorial assumes you have a basic understanding of Blender. Thanks to Deliverator and Ekmek from which a lot of this is copy and paste from their tutorials (I hope you don't mind).
Software Tools Used
Nifskope
Blender 2.72
Nexus Buddy 2 Scripts for Blender 2.7 made by Deliverator
Nexus Buddy 2.1 made by Deliverator
UV Copy Paste Script made by Nutti
You may need to enable the export to OBJ script and install the BR2 export and UV copy paste script for which there are plenty of tutorials that can be googled.
Step 1:
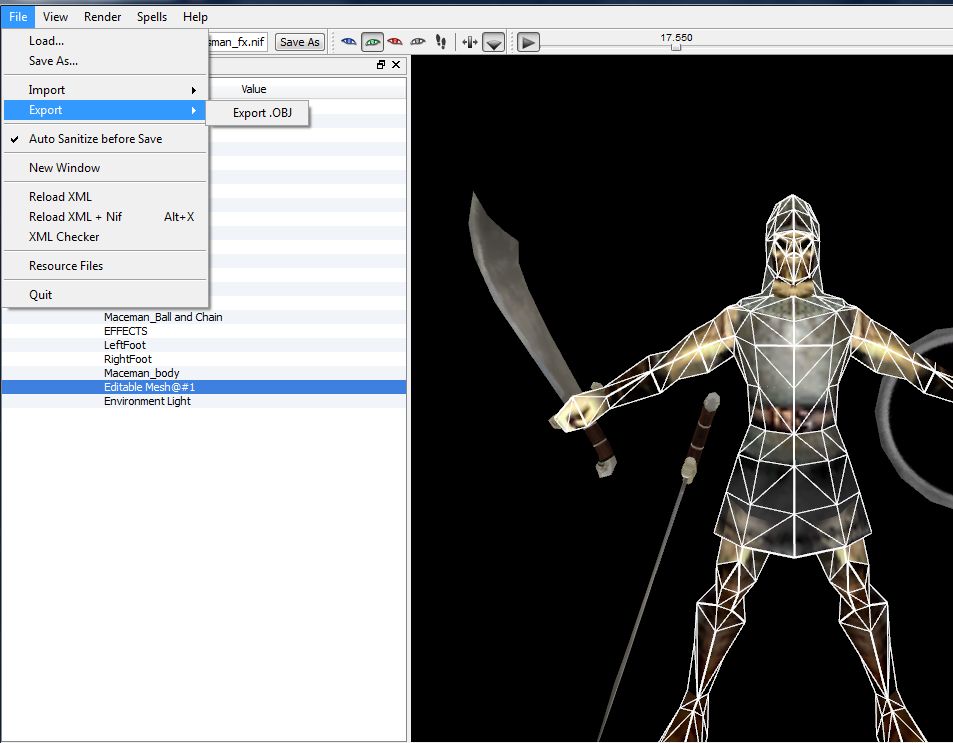
As there is still no NIF importer for Blender 2.7 (that I could find anyway, please correct me if I am wrong) so we will need to use the OBJ importer for our unit as per Ekmek's tutorial.
Export your Civ4 Mesh as an obj files using nifskope. Click OK on any warning messages you get.
Step 2:
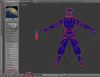
Open your template unit in Blender and import the wave object. NOTE If your unit is a mess it may be easier to fix it first in a new Blender instance then copy and paste it into your template.

Step 3:
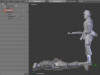
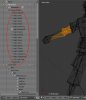
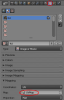
Select the mesh from the Outliner view (hold shift and left click to select if you have multiple meshes).
Resize and rotate if need be. For most cases in the 3D View press 3 then R then type 90 then hit Enter to get it the right way up. Press S to resize if necessary.

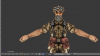
Line up your objects. LINING UP CLOSELY TO THE MESH HELPS MAKE THE RIGGING MATCH BETTER. See stage 2 of this tutorial for more detail on this.

Step 4:
BAKE your mesh only if required.
Note this should not be required with most units, it is really only needed with custom units that take bits and pieces of different units and combines them. In most cases unless your mesh has only one Vertex Group you should just make a multi-mesh unit. If you know how you could make a dummy vertex group and rig it to and unused bone in some cases as well.
A)
Right-click to select the mesh you want to join, hold down Shift and then right click the mesh you want to join it to, Ctrl-J to join the two. Now repeat this for any other meshes you need to join, pressing A in 3D View to deselect all after each join.

B)
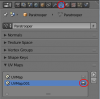
Create a second UV map on your object in Properties > Object Data by clicking on the +.

C)
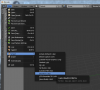
Make sure you have installed the uv copy paste plugin. With your new Object selected Tab into Edit mode on 3D view and press U, select Copy UV Map and select the original UV map. Now press U, select Paste UV Map and select the new UV map.

D)
Select the original Map for your Texture in Properties > Textures > Mapping > Map. Repeat for all textures you need to bake.

E)
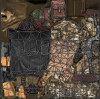
You should see the mess in next screenshot in the UV/Image Editor View. This is the current UV mapping for the unit. It basically tells the graphics engine how to apply a 2D texture to a 3D mesh.
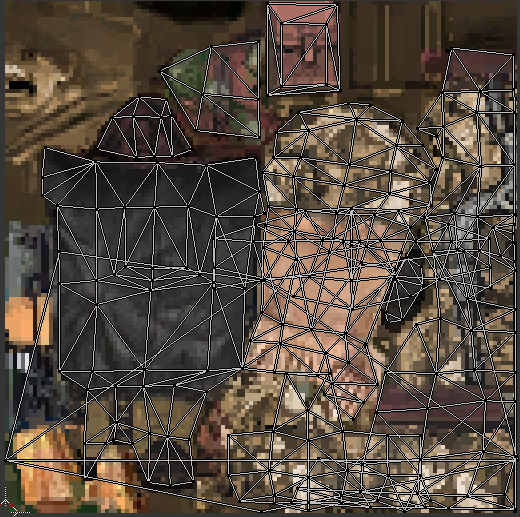
Because we are combining several textures into one, we have the problem that a lot of elements are overlapping. We need to fix this first this before we can bake our texture.
EDIT:I moved this stage here (it used to be after rearranging the materials) as it is easier to work on a black background than a image.
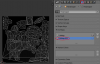
Create a new image in the UV/Image editor by pressing Alt + N or Image > New. Make the image size either 256 x 256 or at the most 512 x 512 and click OK.
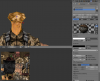
We still have our separate materials which we can use to select the separate elements of the unit. Switch to the second material using highlighting as shown below, press A to make sure everything is deselected in the 3D View and then press the select button for that material. Now the UV window shows only the mappings for the second material:

Now move rotate and/or scale to desired location within box, then press A to deselect, now select the first material and move rotate and/or scale and repeat for any other materials you may have. The UV view should now look something like the Picture in G) with no overlap. Your unit will look all wrong at this point but thats normal.
See the Bake Texture (Part C) of Blender 2.49b tutorial which goes into greater details of how to do this for Blender 2.49b but is still the same in 2.7.
F)
EDIT: This step has been moved to step E.
G)
Select the new UV map in Properties > Object Data and then select the new image in the UV/Image editor, so that the individual islands UV map is displayed over the new image.

H)
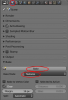
In Properties > Render > Bake select Textures from Bake Mode then press Bake.

I)
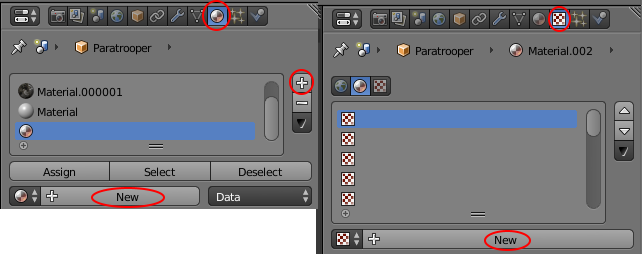
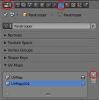
Save your new image, Image > Save As Image. In Properties > Material press + to make a new Material then press New. With new material still highlighted go to Properties > Texture and press New, now under Image press Open and select newly the baked pic we just saved. Back in Properties > Material delete old materials (highlight and press -) so just the new one remains.
J)
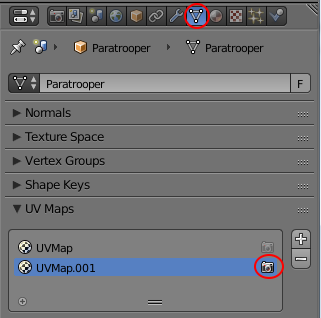
In Properties > Object Data make the NEW map the active map by clicking on the camera icon then highlight the OLD map and press - to delete it.
Step 5:
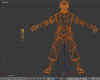
In Object mode in 3D view select the template object and new object with shift RIGHT CLICK. OLD rigged mesh first then the new one second. YOUR NEW MESH MUST HAVE NO VERTEX GROUPS FOR THIS TO WORK. Select Weight Paint mode in the 3D View then press Transfer Weights in he Tools side bar.
Click here if only one vertex group being copied over.

Step 6:
Check rigging. It may be trial an error as you test the animations and you may have to re-rig some parts but this should do 70-80% of the rigging work.

Step 7:
When you are happy with your vertex groupes in Outliner View left click to select new mesh then Shift left click the skeleton then press Ctrl P and select to Armature Deform.

Step 8:
Delete your old template mesh (select then X to delete in 3D view), select your new mesh and press Ctrl A and apply rotation and scale and save then export to br2. If you need help with exporting see this tutorial.
Software Tools Used
Nifskope
Blender 2.72
Nexus Buddy 2 Scripts for Blender 2.7 made by Deliverator
Nexus Buddy 2.1 made by Deliverator
UV Copy Paste Script made by Nutti
You may need to enable the export to OBJ script and install the BR2 export and UV copy paste script for which there are plenty of tutorials that can be googled.
Step 1:
As there is still no NIF importer for Blender 2.7 (that I could find anyway, please correct me if I am wrong) so we will need to use the OBJ importer for our unit as per Ekmek's tutorial.
Export your Civ4 Mesh as an obj files using nifskope. Click OK on any warning messages you get.
Step 2:
Open your template unit in Blender and import the wave object. NOTE If your unit is a mess it may be easier to fix it first in a new Blender instance then copy and paste it into your template.
Step 3:
Select the mesh from the Outliner view (hold shift and left click to select if you have multiple meshes).
Resize and rotate if need be. For most cases in the 3D View press 3 then R then type 90 then hit Enter to get it the right way up. Press S to resize if necessary.
Line up your objects. LINING UP CLOSELY TO THE MESH HELPS MAKE THE RIGGING MATCH BETTER. See stage 2 of this tutorial for more detail on this.
Step 4:
BAKE your mesh only if required.
Note this should not be required with most units, it is really only needed with custom units that take bits and pieces of different units and combines them. In most cases unless your mesh has only one Vertex Group you should just make a multi-mesh unit. If you know how you could make a dummy vertex group and rig it to and unused bone in some cases as well.
A)
Right-click to select the mesh you want to join, hold down Shift and then right click the mesh you want to join it to, Ctrl-J to join the two. Now repeat this for any other meshes you need to join, pressing A in 3D View to deselect all after each join.
B)
Create a second UV map on your object in Properties > Object Data by clicking on the +.
C)
Make sure you have installed the uv copy paste plugin. With your new Object selected Tab into Edit mode on 3D view and press U, select Copy UV Map and select the original UV map. Now press U, select Paste UV Map and select the new UV map.
D)
Select the original Map for your Texture in Properties > Textures > Mapping > Map. Repeat for all textures you need to bake.
E)
You should see the mess in next screenshot in the UV/Image Editor View. This is the current UV mapping for the unit. It basically tells the graphics engine how to apply a 2D texture to a 3D mesh.
Because we are combining several textures into one, we have the problem that a lot of elements are overlapping. We need to fix this first this before we can bake our texture.
EDIT:I moved this stage here (it used to be after rearranging the materials) as it is easier to work on a black background than a image.
Create a new image in the UV/Image editor by pressing Alt + N or Image > New. Make the image size either 256 x 256 or at the most 512 x 512 and click OK.
We still have our separate materials which we can use to select the separate elements of the unit. Switch to the second material using highlighting as shown below, press A to make sure everything is deselected in the 3D View and then press the select button for that material. Now the UV window shows only the mappings for the second material:
Note: The hotkeys for the UV window are pretty much the same to the Edit Window you can use G to Move, R to Rotate, S to Scale, etc. The only difference is there is only an X and Y axis if your want to restrict your movement or scaling in one direction. R followed by 90 can be used to rotate stuff 90 degrees. Ctrl + LMB Drag to lasso select is a must for UV editing as well.
Now move rotate and/or scale to desired location within box, then press A to deselect, now select the first material and move rotate and/or scale and repeat for any other materials you may have. The UV view should now look something like the Picture in G) with no overlap. Your unit will look all wrong at this point but thats normal.
See the Bake Texture (Part C) of Blender 2.49b tutorial which goes into greater details of how to do this for Blender 2.49b but is still the same in 2.7.
F)
EDIT: This step has been moved to step E.
G)
Select the new UV map in Properties > Object Data and then select the new image in the UV/Image editor, so that the individual islands UV map is displayed over the new image.
H)
In Properties > Render > Bake select Textures from Bake Mode then press Bake.
I)
Save your new image, Image > Save As Image. In Properties > Material press + to make a new Material then press New. With new material still highlighted go to Properties > Texture and press New, now under Image press Open and select newly the baked pic we just saved. Back in Properties > Material delete old materials (highlight and press -) so just the new one remains.
J)
In Properties > Object Data make the NEW map the active map by clicking on the camera icon then highlight the OLD map and press - to delete it.
Step 5:
In Object mode in 3D view select the template object and new object with shift RIGHT CLICK. OLD rigged mesh first then the new one second. YOUR NEW MESH MUST HAVE NO VERTEX GROUPS FOR THIS TO WORK. Select Weight Paint mode in the 3D View then press Transfer Weights in he Tools side bar.
Click here if only one vertex group being copied over.
Step 6:
Check rigging. It may be trial an error as you test the animations and you may have to re-rig some parts but this should do 70-80% of the rigging work.
Step 7:
When you are happy with your vertex groupes in Outliner View left click to select new mesh then Shift left click the skeleton then press Ctrl P and select to Armature Deform.
Step 8:
Delete your old template mesh (select then X to delete in 3D view), select your new mesh and press Ctrl A and apply rotation and scale and save then export to br2. If you need help with exporting see this tutorial.
Attachments
-
 Step2.png118.1 KB · Views: 2,372
 -
 Step3a.png116.2 KB · Views: 2,398
 -
 Step3b.png73.7 KB · Views: 2,210
 -
 Step5.png124.2 KB · Views: 2,190
 -
 Step6.png93.3 KB · Views: 2,140
 -
 Step7.png178.6 KB · Views: 2,451
 -
 BakeA.png319.4 KB · Views: 2,174
 -
 BakeB.png21.7 KB · Views: 2,225
 -
 BakeC.png296 KB · Views: 2,104
 -
 BakeD.png28.1 KB · Views: 2,181