After a good long while, I finally have something post-worthy.
Behold, the great battle of Skopia Bridge!
I am the Polish, attacking the Hungarian fortress/capital of Skopia, in Vardar Macedonia. It is their last great refuge, and defended by a powerful army. While besieging this fortress, my army is attacked from behind by a sizable Hungarian force, supplimented by a smaller force on the opposite side near the castle. The garrison sallies, and I have a large battle on my hands. Fortunately, my armies generally practice the buddy system, so my allied army is also involved in the battle. Together, I outnumber them probably 3:2, but there is a twist that makes this more even.
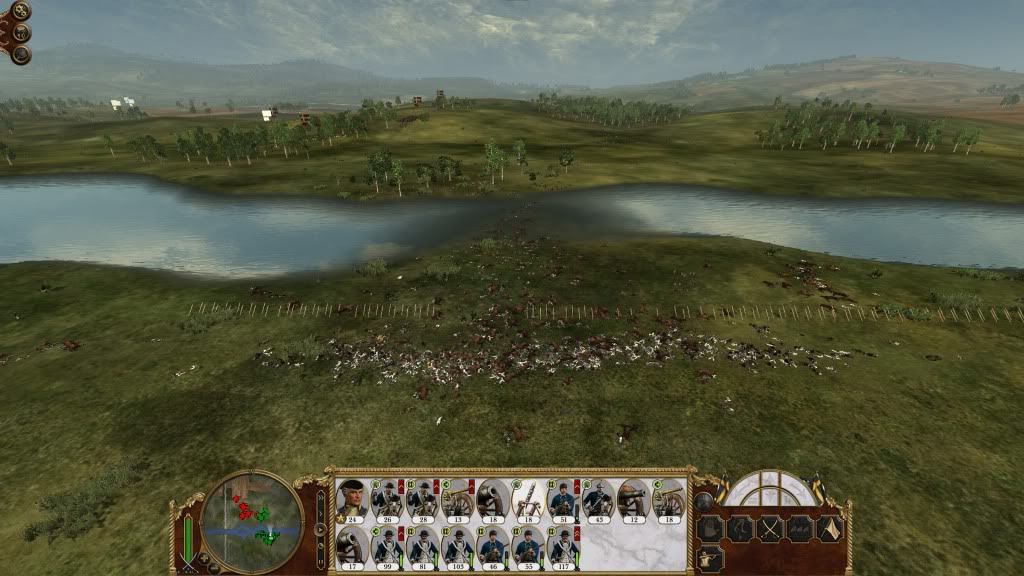
You see, I was standing on the bridge besieging the castle, so when my army was attacked, it became a bridge battle. But the problem is that, because the way things went down, the attacking army is one on side of the river with my allied army, and I am on the opposite side with the fortress garrison! Thus, before the garrisoned army can enter the battle proper, I must defeat the army crossing the river, then re-ford it myself and set up a defense in time.
Fortunately, many things go very right, and this becomes a battle to remember.
My army is a rather decent High Age Polish army; three units each of both Piast Nobles and Dismounted Polish Knights, three units of excellent Lithuanian Archers, two units of Spearmen, two of Halberd Militia, and two of Regular Swordsmen, my general, a bombard cannon crew, and a sizable cavalry detachment of Piast Nobles and Polish Retainers, those great superheroes of lore.
Knowing I may well find myself between a rock and a hard place if this doesn't go down like I need it to, I have my archers lay their stakes facing
towards me, which will give my troops some defense against those nasty Hungarian Nobles, and help break up their infantry formations. This depends somewhat on my pushing past those stakes, but its a gamble I have to take. The bridge is punctuated by steep hills on both sides leading up to it, so I set up my various dismounted knights in a half-circle at the top, to provide defense. The spearmen and cavalry also face opposite, again, in case that larger army gets to me before I can cross.
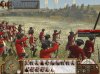
So the battle starts. The small force charges across the bridge, my foot knights charge, and predictably destroy them. The large Hungarian army thankfully starts off in the corner of the map and takes its time getting things together, so I've got some time. The smallest detachment closes quickly, however, and I must split my forces in order to secure at least some of them getting across the river un-accosted.
I send my foot knights, swordsmen, general, and cannon across the bridge, to set up. The archers, spearmen, and cavalry wheel around to deal with the smallest force, which they soundly defeat with a flaming arrow barrage and charge. The main Hungarian army grows closer, and I know I cannot daddle. The archers book it for the bridge, with the spearmen not far behind. The cavalry wrap up with the prisoner-taking, and make it for the bridge.
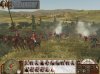
But wait, something's wrong! My bombards are not crossing the river! And the cavalry risk being cut off from the bridge by the Hungarians! I order the spearmen to halt in front of the bridge, about-face, and form a shield wall; they are to act as a rear-guard and secure the lifeline for the rest of my army. Fortunately, those stakes I deployed discourage the Hungarians from behaving too cavalier, and they must walk through them rather than run, which buys me valuable time. The cannons and cavalry make it across, and my spearmen eagerly rejoin their comrades across the bridge.
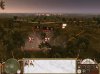
Meanwhile, my allied army has set up its defense on the field across the bridge, where it can add missile defense without actively engaging the Hungarians before my main army folds.
The bridge defense goes as follows: the Halberd Militia will form their Spear Wall in front of the bridge, with the Spearmen directly behind them. The foot knights and swordsmen form the same concave arc around the hilltop that they did before; the archers are on a hillside high above all of this, where they can rain down death with impunity; the cavalry are far behind the lines, ready to charge in and save the day if needed; my general is closer, where he can insipire morale, but far enough away to avoid accidental engagement (or the impetuousness of his guard!). The cannons occupy the space opposite the archers, which gives them a commanding view of the bridge and its approaches.
Not long after I reach these positions, the Hungarian assault begins in earnest.
Great masses of Magyars sweep across the bridge, pressing my spear wall to the breaking point. At first they seem to hold, but the sheer mass of bodies pushing across the bridge cannot be held forever. Then the foot knights trickle in to patch the gaps. But the Hungarians are getting through! Their Feudal Knights thunder across with the General's Bodyguard, and my line threatens to break; spearmen begin to rout, and the Hungarian beachhead widens. I begin to have thoughts about retreat and how to engineer it...maybe order my ally to attack and cover my escape? All the while, my archers and cannons rain fiery death; pitch-coated cannon balls impact tightly-packed Hungarian formations, demolishing scores. As the Hungarians push up the moon-shaped hillside, their rear is exposed to fire from opposing hilltops. The cannons thunder once more, and scores of spearmen disappear. My general sees an opportune moment as the Hungarian line separates, and charges home, cutting the Hungarians off from the bridge. Then, a lucky shot! The Hungarian general is incinerated by a direct cannon hit! And with that, his line folds, and the Hungarian army is doomed. The cavalry mop up the routing Hungarians, taking thousands of prisoners. Of a force of three thousands, not 1/20 escapes to tell the tale of the great battle over the Vardar River.
My general, upon witnessing the Hungarian rout, comments to his chief of staff: "This will be a day long-remembered. It has seen the end of the Genovese (I took their last city, Genoa, earlier this same turn), and will soon see the end of the Hungarian Rebellion."


 ).
).

")


