lemmy101
Emperor
- Joined
- Apr 10, 2006
- Messages
- 1,064
How to Add New Units in Mods The EASY WAY!
Tool by Lemmy101 and CaptainBinky

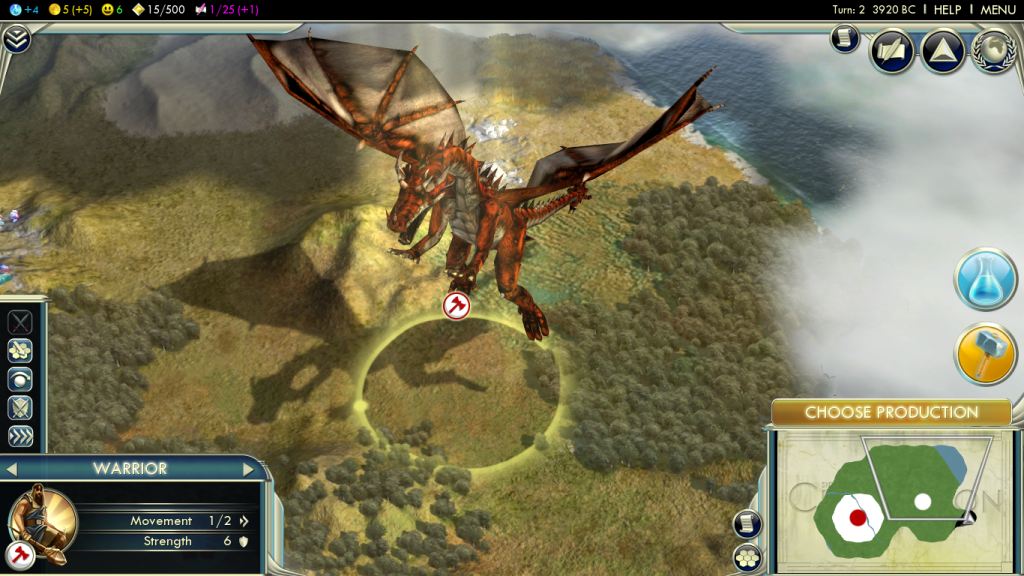
DRAGON IMAGE COURTESY OF DELIVERATOR
This tutorial explains how to get completely new unit models into the game THE EASY WAY. This will be a completely new unit from an FBX with an animation, with stats equivalent to a warrior without you having to write or edit a single line of XML.
For a more in-depth manual guide that was written before Nexus Buddy and so involved xml editing, click here. It's probably worth reading so you know what Nexus Buddy is doing in the background.
What You'll Need
You will need ALL of these before you can start:
Nexus configured and running properly (bugs aside)
IndieStone Nexus Buddy
FPK files unpacked: Load the Nexus Art Tool, select the "Nexus" tab, click "Script Browser", select "Extract PAK (*.fpk) files", click "Run Script", and... wait.
Nexus Buddy
1. Export an FBX (using FBX 2010 exporter in Max, or Blender 2.49b FBX exporter or equivelent) with an animation. The model should use 32 bones or less to work properly though in some cases more will work.
2. Place the FBX in a directory along with DDS versions of any textures used on it. In my example I'll be using a Captain.FBX and Captain_Body_diff.dds. They are placed in C:\Captain\

The texture is named after the mesh it will be put onto, so since in 3DSMax the Captain mesh was called 'Captain_Body' I named the texture 'Captain_Body_diff.dds' so it will automatically be placed on that mesh ('diff' meaning 'diffuse' which is what the main colour texture is called) if you don't know the name of your mesh, you can set the texture manually so don't worry.
3. Place Nexus Buddy into your Nexus folder. In my case it's "c:\Program Files(x86)\Steam\SteamApps\Common\Sid Meier's Civilization V SDK\Nexus\x86\".
4. Run Nexus Buddy and select 'Create a unit' from the main menu. Then select your 'FBX' file in the open file dialog box.
This will import your Captain.FBX into the program. Next time you save or export, it will create a Captain.gr2 in the same folder containing all the material changes you make in here. You will also get a Captain.isxml file which is your Nexus Buddy project file and can be used to reload your entire unit project at a later time.

Things to notice. Firstly, we have one mesh called 'Captain_Body'. (Yours will differ.)
Secondly, you have at least one material that Nexus Buddy has created, one per mesh in your model, and those materials are assigned to the relevant meshes (just the one in my case). It will automatically have assigned the texture to the correct material/mesh due to the naming we used. If not, you can click the material in the list box, and select it's texture in the BaseTextureMap property on the right.

5. Assuming our textures are now assigned to materials properly, click the Unit FXSXML tab at the top to get onto the next page:

6. Click on the 'add' button to add a new animation for our unit that will use the full length of the source fbx animation. In my case 20 frames.

It will name it by default to 'NewAnimation1', you can change this to something relevant in the properties to the right. In my case I called it 'Run', which is what the anim in the source fbx was. We can edit the Start and End frames here later as we add more animations to the main fbx.
7. If you wish, you can edit a bunch of the unit's stats and stuff on the 'Unit Details' tab, but it's created defaults, so we'll just use them and can come back here later to tweak.

8. Now we're going to create a mod for our unit! Load up Mod Buddy.
9. Click 'New Mod'

10. Name it. I called mine 'CaptainMod'. Click OK then fill in all the mod details (description, author etc) and click 'Finish'
11. Alt tab back into Nexus Buddy and select the 'Mod Buddy Export' tab. Select the mod project file in the 'Target Mod' property, then click 'export to mod buddy'.

12. Alt tab back to Mod Buddy, and click 'Reload' on the dialog that's popped up. And that's it! you should see your project there all ready to go! Nexus Buddy has added all the files you need to the project. Wee!

AND THAT'S IT!
Click Build->Build Solution from your main menu, then load Civ 5! Select the mod from the mod browser, and start a game:

YAAAAAAAAY!
Let's build one...

GO GO CAPTAIN!
From Here
Of course the work is not finished yet. For one, he is constantly playing just one animation. Two, you probably want to tweak all his stats and such. Some of this can be done from within Nexus Buddy. Just explore the 'Unit Details' tab:
You can edit these and re-export, then Build->Build Solution again to fine tune your unit's stats.
Some more advanced editing will require editing the XML, but this has saved you a whole bunch of time and leaves you to the more fun task of designing the unit's actual gameplay stats.
Also, obviously you don't want him to be constantly running, or idling or whatever the anim you exported in the FBX was.
Adding a new animation
So you need to get making other animations. Then you can tie these animations to different actions. How? Well first you would reimport the FBX with the 'reimport fbx' button on the Granny File page.
Now let's suppose you have another anim in your imported FBX and you wish to use it.
So at the moment my Run anim is using all 20 of the frames.

Supposing I've reimported a new FBX with two 10 frame animations. So I want to click on my run anim and set the end frame to be 10. in the properties to the right:

Then I click on 'add' to add another animation, we'll assume this is an 'Idle', and set the start frame to 11 and the end to 20:

Note I could click 'add external' to add an external animation.gr2 file from a different export too. Supposing I was converting a Civ 4 unit, I could export all the anims seperately in different FBX files, then once I've exported them all with Nexus Buddy, make a new unit at the end just adding all the anims I exported in the first bunch of times, instead of bothering with frame numbers and so on.
Assigning the animation to actions.
Lastly, we now want to make sure the newly added animation get used by the unit.
Take a look at the 'Event Code Bindings' section of this page:

In the first column it shows every action a unit can do (a combat land unit, which is what template we have selected, and the only one that exists in the version of Nexus Buddy at time of writing)
In the second column is what anim it will play when it performs that action. You can see they have all defaulted to use your first animation.

Simply click one of the actions, and a drop down will appear. Use this to change your different actions to perform different animations.
Re-export to Mod Buddy when you're done!
That's all there is to it! Enjoy your new units!
Hurray!
Tool by Lemmy101 and CaptainBinky
DRAGON IMAGE COURTESY OF DELIVERATOR
This tutorial explains how to get completely new unit models into the game THE EASY WAY. This will be a completely new unit from an FBX with an animation, with stats equivalent to a warrior without you having to write or edit a single line of XML.
For a more in-depth manual guide that was written before Nexus Buddy and so involved xml editing, click here. It's probably worth reading so you know what Nexus Buddy is doing in the background.
What You'll Need
You will need ALL of these before you can start:
Nexus configured and running properly (bugs aside)
IndieStone Nexus Buddy
FPK files unpacked: Load the Nexus Art Tool, select the "Nexus" tab, click "Script Browser", select "Extract PAK (*.fpk) files", click "Run Script", and... wait.
Nexus Buddy
1. Export an FBX (using FBX 2010 exporter in Max, or Blender 2.49b FBX exporter or equivelent) with an animation. The model should use 32 bones or less to work properly though in some cases more will work.
2. Place the FBX in a directory along with DDS versions of any textures used on it. In my example I'll be using a Captain.FBX and Captain_Body_diff.dds. They are placed in C:\Captain\
The texture is named after the mesh it will be put onto, so since in 3DSMax the Captain mesh was called 'Captain_Body' I named the texture 'Captain_Body_diff.dds' so it will automatically be placed on that mesh ('diff' meaning 'diffuse' which is what the main colour texture is called) if you don't know the name of your mesh, you can set the texture manually so don't worry.
3. Place Nexus Buddy into your Nexus folder. In my case it's "c:\Program Files(x86)\Steam\SteamApps\Common\Sid Meier's Civilization V SDK\Nexus\x86\".
4. Run Nexus Buddy and select 'Create a unit' from the main menu. Then select your 'FBX' file in the open file dialog box.
This will import your Captain.FBX into the program. Next time you save or export, it will create a Captain.gr2 in the same folder containing all the material changes you make in here. You will also get a Captain.isxml file which is your Nexus Buddy project file and can be used to reload your entire unit project at a later time.
Things to notice. Firstly, we have one mesh called 'Captain_Body'. (Yours will differ.)
Secondly, you have at least one material that Nexus Buddy has created, one per mesh in your model, and those materials are assigned to the relevant meshes (just the one in my case). It will automatically have assigned the texture to the correct material/mesh due to the naming we used. If not, you can click the material in the list box, and select it's texture in the BaseTextureMap property on the right.
5. Assuming our textures are now assigned to materials properly, click the Unit FXSXML tab at the top to get onto the next page:
6. Click on the 'add' button to add a new animation for our unit that will use the full length of the source fbx animation. In my case 20 frames.
It will name it by default to 'NewAnimation1', you can change this to something relevant in the properties to the right. In my case I called it 'Run', which is what the anim in the source fbx was. We can edit the Start and End frames here later as we add more animations to the main fbx.
7. If you wish, you can edit a bunch of the unit's stats and stuff on the 'Unit Details' tab, but it's created defaults, so we'll just use them and can come back here later to tweak.
8. Now we're going to create a mod for our unit! Load up Mod Buddy.
9. Click 'New Mod'
10. Name it. I called mine 'CaptainMod'. Click OK then fill in all the mod details (description, author etc) and click 'Finish'
11. Alt tab back into Nexus Buddy and select the 'Mod Buddy Export' tab. Select the mod project file in the 'Target Mod' property, then click 'export to mod buddy'.
12. Alt tab back to Mod Buddy, and click 'Reload' on the dialog that's popped up. And that's it! you should see your project there all ready to go! Nexus Buddy has added all the files you need to the project. Wee!
AND THAT'S IT!
Click Build->Build Solution from your main menu, then load Civ 5! Select the mod from the mod browser, and start a game:
YAAAAAAAAY!
Let's build one...
GO GO CAPTAIN!
From Here
Of course the work is not finished yet. For one, he is constantly playing just one animation. Two, you probably want to tweak all his stats and such. Some of this can be done from within Nexus Buddy. Just explore the 'Unit Details' tab:
You can edit these and re-export, then Build->Build Solution again to fine tune your unit's stats.
Some more advanced editing will require editing the XML, but this has saved you a whole bunch of time and leaves you to the more fun task of designing the unit's actual gameplay stats.
Also, obviously you don't want him to be constantly running, or idling or whatever the anim you exported in the FBX was.
Adding a new animation
So you need to get making other animations. Then you can tie these animations to different actions. How? Well first you would reimport the FBX with the 'reimport fbx' button on the Granny File page.
Now let's suppose you have another anim in your imported FBX and you wish to use it.
So at the moment my Run anim is using all 20 of the frames.
Supposing I've reimported a new FBX with two 10 frame animations. So I want to click on my run anim and set the end frame to be 10. in the properties to the right:
Then I click on 'add' to add another animation, we'll assume this is an 'Idle', and set the start frame to 11 and the end to 20:
Note I could click 'add external' to add an external animation.gr2 file from a different export too. Supposing I was converting a Civ 4 unit, I could export all the anims seperately in different FBX files, then once I've exported them all with Nexus Buddy, make a new unit at the end just adding all the anims I exported in the first bunch of times, instead of bothering with frame numbers and so on.
Assigning the animation to actions.
Lastly, we now want to make sure the newly added animation get used by the unit.
Take a look at the 'Event Code Bindings' section of this page:
In the first column it shows every action a unit can do (a combat land unit, which is what template we have selected, and the only one that exists in the version of Nexus Buddy at time of writing)
In the second column is what anim it will play when it performs that action. You can see they have all defaulted to use your first animation.
Simply click one of the actions, and a drop down will appear. Use this to change your different actions to perform different animations.
Re-export to Mod Buddy when you're done!
That's all there is to it! Enjoy your new units!
Hurray!


")


")


