TUTURIAL - Converting units from the Infinitum Site
These Units are already complete and will also be uploaded to this thread:
FireElemental
IceGolem
Golem
Tanar'ri, Marilith
Shadow/Greater Shadow (IWD version)
WaterElemental
Imp
Supa has provided me some very helpful info... This is the one of the easiest and quickest possible method of converting units from Infinitum.
Required Programs:
Civ3FlcEdit
Flicster
Any Graphics Editor
JASC Animation Shop
Steph's Storyboard Builder Sandris Version (SBB)
Other Helpful Programs:
Irfanview
Wavepad Sound Editor * Easy program to create, save, and modify sound files
WinRar * Compress your files to Rar format to upload to this site
Tom2050's Helpful Files
View attachment _InfinitumConversion.rar (DOWNLOAD these files! They will make the process go much quicker.)
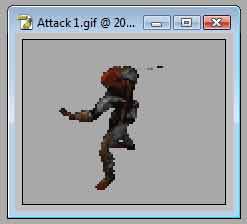
This shows a conversion of the
Shadow Thief from Infinitum.
Setup
1. Download the GIF file (shadowthief-gif.zip)
2. Extract the zip file of the unit.
3. Inside the extracted directory, create a folder (name does not matter, we will call the folder SThief).
4. From the download above _InfinitumConversion, inside this folder is an Animation Folders; copy these folders (AttackA, AttackB, etc) into the SThief folder.
Find the correct unit size for in Civ3
Open up just one of the GIF's into a graphics editing program. We do this to find the correct size of the final unit.
Open up the OffsetsTemplate.jpg (located in the _InfinitumConversion folder). The OffsetsTemplate shows the Civ3 unit circle with a couple sample units for comparsion.
Resize until you find the size you want. When you have found the right size of the unit, you should be able to see the percentage of the resize. In this case, I decided that the size of 70x57 is a good size, as you can see this is 70% of the original width size. Remember this percentage.
 Resizing and setting up the GIF's
Open up each GIF into JASC animation shop.
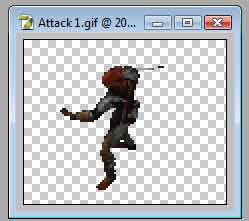
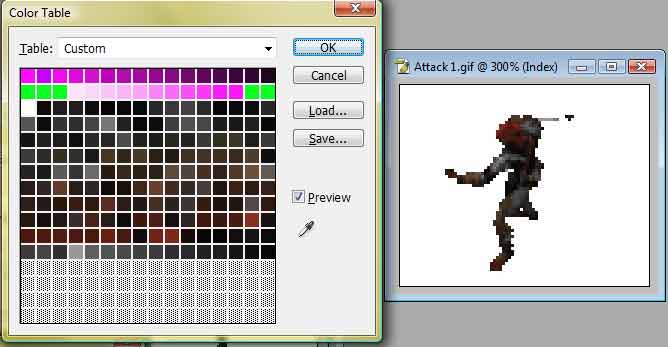
Hit Ctrl-A to select all frames of the gif. Go to Animation -> Replace color. Old color should be the background grey color. New color will be Magenta (255,0,255) for RGB, or FF00FF for HTML code. Make sure the Tolerance is set to 0! Hit OK.
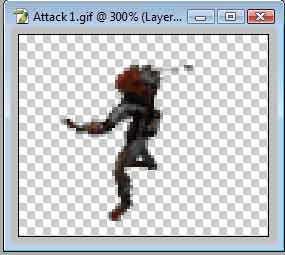
Go to Animation -> Resize Animation. Select Percentage of Original. Type 70 into the width (we got this percentage above). I used the Bicubic Resample for this unit shown below, but Smart Resize is likely the best, since the edges may come out the smoothest. Hit Ok.
File -> Save Frames As. Select BMP output. I keep Long file names checked, and Append Leading zeros to frame index checked. Save frame number in file name should be checked also.
Save the file in the SThief/AttackA folder.
DO THIS for each gif, and place it in the correct folder. JASC animation shop will remember your settings, so doing this should be very quick and easy.
Attack 1.gif goes into the SThief/AttackA folder
Attack 2.gif goes into the SThief/AttackB folder
Attack 3.gif goes into the SThief/AttackC folder
Death.gif goes into the SThief/Death folder
Get Hit.gif goes into the SThief/Fidget folder
Neutral.gif goes into the SThief/Default folder
Walk.gif goes into the SThief/Run folder
Moving the BMP's into the direction folders for each animation
Now the biggest pain in the butt part. For each folder (AttackA, AttackB, AttackC, Death, etc...), you need to place the correct directions into their corresponding folders. So the SW directions need to go into the SW folder, etc.
The BMP images will be placed in the folder by this setup if your files are organized in alphabetical order.
SW images
NW images
NE images
SE images
S images
W images
N images
E images
You should be able to just highlight the images you want, and then drag and drop them into the folder (this is the same as cut and paste).
NOTE!!!!!!!!!!!!!!! Expand Image Canvas Sizes
I still prefer to do a batch canvas resize of all these images. It only takes a couple minutes, and PSP / Photoshop are fully capable of doing these as well as many other programs. You DONT need to do this, but you SHOULD. The advantages are this:
- Doing this makes the Flicster bug impossible since the animation won't be able to hit the right edge (which causes a Flicster smear in the final FLC sometimes), and this bug is very annoying to have in a final result after all of your work.
Irfanview can do this for you in a matter of seconds.
1, Open Irfanview, and go to File -> Batch Conversion/Rename...
2. Under Batch Conversion Settings, set Output format to BMP.
3. Check 'Use Advanced option (for bulk resize..)' and click the Advanced Button next to it.
4. Check 'Canvas Size' and click the Settings button. Under Border dimensions in pixels, make all of them 5. The Border Color should be made Mangenta (255,0,255 RGB values). Click OK.
5. Under MISC: Check 'Overwrite exisitng files', 'Create subfolders in destination folder'. Click OK. Go ahead and Save these settings.
6. For 'Output directory for result files, make it any folder you wish (I put mine right in the ShadowThief-gif directory).
7. Click 'Include subdirectories (for 'Add all'), and then go to your SThief folder, which has the AttackA, AttackB, AttackC, Death, etc folders and click the Add ALL button.
8. Click Start Batch, and it will add a small border around all images, to avoid the Flicster bug, which takes more time to fix than doing this.
Irfanview will make a new folder containing these files. Either overwrite the existing ones with these new ones, or simply use these new ones for the rest of the tuturial. I decided to delete the old ones and cut/paste the new ones into their places.
Creating the Storyboards
Once done, bring up the Sandris Storyboard Builder. Browse and select the shadowthief-gif folder. Click Create Storyboards.
Bring up Flicster and create each NEW storyboard. Make the output directory the SThief directory (where all of your Storyboards BMP's are. Make sure each new Storyboard name is the same as each animation (AttackA, AttackB, etc...).
For each animation, put in the correct dimensions and frame numbers. You can get this info by going into the animation folders and seeing it yourself.
Making the Palette
So here is what would need to be done. 2 ways are shown:
BEST WAY:
-----------
JASC Animation Shop can not make gif's with transparent background. So it cannot be used for this. So everything needs to be done in your graphics editor.
Open an unmodified GIF graphic into your graphics editor (a GIF with the grey background).
Make the grey background transparent (there are several ways to do this, I am not going to explain them all here).
Make sure the image is changed to RGB mode (if it has not been done already).
Resize the image to the proportions you had planned for the unit (this unit was 70%). It's edges should look somewhat blended.
Index the image, load the Shadows palette (ShadowsOnly.act), and select 192 colors (no civ colors here, so last 4 rows are not used) and you have the perfect palette to use for all of your storyboards. It does not matter what the actual unit looks like at this point. The palette is all we are concerned about.
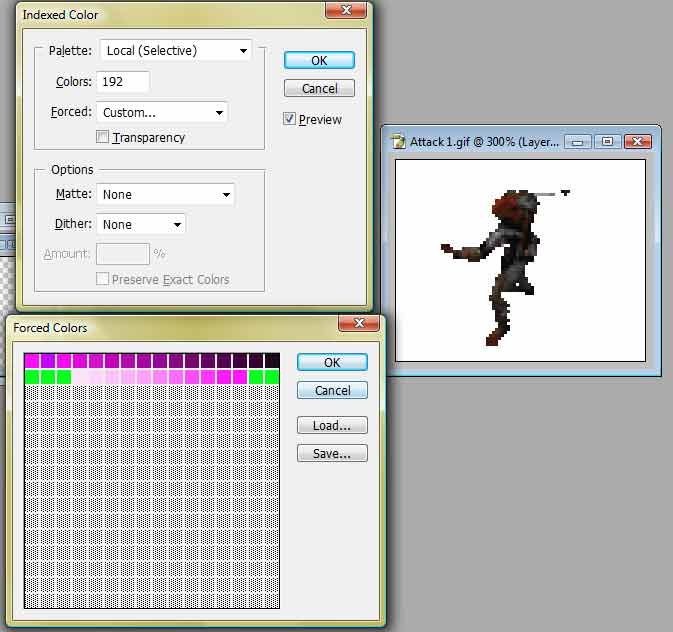
Final Palette, save this palette, apply it to all storyboards.
Some Tuturials on Palettes with GIMP:
How to make a working palette for pcx using the Gimp - Varwnos
GIMP palette recommendation to Varwnos palette info above - Micaelus
Cutting and Pasting with GIMP (Step by step Improvement creation) - Spacer One (has some palette and transperancy help in it)
Some changes may need to be made though, for units with No Civ Colors, 160 colors instead of 254 would need to be used, and the Shadow rows would have to be added in each time for GIMP.
NOT AS GOOD WAY, but works if the above cannot be done:
----------------------------------------------------------
Don't do any of the steps above for palette method #1.
Do all resizes using the regular Steph's SBB when making the Storyboards (Do NOT use the Sandris version). It resizes in an indexed mode, so edges of units may not be as smooth.
You still need to make the final palette, but no magenta pixel blending doing it like this. First 2 rows need to be the shadow rows, and the next 160 colors are unit colors. I still don't know if GIMP can do this automatically though... ??? I would think it should be able to do both, but seems it cannot from what I have read. I have been unable to find a better Palette editor for GIMP than the one that comes with 2.6 for this purpose. So this is a major time consuming process for GIMP users.
-------------------------
Storyboards
Since the SBB makes the borders as black, I change this color to a Magenta (since black may be used as a unit color in many instances, including this one). Use the Magic Wand to select the border, and then use the Paint Bucket tool to change it to this Magenta color (hex: C000FF, RGB 192,0,255).
Apply the palette we just made earlier to this file and save it as a PCX file under the same name. So for the Default.bmp, save it as Default.pcx (which overwrites the Default.pcx file Flicster created). NOTE: Units with NO civ colors must only have indexed palettes with 192 colors! They can have more but colors 193 through 256 must not be any color that is in the image.
Do this for each Storyboard BMP.
Open up each FXM file in Flicster, adjust the Frame Delay to your liking, and export as a FLC file.
Setting the Correct Offsets for each FLC
Set the Offsets of each FLC using Civ3FlcEdit and the OffsetsTemplate file as your guide.
As you can see in the below picture, paste the 1st image of each animation into this Offsets Template (SW directions work well, so paste the SW AttackA, SW AttackB, SW AttackC, SW Death, etc). Adjust each image so they all are aligned on top of each perfectly (best to make the feet align). You may need to make them slightly transparent to see through them, I set their opacity at 50%. Then measure (as shown in the pic) the width and height from the top left corner of the OffsetsTemplate image to the top left corner of the unit image, and this is the offsets to be put into the FLC in Civ3FlcEdit.
 Finishing steps
Now you need to make the Unit32.pcx, Large and Small PCX, and the sound files (which can be downloaded from the Infinitum site as well).
For Unit32.pcx, the palettes are provided to apply to the Unit32 file (for ones with CivColour and ones without). You can open up one of the SE BMP's and just crop/resize it down to 32x32. To keep in form with other unit32's, apply the palette FIRST and then resize.
The PCX.act palette is used for Large and Small PCX. Just load this up for these images and make sure to use all 256 colors. Large PCX should be 128x128 (white backgrounds preferable), and Small PCX 32x32. For these it is better to apply palette AFTER resizing to appropriate size.
Sound files should be save as 22050Hz, 16 bit, Mono. Make sure to setup the INI file properly, add a ReadMe stating you converted this unit, and that it is a Bioware/Interplay unit. Make sure you test the unit in gmae to ensure it looks good.
If any questions, please ask... I still do the units in a slightly different way because I feel the results are a bit better, but it is in essence the same procedure.
The Final unit using this exact procedure looks like this:

The Shadow Thief has been posted
here.
Tom
") ) and post it here with links to the programs I use. All programs are freeware unless you are using PSP or Photoshop. Tuturial would have to be for Photoshop since I don't have PSP... but PSP does also have ability to do batch processing, I am not familiar with how PSP handles it exactly though.
) and post it here with links to the programs I use. All programs are freeware unless you are using PSP or Photoshop. Tuturial would have to be for Photoshop since I don't have PSP... but PSP does also have ability to do batch processing, I am not familiar with how PSP handles it exactly though.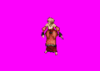


 But the saloon style was based on an even earlier version a little more like the one you posted, so you might find that general style as early as the days of Fanny Hill's London or as Late as Lautrec's Paris - making the time frame maybe 1750 - 1900? Roughly, the industrial age.